Nyos Quantum User manual

Manuale di istruzioni
Instructions

Grazie.
Ci congratuliamo con voi per l'acquisto del vostro nuovo NYOS®
Quantum® Skimmer.
Thank you.
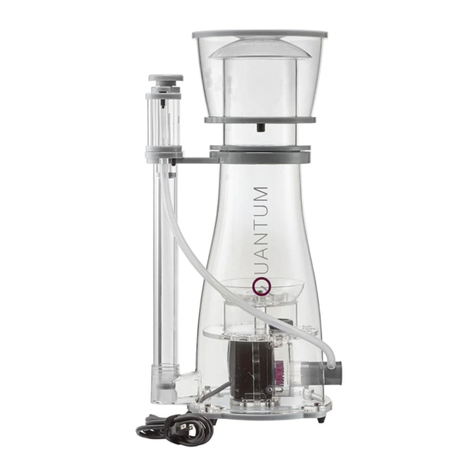
We congratulate you on the purchase of your new NYOS®Quantum®
skimmer.
Leggere le istruzioni per l'uso prima di utilizzare lo skimmer e leggere
attentamente le avvertenze di sicurezza.
Please read the operating instructions before you operate the skimmer
and read the safety information carefully.

INFORMAZIONI DI SICUREZZA 4
GARANZIA 5
INSTALLAZIONE E MESSA IN SERVIZIO 6
MANUTENZIONE, CURA E PULIZIA 8
FAQ E RISOLUZIONE DEI PROBLEMI 10
PARTI DI RICAMBIO 20
SAFETY INFORMATION 12
WARRANTY 13
INSTALLATION AND COMMISSIONING 14
MAINTENANCE, SERVICING AND CLEANING 16
FAQ AND TROUBLESHOOTING 18
SPARE PARTS 20

INFORMAZIONI DI SICUREZZA
Prima di collegare l'apparecchio, vericare se la tensione di esercizio
(vedi gura) corrisponde alla tensione di rete.
L'apparecchio può essere collegato solo ad una presa di corrente con
contatto di terra. La pompa deve essere alimentata con una corrente
nominale residua non superiore a 30 mA tramite un dispositivo di
protezione da correnti residue (RCD). Chiedete al vostro elettricista.
Prima di qualsiasi contatto con l'acqua dell'acquario, tutti i dispositivi
a contatto con l’acqua devono essere scollegati dalla rete elettrica.
L'apparecchio è omologato esclusivamente per uso interno ed
esclusivamente per scopi acquaristici.
Il cavo di alimentazione dell’ apparecchio non può essere sostituito.
Se danneggiato, l’intero apparecchio dev’essere eliminato.
Non piegare il cavo.
Il dispositivo non deve funzionare a secco. Può essere utilizzato solo
per liquidi da +4°C a +35°C. Il motore della pompa è protetto contro
il surriscaldamento.
L’ apparecchio non è destinato a persone (compresi i bambini) con
capacità siche, sensoriali o mentali limitate, a meno che non siano
sorvegliati da una persona responsabile della loro sicurezza o non
abbiano ricevuto istruzioni da tale persona su come utilizzare l'appa-
recchio. I bambini devono essere sorvegliati per assicurarsi che non
giochino con l'apparecchio.
L'apparecchio non deve essere smaltito nei normali
riuti domestici. Deve essere smaltito in modo
opportuno. RAEE.
4

IT
GARANZIA
Per questo prodotto, concediamo al cliente nale una garanzia di 24
mesi dalla data di acquisto su difetti di materiale e di fabbrica.
La condizione per la concessione della garanzia è che l'apparecchio venga
presentato per intero insieme al certicato di garanzia compilato e alla prova
d'acquisto. Le spedizioni di invio, sono a carico del cliente nale.
Se la richiesta di garanzia è giusticata, il pezzo difettoso sarà riparato
o sostituito a nostra discrezione.
ESCLUSIONE DELLA GARANZIA
La garanzia non copre:
Depositi di sporco e calcarei
Funzionamento a secco della pompa
Danni da usura alle parti soggette ad usura (ad es. girante, guarnizioni)
Manipolazione e uso non corretti (anche con l'uso di prodotti
di terzi)
Danni di qualsiasi tipo (ad es. cavi di apparecchi elettrici)
Modiche tecniche e modiche ai componenti
Montaggio errato
Danni consequenziali derivanti da un uso improprio, dal mancato
uso del prodotto o dall'inosservanza delle norme di sicurezza
Data di vendita, timbro e rma del rivenditore. 5

INSTALLAZIONE E MESSA IN SERVIZIO
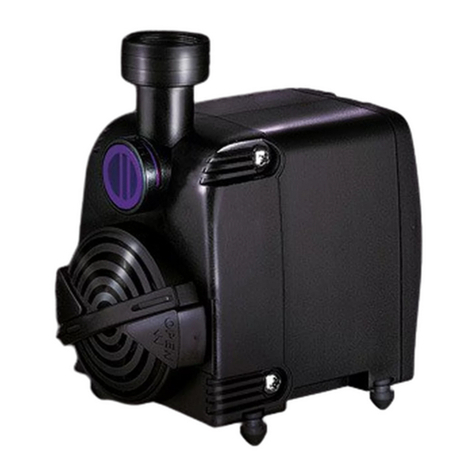
Il vostro NYOS® Quantum® Skimmer® è plug-and-play. Tutto quello che
dovete fare è installare la pompa. Per eseguire questa operazione dovete
allentare le quattro viti in titanio sul corpo (parte n. 21, vedere pagina 20) e
le due viti in titanio su un supporto pompa (parte n. 22, vedere pagina 20).
Inserite la pompa e ricollegate la staa della pompa. Montate quindi il
bubble plate sull'uscita della pompa.
Al momento del ricevimento controllate lo Skimmer, per vericare la
presenza di tutte le parti e gli eventuali danni da trasporto. Se riscontrate
difetti, questi devono essere segnalati al rivenditore entro 48 ore.
Passo 1: Posizionamento nella sump
Rimuovere la pellicola protettiva dal coperchio del contenitore
dello schiumatoio. Preparare il bicchiere dello skimmer.
Collocare lo schiumatoio nella Sump. Per prestazioni ottimali, il livello
dell'acqua in sump dovrebbe essere di circa 21 cm. L'apparecchio non
deve entrare in contatto con i le pareti della sump. È necessario mante-
nere almeno 5 cm di spazio sul lato di aspirazione della pompa.
Per mantenere costante il livello dell'acqua, si raccomanda di utilizzare
un controllo automatico del livello o una paratia con livello costante
dell'acqua. Le uttuazioni del livello dell'acqua inuiscono sulle presta-
zioni dello schiumatoio.
Passo 2: Regolazione
Prima della messa in funzione, familiarizzate con i meccanismi di rego-
lazione. La conoscenza di queste relazioni è un prerequisito per una
regolazione ottimale dell'apparecchio.
Il volume d'aria e il volume d'acqua o il livello dell'acqua possono essere
impostati separatamente sullo skimmer.
Il livello dell'acqua può essere regolato tramite il tubo di livello dell'acqua
(macro regolazione) e la vite di microregolazione (regolazione ne;
scritta "OPEN-CLOSE").
La macro regolazione del livello si eettua girando il tubo di livello dell'acqua
6

IT
Fase 3: Messa in funzione
Aprire completamente il tubo di livello dell'acqua (l'incavo all'estremità
inferiore del tubo punta verso lo skimmer) e la vite di regolazione micro
(girare verso "OPEN").
Ruotare la vite di regolazione dell'aria (in senso antiorario).
Accendere l'apparecchio
Chiudere la vite di micro-regolazione ruotandola in direzione "CHIUSO"
no a quando il livello dell'acqua (o il limite della schiuma d'acqua) si
trova all'incirca al livello della baionetta. Si noti che le modiche alle
impostazioni non sono immediate.
IMPORTANTE: Ci vogliono alcuni giorni prima che lo schiumatoio
funzioni a regime. Leggete attentamente le note a pagina 10-11.
Passo 4: Regolazione ne
Per ottenere prestazioni ottimali di schiumazione, la regolazione ne dell'appa-
recchio, tramite la vite di micro-regolazione e la vite di regolazione dell'aria,
deve essere eettuata dopo uno o più giorni dalla messa in funzione.
Regolate la schiumazione in base alle vostre esigenze (asciutta o bagnata)
Tenete presente che, quanto più alto è il limite della schiuma d'acqua
nello skimmer, tanto più umido sarà lo schiumato.
Passo 5: Altre note
Lo schiumatoio NYOS® Quantum® è adatto all’uso con un ozonizzatore,
no ad un massimo di 50 mg/h. Il tubo essibile per l'ozono può essere
collegato al lato inferiore del silenziatore, nell'apposito attacco per l'ozono.
Svuotate e pulite lo schiumatoio ad intervalli regolari.
7

MANUTENZIONE, CURA E PULIZIA
Lo schiumatoio NYOS® Quantum® può essere completamente smontato per
la manutenzione, la pulizia e l'assistenza. A tale scopo, procedete tramite
gli step indicati di seguito:
Step 1: Rimuovere l'unità dalla sump.
Scollegate la spina dalla corrente.
Togliete l'apparecchio dall'acqua e svuotatelo.
Step 2: Smontaggio dello skimmer
Rimuovete il bicchiere ed il tubo dell'aria. Estraete il Venturi.
Svitate le quattro viti del corpo dello schiumatoio e rimuovetelo.
Se necessario: serrate leggermente il tubo di livello dell'acqua e rimuo-
vete la guarnizione in gomma. A questo punto potete togliere il il tubo.
Se necessario: Rimuovete la vite di regolazione dell'aria e la vite nera
sotto il silenziatore. A questo punto potete rimuovere anche il silenziatore
e i suoi supporti.
Step 3: Rimozione e smontaggio della pompa
Togliete il gruppo bubble-plate rimuovendo la vite in titanio. Quindi
rimuovete il dado di raccordo che collega la pompa e l'unità bubble
plate (operazione non necessaria nel Quantum® 120).
Svitate le viti in titanio sui supporti della pompa. Rimuovete con cautela
i supporti e la pompa.
Rimuovete le quattro viti dall'alloggiamento della pompa.
8

IT
Quantum® 120 e Quantum® 160: in questi modelli potete estrarre
l'intero gruppo dal suo supporto.
Quantum® 220/300: Si consiglia vivamente di non rimuovere il gruppo
dal blocco motore. Se questa operazione fosse necessaria , dovete
utilizzare due cacciaviti ( uno per lato) e sollevare il gruppo con cautela
estrema. Dopo la pulizia la parte dev’essere reinserita nel blocco motore
con una lieve pressione. Capite che la posizione è corretta da un click
perfettamente udibile. Utilizzate poi un cacciavite per sollevare la
girante in modo che ci siano circa 2-3 mm di spazio essa ed il blocco
motore.
Step 4: Pulizia e pulizia di pompa e skimmer
Lo skimmer è stato completamente smontato e può essere pulito.
Utilizzate preferibilmente acqua del rubinetto per la pulizia (non
detergenti). Le incrostazioni e le calcicazioni ostinate possono essere
eliminate utilizzando una soluzione al 10% di acido citrico. Sciacquate
bene con acqua.
Trattate regolarmente le guarnizioni in gomma con grasso siliconico.
Step 5: Montaggio della pompa e dello skimmer
Rimontare tutte le parti dello skimmer nell'ordine appropriato.
NOTA riguardo a Quantum® 220/300: Quando s’installa la girante e si
rimonta la pompa, vi consigliamo di prestare particolare attenzione
alle istruzioni della Fase 3.
9

FAQ E RISOLUZIONE DEI PROBLEMI
Lo skimmer deve avere un periodo di rodaggio iniziale. Questo di solito
richiede alcuni giorni. I seguenti fenomeni potrebbero vericarsi
durante questa fase:
1. Troppa schiumazione
2. Lo schiumatoio non schiuma
3. La pompa è troppo rumorosa
4. Si formano microbolle in uscita
NOTA: In acquari appena avviati questi fenomeni possono essere ancora
più evidenti. , Attendete qualche giorno e poi regolate nuovamente lo
skimmer.
Questa tabella può esservi di ulteriore aiuto:
Problema Possibile causa Soluzione
Schiumazione
eccessiva
- Livello dell'acqua nello skimmer
troppo alto
- Livello dell'acqua in Sump
troppo alto
- Uso di additivi per l'acqua,
soluzioni nutritive, collaper coralli,
ecc.
- Regolare le impostazioni
(ved. pag. 6-7)
- Rimuovere il bicchiere se
necessario, usare carbone
attivo, cambiare l'acqua
- Attendere qualche giorno
10

IT
Lo skimmer
non schiuma
- Fase di rodaggio del dispositivo
- Livello dell'acqua nello skimmer
troppo basso
- Livello in Sump troppo basso
- Pompa intasata, sporca,
calcicata
- Venturi intasato da mangimi
grassi, additivi per l'acqua,
soluzioni nutritive
- Regolare le impostazioni
(ved. pag. 6-7)
- Utilizzare carbone attivo,
cambiare l'acqua
- Aspetta qualche giorno
- Smettete di somministrare
mangimi grassi, additivi e
sospensioni di nutrienti
- Pulite la pompa e, se
necessario, mandatela in
assistenza se necessario
Pompa troppo
rumorosa
- Fase di rodaggio del dispositivo
- Pompa sporca o calcicata,
particelle estranee nella pompa
- Girante danneggiata
- Rotore non correttamente
posizionato nella pompa
- Sump troppo piccola o
troppo bassa. Lo skimmer è a
contatto con le pareti della sump,
la sump agisce come un corpo
di risonanza e amplica i
rumori della pompa.
- Regolare le impostazioni
(ved. pag. 6-7) e attendere
qualche giorno.
- Aprire e pulire la pompa
(vedere pagina 8-9).
- Mandare la pompa in
assistenza
- Spostare lo skimmer
- Scegliete una Sump
più grande
Micro bolle
in uscita
- Fase di rodaggio del dispositivo
- Portata d'acqua troppo alta
- Livello dell'acqua in sump
- Regolare le impostazioni
(vedi pag. 6-7) e attendere
qualche giorno.
- Ruotare ulteriormente il tubo
di livello dell'acqua per
chiudere; ruotare ancora
la vite di microregolazione del
livello dell'acqua per chiudere
ulteriormente (se necessario,
regolare la portata d'aria).
11

SAFETY INFORMATION
Prior to connecting the skimmer, check whether the operating voltage
(see imprint) complies with the mains voltage.
The skimmer may only be connected to an outlet with earth contact.
The pump must be supplied through a residual current device (RCD)
with a rated residual current of no more than 30 mA. Ask your electri-
cian.
Unplug all devices submerged in the water prior to any contact with
aquarium water.
This device is only approved for inside use and only for aquatic pur-
poses.
The power cord of this device cannot be replaced. If damaged, the
device must be scrapped. Do not bend the power cord and do not
carry device on power cord.
The device may not run dry. It may only be used for liquids between
the temperatures of +4°C to +35°C (39°F to 95°F). The pump motor
is protected from overheating.
This device is not intended for the use by persons (including children)
with limited physical, sensory or mental capacities, unless they are
supervised by a person responsible for the safety or this person inst-
ructed them on how to use the device. Children must be supervised
to ensure they do not play with the device.
The device may not be disposed of in the standard
household rubbish. It must be professionally disposed.
12

EN
WARRANTY
The consumer receives for this product a 2 4-month warranty for ma-
terial defects and assembly errors from the date of purchase.
For being granted the warranty, the device must be submitted com-
pletely and together with the completed warranty form and sales slip.
Any shipments to us must be postage paid.
If the warranty claim is justied, the defective part is at our discretion
either repaired or replaced.
EXCLUSION OF WARRANTY
This warranty does not cover
Soiling and lime scale deposits
Dry running of the pump
Wear and tear damages on wear and tear parts (e.g. rotor, seals)
Improper handling and use (including the use of products from
other manufacturers)
Any kind of damages (e.g. wires of electrical devices)
Technical changes and modications to any of the components
Faulty installation
Consequential damages from improper use, lack of maintenance
or non-compliance with safety regulations
Date of sale, stamp and signature of dealer 13

INSTALLATION AND COMMISSIONING
You receive your NYOS®Quantum®skimmer as plug-and-play model.
The only thing you have to install is the pump. To do so, open the four ti-
tanium screws (part no. 2 2 , see p.2 0) on the body as well as two screws
of one pump holding (part no. 2 2 , p.2 0). Put the pump in place and ins-
tall the pump holding again. Mount the bubble plate on the pump outlet,
reinstall the body and put the venturi (part no. 16, p. 2 0) on pump inlet.
Inspect your skimmer immediately upon receipt for completeness and
any transport damages. You must notify the dealer within 48 hours of any
defects.
Step 1: Positioning in the lter tank
Remove the skimmer from the box. Remove the protective lm from
the cover of the skimmer cup. Install the skimmer cup.
Position the skimmer in the sump. For the skimmer to work perfectly, the
water level in the sump should be approx. 2 1 cm (8 in). The device may
not be in contact with the side glass panes of the sump. The suction side
of the pump requires at least 5 cm (2 in) of space.
To keep the water at a consistent level, an automatic level regulator
for water lost through evaporation or a lter chamber with a consis-
tent water level is recommended. Fluctuations in water level aect
the skimming performance.
Step 2 : Setting devices
Before using your skimmer, learn about the setting devices. Knowing
how these are interconnected is required to adjust your device per-
fectly.
You can set the air and water volume respectively water level separa-
tely on your skimmer.
You can regulate the water level through the water level control tube
(rough adjustment) and the micro-adjustment screw (more precise
adjustment„OPEN-CLOSE“)
You adjust the water level roughly by turning the control tube.
14

EN
Step 3: Commissioning
Open the water level control tube (slot at the lower end of the tube
points in the direction of the skimmer) and the micro-adjustment
screw (turn toward„OPEN“) completely.
Open the air adjustment screw (turn counter-clockwise). Turn on the
device.
Close the micro-adjustment screw by turning it toward„CLOSE“ until
the water level (or the water-foam threshold) is approx. at the level of
the bayonet joint. Please note: The response of any adjustment chan-
ges is delayed in time.
IMPORTANT: The skimmer requires some initial run-in period. This
usually takes a few days. It is recommended you read the information
on pp 18-19.
Step 4: Precise adjustment
For a perfect skimmer performance, the device should be ne-tuned
after one to several days. This adjustment is carried out with the
micro-adjustment screw and the air adjustment screw.
Set the skimming action to dry or wet according to your personal
needs. The higher the water-foam threshold, the wetter is the skim-
ming action.
Step 5: Other information
NYOS®Quantum®skimmer is suitable for continuous ozone use of
up to a maximum of 50 mg/h. You can connect the ozone tube to the
ozone connection on the underside of the silencer.
Empty and clean the skimmer cup regularly.
15

MAINTENANCE, SERVICING AND CLEANING
The NYOS®Quantum®skimmer can be completely disassembled for
maintenance, cleaning and servicing. This is done in the order of the
steps described below.
Step 1: Remove the device from the lter tank
Unplug it.
Remove the device from the water and empty it.
Step 2 : Disassemble the skimmer
Remove skimmer cup and air tube. Remove the venturi system.
Open the four screws on the skimmer body and remove them.
As needed, pull lightly on the water level control tube and remove the
rubber seal on the lower end. Now, remove the tube completely.
As needed, remove the air adjustment screw and the black screw
beneath the sound absorber. Then, you are ready to remove and dis-
mantle the sound absorber including its supports.
Step 3: Removal and disassembly of pump
Remove the bubble plate unit by turning the titanium screw in the
centre of the twister. Then, remove the union nut, which connects
pump and bubble plate unit (not necessary in Quantum®12 0).
Open the titanium screws on the pump holdings. Carefully remove
pump holdings and pump.
Remove the four screws on the pump housing.
16

EN
Quantum®12 0 and Quantum®160: In this case, you can pull the enti-
re hybrid wheel unit from its support.
Quantum®2 2 0/300: In general, we recommend you do not remove
the hybrid wheel unit from the motor block. If it is necessary, then
lift it carefully with two athead screwdrivers on opposite sides. Af-
ter cleaning, the unit must be inserted back into the motor block by
applying some even but increased pressure. You can feel it when it
audibly engages. Then, use a athead screwdriver to lift the hybrid
wheel slightly so that you have a space of approx. 2 -3mm (1/12 in)
between the hybrid wheel and the motor block.
Step 4: Cleaning and care of pump and skimmer
Now, the skimmer is completely disassembled and it can be clea-
ned. It is recommended to use tap water for cleaning (do not use any
detergent). Any hard to clean crusts and lime scale deposits can be
removed by placing it in a solution of 10% citric acid. Subsequently,
rinse it well with water.
Use silicon grease regularly on the rubber seals.
Step 5: Assembly of pump and skimmer
Assemble all parts of the skimmer in the corresponding order.
INFORMATION on Quantum®2 2 0/300: When placing the hybrid
wheel unit and assembling the pump, pay close attention to the inst-
ructions under step 3.
17

FAQ AND TROUBLESHOOTING
The skimmer requires some initial run-in period. This usually takes a few
days. The following symptoms can occur during this run-in period of the
device.
1. Skimmer overows
2 . No skimming action
3. Pump is too noisy
4. Micro-bubbles in the outlet
PLEASE NOTE: These symptoms can become even more noticeable in
new aquarium installations with mostly fresh seawater, live rocks or new
aquarium decorations. Wait for a few days and only then re-adjust the
device.
Additional help is oered by the following table that lists frequent sources
of error.
Problem Possible cause Solution
Skimmer
overows
- run-in period of the device
- water level in the skimmer is too
high
- water level in the sump is too
high
- water additives, nutrient solu-
tions, coral glue, etc.
- adjust settings (see pp.
14-15)
- remove skimmer cup,
if needed; use activated
carbon, change water
- wait a few days
18

EN
No skimming
action
- run-in period of the device
- water level in the skimmer is
too low
- water level in the sump is too
low
- pump is clogged, dirty, has
lime scale deposits
- the venturi system is clogged
- feed containing grease, water
additives, nutrient solutions
- adjust settings (see pp.
14-15)
- use activated carbon,
change water
- wait a few days
- discontinue feed contai-
ning grease, water additi-
ves, nutrient solutions
- clean pump and mail to
service if needed
Pump too
noisy
- run-in period of the device
- pump is dirty or has lime
scale deposits, foreign object in
pump
- hybrid wheel unit is damaged
- rotor is not properly positioned
in pump
- lter tank is too small or skim-
mer touches the side panel of
the sump. Then, the lter tank
functions as sound box and can
increase the noise of the pump.
- adjust settings (see pp. 14-
15) and wait a few days
- open and clean pump (see
pp. 16-17)
- mail pump to service
- position the skimmer freely
- select a larger lter cham-
ber
Micro-bub-
bles in the
outlet
- run-in period of the device
- water throughput too high
- water level in the sump is too
high
- adjust settings (see pp. 14-
15) and wait a few days
- turn the water level control
tube further, turn the micro-
adjustment screw for the
water level further (if nee-
ded, adjust the air capacity).
19

PEÇAS DE REPOSIÇÃO / SPARE PARTS
#Nome / Name Art. / part
1Vite regolazione aria /Air adjustment screw QXXX-101
3Silenziatore / Silencer QXXX-103
4Supporto silenziatore / Lower silencer plate QXXX-104
5Tubo dell’aria / Air hose QXXX-105
6Tubo di controllo del livello completo di micro-
regolazione / Water level control tube including
micro-adjustment screw
QXXX-106
7Coperchio dello sckimmer
Lid for skimmer cup
QXXX-107
8Bicchiere dello skimmer ( escluso coperchio)
Skimmer cup (without lid)
QXXX-108
9Tappo di chiusura per scarico bicchiere
Closure for absorber drain
QXXX-109
10 O-ring bicchiere /O-ring for the cup QXXX-1010
11 O-ring per tubo di controllo del livello
O-ring for the water level control tube
QXXX-1011
12 Corpo / Body QXXX-1012
13 Bubble Plate Twister / Bubble Plate Twister QXXX-1013
14 Vite di ssaggio Bubble Plate
Fastening nut for bubble plate
QXXX-1014
15 Base della Bubble Plate
Base plate for bubble plate
QXXX-1015
16 Sistema Venturi / Venturi system QXXX-1016
17 Unità rotore con asse ceramico, cuscinetti e girante
ibrida
Rotor unit including axis, bearings and hybrid
wheel
QXXX-1017
18 Copertura trasparente motore / Clear-View-Reactor QXXX-1018
19 Blocco motore / Motorblock QXXX-1019
20 4x viti di ssaggio per copertura trasparente motore
4x screws for clear-view reactor
QXXX-1020
21 1 vite in titazio cad.
1 titanium screw each
QXXX-1021
22 Supporto pompa / Pump holdings QXXX-1022
23 Piastra di montaggio cad.
Mounting plate for body each
QXXX-1023
24 Base dello Skimmer inclusi piedini in silicone
oor plate including 4x silicon feet
QXXX-1024
Coloque Q120, Q160, Q220 ou Q300 antes do número da
peça. Place Q120, Q160, Q220 or Q300 before the part
number.
20
Nyos®Aquatics GmbH - Daimlerstrasse 27 - 70825 Korntal -
Dipl.-Kfm. Matthias Kapaun, Dr. Christian Kapaun
Homepage: www.nyos.info - Email: info@nyos.info
USt-IdNr: DE 815356612 - WEEE-Reg.-Nr: DE 50985058
Quantum® e il logo Quantum® sono marchi registrati daNYOS® Aquatics
GmbH. Il design è protetto da brevetto depositato da NYOS® Aquatics GmbH.
Quantum®and the Quantum®logo are protected trademarks of NYOS®
Aquatics GmbH. The design is protected as design patent of NYOS®
Aquatics GmbH.
Other manuals for Quantum
1
Table of contents
Languages:
Other Nyos Aquarium manuals
Popular Aquarium manuals by other brands

Deltec
Deltec KM 500 Operating instructions and spare parts list

TMC Aquarium
TMC Aquarium REEF-Skim Series Instructions for installation and use

JBL
JBL COMBISET manual

D-D The Aquarium Solution
D-D The Aquarium Solution KH Manager instruction manual

Kessil
Kessil AP9X user manual

Wave Point
Wave Point BlueStar 01046 manual