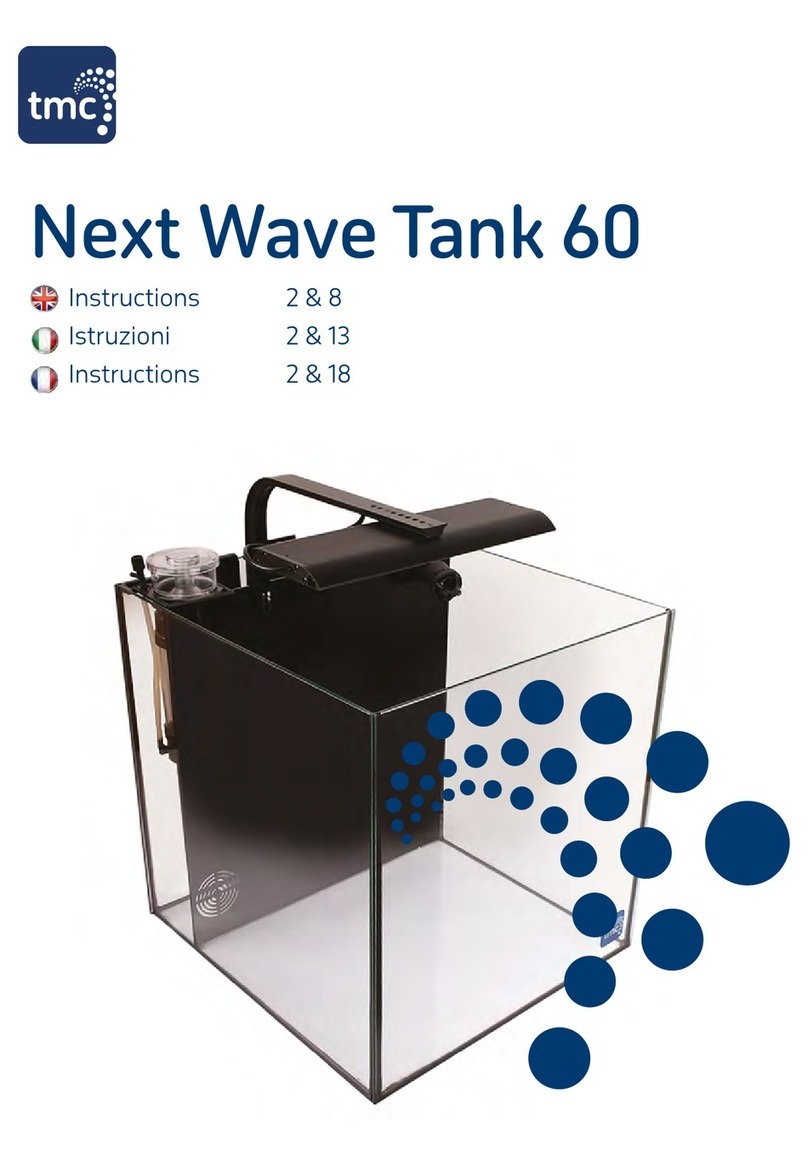
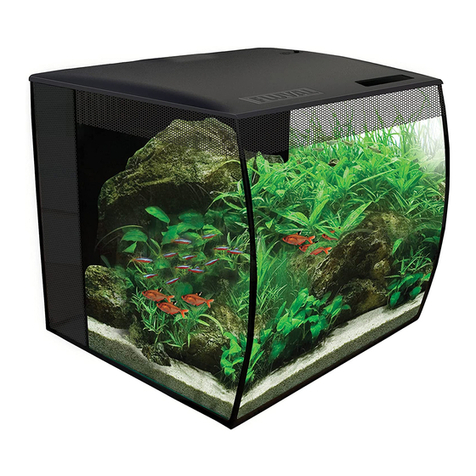
TMC Next Wave Tank 85 User manual

1
Next Wave Tank
60 and 85
Instructions 3 & 10
Instruções 3 & 15
Instrucciones 3 & 20
Installations 3 & 25
Instructies 3 & 30
Istruzioni 3 & 35
Instructions 3 & 40

2

3
IMPORTANT SAFETY INFORMATION - Please Read Carefully
PLEASE READ THE INSTRUCTIONS SUPPLIED WITH EACH INDIVIDUAL COMPONENT
OF THIS AQUARIUM SET, FOR FULL SAFETY, SET UP, OPERATING AND MAINTENANCE
PROCEDURES
INFORMAÇÕES DE SEGURANÇA IMPORTANTES – Leia com atenção
POR FAVOR LEIA AS INSTRUÇÕES FORNECIDAS COM CADA COMPONENTE INDIVIDUAL
DESTE KIT DE AQUÁRIO,PARA OS PROCEDIMENTOS COMPLETOS DE SEGURANÇA,
MONTAGEM, OPERAÇÃO E MANUTENÇÃO
IMPORTANTE INFORMACIÓN SOBRE SEGURIDAD - Lea detenidamente
POR FAVOR LEA LAS INSTRUCCIONES QUE VIENEN CON CADA PIEZA INDIVIDUAL DE
ESTE SET DE ACUARIO,PARA LOS PROCEDIMIENTOS COMPLETOS DE SEGURIDAD,
CONFIGURACIÓN, OPERACIÓN Y MANTENIMIENTO
WICHTIGE SICHERHEITSINFORMATIONEN - Bitte sorgfältig lesen
LESEN SIE BITTE DIE JEDER EINZELNEN KOMPONENTE DIESES AQUARIUM-
SETS BEILIEGENDE ANLEITUNG ZU SICHERHEIT, INSTALLATION, BETRIEB UND
WARTUNGSMASSNAHME
BELANGRIJKE VEILIGHEIDSINFORMATIE – Alstublieft zorgvuldig doorlezen
LEES ALSTUBLIEFT DE INSTRUCTIES,TOEGEVOEGD BIJ IEDER INDIVIDUEEL
ONDERDEEL VAN DIT AQUARIUM SET,VOOR VOLLEDIGE VEILIGHEIDS-,INSTALLATIE-,
WERKINGS- EN ONDERHOUDSPROCEDURES
INFORMAZIONI IMPORTANTI SULLA SICUREZZA - Leggere attentamente
SI PREGA DA LEGGERE LE ISTRUZION DI OGNI COMPONENTE DI QUESTA SERIE DE
VASCHE, PER PROCEDURE DI SICUREZZA TOTALE,ASSEMBLAGGIO,PROCEDURE E
MANUTENZIONE
INFORMATIONS IMPORTANTES RELATIVES À LA SÉCURITÉ – Prière de lire attentivement
PRIÈRE DE LIRE LES INSTRUCTIONS FOURNIES AVEC CHAQUE COMPOSANT
INDIVIDUEL DE CET ENSEMBLE D’AQUARIUM, POUR DES INSTRUCTIONS COMPLÈTES
SUR LES PROCÉDURES EN MATIÈRE DE SÉCURITÉ, INSTALLATION, L’EXPLOITATION ET
LA MAINTENANCE
GB
PT
ES
DE
FR
NL
IT

4
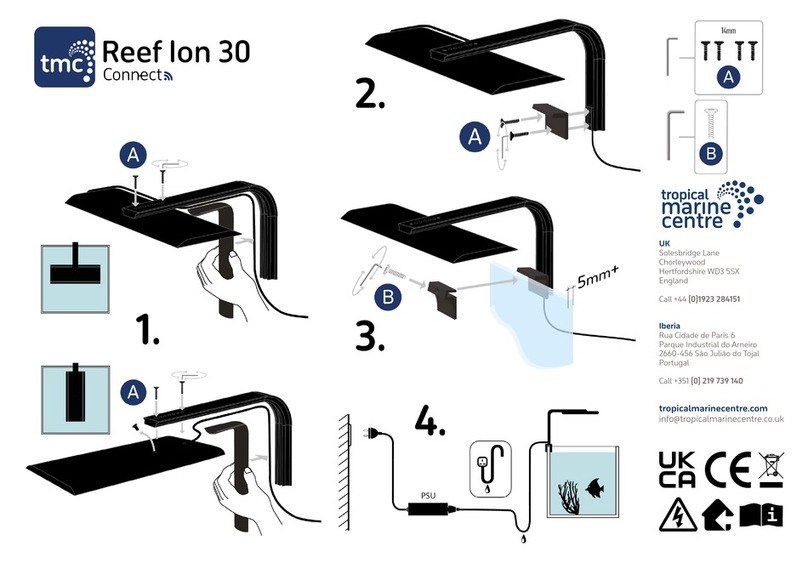
1. Reef Ion 30 - LED light
2. Protein skimmer (2a and 2b: skimmer parts)
3. Filtration Media Basket with filter sponges
4. Reef Pump 500
5. Water outlet tubing
6. Interchangeable outlet nozzles and fittings
9
10
8
1
4
4
73
3
2
2
5
5
6
6
C
B
A
PARTS REQUIRED FOR INSTALLATION (NOT SUPPLIED)
7. Heater
8. Air Pump
9. Flexible air tubing
10. Non return valve.
• Residual Current Device (RCD) with a rated residual operating
current not exceeding 30mA
• Additional connection fittings (depending on individual
installation requirements).
2a
2b
A. Water inlets
B. Water inlets
C. Water outlets
BACK VIEW
GB
Next Wave 85
LED layout
1
Next Wave 60
LED layout +

5
A. Entrada de agua
B. Entrada de agua
C. Salida de agua
A. Ingressi acqua
B. Ingressi acqua
C. Uscita acqua
A. Entrada de água
B. Entrada de água
C. Saída da água
A. Waterinlaten
B. Waterinlaten
C. Waterinlaten
A. Wasserzuflüsse
B. Wasserzuflüsse
C. Wasserauslauf
A. Entrées d’eau
B. Entrées d’eau
C. Sortie d’eau
1. Reef Ion 30 - LED
2. Escumador de proteínas
3. Cesta para medios filtrantes
4. Bomba
5. Tubos de salida de agua
6. Accesorios
1. Reef Ion 30 - LED light
2. Schiumatoio di proteine
3. Cestello per mezzi filtranti con
filtro-spugne
4. Pompa
5. Tubi uscita acqua
6. Accessori
1. Reef Ion 30 - LED
2. Escumador de proteínas
3. Cesto para mídias filtrantes
4. Bomba
5. Tubagem de saída de água
6. Acessórios
1. Reef Ion 30 - LED light
2. Eiwitafschuim
3. Media mand
4. Pomp
5. Buizen wateruitlaat
6. Accessoires
1. Reef Ion 30 - LED
2. Eiweißabschäumer
3. Wasseraufbereiter-Korb mit
Filterschwämme
4. Pumpe
5. Wasserauslaufrohr
6. Fittings
1. Reef Ion 30 - LED light
2. Écumeur de protéines
3. Panier pour élément filtrant avec
des éponges de filtre
4. Pumpe
5. Tuyau pour sortie d’eau
6. Raccords
PT
ES
DE
NL
FR
PIEZAS NECESARIAS PARA LA INSTALACIÓN (NO INCLUIDAS)
7. Calentador
8. Bomba
9. Tubo de aire flexible
10. Válvula de retención.
• Interruptor diferencial con una corriente de disparo nominal no mayor de
30 mA.
• Accesorios de conexión adicionales (de acuerdo a los requisitos de cada
instalación).
COMPONENTI PER L’INSTALLAZIONE (NON IN DOTAZIONE)
7. Riscaldatore
8. Pompa
9. Tubo aria flessibile.
10. Valvola di non ritorno.
• Interruttore differenziale (RCD) con corrente residua di funzionamento
nominale non superiore a 30 mA.
• Raccordi supplementari (in funzione dei requisiti di installazione dei singoli
casi).
PEÇAS NECESSÁRIAS PARA A INSTALAÇÃO (NÃO FORNECIDAS)
7. Aquecedor
8. Bomba
9. Tubagem de ar flexível
10. Válvula de retenção.
• Dispositivo de corrente residual (RCD) com uma corrente de operação
residual nominal não superior a 30mA.
• Acessórios de ligação adicionais (consoante os requisitos de instalação
individuais).
ONDERDELEN NODIG vOOR INSTALLATIE (NIET MEEGELEVERD)
7. Verwarming
8. Pomp
9. Buigzame luchtslang.
10. Terugslagklep.
• Aardlekschakelaar met een waarde van maximaal 30mA als lekstroom.
• Extra aansluitklemmen/houders (afhankelijk van de betreffende installatie).
ZUR INSTALLATION ERfORDERLICHE TEILE (NICHT IM LIEfERUMfANG)
7. Heizer
8. Pumpe
9. Luftschlauch
10. Rückschlagventil. Luftschlauch.
• Fehlerstrom-Schutzeinrichtung mit einem Fehler-Betriebsnennstromwert
von nicht mehr als 30 mA.
• Zusätzliche Verbindungsstücke (je nach Installationsanforderungen).
PIÈCES NÉCESSAIRES À L’INSTALLATION (NON FOURNIES)
7. Chauffage
8. Pompe
9. Tuyau flexible d’air.
10. Clapet anti-retour.
• Dispositif différentiel à courant résiduel (DDR) avec un courant de fonction-
nement résiduel assigné n’excédant pas 30 mA.
• Raccords supplémentaires (en fonction des exigences d’installation
individuelles).
IT

6
!

7
Como instalar o Escumador de proteínas
Cómo instalar el Skimmer
So installieren Sie die Eiweißabschäumer
Hoe de te installeren Eiwitafschuim
Come installare lo Schiumatoio di proteine
Comment installer le Écumeur de protéines
PT
ES
DE
NL
FR
IT
GB HOW TO INSTALL THE PROTEIN SKIMMER

8
1
3
67
4 5
2

9
10
13 14
11 12
8 9
Next Wave 85
LED layout
Next Wave 60
LED layout

10
IMPORTANT SAFETY INFORMATION
Please Read Carefully
CAUTION: Always isolate all electrical appliances from the mains electricity before installing or carrying
out any maintenance to the Next Wave tank.
CAUTION: Power to the water circulation pump and heater (not supplied) must be supplied through a
Residual Current Device (RCD - not supplied) with a rated residual operating current not exceeding 30mA.
CAUTION: Thoroughly rinse the aquarium and filter media,using fresh water and a damp cloth. Never use
soap on any component placed in your aquarium as soap is harmful to livestock.
• Do not run the water circulation pump dry.
• To ensure the water circulation pump continues to maintain a steady water flow, it must be cleaned
regularly to ensure it does not become clogged with debris or detritus.
• Pump rating: 220-240V, 50Hz unless marked otherwise.
CAUTION: Do not operate any appliance if it has a damaged cord or plug, if it is malfunctioning, or if it has
been dropped or damaged in any way.
• This Next Wave is designed to be used indoors and is not suitable for any outdoor applications.
• Ensure the Next Wave is securely installed on a level surface, capable of supporting the weight of the
tank, before operating.
Please Note: This tank must NOT be positioned in direct sunlight as this will lead to excessive algae
growth, or in a location exposed to low temperatures or increased heat levels i.e. NOT by a radiator.
• Ensure the Reef Ion 30 and the heater are securely installed before operating.
CAUTION: Always leave a drip-loop in the water circulation pump, heater and LED light cables to prevent
water running down the cables and reaching the power source.
CAUTION: Always isolate the LED light power supply unit (PSU), the water circulation pump and the
heater from the mains electricity before installing or carrying out any maintenance to the tank.
CAUTION: DO NOT SUBMERGE THE LED LIGHTING SYSTEM. If the light falls into the Next Wave tank by
accident, immediately isolate the LED lighting system from the mains electricity before removing.
• Do not cover the LED lighting system in any way and always ensure good air circulation around it.
• Operation of the LED lighting system in a confined or unventilated space, or where there is an additional
heat source could cause operating problems and a reduction in the usable life of the unit.
• The heater must remain fully submerged at all times. Failure to do so will damage the heater and result in
over-heating of the aquarium water and loss of livestock. If removing the heater from the Next Wave tank
isolate it from the power supply and wait approximately 15-20 minutes for it to cool, before removing it.
• This appliance is not intended for use by persons (including children) with reduced physical, sensory or
mental capabilities, or lack of experience and knowledge, unless they have been given supervision or
instruction concerning use of the appliance by a person responsible for their safety.
DISPOSE OF THIS UNIT RESPONSIBLY.
Check with your local authority for disposal information.

11
PARTS REQUIRED FOR INSTALLATION (NOT SUPPLIED)
• Heater
• Air Pump and flexible air tubing
• Non return valve.
• Residual Current Device (RCD) with a rated residual operating current not exceeding 30mA
• Additional connection fittings (depending on individual installation requirements).
• Bucket or similar container for preparing your saltwater.
• 60/85 litres of saltwater correctly prepared according to the instructions supplied with your chosen
synthetic salt,and at the correct temperature.
USEFUL TIP: We thoroughly recommend saltwater prepared with Tropic Marin synthetic sea salt (see
your local stockist for details and preparation advice).
• Measuring jug or similar vessel (for filling the Next Wave tank with water).
• A small cup, flat plate or something similar (to be used when filling the Next Wave tank with water to
prevent any substrate from being displaced).
1.If you are planning to add aquarium decor e.g.live rock or replica live rock,
position these as required.
Please Note: Ensure all aquarium decor is correctly prepared before
introducing to the Next Wave tank .
2.Carefully pour your selected aquarium substrate into the Next Wave tank .
TMC EcoSand is recommended (see your local TMC stockist for details).
3. Place a small cup, flat plate or something similar on top of the substrate
(to prevent any substrate from being displaced) and carefully pour the
prepared saltwater.
Please Note: The prepared salt water must be at the correct temperature
for the Next Wave tank before adding to the tank.
Please Note: Due to various factors such as evaporation,the water level
in the Next Wave tank will change. Ensure that the water level in the tank,
the protein skimmer chamber and filtration chamber is always closely
monitored.As water evaporates, the salinity level in the tank will also
change so ensure that the specific gravity (SG) of the tank is measured
using a hydrometer,and the tank is regularly topped up with freshwater
or saltwater as necessary to reach the correct specific gravity (SG) and the
required water level.
Please Note: When topping up the tank with new saltwater, the saltwa-
ter must always be prepared correctly and according to the instructions
supplied with your chosen synthetic salt and any water added to the Next
Wave tank must be at the correct temperature.
CAUTION: Livestock should NOT be introduced to the Next Wave tank
until water parameters have been tested and it is safe to do so. Regularly
test the water parameters with reliable test kits and consult your local
retailer for further advice if necessary.
AQUARIUM
SUBSTRATE
PREPARE
SALTWATER
USE A PLATE OR SMALL
CUP WHEN POURING
THE SALTWATER ONTO
THE SUBSTRATE

12
OPERATION
1. Once the Next Wave tank is full of water and ensuring that the protein skimmer chamber, filtration
chamber and the pump and heater chamber are also full of water,plug in and switch on the water circu-
lation pump (4) and the heater (7).
2. Once the water circulation pump (4) is switched on, water will be drawn into the protein skimmer and
filtration chambers via the water inlets (A & B) and will pass through the filter sponges (3) and will return
back into the tank via the water outlet (C) and the directional nozzle (6) Jet Flo or Rota Flo.
CAUTION: To avoid any operating problems,ensure the water inlets and outlets are not obscured by tank
decor, substrate or filter media.
3. Make sure all connections are tightly secured and check for leaks.
4. Ensure the skimmer collection cup and lid (2a) are securely and correctly positioned. Failure to do so
could result in leaks.
5. Plug in and switch on the air pump (8 - not supplied).
6. Carefully turn the air inlet adjustment valve (2b) on the protein skimmer in an anti-clockwise direction
until the micro-bubbles can be seen to just enter the base of the collection cup cone (2a).
NOTE: When any adjustments are made to the air inlet adjustment valve (2b) it will take a few moments
for the micro-bubbles and water level within the skimmer to settle and become stable.
7. Leave the air pump (8) running to allow the skimmer to establish itself and if required make further
adjustments to the air inlet adjustment valve (2b) to control the air and water level within the main
skimmer body (2).
NOTE: With any adjustments made,ensure that the water level in the main skimmer body (2) is closely
monitored to ensure the collection cup (2a) is not flooded.
CAUTION: Failure to do so could result in water overflowing onto the floor.
NOTE: It is perfectly normally for the protein skimmer to take a few days to become established and
stable.
NOTE: Under normal operating circumstances, due to the size of the Next Wave tank, there will generally
be very little organic matter or detritus to be removed by the skimmer and filtration system.Therefore
the skimmer may not always be producing a foam and skimming.This is perfectly normal.As long as the
micro-bubbles and water level within the skimmer are correct, the skimmer will start skimming as soon
as organic matter or detritus build up in the Next Wave tank.
NOTE: Variables such as introducing new micro corals or micro invertebrates into the tank, frequent
feeding, adding supplements or medications, fluctuations in water quality, water changes and mainte-
nance may temporarily alter the performance of the protein skimmer.
8. Plug in and switch on the Reef Ion 30 lighting system.
CAUTION: Due to the size of this tank, the Next Wave tank is NOT suitable for keeping all species of or-
namental aquarium fish (see “Suitable Species for the Next Wave tank” on pages 45-48). If you plan to
introduce livestock to this Next Wave tank such as small fish, micro invertebrates or micro corals,please
ensure you thoroughly research the habitat requirements of the livestock,i.e. the required temperature
and water parameters, before introducing them into this tank. If in any doubt check with your local
aquatic retailer.
We also highly recommend that you purchase a good marine keeping reference book to gain further
knowledge on how to keep your marine livestock in optimum condition and to ensure an enjoyable and
successful marine-keeping experience.

13
MAINTENANCE
CAUTION: To avoid possible electric shock, special care should be taken when using electrical appliances
near water.
CAUTION: Always isolate the LED lighting system,the water circulation pump, the skimmer and the
heater from the mains electricity before installing or carrying out any maintenance to the Next Wave
tank.
1. To operate efficiently, the water circulation pump, the skimmer and the heater must be operated 24
hours a day.
2. For optimum results we recommend that the LED lighting system is operated for up to 10 hours per day.
3. Regularly check to make sure all connections are tightly secured.
4. Check regularly that the protein skimmer is functioning properly and the micro-bubbles and water level
within the skimmer are correct.
CAUTION: Failure to do so could result in water overflowing onto the floor.
5. When the collection cup is full, ensure all waste material is removed and the collection cup is cleaned.
CAUTION: Failure to do so could result in water overflowing onto the floor.
6. Periodically remove the collection cup and clean any organic build up or salt and/or calcium deposits
from the collection cup.
7. Ensure the water outlets on the protein skimmer are clean and free of blockages.
CAUTION: Failure to do so could result in water overflowing onto the floor.
USEFUL TIP: Any blockages or detritus in the main skimmer body should be removed by simply rinsing
the skimmer with warm water under a running tap.
8. When carrying out a water change, rinse out the filter sponges in water removed from the tank (NEVER
use tap water). Periodically replace the filter sponges.Avoid rinsing or replacing all sponges at the same
time to ensure minimal loss of essential bacteria.
9. Clean the water circulation pump regularly to ensure it does not become clogged with debris or detritus.
10. Ensure that the water inlets, water outlet,water outlet tubing and water outlet nozzle are clean and
free of blockages.
CAUTION: Failure to do so could result in operating problems.
11. Regularly clean the inside and outside of the Next Wave tank.
USEFUL TIP: A full range of spares and accessories is available to complement the Next Wave tank.
PLEASE READ THE INSTRUCTIONS SUPPLIED WITH EACH INDIVIDUAL COMPONENT OF THIS
AQUARIUM SET, FOR FULLSAFETY, SET UP, OPERATING AND MAINTENANCE PROCEDURES.

14
LIVESTOCK TIPS
1.Regular water changes of up to 25% are highly recommended, initially on a weekly basis and
subsequently depending on water quality.
2. All livestock must be carefully acclimated before being introduced into the tank.
3. Introduce all livestock very slowly over a number of weeks. Smaller tanks are more sensitive to changes
in water parameters and therefore it is not advisable to introduce more than one animal at a time.
Ensure you allow each animal to settle in fully, and water parameters are correct,before introducing
another.
4. Consider the ultimate size and placement of each species chosen.
5. Example A: Species such as common clown-fish (Amphiprion ocellaris), yellow boxfish (Ostracion
cubicus) or blue damsels (Chrysiptera cyanea) will quickly outgrow a tank of this size and are therefore
completely unsuitable.
6. Example B: Frog spawn or Hammerhead corals (Euphyllia spp.) can be extremely aggressive, and should
not be placed where sweeper tentacles can damage other corals, but must be in an area of sufficient
light intensity. Rate of growth should also be considered when purchasing and placing corals.
7. Please Note: ALL corals will eventually outgrow a tank of this size, and must be maintained and‘pruned’
as necessary. Please refer to our “Suitable Species for the Next Wave tank”on pages 45-48, or speak to
your aquatics retailer for further advice.
8. Consider the dietary requirements of each species added. For example, it may be inadvisable to keep a
large number of filter feeding invertebrates in a small tank. Competition for a limited food source will be
very high, but adding more zoo- or phytoplankton may act as a pollutant in the water.
CAUTION: DO NOT OVERSTOCK THE TANK.
Small tanks inherently support far fewer animals than a traditional reef aquarium and large quantities of
livestock in a Next Wave tank is strongly discouraged. Consult your local retailer for stocking advice.
Why buy Tropical Marine Centre Livestock
• We ethically source and invest in a sustainable trade
• We offer more that 1200 species sourced world wide
• We have well-equipped facilities near the reef
• We offer a short supply chain to ensure consistently high quality livestock
• We sell ONLY healthy, well-acclimatised fish, which are feeding well
• Our livestock is hand selected by your retailer to your own requirements
• TMC has over 50+ years of marine expertise
You can access all the TMC species, information and tips by visiting:
www.tropicalmarinecentre.com

15
INFORMAÇÕES DE SEGURANÇA IMPORTANTES
Leia com atenção
CUIDADO: Isole sempre todos os aparelhos eléctricos da rede eléctrica antes de instalar ou efectuar
qualquer serviço de manutenção no Next Wave.
CUIDADO: A energia da bomba de circulação de água e do aquecedor tem de ser fornecida através de um
Dispositivo de Corrente Residual (RCD) com uma corrente operativa residual classificada não superior a 30
mA.
CUIDADO: Lave bem o aquário e os meios filtrantes, usando água doce e um pano húmido. Nunca use sabão
em qualquer componente colocado no seu aquário, pois o sabão é prejudicial para os habitantes do aquário.
• Não execute a bomba de circulação de água a seco.
• Para garantir que a bomba de circulação de água continua a manter um fluxo de água fixo, tem de ser limpa
regularmente com vista a assegurar que não fica obstruída com detritos ou resíduos.
• Classificação da bomba: 220-240 V,50 Hz excepto indicação em contrário.
CUIDADO: Não utilize qualquer aparelho que tenha um cabo danificado, que não funcione correctamente ou
que tenha caído ao chão ou tenha sido danificado de alguma forma.
• Este Next Wave foi concebido para ser usado no interior e não é aconselhado para aplicações de exterior.
• Certifique-se de que o Next Wave está instalado com segurança numa superfície nivelada, capaz de supor-
tar o peso do aquário, antes do respectivo funcionamento. Nota: Este aquário não pode ficar exposto à luz
direta do sol porque originará o crescimento excessivo de algas, nem num local exposto a baixas temper-
aturas ou níveis de calor mais altos, ou seja, NÃO deve ser colocado junto a um radiador.
• Certifique-se de que o sistema de iluminação Reef Ion 30 e o aquecedor estão instalados com segurança
antes do respectivo funcionamento.
CUIDADO: Deixe sempre uma alça de gotejamento na bomba de circulação de água, no aquecedor e nos
cabos de luz LED para evitar que a água escorra pelos cabos e alcance a fonte de alimentação.
CUIDADO: Isole sempre a unidade de abastecimento eléctrico da luz LED (PSU),a bomba de circulação de
água e o aquecedor da tomada eléctrica antes de instalar ou efectuar qualquer serviço de manutenção no
aquário.
CUIDADO: NÃO MERGULHE O SISTEMA DE ILUMINAÇÃO LED EM ÁGUA.Caso a luz caia acidentalmente no
Next Wave 60, isole imediatamente o sistema de iluminação LED da tomada eléctrica antes da remoção.
• Nunca cubra o sistema de iluminação LED e garanta sempre boa circulação de ar em torno deste.
• O funcionamento do sistema de iluminação LED num espaço confinado ou não ventilado ou sempre que
exista uma fonte de calor adicional pode provocar problemas operativos e uma redução no período de vida
útil da unidade.
• O aquecedor tem de estar sempre totalmente submerso. Caso contrário danificará o aquecedor, resultando
no sobreaquecimento da água do aquário e perda da fauna. Se remover o aquecedor do Next Wave, isole-o
da fonte de alimentação e aguarde aproximadamente 15-20 minutos até que arrefeça, antes de o retirar.
• A utilização deste aparelho por pessoas com capacidades físicas, sensoriais ou mentais reduzidas (incluin-
do crianças) ou por pessoas com pouca experiência e poucos conhecimentos, deve acontecer somente sob
supervisão ou caso tenham recebido instruções relativamente à utilização do aparelho por parte de uma
pessoa responsável pela sua segurança.
ELIMINE RESPONSAVELMENTE ESTA UNIDADE.
Procure mais informações sobre a eliminação desta unidade junto das respectivas autoridades locais.

16
PEÇAS NECESSÁRIAS PARA A INSTALAÇÃO (NÃO FORNECIDAS)
• Aquecedor
• Bomba
• Tubagem de ar flexível
• Dispositivo de Corrente Residual (RCD) com uma corrente operativa residual classificada não superior a
30 mA.
• Tubagem de ar adicional (dependendo dos requisitos específicos de instalação).
• Balde ou recipiente semelhante para a preparação da água salgada.
• 60/85 litros de água salgada correctamente preparada de acordo com as instruções fornecidas com o sal
sintético que escolheu e à temperatura correcta.
CONSELHO ÚTIL: Recomendamos vivamente água salgada preparada com sal marinho sintético Tropic
Marin (consulte o seu armazenista local para obter mais informações e conselhos sobre a preparação).
• Recipiente de medição ou recipiente semelhante (para o enchimento do Next Wave com água).
• Um copo pequeno, um prato liso ou algo semelhante (a utilizar ao encher o Next Wave com água para
evitar que qualquer substrato seja deslocado).
SUBSTRATO
1.Se está a planear adicionar decorações ao aquário (por exemplo, pedras
verdadeiras ou imitações), coloque-as à sua discrição.
NOTA: Certifique-se de que todas as decorações do aquário são
correctamente preparadas antes de serem introduzidas no Next Wave.
2.Despeje cuidadosamente o seu substrato para aquário no Next Wave.
Recomenda-se o oólito ou cascalho TMC (consulte o seu armazenista
TMC local para obter mais informações).
3. Coloque um copo pequeno, um prato liso ou algo semelhante em
cima do substrato (para evitar dispersar o substrato) e despeje
cuidadosamente a preparação de água salgada.
NOTA: A preparação de água salgada tem de estar à temperatura
correcta para o Next Wave antes de ser adicionada ao depósito.
NOTA: Devido a vários factores,tais como a evaporação,o nível da
água no Next Wave alterar-se-á. Certifique-se de que o nível da água
na sump traseira do escumador de proteínas e de filtragem é sempre
monitorizado de perto.À medida que a água se evapora,o nível de
salinidade no aquário também se alterará.Por isso, garanta que a
gravidade específica (GE) do aquário é medida utilizando o hidrómetro
e que o aquário é atestado regularmente com água doce ou salgada,
conforme o caso, de modo a atingir a gravidade específica (GE) correcta e
o nível de água necessário.
NOTA: Ao atestar o depósito com água salgada nova, esta tem de
ser sempre correctamente preparada de acordo com as instruções
fornecidas com o sal sintético que escolheu, devendo a água
acrescentada ao Next Wave estar à temperatura correcta.
CUIDADO: As espécies NÃO devem ser introduzidas no Next Wave até
que os parâmetros da água tenham sido testados e seja seguro fazê-lo.
Teste regularmente os parâmetros da água com equipamentos de teste
fiáveis e consulte o seu revendedor local para obter aconselhamento
adicional, se necessário.
PREPARAÇÃO DE
ÁGUA SALGADA
COLOQUE UM COPO
PEQUENO, UM PRATO LISO
OU ALGO SEMELHANTE EM
CIMA DO SUBSTRATO

17
FUNCIONAMENTO
1. Assim que o Next Wave esteja cheio de água e garantindo que a sump traseira do escumador de
proteínas, filtragem, bomba e do aquecedor estão também cheias de água, ligue e active a bomba de
circulação de água (4) e o aquecedor (7).
2. Assim que a bomba de circulação de água (4) for activada, a água será escoada para a sump traseira
do escumador de proteínas e filtragem (A e B) através das entradas de água (3) e passará através das
esponjas (3) do filtro, regressando posteriormente ao depósito através da saída de água (C) e o injector
“bico de pato” direccional (6).
CUIDADO: Para evitar problemas de funcionamento,tenha atenção para não obstruir as entradas e
saídas de água com decoração, substratos ou outros meios filtrantes.
3. Certifique-se de que todas as ligações estão bem fixas.
4. Garanta que o copo e a tampa de recolha do escumador (2a) estão correctamente e seguramente posi-
cionadas. O incumprimento desta instrução pode resultar em fugas.
5. Ligue e active a bomba de ar (8 - Não fornecidas).
6. Gire com cuidado a válvula de ajuste da entrada de ar (2b) do escumador de proteínas no sentido oposto
ao dos ponteiros do relógio até que possam ser vistas micro-bolhas a entrar na base do cone do copo de
recolha.
NOTA: Quando são efectuados ajustes à válvula de ajuste de entrada de ar (2b), serão precisos alguns
instantes para que as micro-bolhas e o nível de água do escumador se instalem e permaneçam estáveis.
7. Deixe a bomba de ar (8) em execução com vista a permitir que o escumador se estabeleça e, se
necessário, efectue ajustes adicionais à válvula de ajuste da entrada de ar (2b) para controlar o nível de
ar e água dentro da estrutura principal do escumador (2).
NOTA: Com todos os ajustes efectuados, certifique-se de que o nível de água na estrutura principal do
escumador (2) é monitorizado de perto com vista a garantir que o copo de recolha (2a) não está inunda-
do.
CUIDADO: O incumprimento desta instrução pode resultar em derramamento de água para o chão.
NOTA: É perfeitamente normal que o escumador de proteínas demore alguns dias a estabelecer-se e a
permanecer estável.
NOTA: Em condições de funcionamento normais, devido à dimensão do Next Wave,existirão normal-
mente muito poucos materiais orgânicos ou detritos a serem removidos pelo escumador e pelo sistema
de filtragem.Assim sendo, o escumador pode não estar sempre a produzir espuma. Esta é uma situação
perfeitamente normal. Enquanto as micro-bolhas e o nível de água do escumador estiverem correctos, o
escumador começará a escumar assim que os materiais orgânicos ou os detritos se acumulem no Next
Wave 60.
NOTA: Variáveis tais como a introdução de novos micro-corais ou microinvertebrados no depósito, a
alimentação frequente,a inclusão de suplementos ou medicação, as variações na qualidade da água,as
alterações da água e a manutenção podem alterar temporariamente o desempenho do escumador de
proteínas.
8. Ligue e active o sistema de iluminação Reef Ion 30.
CUIDADO: Devido ao tamanho do aquário, o Next Wave é adequado para todas as espécies de peixes
de aquário ornamentais (ver“Lista de Espécies adequadas”página 45-48 ). Se pretende introduzir
animais neste Next Wave 60 como, por exemplo, peixes pequenos, micro invertebrados ou micro corais,
investigue e informe-se sobre os requisitos do habitat para esta fauna, nomeadamente, os parâmetros
de temperatura e de água,antes da introdução neste aquário. Em caso de dúvidas, aconselhe-se no local
onde adquire os produtos para o aquário.

18
Também recomendamos vivamente que adquira um bom livro de consulta sobre manutenção de
espécies marinhas para conhecer mais detalhes sobre como manter as suas espécies marinhas num
estado óptimo e com vista a garantir uma experiência bem-sucedida em termos de manutenção de
espécies marinhas.
MANUTENÇÃO
CUIDADO: Para evitar possíveis choques eléctricos, deve tomar especial atenção ao utilizar aparelhos
eléctricos perto de água.
CUIDADO: Isole sempre o sistema de iluminação LED,a bomba de circulação de água, o escumador de
proteínas e o aquecedor da tomada eléctrica antes de instalar ou efectuar qualquer serviço de ma-
nutenção no Next Wave.
1. Para funcionar com eficiência, a bomba de circulação de água, o escumador de proteínas e o aquecedor
têm de ser utilizados 24 por dia.
2. Para resultados óptimos,recomendamos que o sistema de iluminação LED seja utilizado até 10 horas por
dia.
3. Inspeccione regularmente todas as ligações, certificando-se de que estão bem fixas.
4. Certifique-se regularmente de que o escumador de proteínas está a funcionar devidamente e as mi-
cro-bolhas e o nível de água do escumador estão correctos.
CUIDADO: O incumprimento desta instrução pode resultar em derramamento de água para o chão.
5. Quando o copo de recolha estiver cheio, certifique-se de que todos os resíduos são removidos e o copo
de recolha é limpo.
CUIDADO: O incumprimento desta instrução pode resultar em derramamento de água para o chão.
6. Remova periodicamente o copo de recolha e limpe eventuais substâncias orgânicas ou sais e/ou depósi-
tos de cálcio do copo de recolha.
7. Certifique-se de que as saídas de água no escumador de proteínas estão limpas e isentas de obstruções.
CUIDADO: O incumprimento desta instrução pode resultar em derramamento de água para o chão.
CONSELHO ÚTIL: Eventuais obstruções ou detritos na estrutura principal do escumador devem ser elim-
inados, bastando para tal enxaguar o escumador com água quente debaixo de uma torneira aberta.
8. Ao realizar uma troca de água, lave as esponjas do filtro em água retirada do aquário (NUNCA use água
da torneira). Substitua periodicamente as esponjas do filtro. Evite limpar ou substituir simultaneamente
todas as esponjas para garantir uma perda mínima de bactérias essenciais.
9. Limpe regularmente a bomba de circulação de água com vista a garantir que não fique obstruída com
detritos ou resíduos.
10. Certifique-se de que as entradas de água, a saída de água, a tubagem de saída de água e o injector“bico
de pato”direccional de saída da água estão limpos e isentos de obstruções.
CUIDADO: O incumprimento desta instrução pode resultar em problemas de funcionamento.
11. Limpe regularmente o interior e o exterior do Next Wave.
CONSELHO ÚTIL: Está disponível uma vasta gama de peças sobresselentes e acessórios para comple-
mentar o Next Wave.
Consulte o seu armazenista TMC local para obter mais informações.
POR FAVOR LEIAS AS INSTRUÇÕES FORNECIDAS COM CADA COMPONENTE
INDIVIDUAL DESTE KIT DE AQUÁRIO,PARA OS PROCEDIMENTOS COMPLETOS DE
SEGURANÇA, MONTAGEM, OPERAÇÃO E MANUTENÇÃO

19
SUGESTÕES DE ESPÉCIES PARA O AQUÁRIO
É vivamente recomendado mudanças de água regulares até 25%, inicialmente numa base semanal e
posteriormente em função da qualidade da água.
1.Toda a fauna deve ser cuidadosamente aclimatizada antes de ser introduzida no aquário.
2.Introduza a fauna muito lentamente ao longo de várias semanas.Os aquários mais pequenos são mais
sensíveis a alterações nos parâmetros da água não sendo por isso recomendada a introdução de mais
de um animal de cada vez. Deixe cada um dos animais ambientar-se por completo e espere até que os
parâmetros da água fiquem correctos, antes de introduzir outro animal.
3. Tenha presente o tamanho final da espécie escolhida bem como a sua colocação.
4. Exemplo A: Espécies como o peixe-palhaço vulgar (Amphiprion ocellaris), o peixe-cofre amarelo
(Ostracion cubicus) ou as donzelas azuis (Chrysiptera cyanea) crescem rapidamente ficando grandes
demais para um aquário deste tamanho, motivo pelo qual são totalmente inadequadas.
5. Exemplo B: Os corais Frogspawn ou Hammerhead (Euphyllia spp.) podem ser extremamente agressivos
e não devem ser colocados num local onde os tentáculos varredores possam danificar outros corais, mas
devem ser colocados numa área com intensidade luminosa suficiente. A velocidade de crescimento deve
ser igualmente considerada na compra e na colocação dos corais.
6. Note que: TODOS os corais acabarão por crescer e ficar grandes demais para um aquário deste tamanho,
motivo pelo qual necessitam de manutenção e de ser“podados”. Consulte a nossa lista de espécies
adequadas na página 45-48 ou aconselhe-se na loja onde adquire os produtos para o seu aquário.
7. Tenha em consideração o tipo de alimentação de cada espécie que adicionar.Por exemplo, pode ser
desaconselhado manter um grande número de invertebrados de alimentação por filtração num aquário
pequeno. A competição pela fonte de alimentação será muito grande, mas se adicionar mais zooplâncton
ou fitoplâncton este poderá agir como poluente na água.
CUIDADO: NÃO COLOQUE DEMASIADOS ANIMAIS NO AQUÁRIO
Os aquários pequenos suportam inerentemente uma quantidade de animais muito menor do que um
aquário de recife tradicional,pelo que desaconselhamos vivamente grandes quantidades de animais
num Next Wave. Aconselhe-se no local onde adquire os produtos sobre a fauna adequada para o seu
aquário.

20
IMPORTANTE INFORMACIÓN SOBRE SEGURIDAD
Lea atentamente
ATENCIÓN: Aísle siempre todos los aparatos eléctricos de la toma de suministro eléctrico antes de instalar o
realizar obras de mantenimiento al Next Wave.
ATENCIÓN: El suministro de corriente a la bomba de circulación de agua y el calentador se debe hacer a
través de un Dispositivo de corriente residual (DCR) con una corriente ope ativa residual no superior a 30 mA.
ATENCIÓN: Enjuague minuciosamente el acuario, la tapa y los medios filtrantes con agua dulce y un paño
húmedo. Nunca utilice jabón en ninguno de los componentes que coloque en su acuario, ya que resulta
nocivo para los peces.
• No ponga la bomba de circulación de agua en funcionamiento en seco.
• Para garantizar que la bomba de circulación de agua sigue manteniendo un flujo de agua constante, se debe
limpiar regularmente a fin de que no se atasque con suciedad o desechos.
• Especificaciones de la bomba: 220-240 V,50 Hz a menos que se especifique lo contrario.
ATENCIÓN: No ponga en funcionamiento ningún dispositivo eléctrico con el cable dañado o que funcione
incorrectamente,o que se haya caído o dañado de modo alguno.
• El Next Wave está diseñado para su uso en interior y no es adecuado para aplicaciones de exterior.
• Antes de ponerlo en funcionamiento,asegúrese de que el Next Wave está instalado de un modo seguro en
una superficie llana, capaz de soportar el peso del acuario. Observe: Este acuario no se debe colocar bajo
la luz solar directa,pues esto produciría un crecimiento excesivo de algas, ni en un lugar expuesto a bajas
temperaturas o altos niveles de calor, por ejemplo, NO se debe instalar próximo a un radiador.
• Asegúrese de que el sistema de iluminación Reef Ion 30 y el calentador están instalados de forma segura
antes de poner el aparato en funcionamiento.
ATENCIÓN: Deje siempre un bucle anti goteo en la bomba de circulación de agua, el calentador y los cables
de iluminación LED para impedir que el agua se deslice por los cables y llegue a la fuente de alimentación.
ATENCIÓN: Aísle siempre la fuente de alimentación (PSU) de la unidad de suministro de iluminación LED, la
bomba de circulación de agua y el calentador de la toma de corriente antes de instalar o realizar labores de
mantenimiento en el acuario.
ATENCIÓN: NO SUMERJA EL SISTEMA DE ILUMINACIÓN LED. En caso de que la luz cayera accidentalmente
en el Next Wave, aísle inmediatamente el sistema de iluminación LED de la fuente de alimentación antes de
sacarlo.
• No cubra el sistema de iluminación LED de modo alguno.Asegúrese siempre de que haya una buena circu-
lación de aire a su alrededor.
• La puesta en marcha del sistema de iluminación LED en un espacio confinado o con escasa ventilación, o en
un lugar con una fuente de calor adiciona podría causar problemas de funcionamiento y una reducción de la
vida útil de la unidad.
• El calentador debe estar siempre totalmente sumergido. En caso contrario, el calentador se dañará y au-
mentará excesivamente la temperatura del agua del acuario con la consiguiente pérdida de habitantes.Si va
a sacar el calentador del Next Wave, aíslelo del suministro de corriente eléctrica y espere aproximadamente
15-20 minutos para que se enfríe antes de sacarlo.
• Este aparato no debe ser utilizado por personas (incluidos niños) con capacidades físicas, sensoriales o men-
tales reducidas o que no conozcan ni tengan experiencia con el uso del mismo a menos que hayan recibido
supervisión e instrucciones sobre el uso del aparato de una persona responsable de su seguridad.
DESHÁGASE DE ESTA UNIDAD DE MANERA RESPONSABLE.
Consulte con las autoridades locales para saber cómo deshacerse de ella.
This manual suits for next models
1
Table of contents
Languages:
Other TMC Aquarium manuals
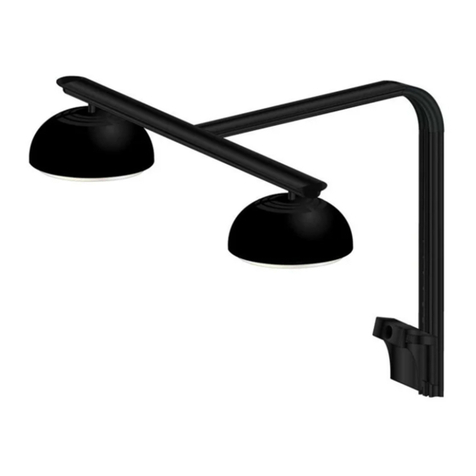
TMC
TMC Reef Photon Operating instructions
TMC
TMC Auto Top-up IR User manual
TMC
TMC Optical Auto Top Up User manual
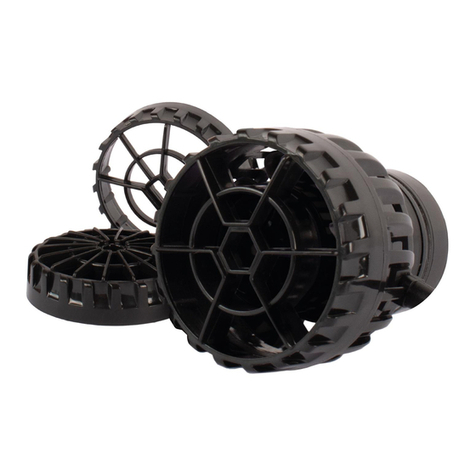
TMC
TMC Reef Flow 2.0 User manual

TMC
TMC Reef Skim 100nano User manual

TMC
TMC REEF-Fill Compact User manual
TMC
TMC Kreisel User manual
TMC
TMC Reef Tide s Series User manual
TMC
TMC Reef Flow 2.0 1000nano User manual
TMC
TMC Reef Guard 50 Aquarium Cover User manual
