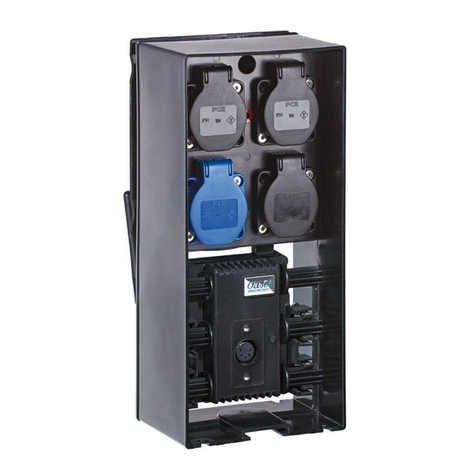
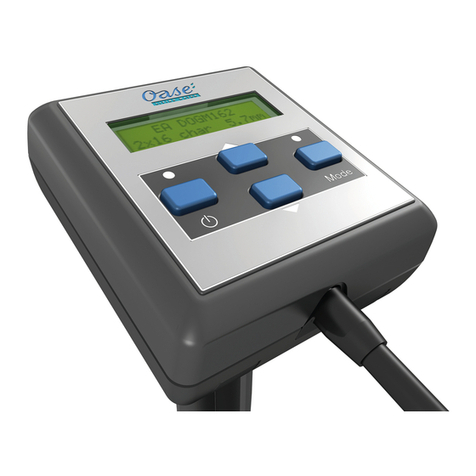
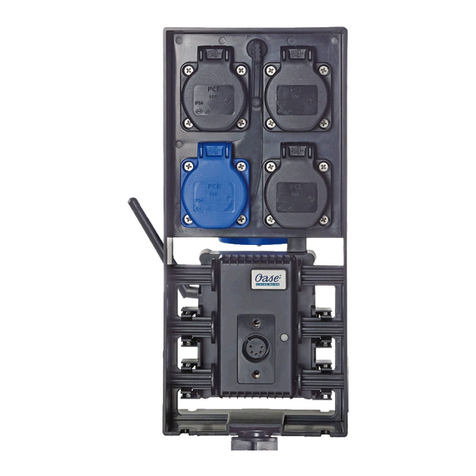
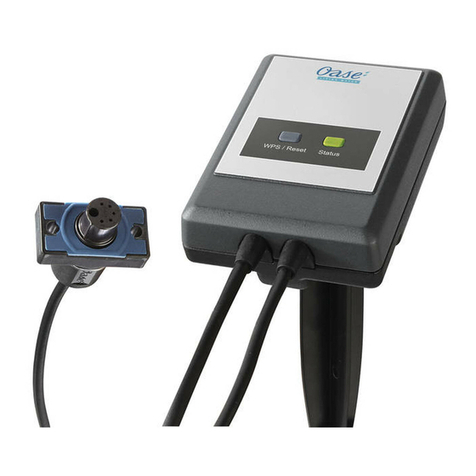
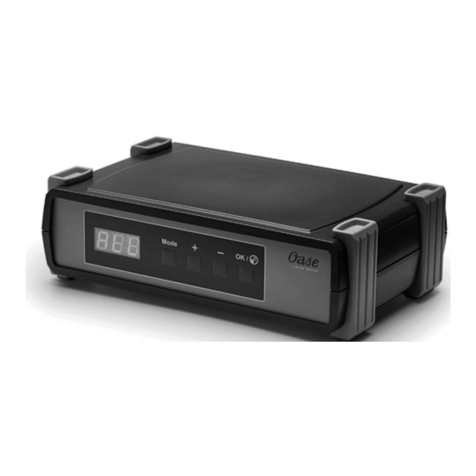
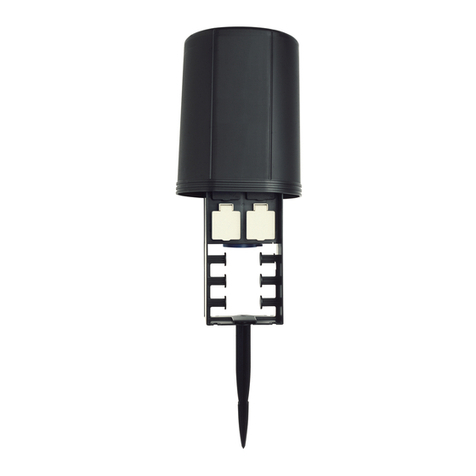
Oase InScenio User manual

InScenio EGC Controller Home/Cloud
Downloaded from www.watergardeningdirect.com

--
2
A
EGC0004
B
EGC0005
C
EGC0006
F
Downloaded from www.watergardeningdirect.com

--
3
D
EGC0007
F
E
EGC0008
F
F
EGC0009
Downloaded from www.watergardeningdirect.com

- EN -
34
-EN -
Translation of the original Operating Instructions
Version of the instructions for use: 1.0
WARNING
•This unit can be used by children aged 8 and above and by per-
sons with reduced physical, sensory or mental capabilities or lack
of experience and knowledge if they are supervised or have been
instructed on how to use the unit in a safe way and they understand
the hazards involved.
•Do not allow children to play with the unit.
•Only allow children to carry out cleaning and user maintenance un-
der supervision.
•Ensure that the unit is fused for a rated fault current of max. 30 mA
by means of a fault current protection device.
•Only connect the unit if the electrical data of the unit and the power
supply correspond. The unit data is to be found on the unit type plate,
on the packaging or in this manual.
•Possible death or severe injury from electrocution! Before reaching
into the water, disconnect all electrical units in the water from the
mains.
•Disconnect the power plug before carrying out any work on the unit.
•Never immerse the unit in water or other liquids.
•Do not use the unit if electrical cables or housings are damaged.
Downloaded from www.watergardeningdirect.com

-EN -
35
Table of Contents
1Information about this operating manual .................................................................................................... 37
1.1 Warnings used in these instructions ............................................................................................... 37
1.1.1 Cross-references used in these instructions.................................................................... 37
2Safety information ....................................................................................................................................... 37
2.1 Correct electrical installation ........................................................................................................... 37
2.2 Safe operation ................................................................................................................................. 38
3Scope of delivery......................................................................................................................................... 38
4Product Description..................................................................................................................................... 38
4.1 Function description ........................................................................................................................ 38
4.2 Intended use.................................................................................................................................... 38
5Installation and connection ......................................................................................................................... 39
5.1 Installing the device with the ground stake ..................................................................................... 39
5.2 Fastening the device to the wall...................................................................................................... 39
5.3 Connecting an EGC-compatible device .......................................................................................... 39
5.4 Connecting the power supply.......................................................................................................... 39
6Commissioning/start-up .............................................................................................................................. 40
6.1 Installing the "OASE Easy Control" app.......................................................................................... 40
6.2 Establishing a WLAN connection .................................................................................................... 40
6.2.1 Establishing a connection to the WLAN router via WPS (router/cloud mode)................. 40
6.2.2 Establishing a direct WLAN connection (access point mode) ......................................... 41
6.3 Operating status display.................................................................................................................. 42
7Operation..................................................................................................................................................... 43
7.1 "Home" screen................................................................................................................................. 43
7.1.1 Operating the pump via EGC ........................................................................................... 44
7.1.2 Operating ProfiClear units via EGC ................................................................................. 46
7.1.3 Operating ProfiLux units via EGC .................................................................................... 49
7.2 "My devices" screen ........................................................................................................................ 51
7.2.1 Adding an EGC-compatible device .................................................................................. 51
7.2.2 ProfiClear Premium Filter – upgrade to EGC................................................................... 52
7.2.3 Removing an EGC-compatible device ............................................................................. 53
7.3 "Settings" screen ............................................................................................................................. 54
7.3.1 Establishing a connection to the WLAN router via WPS (router/cloud mode)................. 55
7.3.2 Manually establishing a connection to the WLAN router (router/cloud mode) ................ 56
7.3.3 Changing the network name ............................................................................................ 56
7.3.4 Changing the WiFi passwort ............................................................................................ 56
7.3.5 Activating the cloud connection........................................................................................ 57
7.3.6 Changing the device password ........................................................................................ 58
7.3.7 Updating the system time................................................................................................. 58
7.3.8 Updating the firmware ...................................................................................................... 59
7.3.9 Displaying device information........................................................................................... 59
7.3.10 Resetting the network settings ......................................................................................... 60
7.3.11 Restoring the factory default settings............................................................................... 60
8Remedy of faults ......................................................................................................................................... 60
8.1 Malfunction table ............................................................................................................................. 60
8.2 Manually starting the firmware update mode.................................................................................. 62
9Maintenance and cleaning .......................................................................................................................... 62
9.1 Cleaning the device......................................................................................................................... 62
Downloaded from www.watergardeningdirect.com

-EN -
36
10 Spare parts.................................................................................................................................................. 62
11 Disposal....................................................................................................................................................... 62
Technical data.................................................................................................................................................... 643
Symbols on the unit ........................................................................................................................................... 644
Downloaded from www.watergardeningdirect.com

-EN -
37
1 Information about this operating manual
Welcome to OASE Living Water. You made a good choice with the purchase of this product InScenio EGC
Controller.
Prior to commissioning the unit, please read the instructions of use carefully and fully familiarise yourself with
the unit. Ensure that all work on and with this unit is only carried out in accordance with these instructions.
Adhere to the safety information for the correct and safe use of the unit.
Keep these instructions in a safe place! Please also hand over the instructions when passing the unit on to a
new owner.
This operating manual applies to InScenio EGC Controller Home and InScenio EGC Controller Cloud.
The name "InScenio EGC Controllerʺis used for descriptions applying to both products.
The name "InScenio EGC Controller Cloudʺis used for descriptions applying only to the cloud variant.
1.1 Warnings used in these instructions
The warning information is categorised by signal words, which indicate the extent of the hazard.
DANGER
Indicates an immediately dangerous situation, which will lead to death or severe injuries, if not
avoided.
WARNING
Indicates a possibly dangerous situation, which could lead to death or severe injuries, if not avoided.
CAUTION
Indicates a possibly dangerous situation, which could lead to medium or minor injuries, if not avoided.
NOTE
Indicates a possibly dangerous situation, which could lead to damage to property or the environment,
if not avoided.
1.1.1 Cross-references used in these instructions
A Reference to a figure, e.g. Fig. A.
→Reference to another section.
2 Safety information
2.1 Correct electrical installation
Electrical installations must meet the national regulations and may only be carried out by a qualified electrician.
A person is regarded as a qualified electrician if, due to his/her vocational education, knowledge and experience,
he or she is capable of and authorised to judge and carry out the work commissioned to him/her. This also
includes the recognition of possible hazards and the adherence to the pertinent regional and national stand-
ards, rules and regulations.
For your own safety, please consult a qualified electrician.
Protect the plug connection from moisture.
Downloaded from www.watergardeningdirect.com

-EN -
38
2.2 Safe operation
Never carry or pull the unit by the electrical cable.
Route cables such that they are protected from damage and do not present a tripping hazard.
Do not use multiple socket adapters.
Only carry out work on the unit that is described in this manual. If problems cannot be overcome, please contact
an authorised customer service point or, if in doubt, the manufacturer.
Never carry out technical changes to the unit.
Only use original spare parts and accessories for the unit.
Data traffic with the OASE Cloud can lead to additional costs due to third-party online services.
3 Scope of delivery
A
Quantity
Description
1
1
EGC Controller
2
1
Retaining frame for fastening to the wall or mounting the ground stake
3
1
Terminal resistor EGC
4
1
Cable connector EGC
5
4
Screws for fastening the plug-in connector
6
1
Ground stake for ground installation
7
1
Operating instructions
8
1
Transformer
4 Product Description
4.1 Function description
InScenio EGC Controller is a device control system with a wireless local area network (WLAN). The connected
units can be controlled via a smartphone or tablet with the OASE Easy Control app.
The controller is available in the versions Home and Cloud. EGC-compatible end devices can only be con-
trolled via the OASE web portal using the InScenio EGC Controller Cloud. The web portal can be accessed at
https://oec.oase-livingwater.com .
Features:
Connection options for EGC-compatible end devices.
The Easy Garden Control System (EGC) allows convenient control of units in the garden and pond, and
ensures maximum convenience and reliability.
Information about EGC and the possibilities it offers can be found at www.oase-livingwater.com/egc-start.
4.2 Intended use
InScenio EGC Controller, referred to as "unit", may only be used as specified in the following:
Operation only as device control system with EGC-compatible OASE end devices.
Operation only at ambient temperatures of -20 °C … +45°C.
Operate in accordance with instructions.
Downloaded from www.watergardeningdirect.com

-EN -
39
5 Installation and connection
WARNING
Electrical current may cause death or severe injuries.
Ensure that the unit is installed in a flood protected position at a distance of at least 2 m from the wa-
ter.
5.1 Installing the device with the ground stake
How to proceed:
C
1. Fully insert the ground stake into the ground.
2. Slide the device onto the ground stake.
3. Check its stability.
5.2 Fastening the device to the wall
How to proceed:
D
1. Remove the retaining frame and fasten it to the wall using suitable screws.
2. Fit the device into the retaining frame.
Ensure that the device is properly engaged in the retaining frame.
5.3 Connecting an EGC-compatible device
The correct fastening of the plug connector is important for a secure connection and an interference-free EGC
network.
The EGC connection cable is available as an accessory in the lengths 2.5 m (47038), 5 m (47039) and 10 m
(47040).
The EGC connection cable and the connection cable of the InScenio EGC Controller are connected to the
EGC cable connector.
How to proceed:
F, G
1. Remove the EGC terminal resistor from the unit.
2. Fit the plug connector and secure with the two screws (max. 2.0 Nm).
Ensure that the rubber seal is clean and fits exactly.
Replace the rubber seal if damaged.
3. Remove the protection cap from EGC-OUTof the last unit in the EGC network, fit the terminal resistor EGC
and secure it with the two screws (max. 2.0 Nm).
Ensure that on EGC-OUT of the last unit in the EGC network, the terminal resistor EGC is installed instead
of an EGC connection cable, to ensure that the EGC network is closed off properly.
The scope of delivery of InScenio FM-Master WLAN or InScenio EGC Controller each contains a terminal
resistor EGC.
NOTE
The device will be destroyed if water penetrates the sockets.
Close off sockets with plug connectors or protection caps and rubber seals.
For further information on the operation and integration into the EGC system, please refer to the oper-
ating manual of the InScenio EGC Controller under http://www.oase-livingwater.com/egc-start.
5.4 Connecting the power supply
How to proceed:
E
1. Screw the plug of the supply line onto the transformer.
2. Establish the power connection.
Downloaded from www.watergardeningdirect.com

-EN -
40
6 Commissioning/start-up
Proceed as follows for starting up:
1. Install the app on your smartphone/tablet. (→ Installing the "OASE Easy Control" app )
2. Connect the InScenio EGC Controller to the power supply. (→ Connecting the power supply)
3. Establishing a WLAN connection and setting a device password (→ Establishing a WLAN connection)
6.1 Installing the "OASE Easy Control" app
iOS
Android
How to proceed:
1. Open Google Play or App Store.
2. Search for the ʺOASE Easy Controlʺapp and install.
Follow the instructions during installation.
3. Confirm the query "access to internal data of the unit".
If access is permitted, individual product photos can be uploaded.
The query appears during installation (Android) or when executing the app ((iOS).
The app appears on the display after successful installation.
6.2 Establishing a WLAN connection
To establish a WLAN connection it is necessary to select one of the two connection types:
WLAN connection
Description
How to proceed
Connect the InScenio EGC Controller and
smartphone/tablet to the router of your home net-
work.
The smartphone/tablet stays connected to the router.
EGC-compatible end devices can be controlled via the
OASE web portal (only InScenio EGC Controller Cloud)
The smartphone/tablet can access the internet.
(→ Establishing a connection to
the WLAN router via WPS
(router/cloud mode))
Alternatively:
(→ Manually establishing a con-
nection to the WLAN router
(router/cloud mode))
Directly connecting the InScenio EGC Controller
and smartphone/tablet
EGC controller and smartphone/tablet are not connected
to the home network.
EGC-compatible end devices cannot be controlled via the
OASE web portal.
Smartphone/tablet cannot access the internet.
(→ Establishing a direct WLAN
connection (access point mode))
6.2.1 Establishing a connection to the WLAN router via WPS (router/cloud mode)
WPS (Wi-Fi Protected Setup) is a standard for establishing a secure WLAN connection at the touch of a but-
ton. This method is recommended in order to quickly and easily establish a WLAN connection between the
InScenio EGC Controller and the router.
In this case it is not necessary to enter the network name (SSID) and password.
The WLAN router must support WPS.
Prerequisite:
The range of the WLAN connection between the router and InScenio EGC Controller can span a distance of up
to 80 m provided there is unobstructed signal transmission and there are no sources of interference.
Compatibility with the following WLAN standards: 802.11n+g+b
Exclusively in the frequency range 2.4 GHz.
Downloaded from www.watergardeningdirect.com

-EN -
41
How to proceed:
On the router:
Press the WPS button on the router to activate WPS.
Follow the information given in the router operating instructions.
WPS is only active for a limited time. Activate WPS on the InScenio EGC Controller during this time.
H
On the EGC Controller:
1. Press the button briefly (max. 2 seconds) to activate the WPS.
The LED is lit green and flashes rapidly.
The WPS remains active for 2 minutes.
The connection is established when the green LED flashes slowly (2 seconds on, 1 second off).
On the smartphone/tablet:
2. Establish a connection to the WLAN router.
3. Start the "OASE Easy Controlʺapp.
InScenio EGC Controller can now be controlled using the "OASE Easy Control" app.
6.2.2 Establishing a direct WLAN connection (access point mode)
If there is no router available or the existing router does not support WPS, it is necessary to establish a direct
connection between the InScenio EGC Controller and a smartphone/tablet. This is also recommended if the
distance from the router exceeds 80 m or the WLAN range for connection to the router is exceeded.
The range of the WLAN connection between the InScenio EGC Controller and your smartphone/tablet can span
a distance of up to 80 m provided there is unobstructed signal transmission and there is no source of inter-
ference.
Compatibility with the following WLAN standards: 802.11n+g+b
Exclusively in the frequency range 2.4 GHz.
The network name (SSID) is indicated on the label on the InScenio EGC Controller.
The sequence of letters "xxxxxx" in the network name (SSID) is device-specific and represents part of
the MAC address of the EGC controller.
The standard password is also indicated on the label on the InScenio EGC Controller.
The InScenio EGC Controller is factory-set to the standard password "oase1234".
The connection is encrypted and protected by a password.
Downloaded from www.watergardeningdirect.com

-EN -
42
The symbols used may differ slightly from the symbols on your smartphone/tablet.
iOS
Android
How to proceed:
1. Open "Settings".
2. Select and activate WLAN.
3. Select ʺOase EGC Controller xxxxxxʺfrom the network list.
4. Enter the WiFi password and select "Connect".
The connection to the InScenio EGC Controller is established.
If the connection is successful, "Connected" (Android) or a "" (iOS) will appear un-
der the network name.
Other WLAN connections are deactivated.
5. Start the "OASE Easy Control" app.
The app automatically selects the language used by the operating system. If the app
does not support that language, it will use English.
When establishing the connection to the InScenio EGC Controller
for the first time, it
is necessary to define a device password to protect the InScenio EGC Controller
from unauthorised access.
Remember the device password as it is also required for adding the InScenio EGC
Controller Cloud to the OASE cloud. (→ Activating the cloud connection)
6.3 Operating status display
H
The LED on the device indicates the operating status of the InScenio EGC Controller.
LED co-
lour
LED status
Description
–
Off
InScenio EGC Controller is switched off.
Green
Lit
InScenio EGC Controller is ready for operation and in access point mode.
Flashing fast
WPS is activated, InScenio EGC Controller is waiting for the router access data.
Flashing slowly (2 seconds on,
1 second off)
InScenio EGC Controller is ready for operation and connected to the router.
Yellow
Lit
InScenio EGC Controller is starting up or is in update mode.
Flashing fast
Firmware update in progress
Flashing slowly (2 seconds on,
1 second off)
InScenio EGC Controller is searching for a connection to the router.
Red
Flashing
Malfunction
Remedy:
Disconnect from the power supply. Wait for 10 seconds then reconnect.
Reset the InScenio EGC Controller to the factory default settings (→ Restoring the fac-
tory default settings)
Carry out a firmware update (→ Updating the firmware)
Downloaded from www.watergardeningdirect.com

-EN -
43
7 Operation
7.1 "Home" screen
"Home" screen
The "home" screen is used for operating the connected devices. Swipe right or left on the screen to select a
connected device.
EGC0015
1
Number of devices added.
Swipe right or left on the screen to select a device.
2
"Home" screen
Touch the symbol to select the screen.
This screen is used for operating the connected devices.
"My devices" screen
Touch the symbol to select the screen.
Add and configure OASE devices.
"Settings" screen
Touch the symbol to select the screen.
For displaying unit information.
Establish a direct connection with the device (access point) or via a WLAN router.
For changing the network name (SSID) and password.
For updating the firmware.
3
Status of the WLAN connection
ONLINE: Smartphone/tablet is connected to the InScenio EGC Controller.
OFFLINE: Smartphone/tablet is not connected to the InScenio EGC Controller.
4
15:51
System time of the InScenio EGC Controller.
The system time can be updated to the time shown on the operating device.
(→ Updating the system time)
Downloaded from www.watergardeningdirect.com

-EN -
44
7.1.1 Operating the pump via EGC
"Home" screen
The OASE product name will be displayed at the top right of the screen. The added device can be labelled
with an individual name.
FMR0037
1
Tiles for operation and display of current values.
2
Switching the device on or off.
Tap the touch symbol "On" to switch on the device.
Tap the touch symbol "Off" to switch off the device.
3
Status display of the EGC connection
Status display lights up green:
The connection between the EGC device and InScenio EGC Controller is active.
Status display lights up grey and the product image is greyed out:
No connection between EGC device and InScenio EGC Controller.(→ Remedy of faults)
Dynamic Function Control (DFC)
Only available for pumps supporting this function. The DFC function is described in the oper-
ating manual of the pump.
How to proceed:
1. Tap "On" or "Off" to switch the DFC function on or off.
If the DFC function is on, the current Scene is displayed.
2. To change the Scene, touch the number of the Scene and hold it for 2 seconds.
A dialogue field will open.
Different Scene are available.
3. Select the desired Scene.
4. Tap ʺOKʺ to apply the setting.
The Scene number is displayed in the tile.
5. To cancel the process, tap "Cancel".
Downloaded from www.watergardeningdirect.com

-EN -
45
Seasonal Flow Control (SFC)
Only available for pumps supporting this function. The SFC function is described in the in-
structions for use of the pump.
Tap "On" or "Off" to switch the SFC function on or off.
If the SFC function is on, the current mode is displayed.
The pump automatically switches between three modes. This enables the pump to adapt to
the ambient conditions of the pond.
Min: Winter mode, low flow rate.
Med: Transition time, medium flow rate.
Max: Summer mode, high flow rate.
Adjusting the pump capacity
While the DFC or SFC function is on, no adjustments can be made. The tile is greyed out.
How to proceed:
Touch the button of the slider control and move it to adjust the pump capacity.
The set capacity is displayed in %.
0 %: Pump is idling.
100 %: Max. pump capacity.
Pump speed
Display of the current speed in rpm.
Pump operating time
Display of the overall operating time in hours.
Pump power consumption
Display of the current power consumption in watt.
Downloaded from www.watergardeningdirect.com

-EN -
46
7.1.2 Operating ProfiClear units via EGC
"Home" screen
The OASE product name will be displayed at the top right of the screen. The added device can be labelled
with an individual name.
FMR0039
1
Tiles for operation and display of current values.
Swipe vertically across the tiles to display additional tiles.
2
Switching the device on or off.
Tap the touch symbol "On" to switch on the device.
Tap the touch symbol "Off" to switch off the device.
3
Status display of the EGC connection
Status display lights up green:
The connection between the EGC device and InScenio EGC Controller is active.
Status display lights up grey and the product image is greyed out:
No connection between EGC device and InScenio EGC Controller.(→ Remedy of faults)
4
Display of system messages
Shows the last system message.
Touch the system message and hold for 1 second to display all systems messages and reset.
A dialogue window opens and lists all system messages that have occurred.
When the cause has been remedied, the system messages are extinguished
automatically or have to
be confirmed via the dialogue field.
The operating instructions of the ProfiClear unit contains detailed descriptions about possible causes
and remedy.
Downloaded from www.watergardeningdirect.com

-EN -
47
Current water temperature in °C
Display only.
Number of cleaning cycles in the past 24 hours
The total of the automatic and time-dependent cleaning cycles is displayed.
The value is saved in the filter control system.
NOTE:
The filter system self-diagnostics monitor automatic cleaning. The test is carried out contin-
uously in a 2 × 24 hour cycle. The test is only active from a water temperature >12 °C.
Very different values may be indicated due to the test.
First 24 hour cycle
If at least one automatic cleaning process is detected, the cycle is repeated after the clean-
ing process has finished.
If no automatic cleaning process is detected, the second 24 hour cycle starts once the first
has finished.
Second 24 hour cycle
The time-dependent cleaning cycle is deactivated. This reduces the number of cleaning cy-
cles.
If at least one automatic cleaning process is detected, the first 24 hour cycle starts again
once the cycle has finished.
If no automatic cleaning process is detected, the system message Er22 is triggered at the
end of the cycle. The time-dependent cleaning cycle starts again.
If an automatic cleaning process is then detected, the first 24 hour cycle starts again.
The
system message Er22 is automatically reset.
Total number of cleaning cycles
The total of the automatic, manual and time-dependent cleaning cycles is displayed.
The value is saved in the filter control system.
Manual cleaning
Manually triggered cleaning cycle.
How to proceed:
1. Tap to start the cycle.
All active cleaning cycles (automatic, time-dependent or manual) are stopped.
2. To cancel the process, tap again.
Downloaded from www.watergardeningdirect.com

-EN -
48
Cleaning time ʺCleaningʺ(
CL
)
This setting changes the duration of the cleaning cycle. If the water does not carry away all
dirt, a longer cleaning time is required. This may become necessary if, for instance, very
long drain pipes or drain pipes with many bends were installed or there is a particularly
large amount of sticky dirt (e.g. during spawning).
A longer cleaning time increases the water consumption. The default setting of 10 s is usu-
ally sufficient (corresponds to approx. a 7/8drum rotation).
How to proceed:
Touch the button of the slider control and move it to adjust the time.
Adjustable range: 10 – 30 s.
Extended cleaning time "Extra Cleaning" (
EC
)
The extended cleaning time after every 20 cleaning cycles prevents larger deposits in the
dirt channel or the pipework. This ensures that the pipework is flushed out at regular inter-
vals.
However, if dirt and residue build up due to unfavourable conditions, increase the cleaning
time to flush out the pipe with additional water.
How to proceed:
Touch the button of the slider control and move it to adjust the time.
Adjustable range: 10 – 60 s.
Time-dependent cleaning "Intervall" (ln)
In addition to automatic cleaning, an option for time-dependent cleaning is available. This
is particularly useful for ponds containing fish. Even if there is only a small amount of dirt,
excrement is always removed from the water cycle before it leads to a build-up of nutrients.
The time-dependent cleaning cycle does not have any influence on the automatic cleaning
cycle that starts when the water level is too low. After each automatic cleaning cycle, the
time interval is reset and starts again from the beginning.
How to proceed:
Touch the button of the slider control and move it to adjust the time.
Adjustable range: 0; 3 – 60 min.
0 minutes: The function is deactivated.
Basic setting: 20 minutes (the ideal setting for most applications).
Basic settings
The control system is reset to the basic settings.
All individually set values are overwritten!
The following values are set:
Cleaning time CL: 10 s
Extended cleaning time EC: 20 s
Interval of the time-dependent cleaning In: 20 min
Downloaded from www.watergardeningdirect.com

-EN -
49
7.1.3 Operating ProfiLux units via EGC
"Home" screen
The OASE product name will be displayed at the top right of the screen. The added device can be labelled
with an individual name.
EGC0020
1
Tiles for operation and display of current values.
Swipe vertically across the tiles to display additional tiles.
2
Switching the device on or off.
Tap the touch symbol "On" to switch on the device.
Tap the touch symbol "Off" to switch off the device.
3
Selecting the device for operation and display of current values or changing the lamp symbol.
Selecting the device for operation and display of current values
Tap the lamp symbol to select a device for the required operation and display of current values.
Tap the lamp symbol again to deselect the device.
Changing the lamp symbol
iOS:
Touch and hold down the lamp symbol for 2 seconds in order to select a photo from the library, to
take a photo using the integrated camera or to remove a photo.
Android:
Touch and hold down the lamp symbol for 2 seconds in order to take a photo using the integrated
camera or to remove a photo.
Adjusting the brightness
The brightness is adjusted for all selected LED lamps.
How to proceed:
Touch the button of the slider control and move it to adjust the brightness.
The set brightness is displayed in %.
0 %: LED lamps off.
100 %: Max. brightness.
Downloaded from www.watergardeningdirect.com

-EN -
50
Colour settings
The colour is adjusted for all selected LED lamps.
How to proceed:
1. Tap .
A dialogue field will open.
2. Tap the desired colour of a colour circle or swipe across the colour circle to select the col-
our.
Tap the white inner circle to select "white" as a colour.
3. Tap to apply the setting.
4. To abort the process, touch .
Show settings
The show function contains several Scenen with different light choreographies. The show is
adjusted for all selected LED lamps.
How to proceed:
1. Tap to switch on the show function.
If the show function is on, the current Scene is displayed.
2. To change the Scene, touch the number of the Scene and hold it for 2 seconds.
A dialogue field will open.
Different Scene are available.
3. Select the desired Scene.
4. Tap to apply the setting.
The Scene number is displayed in the tile.
5. To abort the process, touch .
Show speed adjustment
Adjust the speed at which the selected show is processed. The show continues to repeat.
How to proceed:
Touch the button of the slider control and move it to adjust the speed.
Adjustable range: 1 – 100.
Downloaded from www.watergardeningdirect.com
Other manuals for InScenio
1
Table of contents
Other Oase Controllers manuals

Oase
Oase InScenio FM-Master EGC User manual

Oase
Oase InScenio FM-Master Series User manual

Oase
Oase InScenio EGC User manual

Oase
Oase InScenio EGC Controller Home/Cloud How to use

Oase
Oase StreamMax Pump Controller User manual

Oase
Oase Eco Control User manual

Oase
Oase FM-Master WLAN User manual

Oase
Oase ProfiLux Garden LED Controller User manual

Oase
Oase 33885 User manual

Oase
Oase InScenio FM-Master WLAN User manual