manuals.online logo
Brands
  1. Home
  2. •
  3. Brands
  4. •
  5. OHAUS
  6. •
  7. Scale
  8. •
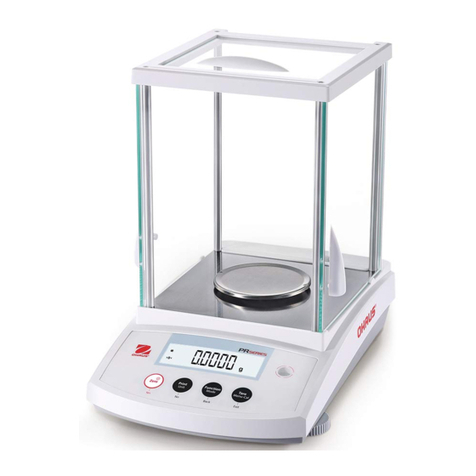
  9. OHAUS PS Series User manual

OHAUS PS Series User manual

Other manuals for PS Series

1

This manual suits for next models

4

Other OHAUS Scale manuals

OHAUS AS20 User manual

OHAUS

OHAUS AS20 User manual

OHAUS DEFENDER SERIES User manual

OHAUS

OHAUS DEFENDER SERIES User manual

OHAUS JE 120 User manual

OHAUS

OHAUS JE 120 User manual

OHAUS HS-120 User manual

OHAUS

OHAUS HS-120 User manual

OHAUS SHRK07AL1 User manual

OHAUS

OHAUS SHRK07AL1 User manual

OHAUS Defender 3000 Series User manual

OHAUS

OHAUS Defender 3000 Series User manual

OHAUS 1610 User manual

OHAUS

OHAUS 1610 User manual

OHAUS Emerald Series User manual

OHAUS

OHAUS Emerald Series User manual

OHAUS Valor 2000 V22PW Installation guide

OHAUS

OHAUS Valor 2000 V22PW Installation guide

OHAUS 5000 User manual

OHAUS

OHAUS 5000 User manual

OHAUS RA Series User manual

OHAUS

OHAUS RA Series User manual

OHAUS Compass CR221 User manual

OHAUS

OHAUS Compass CR221 User manual

OHAUS BW1.5 User manual

OHAUS

OHAUS BW1.5 User manual

OHAUS Scout STX123 User manual

OHAUS

OHAUS Scout STX123 User manual

OHAUS ES series User manual

OHAUS

OHAUS ES series User manual

OHAUS Adventurer Pro AV***M Series User manual

OHAUS

OHAUS Adventurer Pro AV***M Series User manual

OHAUS EXPLORER PRO User manual

OHAUS

OHAUS EXPLORER PRO User manual

OHAUS Valor 3000 User manual

OHAUS

OHAUS Valor 3000 User manual

OHAUS CKW3R User manual

OHAUS

OHAUS CKW3R User manual

OHAUS BW Series User manual

OHAUS

OHAUS BW Series User manual

OHAUS Traveler Series User manual

OHAUS

OHAUS Traveler Series User manual

OHAUS RANGER 4000 Series User manual

OHAUS

OHAUS RANGER 4000 Series User manual

OHAUS Defender 3000 Series User manual

OHAUS

OHAUS Defender 3000 Series User manual

OHAUS SD Series User manual

OHAUS

OHAUS SD Series User manual

Popular Scale manuals by other brands

KERN MCC-M operating instructions

KERN

KERN MCC-M operating instructions

Little Balance SB MECA 8113 user manual

Little Balance

Little Balance SB MECA 8113 user manual

Fitbit Zip Aria Wi-Fi Smart Scale user manual

Fitbit Zip

Fitbit Zip Aria Wi-Fi Smart Scale user manual

KERN MPU 250K100 operating instructions

KERN

KERN MPU 250K100 operating instructions

Steinberg Systems SBS-PF-200 user manual

Steinberg Systems

Steinberg Systems SBS-PF-200 user manual

Total TP2000 user guide

Total

Total TP2000 user guide

A&D HL-200i operating instructions

A&D

A&D HL-200i operating instructions

Scarlett SC-KS57P97 instruction manual

Scarlett

Scarlett SC-KS57P97 instruction manual

BASETech LS-40S operating instructions

BASETech

BASETech LS-40S operating instructions

SR Instruments SR Scales SR565i-H Operating and service manual

SR Instruments

SR Instruments SR Scales SR565i-H Operating and service manual

Gallet PEP 301ART instruction manual

Gallet

Gallet PEP 301ART instruction manual

AWS ZEO-50 user manual

AWS

AWS ZEO-50 user manual

Gima Glass Body Fat Analyzer Use and maintenance book

Gima

Gima Glass Body Fat Analyzer Use and maintenance book

Seca 374 user manual

Seca

Seca 374 user manual

EDLUND BBPZ-20 quick start guide

EDLUND

EDLUND BBPZ-20 quick start guide

TEC TEC SL59 SERIES owner's manual

TEC

TEC TEC SL59 SERIES owner's manual

Alecto ACW-40 user manual

Alecto

Alecto ACW-40 user manual

IKA RCT basic safety control operating instructions

IKA

IKA RCT basic safety control operating instructions

manuals.online logo
manuals.online logoBrands
  • About & Mission
  • Contact us
  • Privacy Policy
  • Terms and Conditions

Copyright 2025 Manuals.Online. All Rights Reserved.

>0< On/Off/Zero
Press this key to turn the scale on. This key is also used to rezero
the display. To turn the scale off, press and hold this key until the
display indicates OFF, then release.
Unit/Cal
Press this key to change the weighing unit. Press and hold to
begin calibration.
Weighing
Slide the pan/cover to Weighing until it locks into position. Place
the scale on a firm level surface. Turn the scale on. When the *
symbol is displayed the scale is ready for use. Place sample on
the pan and read the displayed result. The * indicator appears
when the reading is stable. If using a container, press >0< to tare
the container before adding material. If the capacity of the scale is
exceeded, an E will appear on the display and the load should be
removed immediately.
Calibration
Refer to Specifications for the correct calibration weights.
1. Press and hold Unit/Cal until “CAL” is displayed, then
release it.
2. Press >0<. The required weight will appear in grams.
3. Place the appropriate weight on the pan, then press >0<
4. “PASS” will be displayed when calibration is complete.
Note::
::
: If “CAL E” is displayed a calibration
error has occurred (for example, an in-
correct weight was used or the pan was
disturbed). Repeat the procedure.
Operation
This is a precision weighing in-
strument, handle with care.
Slide the pan/cover as shown to
expose the display and keys.
The pan/cover can slide to ei-
ther Weighing or Storage
positions.
NOTE: For Weighing, slide pan/
cover all the way until a click is
heard (pan locks into weighing
position). Do not apply exces-
sive force when sliding the pan,
and do not press on the pan or
try to remove it.
Once pan is locked into Weighing position, the scale is ready for
use. Batteries are already installed.
To access the batteries, slide the pan/cover
to battery position as shown and press
the release tab. Install battery with (+)
facing up.
Specifications
Model PS121T PS251T
Capacity (g) 120 250
Readability (g) 0.1 0.1
Calibration weight 100g 200g
Weighing Units g, thk, tsg, trc
Tare range to capacity by subtraction
Stabilization time 2 seconds
Optimum operating temp. 65° - 77°F/18° - 25°C
Power requirements 2-CR2032 Lithium batteries (included)
Auto Shut-off 2 minutes no activity
Overload indication [E]
Register your scale under
Warranty Registration at www.ohaus.com
OO
OO
Ohaus PS Series Scales
With Taels
Operating Manual
Ohaus Corporation
19A Chapin Road,
P.O. Box 2033
Pine Brook, NJ 07058, USA
Tel: (973) 377-9000
Fax: (973) 944-7177
www.ohaus.com
With offices worldwide /
P/N 80104065 © Ohaus Corporation 2005, all rights reserved /
Printed in China/
*80104065*
LIMITED WARRANTY
Ohaus products are warranted against defects in materials and
workmanship for duration of the warranty. During the warranty
period Ohaus will repair, or, at its option, replace any
component(s) that proves to be defective at no charge, provided
that the product is returned, freight prepaid, to Ohaus. This war-
ranty does not apply if the product has been damaged by acci-
dent or misuse, exposed to radioactive or corrosive materials, has
foreign material penetrating to the inside of the product, or as a
result of service or modification by other than Ohaus. In lieu of
product registration, the warranty period shall begin on the date
of shipment to the authorized dealer. No other express or implied
warranty is given by Ohaus Corporation. Ohaus Corporation shall
not be liable for any consequential damages. As warranty legisla-
tion differs from state to state and country to country, please con-
tact Ohaus or your local Ohaus dealer for further details.
NOTE: This equipment has been tested and found to comply
with the limits for a Class B digital device, pursuant to Part 15 of
the FCC Rules. These limits are designed to provide reasonable
protection against harmful interference in a residential installa-
tion. This equipment generates, uses and can radiate radio
frequency energy and, if not installed and used in accordance
with the instructions, may cause harmful interference to radio
communications. However, there is no guarantee that interfer-
ence will not occur in a particular installation. If this equipment
does cause harmful interference to radio or television reception,
which can be determined by turning the equipment off and on,
the user is encouraged to try to correct the interference by one or
more of the following measures:
-- Reorient or relocate the receiving antenna.
-- Increase the separation between the equipment and receiver.
-- Connect the equipment into an outlet on a circuit different
from that to which the receiver is connected.
-- Consult the dealer or an experienced radio/TV technician
for help
This device complies with Part 15 of the FCC Rules. Operation is
subject to the following two conditions: (1) this device may not
cause harmful interference, and (2) this device must accept any
interference received, including interference that may cause un-
desired operation.
This Class B digital apparatus complies with Canadian ICES-
003.
Cet appareil numérique de la classe B est conforme à la norme
NMB-003 du Canada.
.