manuals.online logo
Brands
  1. Home
  2. •
  3. Brands
  4. •
  5. OHAUS
  6. •
  7. Scale
  8. •
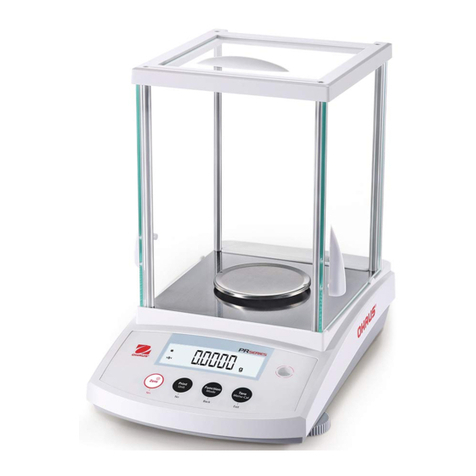
  9. OHAUS Ranger RD User manual

OHAUS Ranger RD User manual

)NSTRUCTION-ANUAL
2ANGER2$#OMPACT3CALES

4ABLEOFCONTENTSRanger RD

4ABLEOFCONTENTS
Page
)NTRODUCTION
1.1 Safety instructions .............................................................................4
1.2 Description ......................................................................................5
1.3 Putting into operation ........................................................................9
/PERATION
2.1 Switching on and off .......................................................................11
2.2 Zeroing / Zero point correction ..........................................................11
2.3 Simple weighing .............................................................................11
2.4 Weighing with tare ..........................................................................12
2.5 Dynamic weighing ..........................................................................13
2.6 Printing results ...............................................................................13
2.7 Cleaning ........................................................................................14
 3ETTINGSINTHEMENU
3.1 Operating the menu ........................................................................15
3.2 Overview .......................................................................................17
3.3 Scale settings (SCALE) ....................................................................19
3.4 Application settings (APPLICATION) ..................................................21
3.5 Terminal settings (TERMINAL) ..........................................................22
3.6 Configuring interfaces (COMMUNICATION) .........................................23
3.7 Diagnosis and printing out of the menu settings (DIAGNOS) ................26
)NTERFACEDESCRIPTION
4.2 SICS interface commands ................................................................29
4.3 TOLEDO Continuous mode ..............................................................32
 %VENTANDERRORMESSAGES
 4ECHNICALDATAANDACCESSORIES
6.1 Technical data ................................................................................36
6.2 Accessories ....................................................................................40
 !PPENDIX
7.1 Information for certified scales in EC countries ....................................41
7.2 Safety checks .................................................................................41
7.3 Table of Geo Values ........................................................................42
7.4 Sample protocols ............................................................................45
)NDEX
4.1 OHAUS interface commands ............................................................27
2ANGER2$

)NTRODUCTION
 )NTRODUCTION
 3AFETYINSTRUCTIONS
$!.'%2
%LECTRICSHOCKHAZARD
!LWAYSPULLOUTTHEMAINSPLUGBEFOREANYWORKONTHEDEVICE
$!.'%2
%LECTRICSHOCKHAZARDIFTHEMAINSCABLEISDAMAGED
#HECKTHEMAINSCABLEFORDAMAGEREGULARLYANDREPLACEITIMMEDIATELYIFITISDAM
AGED
/NTHEREARSIDEOFTHEDEVICEMAINTAINACLEARANCEOFATLEAST CMINORDERTO
PREVENTTHEMAINSCABLEBENDINGTOOMUCH
#!54)/.
/NNOACCOUNTOPENTHEDEVICE
4HEWARRANTYISVOIDIFTHISSTIPULATIONISIGNORED4HEDEVICEMAYONLYBEOPENEDBY
AUTHORIZEDPERSONS
#ALL/(!533ERVICE
#!54)/.
$ONOTUSEH:$$I%H:$$I?F,+%H:$$CINHAZARDOUSAREAS
/URPRODUCTRANGEINCLUDESSPECIALDEVICESFORHAZARDOUSAREAS
#!54)/.
5SEONLYSCALESWITH0ROTECTION#LASS)0IF
sTHESCALEISUSEDINWETAREAS
sWETCLEANINGISNECESSARY
sTHESCALEISUSEDINADUSTYENVIRONMENT
%VENWITH0ROTECTION#LASS)0THESCALEMUSTNOTBEUSEDINENVIRONMENTSWITHCOR
ROSIONRISK
.EVERFLOODTHESCALEORIMMERSEITINLIQUID
)NTRODUCTIONRanger RD

#!54)/.
Handle the compact scale with care.
The scale is a precision instrument.
When the weighing pan has been removed, never clean the area under the load
plate holder with a solid object!
Do not put excessive loads on the scale.
Avoid banging the weighing pan.
.OTE5SEWITHFOODSTUFFS
Parts coming into contact with foodstuffs have smooth surfaces and are easy to clean.
The materials used donotsplinter and are free of harmfulsubstances.
With foodstuffs, it is recommended to use the supplied protective cover.
Clean the protective cover regularly and carefully.
Replace damaged or very dirty protective cover immediately.
 $ESCRIPTION
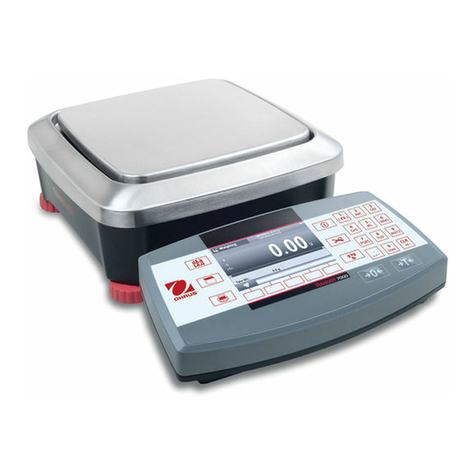
This user manual applies to the following types of compact scales:
•Ranger RD..S with strain gauge weighing cell, Protection Class IP43
•Ranger RD..S IP with strain gauge weighing cell, Protection Class IP65
•Ranger RD..M with MonoBloc, Protection Class IP43
The compact scales are available in a small and large size in various capacities and
resolutions.
The power supply is carried out via a built-in power supply device, an internal
rechargeable battery with an external mains adapter or an external battery.
One of the following options can also be ordered:
•Additional interface RS232 or RS485
•Ethernet interface
•USB interface
•Digital I/O
$ISPOSAL
Observe the valid environmental regulations whendisposingofthe scale.
If the device has a rechargeable battery:
The battery contains heavy metals and therefore must not be disposed of with normal
waste.
Observe the local regulations for disposing of environmentally hazardous materi-
als.
Ranger RD

)NTRODUCTION
 /VERVIEW
Display
Scale specifications
Load plate
Adjustable foot
Keys
Power supply
connection
Fastand fine pressure
equalization, only with
Protection Class IP65
Optional interface
RS232interface
 
)NTRODUCTION2ANGER2$

 $ISPLAY
!CTIVEINTERFACE
7EIGHINGRANGEDISPLAY
"ATTERYCHARGELEVELONLYPRESENTONSCALESWITHABATTERY
3YMBOLFORDISPLAYINGNETVALUES
3YMBOLFORDYNAMICWEIGHING
7EIGHTUNITS
SEGMENTDISPLAYDIGITSWITHDECIMALPOINT
3TABILITYMONITORGOESOUTWHENASTABLEWEIGHTVALUEISREACHED
3IGN
 )DENTIFICATIONFORCHANGEDORCALCULATEDWEIGHTVALUESE GHIGHERRESOLUTION
MINIMUMWEIGHTNOTREACHED
Ranger RD

)NTRODUCTION
 +EYPAD
-AINFUNCTIONS
!DDITIONALFUNCTIONS
+EY &UNCTIONINOPERATINGMODE &UNCTIONINTHEMENU
Switching device on / off, abort To the last menu item n%ND
Setting scale to zero Scrolling back
Taring scale Scrolling forward
Transfer key
Long key press: Calling up menu
Activating menu item
Accepting selected setting
+EY &UNCTION
Switching weight unit
Clear key
)NTRODUCTION2AMGER2$

 0UTTINGINTOOPERATION
 3ELECTINGORCHANGINGTHELOCATION
4HECORRECTLOCATIONISCRUCIALTOTHEACCURACYOFTHEWEIGHINGRESULTS
-AJORGEOGRAPHICAL
LOCATIONCHANGES
4HEMANUFACTURERADJUSTSEACHSCALETOTHELOCALGRAVITYCONDITIONS'%/VALUE)N
THEEVENTOFMAJORGEOGRAPHICALLOCATIONCHANGESTHISSETTINGMUSTBEADJUSTEDBYA
SERVICETECHNICIAN#ERTIFIEDSCALESMUSTALSOBERECERTIFIEDOBSERVINGTHENATIONALCER
TIFICATIONREGULATIONS4HESESTEPSARENOTNECESSARYFORSCALESWITHANINTERNALCALI
BRATIONWEIGHT
3ELECTASTABLEVIBRATIONFREEANDIFPOSSIBLEAHORIZONTALLOCATION
4HEGROUNDMUSTBEABLETOSAFELYBEARTHEWEIGHTOFTHEFULLYLOADEDSCALE
/BSERVETHEFOLLOWINGENVIRONMENTALCONDITIONS
s.ODIRECTSUNLIGHT
s.OSTRONGDRAFTS
s.OEXCESSIVETEMPERATUREFLUCTUATIONS
!LIGNINGTHESCALE
/NLYSCALESTHATHAVEBEENALIGNEDPRECISELYHORIZONTALLYPROVIDEACCURATEWEIGHING
RESULTS4HECERTIFIEDSCALESHAVEASPIRITLEVELTOSIMPLIFYALIGNMENT
4URNTHEADJUSTABLEFEETOFTHESCALEUNTILTHESPIRITLEVELSAIRBUBBLEISINSIDETHE
INNERCIRCLE
2ANGER2$

)NTRODUCTION
 #ONNECTINGTHEPOWERSUPPLY
#!54)/.
"EFORECONNECTINGTHESCALETOTHEMAINSCHECKWHETHERTHEVOLTAGEVALUEPRINTEDON
THERATINGPLATECORRESPONDSWITHTHELOCALMAINSVOLTAGE
.EVERCONNECTTHEDEVICEIFTHEVOLTAGEVALUEPRINTEDONTHERATINGPLATEISDIFFERENT
TOTHELOCALMAINSVOLTAGE
0LUGTHEMAINSPLUGINTOTHESOCKET
!FTERCONNECTIONTHEDEVICEPERFORMSASELFTEST7HENTHEZERODISPLAYAPPEARS
THEDEVICEISREADYTOWEIGH
#ALIBRATE THEDEVICEINORDER TO OBTAIN THE GREATEST POSSIBLE PRECISION SEE
3ECTION
.OTE0ARTIALLYCERTIFIEDSCALESSCALESWITHFIRSTLEVELCERTIFICATIONMUSTBECERTIFIEDBYAN
AUTHORISEDBODYORBYTHE/(!533ERVICE
#ALL/(!533ERVICE
.OTE4HEBATTERYSCHARGINGCAPACITYCANBEREDUCEDUNDERCONTINUOUSMAINSOPERATION
4OMAINTAINTHECHARGINGCAPACITYAFTERAMAXIMUMOFWEEKSDISCHARGETHEBAT
TERYCOMPLETELYBEFORERECHARGINGIT
3CALESWITHABUILTINBATTERYCANWORKINDEPENDENTLYFROMTHEMAINSFORAPPROXI
MATELY HOURSINNORMALOPERATION!PREREQUISITEFORTHISISTHATTHEBACKGROUND
LIGHTINGISSWITCHEDOFFANDTHATNOPERIPHERALDEVICESARECONNECTED
4HEDEVICEAUTOMATICALLYSWITCHESTOBATTERYOPERATIONASSOONASTHEMAINSSUPPLY
ISINTERRUPTED7HENTHEMAINSSUPPLYISRESTOREDTHEDEVICEAUTOMATICALLYSWITCHES
BACKTOMAINSOPERATION
4HEBATTERYSYMBOLINDICATESTHEPRESENTCHARGINGLEVELOFTHEBATTERY SEGMENTCOR
RESPONDSTOAPPROX CAPACITY7HENTHESYMBOLFLASHESTHEBATTERYMUSTBE
CHARGEDMINHOURS4HECHARGINGPERIODISEXTENDEDIFWORKISCONTINUEDDURING
CHARGING4HEBATTERYISPROTECTEDAGAINSTOVERCHARGING
/PERATIONRanger RD

 /PERATION
 3WITCHINGONANDOFF
3WITCHINGON Press ED%E<<.
The scale conducts a display test. When the weight display appears, the scale is
ready to weigh.
3WITCHINGOFF Press ED%E<<.
Before the display goes out, /&&appears briefly.
 :EROING:EROPOINTCORRECTION
Zeroing corrects the influence of slight changes on the load plate.
-ANUAL 1. Unload scale.
2. Press P;HE.
The zero display appears.
!UTOMATICIn the case of scales that cannot be certified, the automatic zero point correction can
be deactivated in the menuor the amountcan be changed.
As standard, the zero point of the scale is automatically corrected when the scale is
unloaded.
 3IMPLEWEIGHING
1. Place weighing sample on scale.
2. Waituntilthe stability monitor goes out.
3. Read weighing result.
Ranger RD

/PERATION
 7EIGHINGWITHTARE
 4ARING
Place the empty container on the scale and press J7H;.
The zero display and the symbol .%4appear.
The tare weight remains saved until it is cleared.
 #LEARINGTHETARE
Unload scale and press J7H;.
The symbol .%4 goes out, the zero display appears.
or
Press 9b[Wh.
The symbol .%4 goes out, the gross weight appears inthe display.
If !#,TRis activated in the menu, the tare weight is automatically cleared as soon
as the scale is unloaded.
 !UTOMATICTARING
0REREQUISITE
!T!R%is activated in the menu,the symbol 4flashes in the display.
Place the container or packaging material onthe scale.
The packaging weight is automatically saved as the tare weight, the zero display
and the symbol .%4 appear.
 #HAINTARE
0REREQUISITE
The tare function #(!)NTRis activated in the menu.
With this function it is possible to tare several times if, for example, cardboard is
placed between individual layers in a container.
1. Place the first container or packaging material on the scale and press J7H;.
The packaging weight is automatically saved as the tare weight, the zero display
and the symbol .%4 appear.
2. Weigh the weighing sample and read/print out the result.
3. Place the second container or packaging material on the scale and press J7H;
again.
The total weight on the scale is saved as the new tare weight. The zero display
appears.
4. Weigh the weighing sample in the second container and read/print the result.
5. Repeat the last two steps for other containers.
/PERATIONRanger RD

 $YNAMICWEIGHING
With the dynamic weighing function, it is possible to weigh restless weighing samples
such as live animals. If this function is activated, the symbol appears in the dis-
play.
With dynamic weighing, the scale calculates the mean value from 56 weighing oper-
ations within 4 seconds.
7ITHMANUALSTART 0REREQUISITE
!6%R!'%-!NU!,is selected in the menu.
The weighing sample must be heavier than 5 scale divisions.
1. Place the weighing sample on the scale and wait until it has stabilized.
2. Press FH?DJ to start dynamic weighing.
During dynamic weighing, horizontal segments appear in the display, and the
dynamic result is then displayed with the symbol .
3. Unload the scale tobe able to start anew dynamic weighing operation.
7ITHAUTOMATICSTART 0REREQUISITE
!6%R!'%!5T/is selected in the menu.
The weighing sample must be heavier than 5 scale divisions.
1. Place the weighing sample on the scale.
The scale starts the dynamic weighing automatically.
During dynamic weighing, horizontal segments appear in the display, and the
dynamic result is then displayed with the symbol .
2. Unload the scale to be able to perform a new dynamic weighing operation.
 0RINTINGRESULTS
If a printer or computer is connected to the scale, the weighing results can be printed
out or sent to a computer.
Press FH?DJ.
The display contents are printed out and transferred to the computer. See
Section 7.4 for sample protocols.
2ANGER2$

/PERATION
 #LEANING
#!54)/.
%LECTRICSHOCKHAZARD
"EFORECLEANINGWITHADAMPCLOTHPULLOUTTHEMAINSPLUGTODISCONNECTTHEUNIT
FROMTHEPOWERSUPPLY
#!54)/.
7HENTHEWEIGHINGPANHASBEENREMOVEDNEVERCLEANTHEAREAUNDERTHELOADPLATE
HOLDERWITHASOLIDOBJECT
4HISCOULDDAMAGETHEWEIGHINGCELL
/THERCLEANINGINFORMATION
s5SEDAMPCLOTHS
s$ONOTUSEANYACIDSALKALISORSTRONGSOLVENTS
s$ONOTCLEANUSINGAHIGHPRESSURECLEANINGUNITORUNDERRUNNINGWATER
s)FVERYDIRTYREMOVETHEWEIGHINGPANPROTECTIVECOVERIFPRESENTANDADJUSTABLE
FEETANDCLEANTHESEITEMSSEPARATELY
s&OLLOWALLTHERELEVANTINSTRUCTIONSREGARDINGCLEANINGINTERVALSANDPERMISSIBLE
CLEANINGAGENTS
3ETTINGSINTHEMENURanger RD

 3ETTINGSINTHEMENU
Settings can be changed and functions can be activated in the menu. This enables
adaptation to individual weighing requirements.
The menu consists of 6 main blocks containing various submenus on several levels.
 /PERATINGTHEMENU
 #ALLINGUPTHEMENUANDENTERINGTHEPASSWORD
The menu differentiates between 2 operating levels: Operator and Supervisor. The
Supervisor level can be protected by a password. When the device is delivered, both
levels are accessible without a password.
/PERATORMENU 1. Press C;DK and keep it pressed until #/D% appears.
2. Press C;DK again.
The menu item T%R-).,appears. Only the submenu D%6)#%is accessible.
3UPERVISORMENU 1. Press C;DK and keep it pressed until #/D% appears.
2. Enter the passwordand confirm with O[i .
The first menu item 3#!,% appears.
.OTENo supervisor password has been defined when the device is first delivered. Therefore
respond to the password inquiry with C;DK when you call up the menu for the first time.
If a password has still not been entered after a few seconds, the scale returns to weigh-
ing mode.
%MERGENCYPASSWORDFOR3UPERVISORACCESSTOTHEMENU
If a password has been issued for Supervisor access to the menu and you have for-
gotten it, you can still enter the menu:
Press P;HE 3 times and confirm with O[i.
Ranger RD

3ETTINGSINTHEMENU
 3ELECTINGANDSETTINGPARAMETERS
3CROLLINGONONELEVEL Scroll forward: Press De.
Scroll back: Press 8WYa.
!CTIVATINGMENUITEMS
ACCEPTINGSELECTION
Press O[i.
%XITINGMENU1. Press ;n_j.
The last menu item %.$appears.
2. Press O[i.
The inquiry 3!6%appears.
3. Confirm inquiry with O[i to save the settings and return to weighing mode.
-or-
Press De to discard changes and return to weighing mode.
3#!,% !00,)# T%R-)., #/--5.) D)!'./3 %ND
#!, D)30,!9 T!R%
3,%%0 07R/&& B,)'(T -/D%
#/- 
0RI.T%R 0!R!-%T
D%6)#% !##%33
#/D%
R%3%T #/-

R3T
#/-8
3ETTINGSINTHEMENU2ANGER2$

 /VERVIEW
,EVEL ,EVEL ,EVEL ,EVEL ,EVEL ,EVEL0AGE
3#!,%#!, 
D)30,!95.)T G KGOZLBT 
5.)T GKGOZLBT
R%3/,5
5.TR/,,/./&&
T!R%!T!R%/./&&
#H!)NTR/./&&
!#,TR/./&&
:%R/!:-/&&D DDD D 
R%3T!RT/./&&
&),T%R6IBR!T,/7-%D()'(
0R/#%335.)6%RD/3).'
3T!"),)&!3T3T!NDRD0R%#)3%
&!#TT%-0 /&&++++ 
-IN7%I'/./&&/./&&
R%3%T35R% 
!00,)#!6%R!'%/&&!5T/-!NU!,
R%3%T35R% 
T%2-).,D%6)#%3,%%0 /&& MIN MIN MIN 
07R/&&9%3./
B,)'(T/./&&
!##%33350%R6)
R%3%T35R% 
#/--5.)#/- #/-  -/D% 0RINT
!0RINT
#/.T).5
D)!,/'
#/.T/,D
D)!,/,D
DTB'R/33 /./&&
T!R% /./&&
N%T /./&&
2ANGER2$

3ETTINGSINTHEMENU
DT''R/33 /./&&
T!R% /./&&
N%T /./&&
#/NT7T
NDD)30
0RI.T%RT%M0,AT3TD!RDT%-0,T
T%-0,T

!3#I&MT,).%&-T-5,T)
3).',%
,%.'T( 
3%0!R!T 
!DD,& 
0!R!-%TB!5D
0!RIT9 NON%NON%ODD
ODD%6%.%6%.
(3(!+%./8/.8/&&N%T
N%T
.%T!DDR 
#H%#3U-/./&&
6CC/./&&
R3T#/-X35R%
#/--5.)/0T)/.%T(.%T)0!DDR335B.%T'!T%7!9 
53B53BT%3T
DI'IT!,)./&&:%R/T!R%
0RINT#,%!R5NIT

/54/&&3T!B,%B%,-IN
!B6-IN5ND%R,D
/6%R,D3T!R
D%&0R.T%M0,T
T%-0,T
,).%
,).%
./T53%D(%!D%R
'R/33T!R%N%T
3T!R,.#R,&& &%%D

D)!'./3T%3T3#INT%R.%XT%R. 
+BO!RD
D)30,!9
3.R
,I3T
R%3%T!,35R%
,EVEL ,EVEL ,EVEL ,EVEL ,EVEL ,EVEL0AGE
3ETTINGSINTHEMENURanger RD

 3CALESETTINGS3#!,%
 #!,nCALIBRATIONADJUSTMENT
This menu item is not available for certified scales without internal calibration weight.
 $)30,!9nWEIGHINGUNITANDDISPLAYACCURACY
 4!2%nTAREFUNCTION
InternalFor scales WITHan internal calibration weight:
1. Unload scale.
2. Activate menu item #!, with 9ES. The scale calibrates with the internal cali-
bration weight.)NT#!, appears in the display. After calibration is
completed, DON% appears briefly in the display, and the scale automatically
returns to weighing mode.
External For scales WITHOUT an internal calibration weight:
1. Unload scale.
2. Activate menu item #!, with 9ES.The scale determines the zero point.
nappears in the display. The calibration weight to be placed on the scale then
flashes in the display.
3. If necessary, change the weight value displayed with .O.
4. Place the calibration weight on the scale and confirm with 9ES.
The scale calibrates with the calibration weight loaded. After calibration is com-
pleted, DON%appears briefly in the display, and the scale automatically returns
to weighing mode.
5.)TSelect weighing unit 1: g, kg, oz, lb, t
5.)TSelect weighing unit 2: g, kg, oz, lb, t
R%3/,5Select readability (resolution), model-dependent
5.TR/,, When 5.4R/,, is switched on, the weight value can be displayed in all available
units with 5NITS.
Notes•On certified scales, the weighing units oz and lb are displayed with the symbol *.
•On certified scales, resolutions that deviate from the scale definition are displayed
without a weighing unit and with the symbol .
•On dual-range/dual intervalscales,resolutions markedwith \n\ are
divided up into 2 weighing ranges / intervals, e.g. 2x 3000 d.
!T!R%Switching on/off automatic taring
#(!)NTR Switching on/off chain tare
!#,TRSwitching on/off automatic taring with automatic clearing of the tare weight when the
load is removed from scale
2ANGER2$

3ETTINGSINTHEMENU
 :%2/nAUTOMATICZEROUPDATE
 2%34!24nAUTOMATICSAVINGOFZEROPOINTANDTAREVALUE
 &),4%2nADAPTATIONTOTHEAMBIENTCONDITIONSANDTHEWEIGHINGTYPE
 &!#4nAUTOMATICTEMPERATUREDEPENDENTADJUSTMENT
4HISMENUITEMAPPEARSONLYONSCALESWITHANINTERNALCALIBRATIONWEIGHT
!:-/NCERTIFIEDSCALESTHISMENUITEMDOESNOTAPPEAR
3WITCHINGONOFFAUTOMATICZEROUPDATEANDSELECTINGZEROINGRANGE
0OSSIBLESETTINGS/&&DDDDD
/./&&7HENTHE2ESTARTFUNCTIONISACTIVATEDTHELASTZEROPOINTANDTAREVALUEARESAVED
!FTERSWITCHINGOFFONORAFTERAPOWERINTERRUPTIONTHEDEVICECONTINUESTOWORKWITH
THESAVEDZEROPOINTANDTAREVALUE
6)BR!T!DAPTATIONTOTHEAMBIENTCONDITIONS
,/7s6ERYSTEADYANDSTABLEENVIRONMENT4HESCALEWORKSVERYQUICKLYBUTISVERY
SENSITIVETOEXTERNALINFLUENCES
-%Ds.ORMALENVIRONMENT4HESCALEOPERATESATMEDIUMSPEED
()'( s2ESTLESSENVIRONMENT4HESCALEWORKSMORESLOWLYBUTISINSENSITIVETOEXTERNAL
INFLUENCES
0R/#%33!DAPTATIONTOTHEWEIGHINGPROCESS
5.)6%Rs5NIVERSALSETTINGFORALLWEIGHINGSAMPLESANDNORMALWEIGHINGGOODS
D/3).'s$ISPENSINGLIQUIDORPOWDERYWEIGHINGSAMPLES
3T!B),)!DJUSTINGTHEWEIGHINGSPEED
&!3T s4HESCALEOPERATESVERYFAST
3T!NDRDs4HESCALEOPERATESATMEDIUMSPEED
0R%#)3%s4HESCALEOPERATESWITHTHEGREATESTPOSSIBLEREPRODUCIBILITY
4HESLOWERTHESCALEWORKSTHEGREATERTHEREPRODUCIBILITYOFTHEWEIGHINGRESULTS
4%-0$EFININGTHETEMPERATUREDIFFERENCEFORAUTOMATICCALIBRATION
/&&s3WITCHINGOFFAUTOMATICCALIBRATIONINTHECASEOFATEMPERATUREDIFFERENCE
++++ s!UTOMATICCALIBRATIONINTHECASEOFATEMPERATURECHANGEOF++ +OR +
SINCETHELASTADJUSTMENT

Other manuals for Ranger RD

2

This manual suits for next models

3

Other OHAUS Scale manuals

OHAUS PX Series User manual

OHAUS

OHAUS PX Series User manual

OHAUS TAJ Carat TAJ203 User manual

OHAUS

OHAUS TAJ Carat TAJ203 User manual

OHAUS Courier 7000 User manual

OHAUS

OHAUS Courier 7000 User manual

OHAUS Scout STX123 User manual

OHAUS

OHAUS Scout STX123 User manual

OHAUS EB SERIES User manual

OHAUS

OHAUS EB SERIES User manual

OHAUS Scout SPX User manual

OHAUS

OHAUS Scout SPX User manual

OHAUS defender 7000 User manual

OHAUS

OHAUS defender 7000 User manual

OHAUS Compass CR221 User manual

OHAUS

OHAUS Compass CR221 User manual

OHAUS Voyager Balances User manual

OHAUS

OHAUS Voyager Balances User manual

OHAUS Scout SKX Series User manual

OHAUS

OHAUS Scout SKX Series User manual

OHAUS CL Series User manual

OHAUS

OHAUS CL Series User manual

OHAUS Catapult 1000 User manual

OHAUS

OHAUS Catapult 1000 User manual

OHAUS DISCOVERY BALANCE User manual

OHAUS

OHAUS DISCOVERY BALANCE User manual

OHAUS JR4KD User manual

OHAUS

OHAUS JR4KD User manual

OHAUS ES series User manual

OHAUS

OHAUS ES series User manual

OHAUS AV53 User manual

OHAUS

OHAUS AV53 User manual

OHAUS Defender 2000 Series User manual

OHAUS

OHAUS Defender 2000 Series User manual

OHAUS Compass CX Series User manual

OHAUS

OHAUS Compass CX Series User manual

OHAUS BC Series User manual

OHAUS

OHAUS BC Series User manual

OHAUS Courier 7000 User manual

OHAUS

OHAUS Courier 7000 User manual

OHAUS ES series User manual

OHAUS

OHAUS ES series User manual

OHAUS Adventurer SL AS64 User manual

OHAUS

OHAUS Adventurer SL AS64 User manual

OHAUS CS 2000 User manual

OHAUS

OHAUS CS 2000 User manual

OHAUS SPJ Carat User manual

OHAUS

OHAUS SPJ Carat User manual

Popular Scale manuals by other brands

Oregon Scientific GR101H user manual

Oregon Scientific

Oregon Scientific GR101H user manual

Eldom TWO110W instruction manual

Eldom

Eldom TWO110W instruction manual

ADE M309800 operating manual

ADE

ADE M309800 operating manual

Tree MRW series Operation manual

Tree

Tree MRW series Operation manual

Steinberg Systems SBS-KW-3000ZM user manual

Steinberg Systems

Steinberg Systems SBS-KW-3000ZM user manual

Aurora AU 4314 quick start guide

Aurora

Aurora AU 4314 quick start guide

Sencor SBS 2600 user manual

Sencor

Sencor SBS 2600 user manual

RADWAG WLT L Series user manual

RADWAG

RADWAG WLT L Series user manual

Snowrex PS 20 operating manual

Snowrex

Snowrex PS 20 operating manual

Sartorius PMA35001-Y installation instructions

Sartorius

Sartorius PMA35001-Y installation instructions

Proscale LCS100 user manual

Proscale

Proscale LCS100 user manual

Goddess SCA 403 Fit2Fit instruction manual

Goddess

Goddess SCA 403 Fit2Fit instruction manual

KERN GAB-N operating instructions

KERN

KERN GAB-N operating instructions

ARESA AR-4313 instruction manual

ARESA

ARESA AR-4313 instruction manual

Seca 664 Service manual

Seca

Seca 664 Service manual

Baxtran SW user guide

Baxtran

Baxtran SW user guide

Digitag Bluetooth Digital Scale instructions

Digitag Bluetooth

Digitag Bluetooth Digital Scale instructions

bewell connect BW-SCF5 manual

bewell connect

bewell connect BW-SCF5 manual

manuals.online logo
manuals.online logoBrands
  • About & Mission
  • Contact us
  • Privacy Policy
  • Terms and Conditions

Copyright 2025 Manuals.Online. All Rights Reserved.