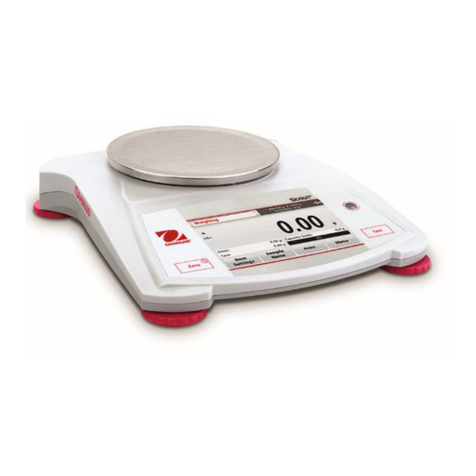
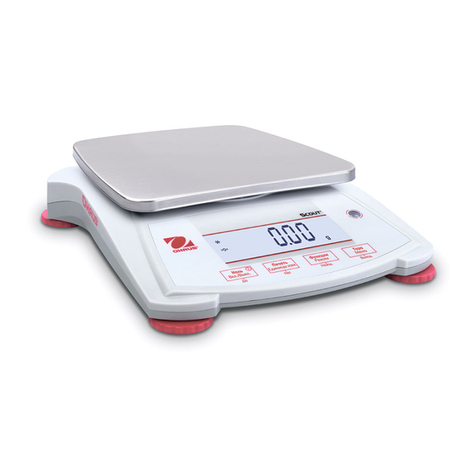
OHAUS PX Series User manual

PX Series Balances
User Guide
Scan the QR code to download the
full
instruction manual.


REVISION HISTORY
Date Version Description
December 19,2022 G
We incorporate the product specification table into
the instruction manual in an effort to reduce printed
materials.
Please download the user instruction manual at
ohaus.com/products or use your smartphone to
scan the QR code on the front page of this manual.


TOC-1
TABLE OF CONTENT
EN
1. INTRODUCTION ..............................................................................................3
2. SAFETY INFORMATION .................................................................................3
3. INSTALLATION ...............................................................................................4
4. OPERATION ....................................................................................................5
5. MAINTENANCE ...............................................................................................6
6. TECHNICAL DATA ..........................................................................................6
ES
1. INTRODUCCIÓN..............................................................................................8
2. INFORMACIÓN SOBRE SEGURIDAD............................................................8
3. INSTALLATION ...............................................................................................9
4. FUNCIONAMIENTO.........................................................................................10
5. MANTENIMIENTO ...........................................................................................11
6. DATOS TÉCNICOS..........................................................................................11
FR
1. INTRODUCTION ..............................................................................................13
2. INFORMATIONS DE SECURITE.....................................................................13
3. INSTALLATION ...............................................................................................14
4. OPERATION ....................................................................................................15
5. ENTRETIEN .....................................................................................................16
6. DONNÉES TECHNIQUES ...............................................................................16
DE
1. EINFÜHRUNG..................................................................................................18
2. SICHERHEITSINFORMATIONEN ...................................................................18
3. INSTALLATION ...............................................................................................19
4. BETRIEB ..........................................................................................................20
5. WARTUNG .......................................................................................................21
6. TECHNISCHE DATEN .....................................................................................22
IT
1. INTRODUZIONE ..............................................................................................23
2. INFORMAZIONI SULLA SICUREZZA.............................................................23
3. INSTALLAZIONZ .............................................................................................24
4. FUNZIONAMENTO ..........................................................................................25
5. MANUTENZIONE.............................................................................................26
6. DATI TECNICI ..................................................................................................27
PL
1. WPROWADZENIE ...........................................................................................28
2. INFORMACJE DOTYCZĄCE BEZPIECZEŃSTWA ........................................28
3. INSTALACJA ...................................................................................................29
4. DZIAŁANIE.......................................................................................................30
5. KONSERWACJA .............................................................................................31
6. DANE TECHNICZNE .......................................................................................32
SV
1. INLEDNING ......................................................................................................33
2. SÄKERHETSFÖRESKRIFTER........................................................................33
3. INSTALLATION ...............................................................................................34
4. DRIFT ...............................................................................................................35
5. UNDERHÅLL ...................................................................................................36
6. TEKNISKA DATA ............................................................................................36

TOC-2
NL
1. INLEIDING........................................................................................................38
2. VEILIGHEIDSINFORMATIE.............................................................................38
3. INSTALLATIE ..................................................................................................39
4. GEBRUIK .........................................................................................................40
5. ONDERHOUD ..................................................................................................41
6. TECHNISCHE GEGEVENS .............................................................................42
DA
1. INDLEDNING ...................................................................................................43
2. OPLYSNINGER VEDRØRENDE SIKKERHED...............................................43
3. INSTALLATION ...............................................................................................44
4. BETJENING .....................................................................................................45
5. VEDLIGEHOLDELSE ......................................................................................46
6. TEKNISKE DATA.............................................................................................46
PT
1. INTRODUÇÃO .................................................................................................48
2. INFORMAÇÕES DE SEGURANÇA.................................................................48
3. INSTALAÇÃO ..................................................................................................49
4. FUNCIONAMENTO..........................................................................................50
5. MANUTENÇÃO................................................................................................51
6. DADOS TÉCNICOS .........................................................................................52
CZ
1. ÚVOD ...............................................................................................................53
2. BEZPEČNOSTNÍ INFORMACE.......................................................................53
3. INSTALACE .....................................................................................................54
4. PROVOZ...........................................................................................................55
5. ÚDRŽBA...........................................................................................................56
6. TECHNICKÉ ÚDAJE........................................................................................56
HU
1. BEVEZETÉS ....................................................................................................58
2. BIZTONSÁGI TUDNIVALÓK ...........................................................................58
3. ÜZEMBE HELYEZÉS.......................................................................................59
4. HASZNÁLAT....................................................................................................60
5. KARBANTARTÁS............................................................................................61
6. TECHNICAL DATA ..........................................................................................61

EN-3
1. INTRODUCTION
Thank you for purchasing our product. This user guide will help you install your balance
and use it safely. Please read it carefully before installation and operation. For detailed
instructions, please visit www.ohaus.com/products.
2. SAFETY INFORMATION
This manual contains installation, operation and maintenance instructions for PX Series
balance. Please read this manual completely before installation and operation.
Definition of Signal Warnings and Symbols
Safety notes are marked with signal words and warning symbols. These show safety
issues and warnings. Ignoring the safety notes may lead to personal injury, damage to
the instrument, malfunctions and false results.
Warning Symbols
General Hazard
Electrical Shock Hazard
Alternating Current
Direct Current
Safety Precautions
Verify that the AC adapter’s input voltage range and plug type are compatible
with the local AC main power supply.
Make sure that the power cord does not pose a potential obstacle or tripping
hazard.
Do not position the balance such that it is difficult to reach the power connection.
The balance is for indoor use only. Do not operate the equipment in hazardous
or unstable environments.
Operate the equipment only under ambient conditions specified in these
instructions.
Do not drop loads on the pan.
Use the balance only in dry locations.
Disconnect the equipment from the power supply when cleaning.
Use only approved accessories and peripherals.
Service should only be performed by authorized personnel.
Intended Use
Use the instrument exclusively for weighing as described in the operating instructions.
Any other type of use and operation beyond the limits of technical specifications without
written consent from OHAUS, is considered as not intended.
This instrument complies with current industry standards and the recognized safety
regulations; however, it can constitute a hazard in use.
If the instrument is not used according to these operating instructions, the intended
protection of the instrument may be compromised and OHAUS assumes no liability.
WARNING
For a hazardous situation with medium risk, possibly resulting in injuries
or death if not avoided.
CAUTION
For a hazardous situation with low risk, resulting in damage to the
device or the property or in loss of data, or injuries if not avoided.
Attention
For important information about the product
Note
For useful information about the product
CAUTION:Read all safety warnings before installing, making connections, or
servicing this equipment. Failure to comply with these warnings could result in
personal injury and/or property damage. Retain all instructions for future reference.

EN-4
3. INSTALLATION
3.1 Select the Location
Avoid heat sources Rapid temperature changes
Air current or
excessive vibrations
Allow sufficient space
3.2 Leveling
Be sure the balance is level before it is used or after its location is
changed.
The PX balance has a level bubble in a small round window beside
the display.
To level the balance, adjust the 4 leveling feet until the bubble is
centered in the circle.
Please refer to the right figure for leveling.
3.3 Connecting Power and Acclimatising the Balance
Connect the DC output connector to the power receptacle on the rear of the balance.
Then connect the AC adapter plug to a suitable electrical outlet.
Acclimatising
It is suggested that the balance should not be used until it has been connected to
power and acclimatised to the environment for a certain period of time. In the case of a
balance with the precision above 0.1 mg, the acclimatisation time should be 1.5 hours;
in the case of balance with the precision of 0.01 mg, the acclimatisation time should be
more than 4 hours.
3.4 Connecting the Interface
The PX balance has two data interfaces, RS232 and USB.
Use the RS-232 port to connect either to a computer or a printer with a standard
(straight-through) serial cable. Use the USB port to connect to a computer with a USB
2.0 Type A to Type B cable.
Interface connections on the rear of the balance
USB: Used to connect to PC only
RS232: Used to connect to PC or Printer
Note: For Connecting, Configuring and Testing the Printer / Computer Interface, see
the Printing section.
3.5 Initial Calibration
For best results, the instrument's calibration should be checked prior to first use. If
adjustment is needed, refer to the Calibration section of the instruction manual.
RS232
USB

EN-5
4. OPERATION
4.1 Overview of Controls and Display
The PX balance has a 2-line backlit display.
CONTROLS
CONTROL FUNCTIONS
Button
Primary
Function
(Short Press)
On / Zero
•If the balance is
Off, turns on the
balance.
•If the balance is
On, sets zero.
Print
•Sends the current
displayed value to
the serial interface.
Function
•Operation is
dependent on the
application mode.
Tare
•Performs tare
operation.
Secondary
Function
(Press and
Hold)
(Extended
Press)
Off
•Zeros the current
value.
•None
Unit
•Changes weighing
units.
•None
Mode
•Changes
application mode.
•None
Menu-Cal
•Enters the main
menu. Calibration is
the first sub-menu.
•Views the preset
Tare value.
Menu
Function
(Short Press)
Yes
•Accepts the
current (blinking)
setting on the
display.
No
•Rejects the current
(blinking) setting on
the display.
•Increments a value
being entered.
Back
•Reverts back to
previous menu
item.
•Decrements a
value being
entered.
Exit
•Immediately exits the
sub-menu.
•Aborts a calibration
in progress.
DISPLAY
Net (NET)
Stability (*)
Result Field:
Negative (-)
Information varies
Centre of Zero (>0<)
by application
Preset tare (PT)
Unit
Istructional Messages

EN-6
4.2 Principal Functions
Zeroing:
Press Zero to zero the balance.
Taring:
With no load on the pan, press Zero to set the display to zero. Place
an empty container on the pan and press Tare. Add material to the
container and its net weight is displayed. After the container and the
objects are removed, the tare value will be displayed as a negative
number. Press Tare to clear.
Weighing:
First press Zero to set the display to zero. Place an object on the
pan. The display indicates the gross weight.
Dot-matrix
Display:
The relevant data in the specific application mode are shown in the
dot-matrix display area.
5. MAINTENANCE
5.1 Cleaning
WARNING: Disconnect the balance from the power supply before cleaning.
Make sure that no liquid enters the interior of the balance.
Clean the balance at regular intervals.
Housing surfaces may be cleaned with a lint-free cloth slightly dampened
with water or a mild cleaning agent.
Glass surfaces may be cleaned with a commercial glass cleaner.
Attention: Do not use solvents, harsh chemicals, ammonia or abrasive cleaning agents.
5.2 Service Information
For troubleshooting common problems, download the user manual from www.Ohaus.com.
If the issue persists, please visit our website for available support and service centers at
https://www.ohaus.com/en-us/support/service-centers.
6. TECHNICAL DATA
The technical data is valid under the following conditions:
Indoor use only
Altitude: Up to 2000 m
Operating temperature: 5°C to 40°C
Operating temperature for optimum weighing performance: 10°C to 30°C
Humidity: maximum relative humidity 80% for temperatures up to 30°C,
decreasing linearly to 50% relative humidity at 40°C
Electrical supply: 12VDC, 0.5A. (For use with certified or approved power
supply, which must have a SELV and limited energy output.)
Mains supply voltage fluctuations: up to ±10% of the nominal voltage
Installation category II
Pollution degree: 2
Detailed product specifications can be found in the user manual and can be
downloaded from www.Ohaus.com/products.

EN-7
LIMITED WARRANTY
Ohaus products are warranted against defects in materials and workmanship from the
date of delivery through the duration of the warranty period. During the warranty period
Ohaus will repair, or replace any component(s) that proves to be defective at no charge,
provided that the product is returned, freight prepaid, to Ohaus.
This warranty does not apply if the product has been damaged by accident or misuse,
exposed to radioactive or corrosive materials, has foreign material penetrating to the
inside of the product, or as a result of service or modification by other than Ohaus. In
lieu of a properly returned warranty registration card, the warranty period shall begin on
the date of shipment to the authorized dealer. No other express or implied warranty is
given by Ohaus Corporation. Ohaus Corporation shall not be liable for any
consequential damages.
As warranty legislation differs from state to state and country to country, please contact
Ohaus or your local Ohaus dealer for further details.

ES-8
1. INTRODUCCIÓN
Gracias por adquirir nuestro producto. Puede instalar y utilizar la balanza de forma
segura y cómoda con la ayuda de esta guía del usuario. Antes de instalarla y utilizarla,
léala atentamente. Para obtener el manual de instrucciones detallado del producto,
visite www.ohaus.com/products.
2. INFORMACIÓN SOBRE SEGURIDAD
Este manual contiene instrucciones relativas a la instalación, operación y
mantenimiento de la Básculas Serie PX. Por favor, lea el manual entero antes de
proceder a la instalación y operación del equipo.
Definición de las señales y símbolos de advertencia
Los consejos de seguridad están marcados con palabras y símbolos de advertencia.
Estos muestran advertencias y problemas de seguridad. Hacer caso omiso de las
indicaciones de seguridad puede llevar a lesiones personales, daños al dispositivo,
fallos de funcionamiento y resultados falsos.
Símbolos de advertencia
Peligro general
Peligro descarga eléctrica
Corriente alterna
Corriente continua
Precauciones de seguridad
Compruebe que el rango de voltaje de entrada del adaptador de CA y el tipo de
enchufe son compatibles con la red eléctrica de corriente alterna local.
Asegúrese de que el cable de alimentación no represente un posible obstáculo
o riesgo de tropezarse.
No coloque la báscula de tal manera que sea difícil llegar a la conexión
eléctrica.
Utilice la báscula solo en interiores. no utilice la unidad en entornos peligrosos
o en lugares inestables.
Opere la unidad solamente bajo las condiciones ambientales especificadas en
estas instrucciones.
No deje caer cargas sobre el plato.
Utilice la báscula solo en lugares secos.
Desconecte el equipo de la fuente de alimentación durante su limpieza.
Utilice accesorios y periféricos aprobados.
Cualquier reparación y servicio debe ser realizado solo por personal autorizado.
Uso Apropiado
Utilice el equipo exclusivamente para los fines de pesaje descritos en el manual.
Cualquier otro tipo de uso y/o funcionamiento, que exceda los límites de las.
ADVERTENCIA
Situaciones peligrosas con riesgo medio, que pueden provocar la
muerte o lesiones graves si no se evitan.
PRECAUCIÓN
Situaciones peligrosas con riesgo bajo, que pueden provocar
daños en el dispositivo o a la propiedad, perdida de datos, o
lesiones graves si no se evitan.
Atención
Información importante sobre el producto.
Nota
Información útil sobre el producto.
PRECAUCIÓN: lea todas las advertencias de seguridad antes de instalar, hacer
conexiones o realizar el mantenimiento de este equipo. El incumplimiento de las
instrucciones podría resultar en lesiones personales y/o daños materiales. Conserve
todas las instrucciones para futura referencia.

ES-9
especificaciones técnicas sin el consentimiento por escrito de OHAUS, se considera
como Uso Inapropiado.
Este equipo cumple con los estándares de la industria y las normas actuales de
seguridad reconocidas; sin embargo, puede constituir un peligro en su uso.
Si el equipo no se utiliza de acuerdo al manual de instrucciones, su seguridad puede
verse afectada, por lo que OHAUS no asume ninguna responsabilidad.
3. INSTALLATION
3.1 Seleccionar la ubicación
Avoid heat sources Rapid temperature changes
Air current or
excessive vibrations
Allow sufficient space
3.2 Nivelación
Asegúrese de que la báscula está nivelada antes de su uso o
después de cambiar su ubicación.
La báscula PX tiene un nivel de burbuja en una pequeña ventana
redonda junto a la pantalla.
Para nivelar la báscula, ajuste los 4 pies de nivelación hasta que la
burbuja esté centrada en el círculo.
Consulte el dibujo de la derecha para ajustar la nivelación.
3.3 Conexión de la alimentación y aclimatación de la báscula
Conecte el conector de salida de CC a la toma de corriente en la parte posterior de la
báscula. A continuación, conecte el enchufe del adaptador de CA a una toma de
corriente adecuada.
Aclimatación
Se recomienda no utilizar la báscula hasta que la unidad esté conectada y se haya
aclimatado al entorno durante un determinado período de tiempo. En el caso de
básculas con precisión por encima de 0,1 mg, el tiempo de aclimatación debe ser de
1,5 horas; en el caso de básculas con una precisión de 0,01 mg, el tiempo de
aclimatación debe ser de un mínimo de 4 horas.
3.4 Conexión de la interfaz
La báscula PX cuenta con dos interfaces de datos, RS232 y USB.
Utilice el puerto RS-232 para conectar con un ordenador o una impresora mediante un
cable serie estándar (directo). Utilice el puerto USB para conectar a un ordenador
mediante un cable USB 2.0 de tipo A a tipo B.
Conexiones de interfaz en la parte posterior de la báscula
USB: utilizado para conectar solo a ordenador
RS232: utilizado para conectar a ordenador o impresora
Nota: consulte la sección «Impresión» para la Conexión, Configuración y Prueba de la
impresora / interfaz del ordenador.
RS232
USB

ES-10
3.5 Calibración inicial
Para garantizar unos resultados de pesaje exactos, antes del primer uso de la balanza
debe calibrarse la misma. Si es necesario realizar ajustes, consulte la sección de
"Calibración" del manual de instrucciones.
4. FUNCIONAMIENTO
4.1 Descripción general de los controles y la pantalla
The PX balance has a 2-line backlit display.
CONTROLES
FUNCIONES DE CONTROL
Botón
Función
primaria
(Pulsación
rápida)
On / Zero
•Si el indicador está
en Off (apagado), se
enciende el indicador.
•Si el indicador está
en On (activado), se
ajusta en cero.
Print
•Envía el valor
mostrado a la
interfaz serial.
Function
•La operación
depende del
modo de
aplicación.
Tare
•Realiza la operación
de tara.
Función
secundaria
(Pulsar y
mantener)
Off
•Ajusta a cero el valor
actual.
Unit
•Cambia las
unidades de
pesaje.
Mode
•Cambia el modo
de aplicación.
Menu-Cal
•Entra en el menú
principal. La
calibración es el
primer submenú.
•Muestra el valor de
tara predeterminado.
Función de
menú
(Pulsación
rápida)
Yes
•Acepta la
configuración actual
(intermitente) en la
pantalla.
No
•Rechaza la
configuración
actual
(intermitente) en
la pantalla.
•Incrementa un
valor introducido.
Back
•Vuelve a la
opción de menú
anterior.
•Disminuye un
valor introducido.
Exit
•Sale inmediatamente
del submenú.
•Aborta una
calibración en curso.
DPANTALLA
Neto (NETO)
Campo de resultados:
Estabilidad (*)
la información varía
Negativo (-)
según la aplicación
Centro de cero (>0<)
by application
Pre-tara (PT)
Unidad
Mensajes de instrucci
ó

ES-11
4.2 Funciones principales
Cero:
Pulse Zero para ajustar la báscula a cero.
Tarar:
Sin carga en el plato, pulse Zero para ajustar la pantalla a cero.
Coloque un recipiente vacío en el plato y pulse Tare. Añada objetos
al recipiente para ver su peso neto. Una vez retirados el recipiente y
los objetos, la carga se mostrará como un número negativo. Pulse
Tare para borrar.
Pesaje:
Pulse el botón Zero para ajustar la pantalla a cero. Coloque un
objeto en el plato. La pantalla indica el peso bruto.
Pantalla de
matriz de
puntos:
Los datos relevantes en el modo de aplicación específica se
muestran en la pantalla de matriz de puntos.
5. MANTENIMIENTO
5.1 Limpieza
ADVERTENCIA: desconecte el equipo de la fuente de alimentación antes
de su limpieza. Asegúrese de que no entre líquido en el interior de la
báscula.
Limpie la báscula a intervalos regulares.
La superficie de la carcasa puede limpiarse con un paño sin pelusas
ligeramente humedecido con agua o un limpiador suave.
Las superficies de vidrio pueden limpiarse con un limpiacristales comercial.
Atención: no utilice disolventes, amoniaco, ni productos químicos o de limpieza abrasivos.
5.2 Información de servicio
La sección de resolución de problemas del manual de usuario está disponible en línea
en www.ohaus.com si el producto no funciona correctamente. Si el problema persiste
después de eso, visite nuestro sitio web para obtener más ayuda.
https://www.ohaus.com/en-us/support/service-centers.
6. DATOS TÉCNICOS
Los datos técnicos son válidos en las siguientes condiciones:
Uso de interior solamente
Altitud: Hasta 2,000 m
Temperatura de funcionamiento: 5°C a 40°C
La temperatura de funcionamiento que garantiza el rendimiento del pesaje
10°C a 30°C
Humedad: máxima humedad relativa 80% para temperaturas hasta 30 °C,
disminuyendo linealmente a 50 % de humedad relativa a 40 °C.
Alimentación eléctrica: 12VDC, 0.5A. (Para usar con una fuente de
alimentación certificada o aprobada, que debe tener una salida de energía
SELV y limitada).
Fluctuaciones de voltaje del suministro eléctrico: hasta ±10 % el voltaje nominal
Categoría de instalación II
Grado de contaminación: 2
Las especificaciones detalladas de cada modelo están escritas en el manual de
instrucciones, por favor visite www.ohaus.com/products.

ES-12
GARANTÍA LIMITADA
Los productos Ohaus están garantizados contra defectos de materiales y mano de
obra desde la fecha de entrega hasta la duración del período de garantía. Durante el
período de garantía Ohaus reparará o, a su elección, reemplazará cualquier
componente(s) que resulte defectuoso sin cargo alguno, siempre que el producto sea
devuelto, a portes pagados, a Ohaus.
Esta garantía no se aplica si el producto ha sido dañado por accidente o mal uso, si ha
sido expuesto a materiales radioactivos o corrosivos, si ha penetrado material extraño
en el interior del producto, o como resultado de un servicio o modificación por alguien
que no sea Ohaus. En lugar de una tarjeta de registro de garantía debidamente
devuelta, el período de garantía comenzará en la fecha de envío al distribuidor
autorizado. Ohaus Corporation no ofrece ninguna otra garantía expresa o implícita.
Ohaus Corporation no será responsable de ningún daño consecuente.
Como la legislación de la garantía difiere de un estado a otro y de un país a otro, por
favor contacte con Ohaus o con su distribuidor local de Ohaus para más detalles.

FR-13
1. INTRODUCTION
Nous vous remercions d'avoir acheté notre produit. Vous pouvez installer et utiliser la
balance en toute sécurité et commodément à l'aide de ce guide d'utilisation. Avant
l'installation et l'utilisation, veuillez le lire attentivement. Pour obtenir le manuel
d'instruction détaillé du produit, veuillez consulter le site www.ohaus.com/products.
2. INFORMATIONS DE SECURITE
Ce manuel contient les instructions pour installer, faire fonctionner et assurer l'entretien
d'une balance PX. Lisez ce manuel intégralement avant l'installation et le démarrage.
Définition des symboles et signes d’avertissement
Les notes de sécurité sont marqués par des mots signaux et des symboles
d’avertissement. Ils présentent les problèmes et avertissements de sécurité. Le non-
respect des notes de sécurité pourrait déboucher sur des blessures personnelles,
l’endommagement de l’appareil, les défaillances et les résultats erronés.
Symboles d’avertissement
Risque général
Risque d’électrocution
Courant alternatif
Courant direct
Précautions de sécurité
Vérifier que la plage de tension d’entrée de l’adaptateur AC et le type de fiche
sont compatibles avec l’alimentation secteur AC locale.
S’assurer que le cordon d’alimentation ne constitue pas un obstacle potentiel
ou un risque de trébuchement.
Évitez de positionner la balance de telle enseigne qu’il soit difficile d’atteindre le
câble d’alimentation.
La balance est CONÇUE pour une utilisation interne uniquement. Ne pas opérer
l’équipement dans des environnements dangereux ou dans des emplacements
instables.
Opérer l’équipement uniquement sous des conditions ambiantes spécifiées
dans les présentes instructions.
Évitez de laisser des charges tomber sur la base.
Utiliser la balance uniquement dans les emplacements secs.
Déconnecter l’équipement de l’alimentation pendant le nettoyage.
Utiliser uniquement les accessoires et périphériques approuvés.
Le service doit uniquement être effectué par le personnel autorisé.
AVERTISSEMENT:
Pour une situation dangereuse avec risque moyen, débouchant
probablement sur des blessures ou la mort en cas de non
évitement.
ATTENTION:
Pour une situation dangereuse avec un faible risque,
débouchant sur un endommagement de l’appareil, des pertes
matérielles ou des données ou encore des blessures en cas de
non évitement.
Attention
Pour des informations importantes concernant le produit.
Remarque
Pour des informations importantes concernant le produit.
ATTENTION: VEUILLEZ lire tous les avertissements de sécurité avant
l’installation, le branchement ou l’entretien de l’appareil. Le non-respect de
ces avertissements pourrait déboucher sur des blessures personnelles et/ou
des dommages matériels. Veuillez conserver toutes les instructions pour une
référence ultérieure.

FR-14
Règles d'utilisation
Utiliser l'appareil uniquement à l'effet de pesage, comme déterminé dans le manuel
d'utilisation. Tout autre type d'utilisation ou de maniement au-delà des limites des
caractéristiques techniques déterminées sans le consentement écrit de la société
OHAUS sera considéré comme non conforme.
Cet appareil est conforme aux normes industrielles et aux règles de sécurité en
vigueur ; cependant, son utilisation peut engendrer un risque de danger.
Si l'appareil n'est pas utilisé conformément au présent manuel d'utilisation, sa
protection souhaitée peut s'en trouver altérée, auquel cas OHAUS déclinera toute
responsabilité.
3. INSTALLATION
3.1 Sélection de la position
Évitez des sources
de chaleur
des changements rapides de
température
le courant d’air ou
les vibrations
excessives
Laisser un espace
suffisant.
3.2 Nivellement
S’assurer que la balance est nivelée avant d’utiliser ou après le
changement de position.
La balance PX a une bulle de niveau dans une fenêtre en petit rond à
côté de l’affichage.
Pour niveler la balance, régler les 4 pieds de nivellement jusqu’à ce
que la bulle soit centrée dans le cercle.
Veuillez vous référer à la figure de droite pour le nivellement.
3.3 Branchement de l’alimentation et acclimatation de la balance
Connect the DC output connector to the power receptacle on the rear of the balance.
Then connect the AC adapter plug to a suitable electrical outlet.
Acclimatation
Il est suggéré que la balance ne soit pas utilisée tant qu’elle n’est pas connectée à une
alimentation et acclimatée à l’environnement pendant une certaine période de temps.
Si la balance a une précision dépassant 0,1 mg, le temps d’acclimatation doit être de
1,5 heure, si la balance a une précision de 0,01 mg, le temps d’acclimatation doit
dépasser 4 heure.
3.4 Branchement de l’interface
La balance PX a deux interférences de données, RS232 et USB.
Utiliser le port RS-232 pour connecter soit un ordinateur, soit une imprimante avec
câble de série standard (direct). Utiliser un port USB pour connecter à un ordinateur
avec un câble USB 2.0 de type A au type B.
Connexions d’interface sur l’arrière de la balance
USB: Utilisé pour connecter le PC uniquement.
RS232: Utilisé pour connecter le PC ou l’imprimante.
RS232
USB

FR-15
Remarque: Consulter la section d’impression pour la connexion, la configuration et le
test de l’imprimante/l’interface de l’ordinateur.
3.5 Étalonnage de départ
Pour des résultats optimaux, l'étalonnage de l'appareil doit être vérifié avant la première
utilisation. Si une correction est nécessaire, consultez la section Étalonnage du manuel
d'instruction.
4. OPERATION
4.1 Aperçu des contrôles et de l'affichage
La balance PX a un affichage rétro éclairé de 2 lignes.
CONTROLES
FONCTIONS DE CONTROLE
Bouton
Fonction
primaire
(Appuyer
légèrement)
On / Zero
•Si l’indicateur est
éteint, allumer
l’indicateur.
•Si l’indicateur est
allumé, régler à
zéro.
Print
•Envoie la valeur de
l’affichage actuel à
l’interface de série.
Function
•L’opération
dépend du mode
d’application.
Tare
•Effectue l’opération
tare.
Fonction
secondaire
(Appuyer et
maintenir)
Off
•Mise à zéro de la
valeur actuelle.
Unit
•Change les unités de
pesage.
Mode
•Change le mode
d’application.
Menu-Cal
•Entre dans le menu
principal Le calibrage
est dans le premier
sous menu.
•Voir la valeur tare
préréglée.
Menu de
fonction
(Appuyer
légèrement)
Yes
•Accepte le
réglage actuel
(clignotement)
sur l’affichage.
No
•Rejette le réglage
actuel (clignotement)
sur l’affichage.
•Augmente la valeur
entrée.
Back
•Retourne à
l’élément du
menu précédent.
•Réduit la valeur
entrée.
Exit
•Quitter
immédiatement le
sous menu.
•Annuler le calibrage
en cours.
L’AFFICHAGE
Net (NET)
Champ de résultat:
Stabilité(*)
Les informations
Négatif (-)
varient en fonction
Centre de zéro (>0<)
de l’application.
Pré-tare (PT)
Unité
Messages
d’instruction

FR-16
4.2 Fonction principales
Zéro:
Appuyer sur Zéro pour mettre la balance à zéro.
Tarage:
Sans charge sur le plateau, appuyer sur Zéro pour régler l’affichage
à zéro. Placer un récipient vide sur le plateau et appuyer sur Tare.
Ajouter des matériels sur le récipient et son poids net s’affiche. Une
fois le récipient et les objets retirés, la charge affichera un numéro
négatif. Appuyer sur Tare pour effacer.
Pesage:
Appuyer premièrement sur Zéro pour régler l’affichage à zéro. Placer
un objet sur le plateau. L’affichage indique le poids brut.
Ajouter la
matrice à
points:
Les données pertinentes dans le mode d’application spécifique sont
affichées dans la zone d’affiche de matrice à points.
5. ENTRETIEN
5.1 Nettoyage
AVERTISSEMENT: Déconnecter la balance de l’alimentation avant le
nettoyage. S’assurer qu’aucun liquide n’entre dans la balance.
Nettoyer la balance à des intervalles réguliers.
Les surfaces du boîtier pourraient être nettoyées avec un tissu sans peluche
légèrement mouillé avec de l’eau ou un agent de nettoyage doux.
Les surfaces en verre pourraient être nettoyées avec un nettoyant de verre
commercial.
Attention: Évitez d’utiliser les solvants, notamment les produits chimiques durs, les
agents de nettoyage abrasifs ou en ammoniaque.
5.2 informations sur le service
La section de dépannage du manuel d'utilisation est disponible en ligne à l'adresse
www.ohaus.com si le produit ne fonctionne pas correctement. Si le problème persiste
après cela, veuillez consulter notre site Web pour obtenir une aide supplémentaire.
https://www.ohaus.com/en-us/support/service-centers.
6. DONNÉES TECHNIQUES
Les données techniques sont valables dans les conditions d'utilisation suivantes:
Utilisation intérieure uniquement.
Altitude: Jusqu’à 2000 m
Température de fonctionnement : 5°C à 40°C
La température de fonctionnement qui garantit les performances de pesage :
10°C à 30°C
Humidité: humidité relative maximale 80% pour les températures dépassant
30°C, baissant de manière linéaire de 50% à une humidité relative de 40°C.
alimentation électrique : 12VDC, 0.5A. (A utiliser avec une alimentation certifiée
ou approuvée, qui doit avoir un SELV et une sortie d'énergie limitée).
Fluctuations de tension d’alimentation: jusqu’à ±10% de la tension nominale.
Catégorie d’installation II
Degré de pollution 2
les spécifications détaillées de chaque modèle sont écrites dans le manuel d'instruction,
veuillez visiter www.ohaus.com/products.
Other manuals for PX Series
5
Table of contents
Languages:
Other OHAUS Scale manuals

OHAUS
OHAUS ES series User manual

OHAUS
OHAUS 5000 User manual

OHAUS
OHAUS Ranger User manual

OHAUS
OHAUS I-C52M100L User manual

OHAUS
OHAUS CL Series User manual

OHAUS
OHAUS ES series User manual

OHAUS
OHAUS ES6R User manual

OHAUS
OHAUS DEFENDER D60ER User manual

OHAUS
OHAUS VE1500P User manual

OHAUS
OHAUS Explorer EX125 User manual

OHAUS
OHAUS SCOUT II User manual

OHAUS
OHAUS ES series User manual

OHAUS
OHAUS 1119D User manual

OHAUS
OHAUS EXPLORER PRO User manual

OHAUS
OHAUS 1400 Series Manual

OHAUS
OHAUS ES series User manual

OHAUS
OHAUS SCOUT User manual

OHAUS
OHAUS Scout pro User manual

OHAUS
OHAUS Valor 7000 series User manual

OHAUS
OHAUS Ranger 3000 Series User manual