1-3 6600-0342-000 08/08/01 1-3
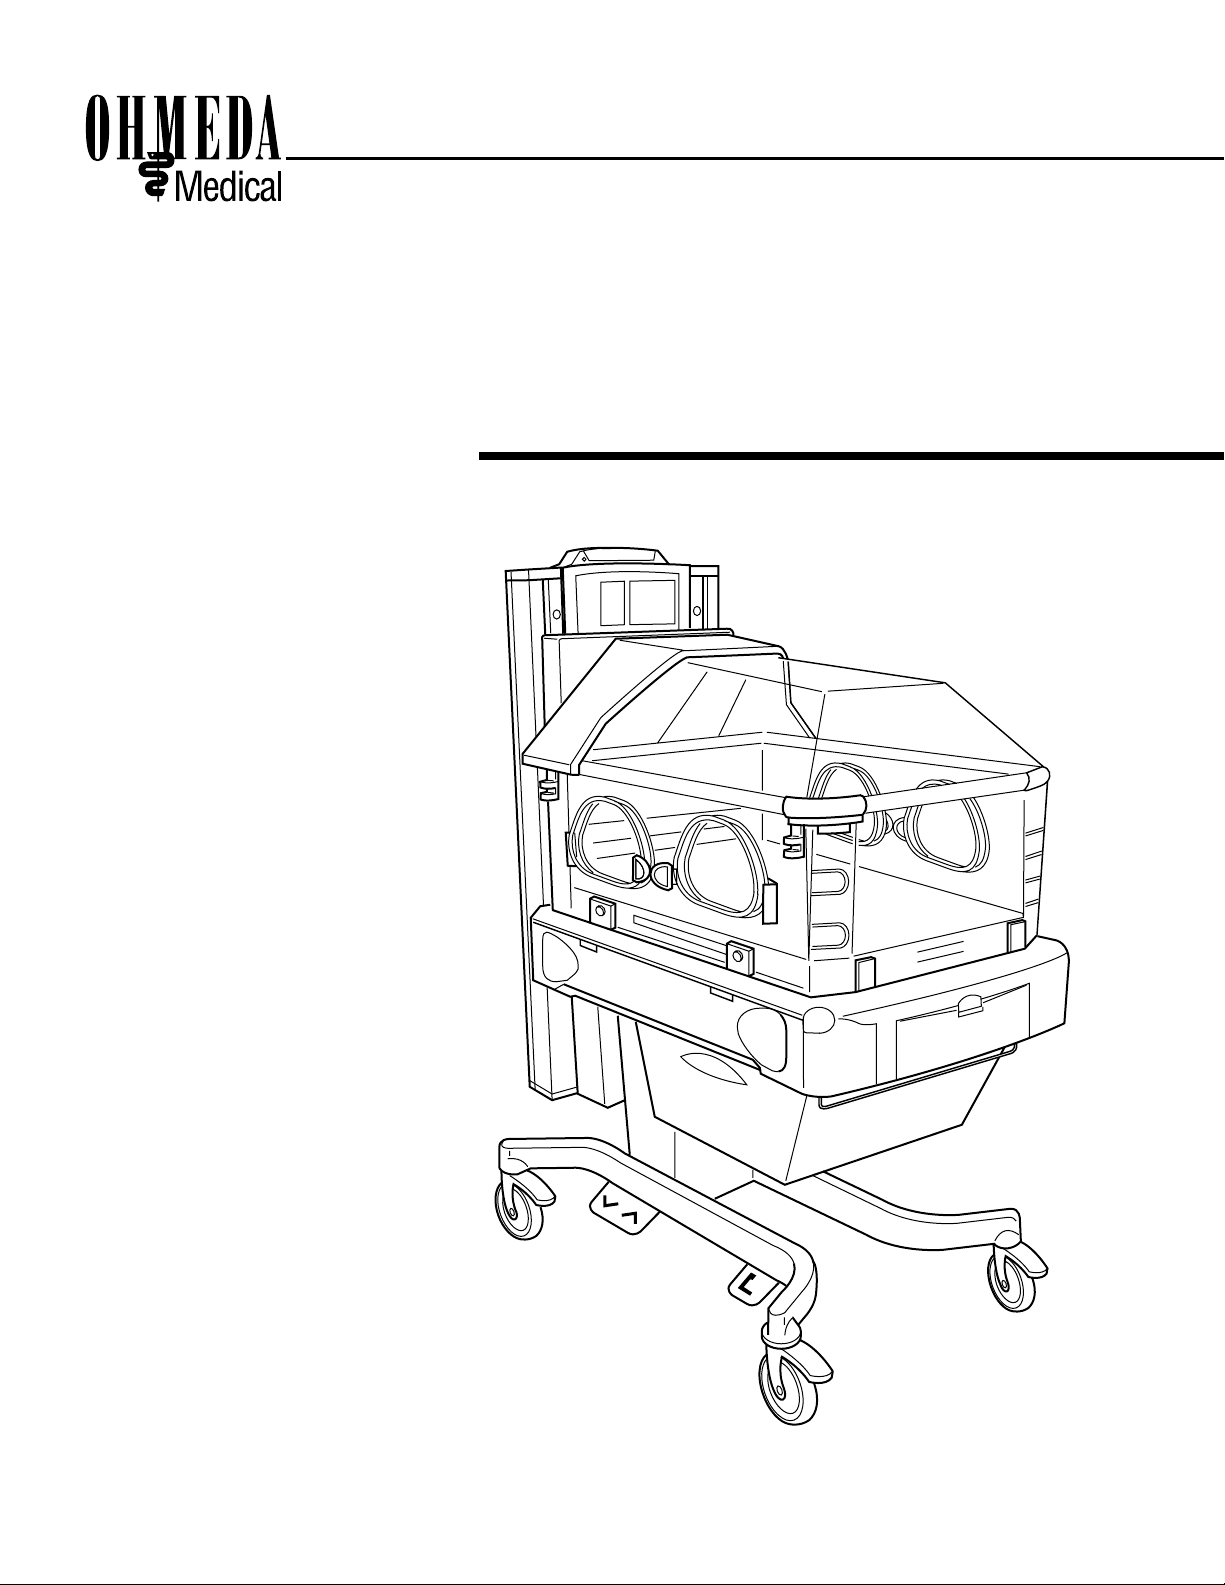
General Information
Incubator operation
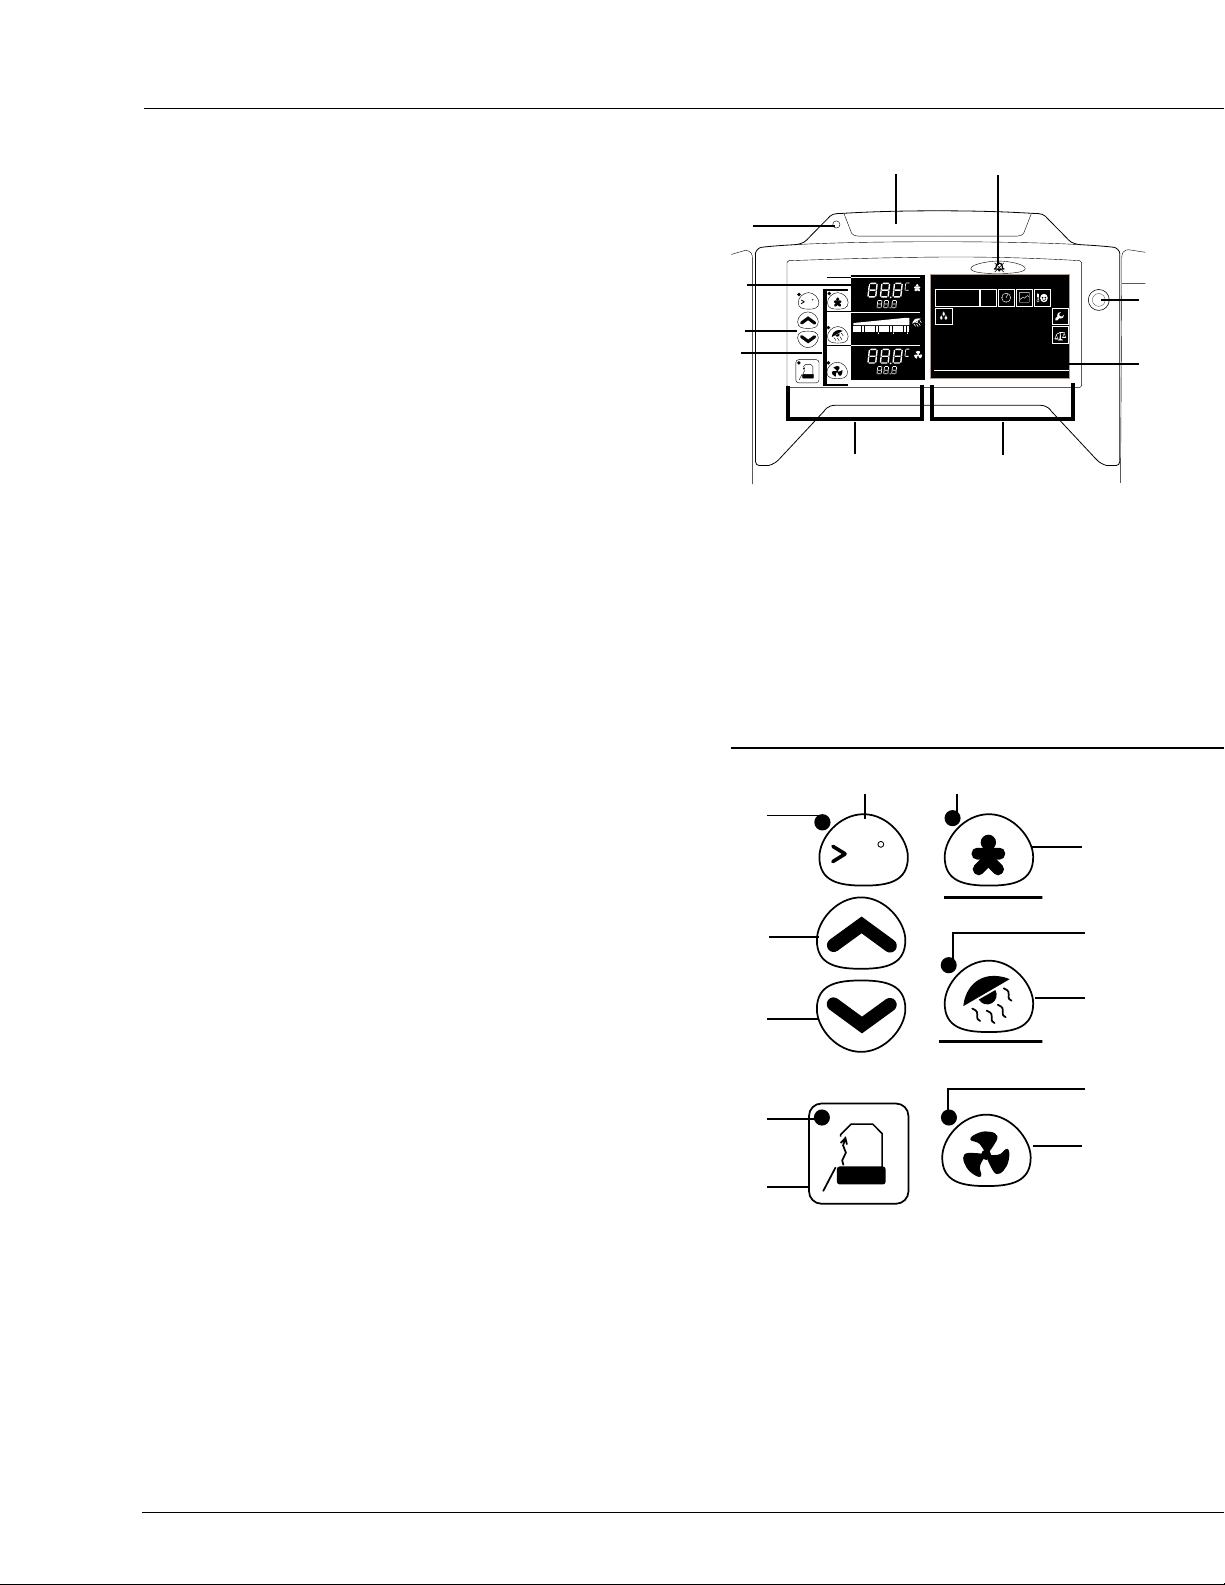
When operating as an incubator, select the control mode by
pushing the Air Mode Button at the bottom or the Baby Mode
Button at the top of the temperature regulation controls.
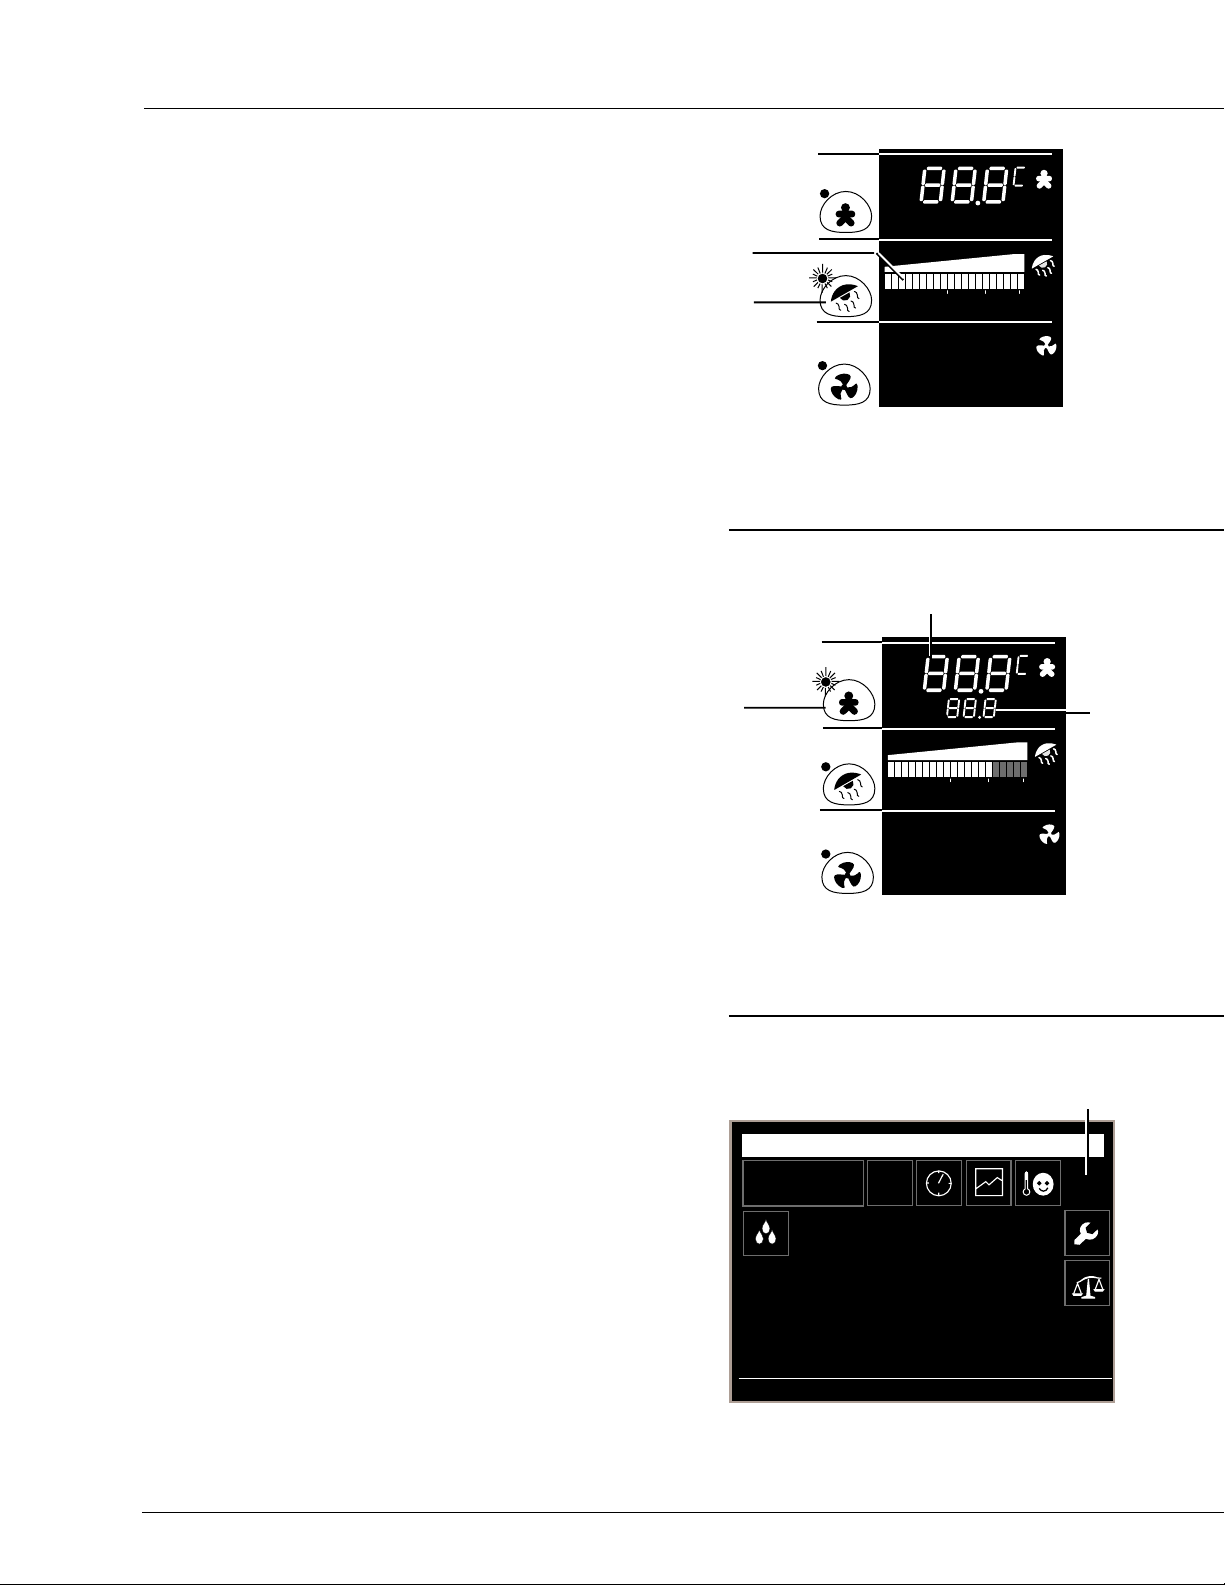
Air Control Mode
TheAir Mode Indicator lights when air mode is selected. Two
temperature values are shown in the lower third of the display:
the value shown in the larger numerals at the top is the air
temperature measured by the compartment probe, the value
shown below in smaller numerals is the air set temperature. The
set temperature can be adjusted using the temperature/power
buttons located at the left of the mode buttons. Temperature
settings from 20°to 37°C can be entered in 0.1°C increments.
Temperatures from 37°to 39°C can only be entered after
pressing the >37°C Button.
Note: When operating the OmniBed as an incubator in the air
mode with a probe attached to the infant’s skin, the infant’s
temperature will also be shown in the baby temperature
section at the top of the display.
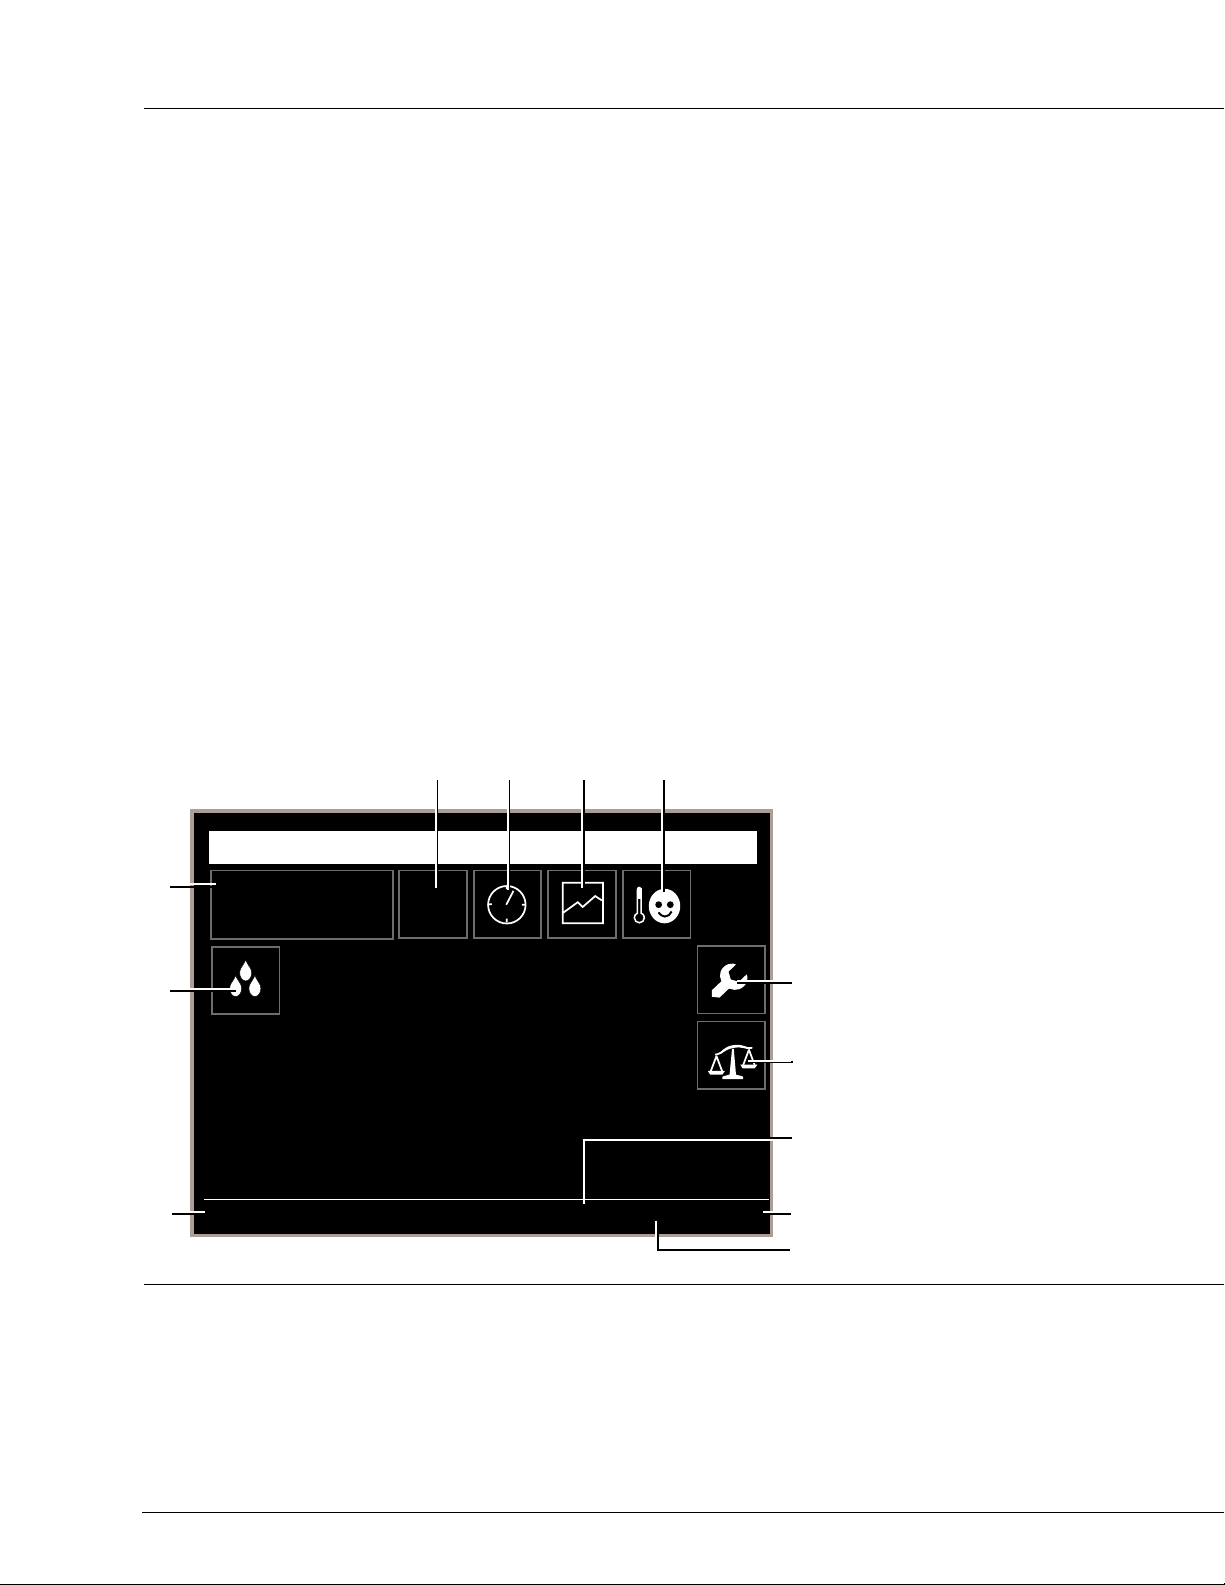
Baby Control Mode
The Baby Mode Indicator lights when the baby mode is selected.
Two temperature values are shown in the upper third of the
display: the value shown in larger numerals at the top is the
temperature measured by the probe on the infant’s skin, the
value shown below in smaller numerals is the baby set tempera-
ture, which can be adjusted by using the temperature/power
buttons located at the left of the mode buttons. Temperature
settings from 35°to 37°C can be entered in 0.1°C increments.
Temperatures settings from 37°to 37.5°C can only be entered
after pressing the >37°C Button.
Note: When operating the OmniBed as an incubator in the baby
mode, the compartment temperature will also be shown in the air
temperature display section at the bottom of the display.
Boost Air Curtain
If the OmniBed is being operated as an incubator, and the
doors will be open for an extended length of time, pushing the
Boost Air Curtain Button increases fan speed and improves
open door thermal performance.
An indicator on the button lights when the BoostAir Curtain is
activated. Running the fan at higher speed, however, will raise
the noise level in the infant compartment. To deactivate the
BoostAir Curtain, push the button a second time to resume
Whisper Quiet™mode. The BoostAir Curtain will automatically
shut off after twenty minutes and the indicator light will go out.
The button must be pressed again to continue for another twenty
minutes at high speed.
Note: The fan speed may increase automatically due to other
requirements without pushing the Boost Air Curtain button, and
in these cases the button indicator will not light.
1. Air Set Temperature
2. Air Temperature
3. Air Mode Button
25
%
50
%
75
%
100
%
CI.31.008
12
3
25
%
50
%
75
%
100
%
CI.31.009
1. Baby Mode Button
2. Baby Set Temperature
3. Baby Temperature
1
2
3
CI.31.010