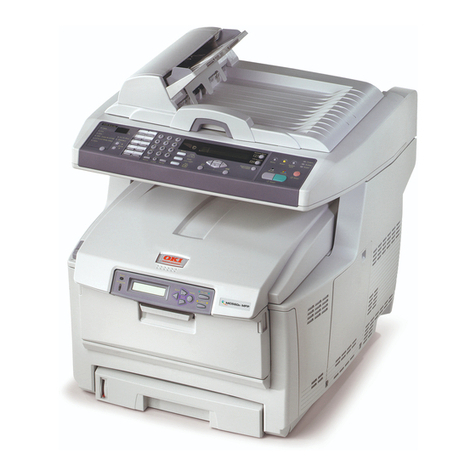
Oki CX4545 MFP Configuration guide

MULTIFUNCTIONAL DIGITAL COLOR SYSTEMS /
MULTIFUNCTIONAL DIGITAL SYSTEMS
Printing Guide
ES9160 MFP/ES9170 MFP
ES9460 MFP/ES9470 MFP
CX3535 MFP/CX4545 MFP

©2012 Oki Data Corporation All rights reserved
Under the copyright laws, this manual cannot be reproduced in any form without prior written permission of Oki Data.

Preface 1
Preface
Thank you for purchasing Oki Data Multifunctional Digital Systems. Also this guide describes instructions on how to set up
the printer drivers required for this equipment, and how to print with them. Read this manual before using your
Multifunctional Digital Systems. Keep this manual within easy reach, and use it to configure an environment that makes
best use of the OKI MFP's functions.
How to read this manual
Symbols in this manual
In this manual, some important items are described with the symbols shown below. Be sure to read these items before
using this equipment.
Other than the above, this manual also describes information that may be useful for the operation of this equipment with
the following signage:
Screens and Operation Procedures
Illustrations for the control panel and the touch panel shown in this manual are those of the ES9460 MFP/ES9470
MFP/CX3535 MFP/CX4545 MFP. The shape and location of some buttons on the control panel and the dimension of
the touch panel of the ES9160 MFP/ES9170 MFP differ from those of other series, however, the names and functions
of the buttons and parts are the same.
In this manual, the screens and the operation procedures in Windows are described for Windows 7.
The details on the screens may differ depending on how the equipment is used, such as the status of the installed
options, the OS version and the applications.
If you use Windows Server 2008 R2, refer to the operation procedure for Windows 7, though the screens or the menu
names, etc. may differ.
In this manual, the screens and the operation procedures in Macintosh are described for Mac OS X 10.2.x and Mac
OS X 10.6.x.
The details on the screens may differ depending on how the equipment is used, such as the status of the installed
options, the OS version and the applications.
In this manual, the initial values of the setting items are underlined.
Indicates a potentially hazardous situation which, if not avoided, could result in death, serious
injury, serious damage, or fire in the equipment or surrounding assets.
Indicates a potentially hazardous situation which, if not avoided, may result in minor or moderate
injury, partial damage to the equipment or surrounding assets, or loss of data.
Indicates information to which you should pay attention when operating the equipment.
Describes handy information that is useful to know when operating the equipment.
Pages describing items related to what you are currently doing. See these pages as required.

2 Preface
Trademarks
The official name of Windows XP is Microsoft Windows XP Operating System.
The official name of Windows Vista is Microsoft Windows Vista Operating System.
The official name of Windows 7 is Microsoft Windows 7 Operating System.
The official name of Windows Server 2003 is Microsoft Windows Server 2003 Operating System.
The official name of Windows Server 2008 is Microsoft Windows Server 2008 Operating System.
Microsoft, Windows, Windows NT, and the brand names and product names of other Microsoft products are
trademarks of Microsoft Corporation in the US and other countries.
Apple, AppleTalk, Macintosh, Mac, Mac OS, Safari, and TrueType are trademarks of Apple Inc. in the US and other
countries.
Adobe, Acrobat, Reader, and PostScript are either registered trademarks or trademarks of Adobe Systems
Incorporated in the United States and/or other countries.
Mozilla, Firefox and Firefox logo are trademarks or registered trademarks of Mozilla Foundation in the U.S. and other
countries.
IBM, AT and AIX are trademarks of International Business Machines Corporation.
NOVELL, NetWare, and NDS are trademarks of Novell, Inc.
Other company and product names given in this manual or displayed in this software may be the trademarks of their
respective companies.

CONTENTS 3
CONTENTS
Preface....................................................................................................................................... 1
Chapter 1 OVERVIEW
Features and Functions ........................................................................................................... 6
About Printer Drivers ............................................................................................................... 7
For Macintosh........................................................................................................................ 7
For UNIX/Linux ...................................................................................................................... 7
Chapter 2 PRINTING FROM WINDOWS
Before Using the Printer Driver............................................................................................. 10
Configuring the options........................................................................................................ 10
Setting the department code ............................................................................................... 14
Copying the PPD file for Windows....................................................................................... 15
Printing From Application ..................................................................................................... 16
Considerations and limitations............................................................................................. 16
How to print ......................................................................................................................... 16
Setting Up Print Options........................................................................................................19
How to set up ...................................................................................................................... 19
Print options ........................................................................................................................ 26
Printing With Best Functions for Your Needs ..................................................................... 78
Printing various print job types ............................................................................................ 78
Layout and finishing options in [Basic] tab menu ................................................................ 90
Layout and finishing options in [Finishing] tab menu........................................................... 92
Finishing options in [Paper Handling] tab menu ................................................................ 100
Finishing options in [Effect] tab menu................................................................................ 103
Using various types of paper ............................................................................................. 108
Switching equipment to print jobs...................................................................................... 113
Splitting a print job across two pieces of equipment (Tandem Printing)............................ 115
Chapter 3 PRINTING FROM Macintosh
Printing From Application on Mac OS X 10.2.4 to Mac OS X 10.7.x ................................ 118
Considerations and limitations........................................................................................... 118
How to print from Mac OS X 10.2.4 to Mac OS X 10.7.x................................................... 119
Page Setup dialog on Mac OS X 10.2.4 to Mac OS X 10.7.x............................................ 120
Print dialog on Mac OS X 10.3.x to Mac OS X 10.7.x ....................................................... 125
Print dialog on Mac OS X 10.2.x ....................................................................................... 150
Chapter 4 PRINTING FROM UNIX/Linux
Printing From Application ................................................................................................... 168
Considerations and limitations........................................................................................... 168
Printing using lp command ................................................................................................ 168
Generic “lp” and “lptap” options ......................................................................................... 168
General options ................................................................................................................. 169
PCL5e specific options ...................................................................................................... 182


4 CONTENTS
Chapter 5 MANAGING PRINT JOBS FROM THE CONTROL PANEL
Monitoring the Print Job Status .......................................................................................... 186
Normal Print / Scheduled Print jobs................................................................................... 186
Proof Print jobs.................................................................................................................. 191
Private Print jobs ............................................................................................................... 194
Hold Print jobs ................................................................................................................... 198
Invalid jobs ........................................................................................................................ 202
Printing files from USB media (USB Direct Printing) ......................................................... 205
Viewing the Print Job Log ................................................................................................... 212
Checking Supplies ............................................................................................................... 214
Viewing the drawer status ................................................................................................. 214
Checking remaining toner levels ....................................................................................... 214
Chapter 6 OTHER PRINTING METHODS
FTP Printing .......................................................................................................................... 216
Email Printing ....................................................................................................................... 217
Chapter 7 APPENDIX
Internal Fonts List ................................................................................................................ 220
Internal PCL fonts list ........................................................................................................ 220
Internal PS fonts list........................................................................................................... 221
INDEX ................................................................................................................................................................... 223

1.OVERVIEW
This chapter provides an overview of the printing functions.
Features and Functions........................................................................................................... 6
About Printer Drivers............................................................................................................... 7
For Macintosh.........................................................................................................................................................7
For UNIX/Linux.......................................................................................................................................................7

1 OVERVIEW
6 Features and Functions
Features and Functions
Extensive Client Platform Support
This equipment supports printing from IBM-compatible PC, Macintosh, and UNIX/Linux workstations. Not all features are
supported on all platforms, however.
Various Port Options
You can map this equipment to print to an SMB, IPP, Raw TCP, WSD, or LPR port.
Multiple Job Types
Job Types refer to the way this equipment handles a print job.
The Normal mode requires no special handling and is the most frequently used printing mode.
Scheduled Print lets you specify the time and date at which to print a job.
The Private Print mode allows you to hold a job in the print queue until you enter a password at the copier touch panel
to print the job.
The Hold Print mode allows you to hold a job in the hold queue until you continue the job from the touch panel.
The Proof Print mode prints the first copy of a multi-copy job and then awaits your approval before printing the
remaining copies.
Overlay File prints a document element, such as text or graphics, to a file for superimposing on the background of
other documents.
The Store to e-Filing mode allows you to store the printed document in e-Filing.
The Multiple Job Type feature allows you to print jobs of more than one type together. For example, you can store a job
in the specified e-Filing and print it at the specified time by combining Scheduled Print and Store to e-Filing.
Professional Finishing Options
Depending on the type of finishing units you have installed on this equipment, you can choose to sort, group, fold and
staple your documents (including saddle-stitching) and punch binding holes.
Sophisticated Document Layout and Assembly Options
You can choose whether to print your document as you have set it up in the application, or to impose printer-driven
document layout options such as printing in Book Format or printing Multiple Pages per Sheet.
Additionally, the printer drivers provide the ability to print selected pages on different media. This includes printing front
and back covers, inserting sheets at predefined positions within the document, or interleaving pages so that every other
page is inserted blank or printed on a different type of media.
Various Sizes of Printing Paper Available
You can use paper larger than the standard sizes defined in the custom paper size setting when you print data created
with applications.
Watermark and Image Overlay Support
Watermarks are a great way to subtly convey useful information about your printed documents. Common watermarks are
“Confidential,” “Draft,” and “Original.” Several watermarks have been pre-defined for use with your documents, or you can
create and save your own custom watermarks.
Watermarks consist of text. Image Overlays can be any combination of text, graphics or other document elements.
Printing watermarks consumes fewer resources than using Image Overlays, so you should use watermarks wherever
possible, particularly when printing speed is an issue.

1 OVERVIEW
About Printer Drivers 7
About Printer Drivers
Printer drivers required for each OS are included in the Client Utilities CD-ROM. For instructions on how to install them,
refer to the Software Installation Guide.
For Macintosh
Printer drivers required for Macintosh OSs are included in the following folders of the Client Utilities CD-ROM:
Macintosh PPD files
[Client Utilities CD-ROM]: MacPPD: OSX
This includes the PPD files to enable printing from Macintosh on the Mac OS X 10.2.4 to 10.3.X and Mac OS X 10.4 to
10.7.x, and the plug-in file to enable printing from Mac OS X 10.4 to 10.7.x.
For UNIX/Linux
Printer drivers required for UNIX/Linux are included in the following folders of the Client Utilities CD-ROM:
Solaris filter
The tar file for Solaris v2.6/2.7/7.8/8/9/10 is included in the following folder:
Choose the appropriate file depending on the model to be used.
[Client Utilities CD-ROM]/Admin/SolarisFilter/Usa/
HP-UX filter
The tar file for HP-UX ver.10.20/11.x and HP-UX64 ver.11.31 is included in the following folder:
Choose the appropriate file depending on the model to be used.
[Client Utilities CD-ROM]/Admin/HP-UXFilter/Usa/
AIX filter
The tar file for AIX 4.3.3 is included in the following folder:
Choose the appropriate file depending on the model to be used.
[Client Utilities CD-ROM]/Admin/AIXFilter/Usa/
Linux filter
The tar file for Red Hat 7.x/8.x/9.x, Red Hat Enterprise WS2, SuSE Linux 7.x/8.x/9.x, Mandrake Linux 7.x/8.x/9.x and
Turbolinux 8/10 is included in the following folder:
Choose the appropriate file depending on the model to be used.
[Client Utilities CD-ROM]/Admin/LinuxFilter/Usa/
SCO UNIX filter
The tar file for SCO UnixWare 7 and SCO Open UNIX 8 is included in the following folder:
Choose the appropriate file depending on the model to be used.
[Client Utilities CD-ROM]/Admin/OpenUnixFilter/Usa/
CUPS PPD file
The PPD file to enable printing from CUPS is included in the following folder:
Choose the appropriate file depending on the model to be used.
[Client Utilities CD-ROM]/Admin/CUPS/Usa/2-sided_default/
This PPD file enables to set 2-sided printing by default.
[Client Utilities CD-ROM]/Admin/CUPS/Usa/normal/
This PPD file enables to set 1-sided printing by default.


2.PRINTING FROM WINDOWS
This chapter provides instructions on how to print from a Windows computer.
Before Using the Printer Driver............................................................................................. 10
Configuring the options ........................................................................................................................................10
Setting the department code ................................................................................................................................14
Copying the PPD file for Windows .......................................................................................................................15
Printing From Application ..................................................................................................... 16
Considerations and limitations..............................................................................................................................16
How to print ..........................................................................................................................................................16
Setting Up Print Options........................................................................................................19
How to set up .......................................................................................................................................................19
Print options .........................................................................................................................................................26
Printing With Best Functions for Your Needs ..................................................................... 78
Printing various print job types .............................................................................................................................78
Layout and finishing options in [Basic] tab menu .................................................................................................90
Layout and finishing options in [Finishing] tab menu............................................................................................92
Finishing options in [Paper Handling] tab menu.................................................................................................100
Finishing options in [Effect] tab menu.................................................................................................................103
Using various types of paper..............................................................................................................................108
Switching equipment to print jobs.......................................................................................................................113
Splitting a print job across two pieces of equipment (Tandem Printing) .............................................................115

2 PRINTING FROM WINDOWS
10 Before Using the Printer Driver
Before Using the Printer Driver
Before printing, you have to configure the following options:
Configuration Settings
To use optional devices such as optional drawers, the Finisher or Hole Punch Unit, you must first configure these
devices. The features of these optional devices are not available unless you inform the system that the optional
devices are installed.
Before printing, you can configure the following option if necessary:
Department Code
You can use department codes to manage each job. For example, a system administrator can check how many sheets
of copies a certain department has made. When the Department code is enabled, you are prompted to enter a
department code before printing. If you enter the department code in the corresponding field in advance, you can print
without having to do this every time. Ask your administrator about the codes. When SNMP communication between
the equipment and your computer is enabled, you are also prompted to enter the code before printing.
Configuring the options
To use this equipment properly, you need to save the configuration of the options installed on the [Device Settings] tab
menu after you installed the printer drivers. In the default setting, you can obtain the configuration data of options installed
automatically by opening the [Device Settings] tab menu. If SNMP communication between this equipment and your
computer is not available, or you want to configure options manually, see the following page:
P.11 “Configuring options manually”
When SNMP communication between this equipment and your computer is enabled, you can retrieve the option
configuration information by clicking [Update Now].

2.PRINTING FROM WINDOWS
Before Using the Printer Driver 11
2 PRINTING FROM WINDOWS
Configuring options manually
If SNMP communication between this equipment and your computer is not available:
Setting the [Device Settings] tab manually
You need to log in to Windows with the “Administrator” privilege.
1
Click [Start] menu and select [Devices and Printers].
The Printers folder appears.
For Windows Vista or Windows Server 2008
Click [Start] menu, [Control Panel], [Hardware and Sound] and select [Printers].
For Windows XP or Windows Server 2003
Click [Start] menu and select [Printers and Faxes].
2
Select the printer driver for this equipment, and then click [Printer properties] in the
[File] menu.
The printer driver properties dialog box appears.
For Windows XP / Windows Vista / Windows Server 2003 / Windows Server 2008, click [Properties] in the [File]
menu and select the printer driver for this equipment.
If the [File] menu is not displayed, press [Alt].
If the dialog box displayed does not allow the printer driver properties to be changed, follow the procedure
below.
- For Windows Vista, click [Run as administrator] and [Properties] in the [File] menu.
If the password entry screen appears, enter the administrator password.
The [User Account Control] dialog box appears. Click [Continue].
- For Windows 7, some tab menus have a button in the printer driver properties. To change the
properties, click on it. If the properties cannot be changed, ask your system administrator.
To change a network-installed printer driver, the administrator privilege is necessary. Ask your system
administrator for details.

2 PRINTING FROM WINDOWS
12 Before Using the Printer Driver
3
Display the [Device Settings] tab menu, and set the following options.
Model Selection — This sets the model type. The setup items of the printer driver are changed according to the
model selected.
If you select [PCL], you can narrow down the setup items of the printer driver to those used commonly in all of
the OKI MFP series. It is convenient in such cases as when you are using a printer driver already installed to
other OKI MFP.
Option — This option sets whether the following optional devices are installed.
Drawers — This sets whether the optional drawers or the Large Capacity Feeder (optional) (not available for
some countries or regions) are installed.
Finisher — This sets whether or not the Finisher (optional) is installed.
Hole Punch Unit — This sets whether or not the Hole Punch Unit (optional) is installed.
External LCF — This sets whether or not the External Large Capacity Feeder (optional) is installed.
Inserter Unit — This sets whether or not the Inserter Unit (optional) is installed.
The Large Capacity Feeder (optional) is not available for some countries or regions.
Setup items differ depending on the model and the option configuration.
For more information about each item, see the descriptions about the [Device Settings] tab.
P.69 “[Device Settings] tab”
4
Click [Drawer Settings].
The [Drawer Settings] dialog box appears.

2.PRINTING FROM WINDOWS
Before Using the Printer Driver 13
2 PRINTING FROM WINDOWS
5
Set the following options and click [OK].
Drawer 1 — Select the size and type of paper that is loaded in the 1st Drawer.
Drawer 2 — Select the size and type of paper that is loaded in the 2nd Drawer.
Drawer 3 — Select the size and type of paper that is loaded in the 3rd Drawer (optional) when it is installed.
Drawer 4 — Select the size and type of paper that is loaded in the 4th Drawer (optional) when it is installed.
LCF — Select the size and type of paper that is loaded in the Large Capacity Feeder (optional) when it is installed.
External LCF — Select the size and type of paper that is loaded in the External Large Capacity Feeder (optional)
when it is installed.
Bypass Tray — Select the type of paper that is loaded in the Bypass Tray.
Override Application Paper Source Settings — Select this check box to use the paper source setting in the
printer driver rather than the application setting.
Setup items differ depending on the model and the option configuration.
For more information about each item, see the descriptions about the Drawer Settings.
P.71 “Drawer Settings”
6
Click [Apply] or [OK] to save settings.

2 PRINTING FROM WINDOWS
14 Before Using the Printer Driver
Setting the department code
When this equipment is managed by department codes, you have to enter yours on the printer driver.
This allows a network administrator to check the number of copies printed by specific department members. Also users
can check who submitted the print jobs, by touch panel display and monitoring tools.
Please ask your administrator whether you should enter the Department Code.
When the User Management setting is enabled, it is used to manage a print job instead of the Department Code
Management setting. In this case, a user name that has been entered to log in to your computer is used for the
authentication of the print job. Therefore, you do not need to set your department code to the printer driver but you
must register your user name in advance. If your user name is not registered, the print job is processed as an
invalid one according to the User Authentication Enforcement setting. Also if a print job is sent in RAW format, it is
processed according to the RAW Print Job setting. For more information about the User Authentication
Enforcement setting or the RAW Print Job setting, refer to the TopAccess Guide.
If the No Limit Black function is enabled, you do not have to specify the department code when you print a
document with [Black and White] selected for the [Color] option in the [Basic] tab of printer driver.
How the equipment performs printing for an invalid department code print job, for which an invalid department code
is specified, varies depending on the Invalid Department Code Print Job setting that can be set in the TopAccess
Administrator mode and whether SNMP communication is enabled or not.
- When SNMP communication is enabled and Invalid Department Code Print Job is set to [Store to invalid job
list], an error message will be displayed when an invalid department code is entered.
- When SNMP communication is disabled and Invalid Department Code Print Job is set to [Store to invalid job
list], the invalid department code print job will be stored in the invalid department code print job list without
printing.
- When the Invalid Department Code Print Job is set to [Print], the invalid department code print job will be
printed.
- When the Invalid Department Code Print Job is set to [Delete], the invalid department code print job will be
deleted.
A department code needs to be entered every time you begin printing. If you have to use a different department
code for each print job, enter it when you begin printing.
Entering department code
1
Click [Start] menu and select [Devices and Printers].
The Printers folder appears.
For Windows Vista or Windows Server 2008
Click [Start] menu, [Control Panel], [Hardware and Sound] and select [Printers].
For Windows XP or Windows Server 2003
click [Start] menu and select [Printers and Faxes].

2.PRINTING FROM WINDOWS
Before Using the Printer Driver 15
2 PRINTING FROM WINDOWS
2
Select the printer driver of this equipment, and then click [File] menu and select
[Printing Preferences].
If the [File] menu is not displayed, press [Alt].
The printing preferences dialog box appears.
3
Display the [Others] tab menu and enter your department code in the [Department
Code] box.
In the [Department Code] box, you can enter a department code within 63 characters.
A department code must consist of one-byte characters such as numbers from 0 to 9, letters of the alphabet
from A to Z (both capital and small ones), a hyphen (-), an underscore (_), and a period (.).
4
Click [Apply] or [OK] to save the settings.
Copying the PPD file for Windows
The Client Utilities CD-ROM contains a printer description file for popular Windows applications. For applications not
allowing the automatic installation of PPD files, copy the PPD file to a proper directory in order to enable printer-specific
settings in the [Print] dialog box or the [Page] Setup dialog box.
For more information about copying PPD files, refer to the Software Installation Guide.

2 PRINTING FROM WINDOWS
16 Printing From Application
Printing From Application
This section describes how to print a document from application.
P.16 “Considerations and limitations”
P.16 “How to print”
Considerations and limitations
When the User Management setting is enabled, it is used to manage a print job instead of the Department Code
Management setting. In this case, a user name that has been entered to log in to your computer is used for the
authentication of the print job. Therefore, you do not need to set your department code to the printer driver but you
must register your user name in advance. If your user name is not registered, the print job is processed as an invalid
one according to the User Authentication Enforcement setting. Also if a print job is sent in RAW format, it is processed
according to the RAW Print Job setting. For more information about the User Authentication Enforcement setting or the
RAW Print Job setting, refer to the TopAccess Guide.
When the Windows Domain Authentication is used for the User Management Setting, your computer must log in the
domain.
If the No Limit Black function is enabled, you do not have to specify the department code when you print a document
selecting [Black and White] in the [Color] option in the [Basic] tab of printer driver.
Some print options can be set from both the application and the printer driver, such as collation. If the collation is set
from the application, documents may not be properly printed. If that happens, use the printer driver to set the collation.
Depending on the application, some print options such as the orientation need to be set from the application. For print
options that can be set from both the application and the driver, refer to the manual of the application.
Cautionary points when using a PS printer driver
When printing with a PS printer driver from Adobe Acrobat, this option is disabled. To use this option with PostScript,
use a PCL Printer driver, click [Customization] on the [Device Settings] tab, and select [PostScript] in the [Output PDL]
box of the [PDL Settings] tab.
When any of the following functions is set in a PS printer driver, the print function will work appropriately even if print
data are generated in the application side since this happens in the printer driver side by ignoring the pass-through
printing of the application.
- Print to Overlay file
- Print Overlay Image
-Nin1
-Booklet
- Interleave (Duplicate)
- Templates printing
- Print Paper Size
- Image Scale
-PosterPrint
- Tandem Print
How to print
Once you have installed the printer driver and configured it properly, you can print directly from most Windows
applications. Simply choose the Print command from your application.
You can print using the various functions by setting print options on the printer driver.
Printing from Windows applications
The following describes an example for printing from Notepad on Windows 7.
1
Open a file and select [Print] from the [File] menu of the applications.
The [Print] dialog box appears.

2.PRINTING FROM WINDOWS
Printing From Application 17
2 PRINTING FROM WINDOWS
2
Select the printer driver of the equipment to be used and click [Preferences].
The printing preferences dialog box appears.
The procedures for displaying the properties dialog for the printer driver may be different depending on the application
that you are using. See your application’s manual about displaying the printer properties dialog box.
3
Setting the print options on each tab according to how you want to print.
Setting the print options varies depending on how you want to print a document.
P.26 “Print options”
You can also set the print options using setting profiles.
P.20 “Setting print options using profiles”
4
Click [OK] to save the settings.

2 PRINTING FROM WINDOWS
18 Printing From Application
5
Click [Print] to print a document.
Other manuals for CX4545 MFP
10
This manual suits for next models
5
Table of contents
Other Oki All In One Printer manuals

Oki
Oki LUCIDIOM EQ-9800 User manual

Oki
Oki OKIFAX 5050 User manual

Oki
Oki MC160MFP Mounting instructions

Oki
Oki ES9460 MFP User manual

Oki
Oki C9600 Series Configuration guide

Oki
Oki ES5462dw MFP User guide

Oki
Oki MB760dnfax User manual

Oki
Oki CX4545 MFP Programming manual

Oki
Oki C9300 Series User manual

Oki
Oki B2520 MFP Training manual