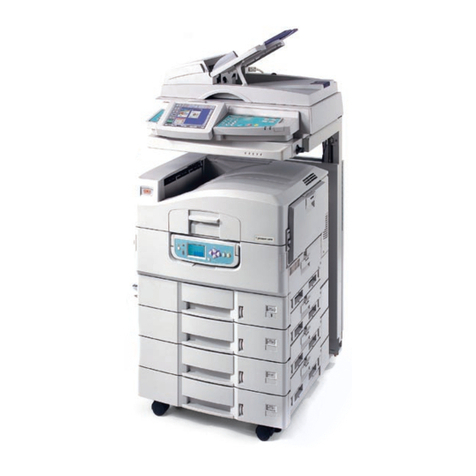
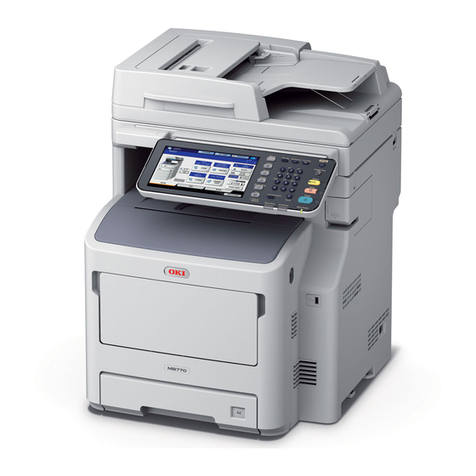
Oki CX 1145 MFP Instruction Manual

Network Administration Guide
CX1145 MFP
59315601, Rev. 1.0

TRADEMARKS AND COPYRIGHT 1
TRADEMARKS AND COPYRIGHT
Trademarks
yThe official name of Windows 98 is Microsoft Windows 98 Operating System.
yThe official name of Windows Me is Microsoft Windows Me Operating System.
yThe official name of Windows NT is Microsoft Windows NT Operating System.
yThe official name of Windows 2000 is Microsoft Windows 2000 Operating System.
yThe official name of Windows XP is Microsoft Windows XP Operating System.
yThe official name of Windows Vista is Microsoft Windows Vista Operating System.
yThe official name of Windows Server 2003 is Microsoft Windows Server 2003 Operating
System.
yMicrosoft, Windows, Windows NT, and the brand names and product names of other
Microsoft products are trademarks of Microsoft Corporation in the US and other countries.
yApple, AppleTalk, Macintosh, Mac, TrueType, and LaserWriter are trademarks of Apple Inc.
in the US and other countries.
yPostScript is a trademark of Adobe Systems Incorporated.
yNetscape is a trademark of Netscape Communications Corporation.
yIBM, AT and AIX are trademarks of International Business Machines Corporation.
yNOVELL, NetWare, and NDS are trademarks of Novell, Inc.
yOther company names and product names in this manual are the trademarks of their respec-
tive companies.

2 Preface
Preface
Thank you for purchasing Multifunctional Digital Systems. This Network Administration Guide
explains the instructions for administrators to set up and manage the Multifunctional Digital Sys-
tems. Read this guide before using to your Multifunctional Digital Systems. Keep this guide
within easy reach, and use it to configure an environment that makes best use of the .
About This Guide
This manual describes about the setting up network servers for network functions.
For information about initial setup for the Multifunctional Digital Systems, see the Quick Start
Guide.
Conventions
yThe term “this equipment” in this manual refers to the Multifunctional Digital Systems.
yThe term “e-Filing” in this manual is an abbreviation of “electronic filing”.
Precautions in this manual
To ensure correct and safe use of this equipment, this operator’s manual describes safety pre-
cautions according to the three levels shown below.
You should fully understand the meaning and importance of these items before reading this
manual.
Other than the above, this manual also describes information that may be useful for the opera-
tion of this equipment with the following signage:
Indicates a potentially hazardous situation which, if not avoided, could result
in death, serious injury, or serious damage, or fire in the equipment or sur-
rounding assets.
Indicates a potentially hazardous situation which, if not avoided, may result in
minor or moderate injury, partial damage of the equipment or surrounding
assets, or loss of data.
Indicates a procedure you should follow to ensure the optimal performance of
the equipment and problem-free copying.
Describes handy information that is useful to know when operating the equip-
ment.
Pages describing items related to what you are currently doing. See these
pages as required.

TABLE OF CONTENTS 3
TABLE OF CONTENTS
TRADEMARKS AND COPYRIGHT...............................................................1
Preface...........................................................................................................2
Chapter 1 Setting up Network Server
About Network Server Setup.......................................................................6
Setting up Windows Print Server................................................................7
Configuring the Windows Print Server.......................................................7
Setting up NetWare Print Server .................................................................9
Setting up the NetWare in Bindery Mode ..................................................9
Setting up the NetWare in NDS Mode.....................................................11
Setting up the NetWare in NDPS Mode ..................................................12
Setting up the NetWare in iPrint Mode ....................................................17
Setting up DNS and Mail Servers..............................................................19
Tips of Setting up the DNS and Mail Servers for Email...........................21
Tips of Setting up the DNS and Mail Servers for Internet Fax.................21
Tips of Setting up the DNS and Mail Servers for Offramp Gateway........21
Setting up LDAP Authentication Service .................................................22
Configuring DNS Forward and Reverse Lookup Zones ..........................22
Configuring the Equipment Using TopAccess ......................................... 27
Chapter 2 Troubleshooting
Troubleshooting Overview ........................................................................30
Network Connectivity Problems...............................................................30
Cannot Discover Device ..........................................................................34
Cannot Ping the Device...........................................................................36
Cannot Print From Client ......................................................................... 37
Network or Touch Panel Display Disabled After LDAP Search............... 38
LDAP Authentication Takes a Long Time................................................38
Troubleshooting Hardware Errors ............................................................39
Common Errors ....................................................................................... 39
Device Status Indicators.......................................................................... 40
TopAccess Error Messages ....................................................................42
Troubleshooting Network Errors ..............................................................46
Cannot See This Equipment....................................................................46
Cannot Print To This Equipment .............................................................48
Chapter 3 Appendix
Default Setting List.....................................................................................50
Default Settings for General Setting........................................................50

4 TABLE OF CONTENTS
Default Settings for Network Setting........................................................51
Default Settings for Copier Setting ..........................................................55
Default Settings for Fax Setting (Optional) ..............................................56
Default Settings for Save as file Setting .................................................. 56
Default Settings for Email Setting............................................................56
Default Settings for Internet Fax Setting.................................................. 57
Default Settings for Printer Setting ..........................................................57
Default Settings for Print Service.............................................................57

1.Setting up Network Server
This section describes the instructions on how to set up the network servers.
About Network Server Setup ...................................................................................6
Setting up Windows Print Server ............................................................................7
Configuring the Windows Print Server ................................................................................................7
Setting up NetWare Print Server..............................................................................9
Setting up the NetWare in Bindery Mode............................................................................................9
Setting up the NetWare in NDS Mode ..............................................................................................11
Setting up the NetWare in NDPS Mode ............................................................................................12
Setting up the NetWare in iPrint Mode..............................................................................................17
Setting up DNS and Mail Servers ..........................................................................19
Tips of Setting up the DNS and Mail Servers for Email.....................................................................21
Tips of Setting up the DNS and Mail Servers for Internet Fax ..........................................................21
Tips of Setting up the DNS and Mail Servers for Offramp Gateway .................................................21
Setting up LDAP Authentication Service..............................................................22
Configuring DNS Forward and Reverse Lookup Zones....................................................................22
Configuring the Equipment Using TopAccess...................................................................................27

1 Setting up Network Server
6 About Network Server Setup
About Network Server Setup
This chapter describes environments that typically include one or more network servers (Novell
NetWare servers and Windows print servers) that will share printing to this equipment. It
describes setting up servers that use IPX/SPX or TCP/IP protocols for communicating with this
equipment. In addition, it includes some guidelines for setting up the DNS server and mail server
to enable the Scan to Internet Fax and Email features, and for setting up the LDAP service using
the Kerberos Network Authentication Service.

Setting up Windows Print Server 7
Setting up Windows Print Server
If a Windows NT 4.0, Windows 2000, Windows XP, Windows Vista, and Windows Server 2003
computer is connected to this equipment using TCP/IP, it can print directly to this equipment. If
the computer shares the printer over the network, it is acting as a print server for Windows cli-
ents. The client machines print to this equipment by printing to the Windows print server. Printing
can then be monitored and controlled at the Windows print server machine.
The Windows print server can also use AppleTalk protocols for printing to this equipment as an
alternative to TCP/IP. When creating a printer to share with AppleTalk users, do not “capture” the
printer. Capturing the printer forces all users to print to the server rather than directly to the
printer. If you capture the printer, this equipment print connections will not appear in the Mac OS
Chooser.
Configuring the Windows Print Server
To configure a Windows print server to communicate with this equipment, follow these general
steps. More detail is provided in subsequent sections.
yLoad the TCP/IP network protocol on the server and configure it with an IP address, subnet
mask, and gateway.
yMake sure the Microsoft TCP/IP printing service is installed, and that the computer is using
Raw TCP or LPR printing.
yOn the Windows print server, install the appropriate printer drivers (if necessary) and share
the printer on the network.
P.7 “Installing the Printer Drivers as Shared Printers”
yConfigure clients for printing to the printer shared by the Windows print server.
P.8 “Setting up the Clients”
Installing the Printer Drivers as Shared Printers
First, install the Windows printer drivers. The installation instructions in the Printing Guide can
be used for every computer that will print directly and independently to this equipment. However,
if you are an administrator running Windows NT 4.0 Server, Windows NT 4.0 Workstation, Win-
dows 2000 Professional, Windows XP Professional, Windows Vista, or Windows Server 2003,
you can also create a printer and share it with clients on the network. When a printer is shared,
clients who are not able or are not given permission to establish an independent network con-
nection to this equipment can print through the server.
If you have not installed the printer files on the Windows print server computer, do so now follow-
ing the instructions for Raw TCP or LPR printing in the Printing Guide. Then, or if you have
already installed the printer files on the computer you are using as a Windows print server, see
your Windows documentation for information about sharing the printer.
In addition, the printer files for every Windows version can be installed to the shared printer so
that Windows clients can use the shared printer as a Point and Print printer, which enables cli-
ents to download the appropriate printer driver from the shared printer.
yWhen installing the printer driver to Windows NT 4.0 clients from the Windows NT 4.0 print
server, please check the “Always spool RAW datatype” box on the Print Processor dialog
box (displayed by clicking the [Print Processor...] button on the General tab of printer proper-
ties dialog box of the shared printer on the Windows NT 4.0 print server).
yWhen installing the Windows 2000 PCL printer driver to the Windows 2000 server, you must
clear the “Enable advanced printing features” check box on the Advanced tab of the printer
properties dialog box.
1 Setting up Network Server
8 Setting up Windows Print Server
Setting up the Clients
Each client of a Windows print server is already using a network protocol to communicate with
the server. Each client can print to this equipment if the printer has been shared by a Windows
print server. In that case the client does not have to use the same network protocol to connect to
the Windows print server as the server uses to communicate with the equipment.
To set up printing on client computers, connect to the print server and select the shared printer.
Right-click the printer and select [Open]. When prompted, click [Yes] to have Windows set up
the printer.
After clients have selected the printer, they can choose it from the Print Setup, Page Setup, or
Print dialog box of their application. Clients can change printing options for their own job, but
printer properties are grayed and not available for changing. When a client prints a document,
the job is transmitted to the Windows print server, and from there to this equipment.
The job is listed in the Print Manager on the client computer, and the administrator can track it in
the Print Manager on the Windows print server.

Setting up NetWare Print Server 9
Setting up NetWare Print Server
This equipment supports the following Novell printing services:
yNetWare 5.1/6.0/6.5 bindery emulation mode
yNetWare 5.1/6.0/6.5 NDS mode (over IPX/SPX only)
yNetWare 5.1/6.0/6.5 NDPS mode
yNetWare 6.0/6.5 iPrint mode
This chapter provides an overview of how to set up this equipment as a Novell Network Printer,
Print Server, or NDPS Printer Agent. For more detailed information, refer to your Novell docu-
mentation.
Setting up the NetWare in Bindery Mode
You can connect only one directory tree to this equipment. If you need to connect additional Net-
Ware 5.1/6.0/6.5 servers, do so by using bindery emulation, which causes the 5.1/6.0/6.5 server
to behave like, and be accepted as, a NetWare 3.x server.
The file server selected must not be in the same tree as that selected in NDS Setup.
In order to set up the NetWare 5.1/6.0/6.5 server in bindery emulation mode for printing to this
equipment, the network administrator must do the following:
yEdit the network startup file to set the bindery context.
P.9 “Editing the Network Startup File”
yConfigure the print queues, print server, and printer on the file server.
P.10 “Setting up the NetWare File Server”
Editing the Network Startup File
The following procedures explain how to edit the bindery contexts in the network startup file.
Editing the bindery context
1
On NetWare file server, enter “load install” and press the [Enter]
key.
2
Select [NCF Files Options] from the menu.
3
Select [Edit AUTOEXEC.NCF] from the menu.
4
Search for the file to see if you have a statement similar to the fol-
lowing included:
SET BINDERY CONTEXT=0U=ENG
yIf the statement above can be found in the file, the server has a bindery. If this is not
found, enter the statement above and save the file.
5
Restart the NetWare file server.

1 Setting up Network Server
10 Setting up NetWare Print Server
Setting up the NetWare File Server
The following explains how to set up a NetWare 4.x file server with bindery emulation so that
network users can print to this equipment from their computers, and this equipment can obtain
print jobs from the NetWare server.
For NetWare 5.1/6.0/6.5 in emulation, the NetWare print server and print queue for this equip-
ment are created and configured from NetWare Print Console (PCONSOLE), a NetWare utility
that is stored in NetWare’s PUBLIC directory.
Setting up the bindery with PCONSOLE
1
Start PCONSOLE at the DOS prompt on the computer.
2
Select [Print Queue] from the Available Options menu and press the
[Enter] key.
yThe Print Queues window appears.
3
Press the [Insert] key and enter the print queue name and press the
[Enter] key.
4
Press the [Esc] key to close the Print Queues window.
5
Select [Print Server] from the Available Options menu and press the
[Enter] key.
6
When the message is displayed, press the [Enter] key.
yThe Print Servers window appears.
7
Press the [Insert] key and enter a print server name and press the
[Enter] key.
yThe print server name must be “MFP_[NIC Serial Number]”. You can find the Unit
Serial Number of the equipment on the NIC Configuration list can be printed from the
control panel.
8
Select a created print server name from the Print Servers window
and press the [Enter] key.
yThe Print Server Information menu appears.
9
Select [Printers] from the Print Server Information menu and press
the [Enter] key.
yThe Defined Printers window appears.
10
Press the [Insert] key and enter a printer name and press the
[Enter] key.
11
Select a created printer name from the Defined Printers window and
press the [Enter] key.
12
Highlight the Printer Type field and press the [Enter] key.
yThe Printer Type menu appears.
13
Select “Other/Unknown” and press the [Enter] key.
14
Highlight the Print queue assigned field and press the [Enter] key.
yThe NetWare Server\Print Queue window appears.

Setting up NetWare Print Server 11
15
Press the [Insert] key and select the created queue from the Avail-
able Print Queues menu and press the [Enter] key.
yUp to 10 queues can be selected. If you created several queues, repeat the operation
to add all queues that are required.
16
When more than one queue is added, you must enter the priority
value.
17
Press the [Esc] key until the Save Changes menu appears.
18
Select “Yes” and press the [Enter] key.
Setting up the NetWare in NDS Mode
The following explains how to set up a NetWare 5.1/6.0/6.5 file server with NDS so that network
users can print to this equipment from their computers, and this equipment can obtain print jobs
from the NetWare server. More detail is provided in your NetWare documentation.
Setting up the NDS with NetWare Administrator
1
In NetWare Administrator, select the container object to create the
printer and click the [Object] menu and select [Create].
yThe New Object dialog box appears.
2
In the Class of new object list, select “Print Queue” and click [OK].
yThe Create Print Queue dialog box appears.
3
Select “Directory Service Queue” and enter the name of the print
queue in the Print Queue name field.
4
Click the browse button at the next to the Print Queue Volume field.
yThe Select Object dialog box appears.
5
Select the volume to create a print queue and click [OK].
6
Click [Create].
yThe print queue is created.
7
Click the [Object] menu and select [Create].
yThe New Object dialog box appears.
8
In the Class of new object list, select “Printer” and click [OK].
yThe Create Printer dialog box appears.
9
Enter the printer name, check the “Define additional properties”
option and click [Create].
10
Display the Assignments window and click [Add].
yThe Select Object dialog box appears.
11
Select a created queue and click [OK].
12
Display the Configuration window, select “Other/Unknown” at the
Printer Type drop down box and click [OK].
yThe printer is created.

1 Setting up Network Server
12 Setting up NetWare Print Server
13
Click the [Object] menu and select [Create].
yThe New Object dialog box appears.
14
In the Class of new object list, select “Print Server” and click [OK].
yThe Create Print Server dialog box appears.
15
Enter the print server name, check the “Define additional proper-
ties” option and click [Create].
yThe print server name must be “MFP_[NIC Serial Number]”. You can find the Unit
Serial Number of the equipment on the NIC Configuration list can be printed from the
control panel.
16
Display the Assignments window and click [Add].
yThe Select Object dialog box appears.
17
Select a created printer and click [OK].
18
Click [OK] to close Assignments window for the print server.
yThe print server is created.
Setting up the NetWare in NDPS Mode
This equipment supports printing over NetWare 5.1/6.0/6.5 networks running either the TCP/IP
protocols or the IPX protocol. For pure IP printing, this equipment takes advantage of features in
NDPS (Novell Distributed Print Services).
An administrator can use Novell Printer Gateway to set up the NetWare server in NDPS mode.
P.12 “Setting up NDPS Using Novell Printer Gateway”
Setting up a NetWare environment correctly requires the presence and active cooperation of the
Novell network administrator. You must have administrator privileges on the network to create
new NDPS objects.
Setting up NDPS Using Novell Printer Gateway
NDPS is not like the earlier queue-based versions of NetWare printing. Instead, you use an
NDPS Manager and a Printer Agent, which control the tasks previously handled by a print
queue, print server, and spooler. You can also make the printer driver available for clients to
download from Windows client computers.
Before configuring the NetWare file server in NDPS mode, please confirm followings:
yFor NetWare 5.1, the Support Pack 8 and Novell Gateway version 2.1.6 or later with
ndps3sp2c are installed.
yFor NetWare 6.5, the Support Pack 5 and Novell Gateway version 3.00 or later with
ndps3sp2c are installed.
yMake sure you have a valid IP address for this equipment and for any computers that will
print to it (when used in the TCP/IP network).
yIn the equipment setup, enable TCP/IP and enter the IP address, Subnet mask, and Gate-
way address for this equipment (when used in the TCP/IP network).

Setting up NetWare Print Server 13
Setting up the NDPS with NetWare Administrator
1
In NetWare Administrator, select the container object to create the
printer and click the [Object] menu and select [Create].
yThe New Object dialog box appears.
2
Select “NDPS Broker” and click [OK].
yThe Create NDPS Broker Object dialog box appears.
If the NetWare file server has been installed as supporting the NDPS service, the NDPS
Broker is created as default. In this case, you can use the default NDPS Broker.
3
Specify the “NDPS Broker Name” and “RMS Volume” options, and
click [Create].
yThe NDPS Broker is created.
4
Click the [Object] menu and select [Create].
yThe New Object dialog box appears.
5
Select “NDPS Manager” and click [OK].
yThe Create NDPS Manager Object dialog box appears.
6
Specify the “NDPS Manager Name”, “Resident Server”, and “Data-
base Volume” option, and click [Create].
yThe NDPS Manager is created.
7
After creating the NDPS Broker and NDPS Manager, please load the
NDPS Broker and NDPS Manager by entering the following com-
mands in the Console screen of the NetWare server.
load broker [Created NDPS Broker Name]
load NDPSM [Created NDPS Manager Name]
8
Double-click the NDPS Broker object that you created.
yThe NDPS Broker dialog box appears.
9
Click [Resource Management (RMS)].
10
Click [Add Resources...].
yThe Manage Resources dialog box appears.
If the [Add Resources...] button is disabled, make sure that the broker is loaded. This
button will be enabled only when the broker is loaded.
11
Select the applicable OS icon in the “Resource Types” list, and
click [Add...].
yThe Add Resources dialog box appears.

1 Setting up Network Server
14 Setting up NetWare Print Server
12
Click [Browse].
yThe Select Printer Driver dialog box appears.
The [Browse] button may not be available according to the Support Pack version. If the
[Browse] button is disabled, specify “/DISABLETLSMGR” option when starting the
nwadmin32.exe.
13
Insert the Drivers & Network Utilities CD-ROM into the CD-ROM
drive.
yWhen inserting the Drivers & Network Utilities CD-ROM, the installer may automati-
cally start. Click [Cancel] to exit the installer and continue the operation.
14
Locate the directory where the printer driver for your Windows ver-
sion is located, select the INF file.
yWhen you want to install the PCL5c printer driver for Windows 98/Me, locate "[CD-
ROM drive]:\Client\Drivers\9X_ME\PCL5c\<language>".
yWhen you want to install the PCL6 printer driver for Windows 98/Me, locate "[CD-
ROM drive]:\Client\Drivers\9X_ME\PCL6\<language>".
yWhen you want to install the PSL3 printer driver for Windows 98/Me, locate "[CD-
ROM drive]:\Client\Drivers\9X_ME\PS\<language>".
yWhen you want to install the PCL5c printer driver for Windows NT 4.0, locate "[CD-
ROM drive]:\Client\Drivers\NT\PCL5c\<language>".
yWhen you want to install the PCL6 printer driver for Windows NT 4.0, locate "[CD-
ROM drive]:\Client\Drivers\NT\PCL6\<language>".
yWhen you want to install the PSL3 printer driver for Windows NT 4.0, locate "[CD-
ROM drive]:\Client\Drivers\NT\PS\<language>".
yWhen you want to install the PCL5c printer driver for Windows 2000/XP/Vista/Server
2003, locate "[CD-ROM drive]:\Client\Drivers\W2K_XP_VISTA\PCL5c\<language>".
yWhen you want to install the PCL6 printer driver for Windows 2000/XP/Vista/Server
2003, locate "[CD-ROM drive]:\Client\Drivers\W2K_XP_VISTA\PCL6\<language>".
yWhen you want to install the PSL3 printer driver for Windows 2000/XP/Vista/Server
2003, locate "[CD-ROM drive]:\Client\Drivers\W2K_XP_VISTA\PS\<language>".
-When you want to install the PCL6 printer driver, locate "[CD-ROM drive]:\Client\Driv-
ers\XP_VISTA_X64\PCL6\<language>".
-When you want to install the PCL5c printer driver, locate "[CD-ROM drive]:\Client\Driv-
ers\XP_VISTA_X64\PCL5c\<language>".
- When you want to install the PSL3 printer driver, locate "[CD-ROM drive]:\Client\Driv-
ers\XP_VISTA_X64\PS\<language>".
15
Click [OK].
yReturns to the Add Resources dialog box.
16
Click [OK].
yReturns to the Manage Resources dialog box.
17
Repeat the procedure from Step 10 to Step 15 to add all printer driv-
ers for the applicable OS.
18
Click [OK] to close the Manage Resources dialog box.
yReturns to the NDPS Broker dialog box.

Setting up NetWare Print Server 15
19
Click [OK] to close the NDPS Broker dialog box.
20
Click the [Object] menu and select [Create].
yThe New Object dialog box appears.
21
Select “NDPS Printer” and click [OK].
yThe Create NDPS Printer Object dialog box appears.
22
Specify the “NDPS Printer Name” option, select “Create a New
Printer Agent”, and click [Create].
yThe Create Printer Agent dialog box appears.
When setting up the NDPS in the iPrint mode, do not enter more than 7 characters for the
“NDPS Printer Name” option. If you enter more than 7 characters for the “NDPS Printer
Name” option, the default watermarks will not be registered when installing the printer
drivers in Windows 98/Me.
23
Specify the “Printer Agent (PA) Name” and “NDPS Manager Name”
option. Then select “Novell Printer Gateway” in the “Gateway
Types” list and click [OK].
yThe Warning dialog box appears.
24
Click [OK].
yWhen it finishes initializing, the Information dialog box appears.
25
Click [OK].
yThe Configure Novell PDS for Printer Agent dialog box appears.
26
Select “((NONE))” in the “Printer Type” list and select “Novell Port
Handler” in the “Port Handler Type” list. Then click [OK].
yThe Configure Port Handler for Printer Agent dialog box appears.
27
Continue the procedure according to which connection type to be
used.
P.15 “Configuring the LPR connection in the TCP/IP network”
P.16 “Configuring the queue based connection in the IPX/SPX network”
Configuring the LPR connection in the TCP/IP network
1
In the Configure Port Handler for Printer Agent dialog box, select
“Novell LPR Printer Gateway (SNMP)” (or “Remote (LPR on IP)”)
and click [Next].
2
Enter the IP address of this equipment in the “Host Address” field,
and click [Finish].
yIt takes about 60 seconds to load the Printer Agent. After it finishes loading the
Printer Agent, the Select Printer Drivers dialog box appears.
3
Select the printer drivers to be installed in the “Printer Drivers” list
at each OS tab, and click [Continue].
yThe Information dialog box appears.

1 Setting up Network Server
16 Setting up NetWare Print Server
4
Click [OK].
yIt takes about 60 seconds to complete the creation of the NDPS Printer object.
5
Double-click the NDPS Printer object that you created.
yThe NDPS Printer dialog box appears.
6
Click [NDPS Remote Printer Management].
7
Check the “Install to workstation in this container” and click
[Update].
8
Click [OK] to close the NDPS Printer dialog box.
Configuring the queue based connection in the IPX/SPX network
1
In the Configure Port Handler for Printer Agent dialog box, select
“Forward Jobs to a Queue” and click [Next].
2
Enter the NDS queue name in the “Queue Name” field and the user
name in the “Queue User Name” field. Then click [Finish].
yThe Select Printer Drivers dialog box appears.
The NDS queue must be created.
3
Select the printer drivers to be installed in the “Printer Drivers” list
at each OS tab, and click [Continue].
yThe Information dialog box appears.
4
Click [OK].
yIt takes about 60 seconds to complete the creation of the NDPS Printer object.
5
Double-click the NDPS Printer object that you created.
yThe NDPS Printer dialog box appears.
6
Click [NDPS Remote Printer Management].
7
Check the “Install to workstation in this container” and click
[Update].
8
Click [OK] to close the NDPS Printer dialog box.

Setting up NetWare Print Server 17
Setting up the NetWare in iPrint Mode
This equipment also supports the Novell iPrint.
Using the iPrint system, you can set up the printer that can be accessed using URL from client
computers. The iPrint system is based on the NDPS architecture so that you must have NDPS
installed and configured in the NetWare 6.0/6.5 server.
Before configuring the NetWare file server in NDPS mode, please confirm followings:
yThe NDPS Broker, NDPS Manager, and NDPS Printer must be created.
P.13 “Setting up the NDPS with NetWare Administrator”
yThe Novell iManager must be installed.
For more information to install the Novell iManager, please see the documentation for the
Novell iManager that is provided by Novell, Inc.
In order to set up the iPrint system, the network administrator must do the following:
1. Installing iPrint
P.17 “Installing iPrint”
2. Enabling the DNS on the Printer Services Manager
P.17 “Enabling DNS on the Printer Services Manager”
3. Enabling iPrint service
P.18 “Enabling iPrint Service”
Installing iPrint
1
Click [Novell] in the GUI screen of NetWare and select [Install].
2
Click [Add].
If the iPrint/NDPS is displayed in the list, iPrint has already been installed during the
installation of NetWare. In that case, you do not have to operate the installation for iPrint.
3
Insert the NetWare Operating System CD-ROM into your CD-ROM
drive.
4
Select the “PRODUCT.Nl” file that is located in the root of the CD-
ROM, and click [OK].
5
Follow the prompts to install iPrint/NDPS.
Enabling DNS on the Printer Services Manager
Before enabling DNS for the Printer Services Manager, you should add the DNS name for the
Printer Services Manager to the DNS server.
After you add the DNS to the DNS server, follow the steps below to enable the DNS on the
Printer Services Manager.
1
At the server console, enter the following syntax.
NDPSM <NDPS Manager Name> /dnsname=<NDPS Manager DNS Name>

1 Setting up Network Server
18 Setting up NetWare Print Server
Enabling iPrint Service
After enabling DNS on the Printer Services Manager, enable the iPrint Service using the iMan-
ager.
yTo do this, iManager must be installed on your NetWare server. For information about install-
ing iManager, see the documentation for iManager that is provided by Novell, Inc.
yYou must use a supported browser to access iManager. The supported browsers vary
depending on the version of iManager that you installed.
For iManager 1.5.2
- Microsoft Internet Explorer 5.5 or later (Recommended)
- Netscape 6.2 or later
For iManager 2.0.x
- Microsoft Internet Explorer 6 SP1 or later (Recommended)
- Netscape 7.1 or later
- Mozilla 1.4 or later
1
Enter the URL “https://<IP address>:2200” in the address bar of
your browser, and click the iManager link for the NetWare server
under eDirectory iManager.
2
Enter the user name and password to log in to iManager.
3
Click [iPrint Management] in the Contents Panel and click [Manage
Printer].
4
Select the printer that you created for the equipment.
5
Click [Client Support] and click [IPP Support].
6
Check the “Enable IPP Access” check box.
7
If you want to secure printing, check the “Require Security” check
box.
yWhen the “Require Security” option is enabled, users must be authenticated to eDi-
rectory using the user name and password.
8
Click [Apply] and [OK] to save settings.
yThe IPPSRVR.NLM is automatically loaded.

Setting up DNS and Mail Servers 19
Setting up DNS and Mail Servers
This section describes how to set up the DNS server and Mail server for the Internet connection.
The figure illustrates a general network environment for Internet connection from a local area
network.
As shown in the figure above, a local area network usually consists of several segments: one
connects to the router directly (and is assigned a Global IP address) and others are for client
computers.
To enable Internet access from the local area network, the router must be assigned a Global IP
Address. In the above figure, the Private IP addresses have been assigned to all devices in the
local area network, and the router maps between the Private IP addresses and Global IP
Addresses using the NAT, Network Address Translation. This gives clients and servers access
to the Internet through the router.
Regarding the security, it is preferred to place this equipment in a different segment from the
router that connects to the Internet.
Also, in order to enable Internet communication from the device in the local area network, the
Domain Name Service is used. In the Internet, the DNS server specifies the domain name
related to the global IP address of the servers. To recognize the domain names in the Internet,
the domain names must be registered in both the DNS server in the Internet, which is managed
by the public DNS organization, and the DNS server in the local area network where the remote
devices are actually located. To configure the DNS server in your local area network, create fol-
lowing records in the DNS server:
yDNS zone name (i.e. “ifax.com”)
yHost name of the DNS server (i.e. “nshost”)
yNS record to specify the DNS server in your zone (i.e. “nshost.ifax.com”)
Client Client
DNS Server Email Server
Router
Internet
LAN
192.168.0.2 192.168.0.3
Proxy Server
192.168.0.3
192.168.0.4
192.168.1.1
192.168.1.2 192.168.1.3 192.168.1.4
192.168.0.1
Global IP Address
Router
Other manuals for CX 1145 MFP
17
Table of contents
Other Oki All In One Printer manuals