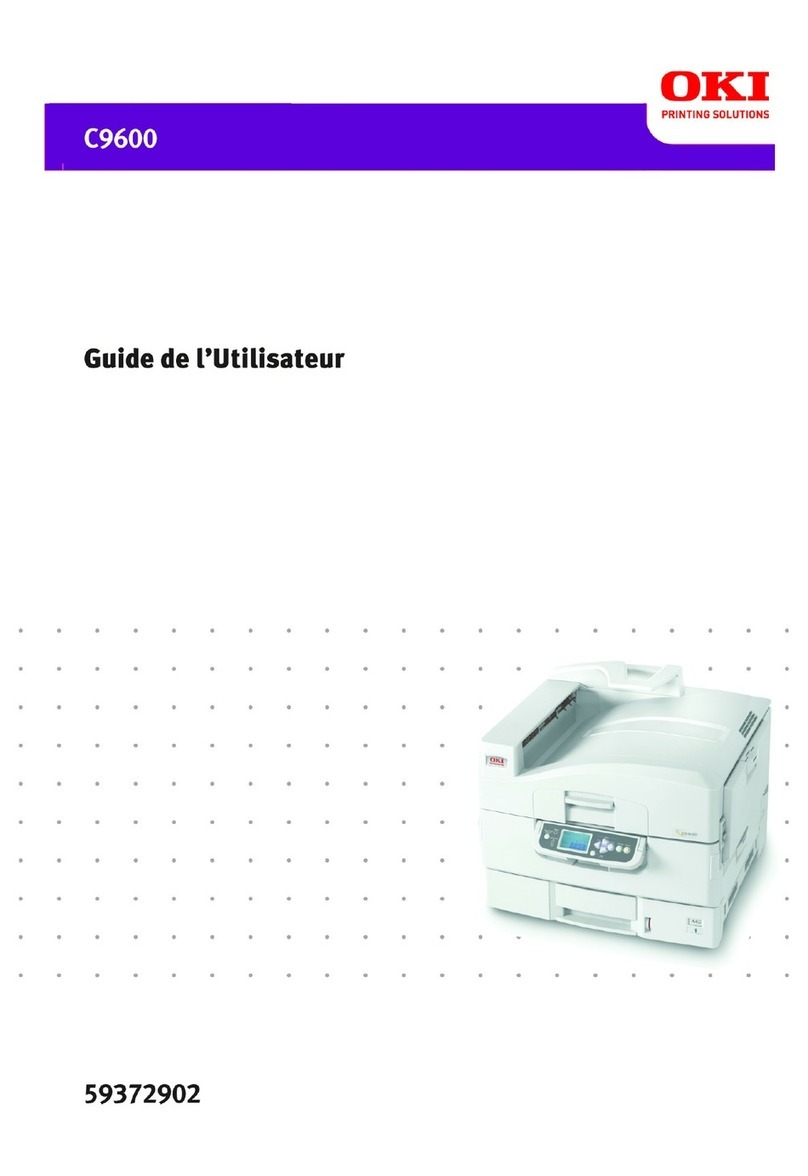
Oki C9800 Series User manual

C9800 Series / pro900 Series
Service & Troubleshooting Guide
©2010 OkiData Americas, Inc.
Disclaimer
Every effort has been made to ensure that the information in this document is complete, accurate, and up to date. The manufacturer assumes no responsibility
for the results of errors beyond its control. While all reasonable efforts have been made to make this document accurate and helpful as possible, we make no
warranty of any kind, expressed or implied, as to the accuracy or completeness of the information contained herein. For the most up-to-date service information
available, visit our website at www.okidata.com © Okidata Americas, Inc. 2010

Contents
Chapter 1
Printer Maintenance Procedures
1.1 Service Maintenance Procedures
1.2 Cleaning the Printer
1.3 Cleaning the Imaging Unit Contacts
1.4 Cleaning the LED Heads
1.5 Cleaning the Feed Rollers

Chapter 2
User Menu and Adjustments
2.1 Accessing the User Menu
Main Menus Sub Menus
Configuration Print Page Count • Finisher Count • Supplies Life
Network • Paper Size in Tray • System
Print Pages Print Pages
Suspend Printing
Resume Printing
Print Secure Job Print Secure Job
Menus Tray Configuration • System Adjust
Shut Down
Admin Setup Admin Setup
Calibration Exit Calibration • Auto Density Mode
Auto BG Adjust Mode • Adjust Density
Adjust Registration • Setup Calibration
Calibrate • Remove Calibration
Print Statistics Statistics Menu • Log Size • Reset Counter
Change Password
2.2 Service Modes and Adjustments
2.2 Accessing Service Mode
2.3 Service Diagnostics Controls
2.4 The Motor & Clutch Test
2.5 The Switch Scan Test
2.6 Service Adjustments
Calibrating the Printer
Using Command WorkStation to Calibrate the Printer

Chapter 3
Troubleshooting Print Quality
3.1 An Overview of Print-Quality Problems
Print-Quality Problems Overview
Defects Associated with Specific Printer Components
3.2 Generating and Analyzing Test Prints
Generating and Analyzing Control Panel Test Prints
Generating and Analyzing Service Test Prints
Generating and Analyzing Print Engine Test Prints
3.3 Print-Quality Troubleshooting Practices
Light Prints in All Colors
Light Print in Only One Color
Blank Prints
Mottled or Splotchy Prints
Unexpected Colors
Repeating Bands, Lines, Marks, or Spots
Random Bands, Lines, Marks, or Missing Spots
Random Spots
Background
Ghosting or Hot Offset
Incomplete Fusing or Cold Offset
Mis-Registration, Color Layers Not Correctly Registered
Toner on Back of Print
Image Not Centered or Positioned Correctly
Process Direction Bands, Voids, or Streaks
Scan Direction Bands, Voids, or Streaks
Scan Direction Dark Streaks
Process Direction Lines or Streaks

Chapter 4
Troubleshooting Paper Jams
4.1 Open Cover - Paper Jam – Tray X Side Cover
4.2 Open Cover - Paper Jam – Side Cover
4.3 Open Cover - Paper Jam – Top Cover
4.4 Paper Jam – Duplex Unit

Chapter 5
Troubleshooting Self Diagnostic Codes
5.1 Self Diagnostic Error Codes
Self Diagnostic Error Codes (Printer)
Self Diagnostic Error Codes (Finisher)
Self Diagnostic Error Codes (Other Codes)
5.2 General Troubleshooting
No Control Panel Display
Control Panel LED is on, No Control Panel Display
Printer does not appear to Operate at Power On.
Printer Continually Displays “Warming Up” or “Initializing”
Troubleshooting AC Power Supply
Troubleshooting DC Power Supply
Troubleshooting RAM Memory Failures
Paper Size Errors
5.3 Troubleshooting Error Codes
167-169 & 170-176 Fuser Failure
123, 124 Environmental Sensor Failure
321 Motor Overheating Failure
102-106 & 200-202 Engine Control Board Failure
None LVPSPower Supply Failure
051 Controller Fan Failure
121 PowerSupplyFanFailure
127 (Fuser), 128 (Fuser, Belt) 918 (Duplex) Fan Failure
181, 919 Duplex Interface Failure
180-186, 910-926 Tray 2, 3, 4 Com. Errors
189 Inverter Unit Interface Failure
131-134 C, M, Y, K LED Failure
179 FuserMismatchError
360 Unsupported Duplex Unit Rom
155 FuseCutError(Fuser)
154 Fuse Cut Error (Transfer Belt)
151-153 Fuse Cut Error C, M, Y, K Drum
072 Control PCB to Engine PCB Com. Failure
096 FinisherInterfaceError
097 InverterPowerSupplyFailure
050, 187 Control Panel Com. Failure
330, 917 Error in the Transfer Belt
340-343 C, M, Y, K Drum Unit Failure
240-248 Engine PCB Flash Memory Error
111-117 Unsupported ROM
160-163 Toner Sensor Detection Error
125 MT Home Position Detect Error
144-147 Toner Switch Error/ Lock Error
142 Color Up/Down Error
310 TopCoverOpenError
320 Fuser Unit Detected as Missing
350-353 Drum Unit Life Error
354 FuserLifeError
355 BeltLifeError
410-413 Toner Out Error
Chapter 1
Printer Maintenance Procedures
1.1 Service Maintenance Procedures
Perform the following procedures whenever you check, service, or repair the printer. Cleaning the
printer, as outlined in the following steps, assures proper operation of the printer and reduces the
probability of having to service the printer in the future. The frequency of use, Average Monthly
Print Volume (AMPV), type of media used, and operating environment are factors in determining
the frequency of this maintenance procedure. Be sure to record the number of sheets printed
between each service visit and attach the PS test page, Demo Page, and configuration sheets to
your service log for future reference.
Recommended Tools
•Toner vacuum cleaner
•Laptop computer with:
(Windows XP)
(Current Model Print Drivers)
(Current Command Workstation loaded)
(Kodak Calibration Pack)
•Clean, dry, lint-free cloth
•Black, light protective bag
Perform these routine maintenance procedures during the course of servicing the printer.
•Clean the feed rollers, exit rollers, and guides; replace as necessary.
•Remove and clean all paper trays.
•Clean the Color Registration and Automatic Density Control Sensors.
•Check cleanliness of interior and exterior, including fans; clean as necessary.
•Check the print engine and Fiery Controller firmware version located on the first page of the
configuration sheet. Update as necessary.
•Print a PS test page and Demo page, diagnose, and repair any problems as indicated.
•Perform the Printer calibrations in Chapter 2.
•Review proper printer operation using a customer file, if possible. Check with the customer
regarding any special applications they may be running.
•Review with the customer all work that was performed; and discuss proper printer care and
the importance of properly using the shut down sequence to prevent Hard Drive
issues.

1.2 Cleaning the Printer
Perform the following general cleaning steps as indicated by the printer’s operating environment.
Caution
Never apply alcohol or other chemicals to any parts in the printer. Never use a damp cloth to clean
up toner. If you remove the Image Drum Units, place them in a light protective bags or similar
means to protect the drums as exposure to light can quickly degrade performance and result in
early failure.
1. Record number of sheets printed on a service log left with the printer.
2. Print several sheets of paper to check for problems or defects.
3. Turn off the printer.
4. Clean all fans to remove excess dust.
5. Ensure that all cover vents are clean and free of obstructions.
6. Remove any debris or foreign objects from the Transfer Unit, Fuser, and Imaging Units.
7. Vacuum loose toner from the printer interior using a Type II toner vacuum only.
8. Remove and clean the paper trays.
9. Clean / inspect all rubber rollers with a lint-free cloth slightly dampened with cold water.
Replace as necessary.
1.3 Cleaning the Imaging Unit Contacts
1. Open the Top Cover.
2. Remove the Imaging Units and place it on a stable surface.
3. Working quickly to reduce light exposure, clean the 4 contacts at the front of the Imaging Unit.
4. Clean the 3 contacts at the rear of the imaging unit.
5. Clean the contacts on the Housing Bias Assembly.

1.4 Cleaning the LED Heads
Clean the LED Head if a vertical White band or White stripe appears on the print.
Caution
Always use a soft, dry, lint-free cloth to clean the LED Heads. Never use solvents to clean the lens.
1. Open the Top Cover.
2. Clean each LED Head with a clean, lint- free cloth.
1.5 Cleaning the Feed Rollers
Clean the accumulated dust from the Feed Rollers.
Caution
Use care not to scratch or otherwise abrade the roller surface while cleaning. Gently rub the
roller surface using a soft, lint-free cloth moistened with water.
1. Access the rollers by removing Tray 1 or opening the MPT tray.
2. Clean each roller with soft, lint-free cloth moistened with water.
Tray 1 Rollers
MPT Tray Rollers

Chapter 2
User Menu and Adjustments
2.1 Accessing the User Menu
Press the menu up arrow to access the User Menu.
User Mode Menus
Main Menus Sub Menus
Configuration Print Page Count • Finisher Count • Supplies Life
Network • Paper Size in Tray • System
Print Pages Print Pages
Suspend Printing
Resume Printing
Print Secure Job Print Secure Job
Menus Tray Configuration • System Adjust
Shut Down
Admin Setup Admin Setup
Calibration Exit Calibration • Auto Density Mode
Auto BG Adjust Mode • Adjust Density
Adjust Registration • Setup Calibration
Calibrate • Remove Calibration
Print Statistics Statistics Menu • Log Size • Reset Counter
Change Password
Functions
*Configuration
Print Pages
Suspend Printing
Resume Printing

Configuration
Print Page Count
Item
Description
Color Page
Displays the number of color printed pages converted to letter equivalent.
Monochrome Page
Displays number of monochrome printed pages converted to letter equivalent.
Traym
Displays the Total Pages from each Tray
MP Tray
Displays the Total Pages from the MP Tray
Finisher Count
Item
Description
Staple
Displays total pages stapled
Punch
Displays total pages punched
Finisher
Displays total pages ejected into the finisher
Supplies Life
Item
Description
Drum C, M, Y, K
Displays the remaining life span of drum as a percentage. Select C, M, Y, or K
Belt
Displays the remaining life span of the belt unit as a percentage.
Fuser
Displays the remaining life span of the fuser unit as a percentage.
Toner C, M, Y, K
Displays the remaining life span of toner as a percentage. Select C, M, Y, or K

Paper Size in Tray
Item
Description
Tray
Displays detected paper size of selected Tray
MP Tray
Displays detected paper size of the MP Tray.
System
Item
Description
Serial Number
Displays serial no. of the printer.
Asset Number
Displays Asset Number. Asset Number is 8
alphanumeric characters that can be assigned by
a user. Same as Asset Number of Menu Map.
CU Version
Displays version no. of CU (Fiery Controller) firmware.
Same as CU version of Menu Map.
PU Version
Displays version no. of PU (Engine Board) firmware.
Same as PU version of Menu Map.
Total Memory
Displays total RAM memory installed in the printer.
Same as Total Memory of Menu Map.
HDD
Displays size of hard disk and file system version.
Same as HDD of Menu Map.

Print Pages
Print Pages
Item
Description
PS Test Page
Prints the PostScript sample page.
Configuration
Prints printer configuration details.
Job Log
Prints EFI job log details.
Color Charts (disk only)
Prints color charts.
PS Font List
Prints PostScript font list.
PCL Font List
Prints PCL emulation font list.
Demo Page
Prints a demo page.
E-mail Log
Prints e-mail log.
Usage Report*
Prints a usage report.
(must be activated from the Print Statistics menu)
Statistics Log
Prints Oki job log details.
Error Log
Prints the error log.
E-mail Log
Prints e-mail log.
PrintMe Log
Prints e-mail log.
Suspend Printing Sets Printer to Off-line Status
Resume Printing Sets Printer to On-line Status

Print Secure Job
Print Secure Job
Item
Description
Enter Password
Enter a password to use secure printing.
Not Found
Secure Job
Print/Delete
Use a secure printing job (Secure Job) or a job Stored to HDD when printing.
When you print a Secure document, it is deleted from the HDD. When you print
a document Stored to HDD, it prints and remains stored on the HDD until you
manually delete it.
Not Found: (no jobs) is indicated when there is no output file.
The following messages are displayed when there are printable files.
Print: When you select Print, Set Collating Amount is displayed to enable you
to specify a number of copies. After specifying the number of copies, press
Enter to print all jobs with the specified number of copies.
Delete: When you select Delete, you are prompted to recheck by Yes/No
display, and selecting Yes deletes all jobs.
Menus
Tray Configuration
Item
Description
Paper Feed Tray1,2,3,4
MP Tray
Specifies a feed tray.
Auto Tray Switch
Sets the automatic tray switch function. ON or OFF
Tray Sequence
Down, Up, Paper feed tray- Specifies selection order priority for automatic
tray selection/automatic tray switch.
Unit of Measure
Specifies units for custom paper size. Inch or mm
Tray Config,
Sets paper configuration in paper Trays. Paper Size- Cassette size or Custom
Media Type-Plain, Letterhead, Transparency, Bond, Recycled, Card Stock,
Rough, Glossy Media weight-Auto, Light, Heavy, Ultra heavy

System Adjust
Item
Description (Printer Defaults are indicated in Blue)
Power Save Time
Sets the period after which power save mode starts. 5 min, 15 min, 30 min, 60 min,
240 min
Clearable Warning
When Online is selected, you must manually clear the warning by pressing the Online
button. Change to Job if you wish the message to automatically clear when a new print
job is received. Online or Job
Auto Continue
Sets whether the printer is automatically recovered when Memory Overflow or Tray
Request occurs. ON or OFF
Manual Timeout
If paper is not fed within this time in manual feed, the job is cancelled. OFF, 30 sec, 60
sec.
Wait Timeout
Sets the time period between stopping receipt of job data and forced print. For PS,
printing is not carried out and the job is cancelled. Range is off, 5 sec. to 300 sec.
default is 40 sec.
Low Toner
Sets the printing operation when insufficient toner is detected. Continue:the printer
can continue printing while remaining online. Stop: the printer stops printing and goes
offline.
Jam Recovery
ON: continues printing the job, including any jammed pages, once the jam has been
cleared. OFF: Cancels a job including the page currently jammed.
X Adjust - Adjusts the position of the whole printing image (0.25 mm at a time)
Range is -2.00 to +2.00 mm (horizontally). Default is 0.00mm.
Y Adjust - Adjusts the position of the whole printing image (0.25 mm at a time)
Range is -2.00 to +2.00 mm (Vertically). Default is 0.00mm.
Duplex X Adjust - During the flip-side printing of duplex printing, adjusts the position of
the whole printing image (0.25 mm at a time. Range is -2.00 to +2.00 mm
(horizontally). Default is 0.00mm.
Print Position Adjust
Duplex Y Adjust - During the flip-side printing of duplex printing, adjusts the position of
the whole printing image (0.25 mm at a time. Range is -2.00 to +2.00 mm (Vertically).
Default is 0.00mm.
Darkness Cyan, Magenta,
Yellow, Black
Adjusts the engine density for Cyan, Magenta, Yellow, Black. Darkest value is +3,
Lightest value is -4. Default is 0.
Cyan Magenta Yellow
Reg Fine Adjust
Makes fine adjustment to image registration against Black in the horizontal direction.
Adjust. is for Cyan, Magenta, Yellow. Range is -3 to +3. Default is 0.
Paper Black Setting
Used for micro adjustment when very visible faded print results or light specks (or
streaks) result when printing in Plain Paper/Black setting. Range is -2 to +2. Decrease
the value if light specks (or streaks) or snow flake like printing results in high density
print areas. Default is 0.
Paper Color Setting
Used for micro adjustment when very visible faded print results or light specks (or
streaks) result when printing in Plain Paper/Color setting. The range is -2 to
+2.Decrease the value if light specks (or streaks) or snow flake like printing results in
high density print areas. Default is 0.
Transparency Black Setting
As for Paper Black Setting above. The range is -2 to +2. Default is 0.
Transparency Color Setting
As for Paper Color Setting above. The range is -2 to +2. Default is 0.

BG Setting (New)
allows for minor corrections in print anomalies such as "dirty background" due to
environmental conditions (temperature, humidity, media)
Drum Cleaning
Set to produce idling of a drum before printing in order to reduce horizontal white lines.
This will shorten image drum life. Default is Off.
Hex Dump
Prints out the data received from the host PC in hexadecimal code.
Shut Down Allows for: Restart of Server, Shut Down of the System, or Reboot of
System. Select appropriate item and execute.
Admin Setup Continue to setup: Yes / No Select yes (message: running setup)
Admin Setup
Item
Description
Exit Setup
Exits Setup Menu
Server Setup
See configuration sheet under Server Setup
Network Setup
See configuration sheet under Network Setup
Parallel Setup
See configuration sheet under Parallel Setup
USB Setup
See configuration sheet under USB Setup
Printer Setup
See configuration sheet under Printer Setup
PS Setup
See configuration sheet under PS Setup
PCL Setup
See configuration sheet under PCL Setup
Color Setup
See configuration sheet under Color Setup
Job Log Setup
See configuration sheet under Job Log Setup
Change Password
Change Admin. Password
Language
Clear Server
Clears all Server Information
Factory Defaults
Restores Printer to Factory Default
Warning: All Information such as IP addresses etc. will be lost. Be sure to print a
Configuration sheet prior to setting the printer to Factory Default.

Calibration
Exit Calibration
Item
Description
Exit Calibration
Select “enter” to exit the calibration screen
Auto Density Mode
Item
Description
Adjust Density Mode
*On / Off – Turns On or Off the Auto Density Mode
Auto BG Adjust Mode
Item
Description
Auto BG Adjust Mode
*Off , -1,0,+1,+2 – Adjustment of the Auto Background
Adjust Density
Item
Description
Adjust Density
*Yes / No – Select yes to execute density adjustment
Adjust Registration
Item
Description
Adjust Registration
*Yes / No– Select yes to execute registration adjustment
Set Up Calibration
Item
Description
Standard
*Auto Select / Bypass – Selects paper source for calibration
Expert
*Auto Select / Bypass – Selects paper source for calibration

Calibrate
Item
Description
*6X6 Dot Screen
Print limits Pg. Yes / *No See “Calibrating the Printer” in 2.6
12X6 Dot Screen
Print limits Pg. Yes / *No See “Calibrating the Printer” in 2.6
12X6 Line Screen
Print limits Pg. Yes / *No See “Calibrating the Printer” in 2.6
12X12 Dot Screen
Print limits Pg. Yes / *No See “Calibrating the Printer” in 2.6
Copier Screen
Print limits Pg. Yes / *No See “Calibrating the Printer” in 2.6
Remove Calibration
Item
Description
*6X6 Dot Screen
Affects all. Contin? *Yes / No ( removes previous Calibration)
12X6 Dot Screen
Affects all. Contin? *Yes / No ( removes previous Calibration)
12X6 Line Screen
Affects all. Contin? *Yes / No ( removes previous Calibration)
12X12 Dot Screen
Affects all. Contin? *Yes / No ( removes previous Calibration)
Copier Screen
Affects all. Contin? *Yes / No ( removes previous Calibration)
Print Statistics
Enter Password - Default password is 0000
Statistics Menu
Item
Description
Statistics Menu
Enter Password “0000”
*Enable / Disable – Turns On or Off the Print Statistics Menu (MFP)
To access select “Setup” from the scanner control panel. Select “Report” ,
Select “Print” from “MFP Statistics Report”

Service Modes & Adjustments
2.2 Accessing Service Mode
Enter Service Mode by holding down the menu up / menu down and help buttons
at the same time while powering up the machine. (This may take up to 60 seconds.)
The System Maintenance Menu will appear.
Service Mode Menus
There are 4 menus under system maintenance described as follows:
1. OKIUSER - Used to set operating environment by country location. Should always be set to ODA
2. Maintenance Print Menu - This switches whether to Show/Hide the Print Information, ID Check
Pattern and Engine Status of the Function Menu. If this item is disabled, the Print Information, ID
Check Pattern and Engine Status of the Function Menu is never displayed. The printer is restarted
after the settings are modified and exiting from the menu.
3. Print Page Count - This sets whether to Show/Hide the display of the "Functions",
"Configuration", "Print Page Count", or "Total Page".
4. Diagnostic Mode – Used to perform diagnostic tests such as “Motor & Clutch” and “Switch Scan”
to assist in troubleshooting motor, clutch, sensor, and switch operation.
2.3 Service Diagnostics Controls
Use the Control Panel buttons to interact with Service Diagnostics’ tests and utilities.
Initialization
Please wait…

Button Function
_____________________________________________________________________
Back Returns to the prior higher level menu structure, if available.
If help text is displayed, pressing Back restores the current menu item.
_____________________________________________________________________________
Cancel Terminates the current test or cancels current Help display.
_____________________________________________________________________
Help Provides help information, if available. Pressing Help (?) again restores
the current menu item and removes the help text.
_____________________________________________________________________________
Up Arrow Scrolls up one menu item within a menu list. Used to increment data in
tests requiring user input.
_____________________________________________________________________________
Down Arrow Scrolls down one menu item within a menu list. Used to decrement
data in tests requiring user input.
_____________________________________________________________________
Enter Enters the highlighted menu. Executes the current test item. Used to
select a data value entered by the user.
_____________________________________________________________________________
Note -The best method of exiting Service Diagnostics is to cycle printer power. This insures all printer components are reset.
Also, an occasional paper jam is normal on the first print if clutch or solenoid tests were run.
2.4 Accessing the Motor & Clutch Test
The “Motor & Clutch Test” under the “Diagnostics” menu in service mode can be an important tool
in assisting in the diagnosis of service related issues in the ES3640 / CX3641 MFP. The test gives
you the ability to test the operation of all of the motors, clutches, and solenoids in the Printer,
Large Capacity Feeder, and Duplexer that are indicated below.
For additional information, see “Component Disassembly” Guide.
Other manuals for C9800 Series
1
This manual suits for next models
1
Table of contents
Other Oki Printer manuals