Oleo-Mac Sparta 380 Manual

I
D
GB
SK
OPERATOR'S INSTRUCTION BOOK
MANUALE DI USO E MANUTENZIONE
BEDIENUNGSANLEITUNG
MANUEL D'UTILISATION ET D'ENTRETIEN
MANUAL DE INSTRUCCIONES
NÁVOD NA POUŽITIE A ÚDRŽBU
Pubbl. 61210119A rev. 2 - Giu/2015
F
SPARTA 380 (36.3 cm3)- SPARTA 440 (40.2 cm3)
E

I
D
E
SK
INTRODUZIONE
ISTRUZIONI ORIGINALI
Per un corretto impiego del decespugliatore e per evitare incidenti, non iniziate il lavoro senza aver
letto questo manuale con la massima attenzione. Troverete su questo manuale le spiegazioni di
funzionamento dei vari componenti e le istruzioni per i necessari controlli e per la manutenzione.
N.B. Le descrizioni e le illustrazioni contenute nel presente manuale si intendono non
rigorosamente impegnative. La Ditta si riserva il diritto di apportare eventuali modiche senza
impegnarsi ad aggiornare di volta in volta questo manuale.
ENLEITUNG
ÜBERSETZUNG DER ORIGINALANLEITUNGEN
Um richtig mit der Motorsense umgehen zu können und Unfälle zu vermeiden, lesen Sie diese
Bröschure vor Aufnahme der Arbeit gründlich durch. Im Suchverzeichnis nden Sie die Angabe,
auf welchen Seiten die Hinweise zur Arbeitsweise der unterschiedlichen Teile und Erklärungen zu
den anfallenden Wartungs- und Kontrollarbeiten zu nden sind.
N.B.: Die in dieser Bröschure enthaltenen Beschreibungen und Abbildungen verstehen sich
unverbindlich. Der Hersteller behält sich das Recht vor, die Einzel - und Zubehörteile dieses
Modells aus technischen oder absatz-bedingten Gründen zu ändern , ohne die Angaben dieser
Bröschure jedesmal zu berichtigen.
INTRODUCCION
TRADUCCIÓN DE LAS INSTRUCCIONES ORIGINALES
Para una correcta utilizaciòn de la desbrozadora y para evitar incidentes, no empiece a trabajar sin
haber leido atentamente este manual. Ud. encontrarà las explicaciones de funcionamiento de los
diferentes componentes y las instrucciones para el control y mantenimiento de la desbrozadora.
P.D. Las descripciones contenidas en el presente manual no se consideran rigurosamente
obligatorias.Laempresasereservaelderechodeaportareventualesmodicacionessinobligarse
a poner al dìa este manual.
PREKLAD PÔVODNÉHO NÁVODU NA POUŽITIE
Nezačínajte prácu, kým si pozorne neprečítate tento návod na použitie, predídete tak nehodám a
dozviete sa informácie, ako stroj správne používať. Nájdete tu vysvetlenie ako obsluhovať rôzne
časti stroja a inštrukcie pre kontrolu a údržbu.
Poznámka: Ilustrácie a špecifikácie uvedené v tomto návode nie sú prísne záväzné. Výrobca si
vyhradzuje právo na vykonávanie zmien bez predchádzajúceho upozornenia.
ÚVOD
GB INTRODUCTION
TRANSLATION OF ORIGINAL INSTRUCTIONS
To correctly use the brush cutter and prevent accidents, do not start work without having rst
carefully read this manual. You will nd explanations concerning the operation of the various parts
plus instructions for necessary checks and relative maintenance.
Note:IllustrationsandspecicationsinthismanualmayvaryaccordingtoCountryrequirements
and are subject to change without notice by the manufacturer.
FINTRODUCTION
TRADUCTION DES INSTRUCTIONS ORIGINALES
Pourunemploicorrectdeladébroussailleuseetpouréviterlesaccidents,nepascommencerletravail
sans avoir d'abord lu attentivement le manuel. Vous trouverez les descriptions du fonctionnement
des divers composants et les instructions pour les contrôles nécessaires et pour l'entretien.
N.B.Lesdescriptionsetlesillustrationscontenuesdanscemanueln'engagentpasrigoureusement
le constructeur. La société se réserve le droit d'apporter d'éventuelles modications sans devoir
mettre à jour à chaque fois le manuel.
ATTENZIONE !!!
RISCHIO DI DANNO UDITIVO
NELLE NORMALI CONDIZIONI DI UTILIZZO, QUESTA
MACCHINA PUO' COMPORTARE, PER L'OPERATORE
ADDETTO, UN LIVELLO DI ESPOSIZIONE PERSONALE
GIORNALIERO A RUMORE PARI O SUPERIORE A
85 dB (A)
ATENCIÓN !!!
RIESGO DE DAÑO AUDITIVO
EN NORMALES CONDICIONES DE UTILIZACIÓN,
ESTA MAQUINA PUEDE TOLERAR PARA EL OPERADOR
ENCARGADO, UN NIVEL DE EXPOSICÍON
DIARIO A RUIDO EQUIVALENTE O SUPERIOR A
UPOZORNENIE!!!
RIZIKO POŠKODENIA SLUCHU
ZA NORMÁLNYCH PODMIENOK POUŽÍVANIA TOHTO
PRÍSTROJA SA OSOBA, KTORÁ HO
POUŽÍVA, VYSTAVUJE DENNEJ HLADINE HLUKU
ROVNAJÚCEJ SA ALEBO VYŠŠEJ AKO
WARNING !!!
RISK OF DAMAGING HEARING
IN NORMAL CONDITIONS OF USE, THIS MACHINE
MAY INVOLVE A DAILY LEVEL OF PERSONAL
EXPOSURE TO NOISE FOR THE OPERATOR EQUAL
TO OR GREATER THAN
85 dB (A)
ACHTUNG !!!
HÖRSCHADEN - RISIKO
UNTER NORMALEN ANWENDUNGSBEDIGUNGEN
KANN DIESES GERÄT DIE BEDIENUNGSPERSON
EINEM TÄGLICHEN GERÄUSCHPEGEL VON
85 dB (A)
ODER MEHR AUSSETZEN
ATTENTION !!!
DANGER D’ATTEINTE A L’OUIE
L’OPERATEUR UTILISANT NORMALEMENT
CETTE MACHINE PEUTS S’EXPOSER
QUOTIDIENNEMENT A UN BRUIT EGAL
OU DEPASSANT
85 dB (A)
85 dB (A) 85 dB (A)
2

I
F
GB
D
E
SK
INDICE
INTRODUZIONE ____________________ 2
SPIEGAZIONE SIMBOLI E AVVERTENZE DI
SICUREZZA _________________________ 4
COMPONENTI DEL DECESPUGLIATORE 6
NORME DI SICUREZZA_______________ 8
ASSEMBLAGGIO_____________________ 14
AVVIAMENTO ______________________ 20
ARRESTO MOTORE __________________ 30
INDEX
INTRODUCTION ____________________ 2
EXPLICATION DES SYMBOLES ET REGLES
DE SECURITE _______________________ 4
COMPOSANTS DE LA DEBROUSSAILLEUSE
6
NORMES DE SECURITE_______________ 9
ASSEMBLAGE _______________________ 14
MISE IN ROUTE _____________________ 20
ARRET DU MOTEUR _________________ 30
INDEX
INTRODUCTION ____________________ 2
EXPLANATION OF SYMBOLS AND SAFETY
WARNINGS _________________________ 4
BRUSH CUTTER COMPONENTS _______ 6
SAFETY PRECAUTION _______________ 8
ASSEMBLY __________________________ 14
STARTING __________________________ 20
STOPPING THE ENGINE ______________ 30
INHALT
ENLEITUNG ________________________ 2
ERLAUTERUNG DER SYMBOLE UND
SICHERHEITSHINWEISE______________ 4
BAUTEILE DER MOTORSENSE_________ 6
SICHERHEITSVORKERUNGEN ________ 10
MONTAGE__________________________ 15
ANLASSEN__________________________ 21
MOTOR ABSTELLEN _________________ 31
INDICE
INTRODUCCION ____________________ 2
EXPLICACION SIMBOLOS Y
ADVERTENCIÂS DE SEGURIDAD ______ 4
COMPONENTES DE LA DESBROZADORA
6
NORMAS DE SEGURIDAD ____________ 10
MONTAJE___________________________ 15
PUESTA EN MARCHA ________________ 21
PARADA DEL MOTOR________________ 31
OBSAH
ÚVOD _____________________________ 2
VYSVETLIVKY A BEZPEČNOSTNÉ
UPOZORNENIA
_____________________ 4
ČASTI KROVINOREZU ______________ 6
PRAVIDLÁ BEZPEČNOSTI ___________ 11
MONTÁŽ __________________________ 15
ŠTARTOVANIE _____________________ 21
ZASTAVENIE MOTORA _____________ 31
UTILIZZO __________________________ 30
MANUTENZIONE____________________ 46
RIMESSAGGIO ______________________ 58
DATI TECNICI ______________________ 60
DICHIARAZIONE DI CONFORMITÀ____ 64
TABELLA DI MANUTENZIONE ________ 66
RISOLUZIONE DEI PROBLEMI_________ 69
CERTIFICATO DI GARANZIA _________ 74
GEBRAUCH _________________________ 31
INSTANDHAL _______________________ 47
LÄNGERUNG _______________________ 59
TECHNISCHE ANGABEN _____________ 60
KONFORMITATS-ERKLARUNG________ 64
WARTUNGSTABELLE ________________ 67
STÖRUNGSBEHEBUNG_______________ 70
GARANTIE-ZERTIFICAT______________ 75
USE ________________________________ 30
MAINTENANCE _____________________ 46
STORAGE___________________________ 58
TECHNICAL DATA __________________ 60
DECLARATION OF CONFORMITY _____ 64
MAINTENANCE CHART ______________ 66
TROUBLE SHOOTING CHART_________ 69
WARRANTY CERTIFICATE ___________ 74
UTILIZACION_______________________ 31
MANTENIMIENTO___________________ 47
ALMACENAJE_______________________ 59
DATOS TECNICOS ___________________ 60
DECLARACION DE CONFORMIDAD ___ 64
TABLA DE MANTENIMIENTO_________ 68
RESOLUCIÓN DE PROBLEMAS ________ 71
CERTIFICADO DE GARANTIA_________ 75
UTILISATION _______________________ 30
ENTRETIEN_________________________ 46
REMISSAGE _________________________ 58
DONNEES TECHNIQUES _____________ 60
DECLARATION DE CONFORMITÉ _____ 64
TABLEAU D'ENTRETIEN______________ 67
RÉSOLUTION DES PROBLÈMES________ 70
CERTIFICAT DE GARANTIE___________ 74
POUŽITIE__________________________ 31
ÚDRŽBA___________________________ 47
SKLADOVANIE _____________________ 59
TECHNICKÉ ÚDAJE _________________ 60
ES VYHLÁSENIE O ZHODE___________ 64
TABUĽKA ÚDRŽBY _________________ 68
RIEŠENIE PROBLÉMOV ______________ 71
ZÁRUKA __________________________ 75
3

4
I
GB
F
SPIEGAZIONE SIMBOLI E AVVERTENZE DI SICUREZZA
EXPLANATION OF SYMBOLS AND SAFETY WARNINGS
EXPLICATION DES SYMBOLES ET REGLES DE SECURITE
ERLÄUTERUNG DER SYMBOLE-UND SICHERHEITSHINWEISE
EXPLICACION SIMBOLOS Y ADVERTENCIAS DE SEGURIDAD
VYSVETLIVKY A BEZPEČNOSTNÉ UPOZORNENIA
D
E
SK
I1 - Leggereillibrettousoemanutenzioneprimadiutilizzare
questa macchina.
2 - Indossare casco, occhiali e cue di protezione.
3 - Portare calzature di protezione e guanti usando dischi
metallici o di plastica.
4 - Prestare attenzione al lancio di oggetti.
5 - Tenere persone lontane 15 m.
6 - Fareparticolareattenzionealfenomenodelcontraccolpo.
Può essere pericoloso.
7 - ATTENZIONE! - Le superci possono essere calde!
1 - Read operator's instruction book before operating this
machine.
2 - Wear head, eye and ear protection.
3 - Wear strong boots and gloves when cutting with metal
or plastic blades.
4 - Be aware that objects can be thrown.
5 - Keep bystanders away 15 m.
6 - Warning! Kickback it’s danger.
7 - WARNING! – e surface can be hot!
1 - Lire le manuel avant d'utiliser cette machine.
2 - Vêtir casque, visière et protège-oreilles.
3 - Porterchaussuresdeprotectionetgantsquandonutilise
disques métalliques ou de plastique.
4 - Prêter d’attention au lancement d’objets.
5 - Personne doit approcher à moins de 15 m.
6 - Portez une attention particulière aux phénomènes de
rebond.
7 - ATTENTION! - La surface risque d'être très chaude !
GB
F
D1 - Betriebsanleitung vor der Inbetriebsnahme lesen.
2 - Immer Helm, Schutzbrille und Geräuschschutz tragen.
3 - Sicherheitsschuhe und -handschuhe mit Metall- oder
Plastikscheiben tragen.
4 - Vorsicht, auf aufspritzende Steine usw. achten.
5 - Keine andere Person soll sich im Umkreis von 15 m
aualten.
6 - Achtung! Vorsicht Rückschlaggefahr.
7 - ACHTUNG! - Heiße Oberächen!
1 - Antes de utilisar esta maquina, leer el manual de
instrucciones.
2 - Llevar casco, gafas y auriculares de proteccion.
3 - Utilizar calzado de seguridad y guantes cuando se
utilizan discos metálicos o de plástico.
4 - ¡Atención! Posible expulsión de objetos.
5 - La gente a más de 15 m.
6 - ¡Atencion! Advertencia sobre el peligro de sacudida.
7 - ¡ATENCIÓN! - ¡Las supercies pueden estar calientes!
1 - Pred prácou s týmto prístrojom si prečítajte návod na
použitie a údržbu.
2 - Používajte ochrannú prilbu, okuliare a slúchadlá.
3 - Pri používaní kovových alebo plastových kotúčov
používajte ochrannú obuv a rukavice.
4 - Pozor na odmrštené redmety.
5 - Udržiavajte min. vzdialenosť 15 m od okolostojacich
osôb a zvierat.
6 - Mimoriadnu pozornosť venujte spätnému vrhu. Môže
byť veľmi nebezpečný.
7 - POZOR! - Povrch môže byť horúci!
E
SK
1
2
3
4
5
6
7

5
I
GB
F
SPIEGAZIONE SIMBOLI E AVVERTENZE DI SICUREZZA
EXPLANATION OF SYMBOLS AND SAFETY WARNINGS
EXPLICATION DES SYMBOLES ET REGLES DE SECURITE
ERLÄUTERUNG DER SYMBOLE-UND SICHERHEITSHINWEISE
EXPLICACION SIMBOLOS Y ADVERTENCIAS DE SEGURIDAD
VYSVETLIVKY A BEZPEČNOSTNÉ UPOZORNENIA
D
E
SK
I8 - Tipo di macchina: DECESPUGLIATORE.
9 - Livello di potenza acustica garantita.
10 - Marchio CE di conformità.
11 - Numero di serie.
12 - Anno di fabbricazione.
13 - Massima velocità dell’albero di uscita
(numero di giri al minuto).
14 - Bulbo primer
8 - Type of machine: BRUSH CUTTER.
9 - Guaranteed sound power level.
10 - CE conformity marking.
11 - Serial number.
12 - Year of manufacture.
13 - Max. speed of output shaft, RPM
14 - Primer bulb
8 - Type de machine : DEBROUSSAILLEUSE.
9 - Niveau de puissance acoustique garanti.
10 - Label CE de conformité.
11 - Numéro de série.
12 - Année de fabrication.
13 - Vitesse maximale de l’arbre de sortie, en tr/min.
14 - Pompe primer
GB
F
D8 - Gerät: MOTORSENSE.
9 - Garantierter akustischer Schalleistungspegel.
10 - CE-Zeichen.
11 - Seriennummer.
12 - Baujahr.
13 - Maximale Drehzahl der Abtriebswelle in Umin.
14 - Starterpumpe
8 - Tipo de máquina: DESBROZADORA.
9 - Nivel de potencia acústica garantizado.
10 - Marcha CE de conformidad.
11 - Número de serie.
12 - Año de fabricación.
13 - Velocidad máxima en el eje de salida, RPM.
14 - Burbuja primer
8 - Druh stroja: MOTOROVÁ KOSA.
9 -
Zaručená hladina akustického výkonu
10 - Značka zhody CE
11 - Číslo série
12 - Rok výroby.
13 - Max. otáčky výstupného hriadeľa, ot./min.
14 - Vstrekovač nádrže
E
SK
1210
11
10
8
9
13
14

I
1 -Attacco cinghiaggio
2 -Interruttore di massa
3 -Protezione marmitta
4 -Candela
5 -Filtro aria
6 -Tappo serbatoio
carburante
7 -Serbatoio carburante
8 -Leva acceleratore
9 -Impugnatura
COMPONENTI DEL DECESPUGLIATORE
10 -Tubo di trasmissione
11 -Protezione di sicurezza
12-Disco/Testina a li di
nylon
13 -Cinghiaggio
14 -Impugnatura
d’avviamento
15 -Bulbo primer
16 -Leva starter
17- Barriera di sicurezza
GB
1 -Harness attachment
2 -On/o switch
3 -Muer guard
4 -Spark plug
5 -Air lter
6 -Fuel tank cap
7 -Fuel tank
8 -rottle lever
9 -Handle
BRUSH CUTTER COMPONENTS
10 -Sha arm
11 -Curved guard
12 -Blade/Nylon line head
13 -Harness
14 -Starter Handle
15 -Purge Bulb
16 -Choke Lever
17- Safety boom
F
1 -Sistème à courroie
2 -Interrupteur d'arrêt du
moteur
3 -Protection du pot
d'échappement
4 -Bougie
5 -Filtre à air
6 -Bouchon du réservoir
de carburant
7 - Réservoir de carburant
COMPOSANT DE LA DEBROUSSAILLEUSE
8 - Levier de l'accélérateur
9 - Poignée
10 - Tuyau de transmission
11 - Protection de sécurité
12 -Disque/Tête a ls de nylon
13 - Harnais
14 - Poignée du lanceur
15 - Poire d’amorçage
16 - Levier de starter
17- Barrière de sécurité
DBAUTEILE DER MOTORSENSE
1 -Einhängevorrichtung
für Schultergurt
2 -Ein- / Aus - Schalter
3 -Hitzeschutzgitter
4 -Zündkerze
5 -Lulter
6 -Krastoankdechel
7 -Krastoank
8 -Gashebel
9 -Handgri
10 -Scha
11 -Schneidschutzvorrichtung
12 -Schneid blatt/2-faden
Nylonkopf
13 -Traggurte
14 -Anwerfgriff
15 -Dekompressionsventil
16 -Vergaserhebel
17- Schutzstange
E
1 -Conexión del correaje
2 -Interruptor de parada del
motor
3 -Protección del silenciador
4 -Bujia
5 -Filtro de aire
6 -Tapón depósito
combustible
7 -Depósito combustible
8 -Palanca del acelerador
9 -Empuñadura
COMPONENTES DE LA DESBROZADORA
10 -Tubo de transmisión
11 -Protección
12 -Disco/Cabezal con hilos
de nylon
13 - Arnés
14 -Empuñadura del motor
de arranque
15 -Pera de purga
16 -Palanca de
estrangulación
17- Barra de seguridad
SK
1 -Úchyt na pripojenie
ramenného popruhu
2 -Spínač zapaľovania
3 -Kryt tlmiča výfuku
4 -Sviečka
5 -Vzduchový filter
6 -Uzáver palivovej
nádrže
7 -Palivová nádrž
8 -Páčka plynu
ČASTI MOTOROVEJ KOSY
9 -Rukoväť
10-Rúrka hriadeľa
11-Ochranný štít
12-Kosiaci/rezný nástroj
13-Popruh
14-Rukoväť štartéra
15-Vstrekovač paliva
16-Páčka sýtiča
17 - Bezpečnostná opierka
6

NOTE:
7

Italiano
NORME DI SICUREZZA
ATTENZIONE - Il decespugliatore, se ben usato, è uno
strumento di lavoro rapido, comodo ed ecace; se usato in
modo non corretto o senza le dovute precauzioni potrebbe
diventare un attrezzo pericoloso. Perchè il vostro lavoro sia
sempre piacevole e sicuro, rispettare scrupolosamente le
norme di sicurezza qui riportate e nel corso del manuale.
ATTENZIONE: Il sistema di accensione della vostra unità,
produceuncampoelettromagneticodiintensitàmoltobassa.
Questo campo può interferire con alcuni pacemaker. Per
ridurre il rischio di lesioni gravi o mortali, le persone con
pacemaker dovrebbero consultare il proprio medico e il
costruttoredelpacemakerprimadiutilizzarequestamacchina.
ATTENZIONE! – Regolamenti nazionali possono limitare
l’uso della macchina.
1 - Non utilizzare la macchina prima di essere istruiti in modo
specifico sull’uso. L’operatore alla prima esperienza deve
esercitarsi prima dell’utilizzo sul campo.
2 - La macchina deve essere usata solo da persone adulte, in buone
condizioni siche e a conoscenza delle norme d’uso.
3 - Nonusareildecespugliatoreincondizionidiaaticamentosico
o sotto l'eetto di alcool, droghe o farmaci (Fig.1).
4 - Indossare abiti adatti e articoli di sicurezza quali stivali,
pantaloni robusti, guanti, occhiali protettivi, cua e casco
antinfortunistico (v. pag. 12-13).
5 - Usare vestiario aderente ma comodo.
6 - Non permettere ai ragazzi di usare un decespugliatore.
Non permettere ad altre persone di restare nel raggio di 15
metri durante l'uso del decespugliatore (Fig. 2).
7 - Prima di usare un decespugliatore vericare che il bullone
ssaggio disco sia ben stretto.
8 - Il decespugliatore deve essere equipaggiato con gli attrezzi da
taglio consigliati dal costruttore (v. pag. 61).
9 - Non usare il decespugliatore senza la protezione del disco o
della testina.
10 - Prima di avviare il motore accertarsi che il disco sia libero di
girare e non sia a contatto con corpi estranei.
11 - Durante il lavoro controllarespessoil disco fermandoilmotore.
Sostituire il disco appena appaiono crepe o rotture (Fig. 3).
12 - Usare la macchina solo in luoghi ben ventilati, non utilizzare
in atmosfera esplosiva, inammabile o in ambienti chiusi
(Fig. 4).
13 - Conmotoreinmotononfarealcunamanutenzioneenontoccare
il disco.
14 - E proibito applicare alla presa di forza della macchina alcun
dispositivo che non sia quello fornito dal costruttore.
15 - Non lavorare con una macchina danneggiata, mal riparata,
mal montata o modicata arbitrariamente. Non togliere o
danneggiare o rendere inecace alcun dispositivo di sicurezza.
Utilizzare solo dispositivi di taglio indicati in tabella.
16 - Mantenere tutte le etichette con i segnali di pericolo e di
sicurezza in perfette condizioni. In caso di danneggiamenti o
deterioramenti occorre sostituirle tempestivamente
(Vedi pag. 4-5).
17 - Non utilizzare la macchina per usi diversi da quelli indicati
dal manuale (vedi pag. 30).
18 - Non abbandonare la macchina con il motore acceso.
19 - Non avviare il motore senza il braccio montato.
20 - Controllare giornalmente il decespugliatore per assicurarsi che
ogni dispositivo, di sicurezza e non, sia funzionante.
21 - Noneettuareoperazionioriparazionichenonsianodinormale
manutenzione. Rivolgersi ad ocine autorizzate.
22 - In caso di necessità della messa fuori servizio della macchina,
nonabbandonarlanell’ambiente,maconsegnarlaalRivenditore
che provvederà alla corretta collocazione.
23 - Consegnate o prestate il decespugliatore soltanto a persone
esperte e a conoscenzadelfunzionamentoe del correttoutilizzo
della macchina. Consegnate anche il Manuale con le istruzioni
d’uso, da leggere prima di iniziare il lavoro.
24 - Rivolgetevi sempre al vostro Rivenditore per qualsiasi altro
chiarimento o intervento prioritario.
25 - Conservare con cura il seguente Manuale e consultarlo prima
di ogni utilizzo della macchina..
26 - Ricordare che il proprietario o l’operatore è responsabile degli
incidenti o dei rischi subiti da terzi o da beni di loro proprietà.
English
SAFETY PRECAUTIONS
1234
1 - Do not operate the machine unless you have received specic
instructiononitsuse.Firsttimeusersmustfamiliarisethemselves
thoroughly with the operation of the machine before working in
the eld.
2 - e machine must only be used by adults in good physical
condition who are familiar with the operating instructions.
3 - Never use the brush cutter when you are tired or fatigued or if
you have taken alcohol, drugs or medication (Fig. 1).
4 - Wear appropriate clothing and safety articles such as: boots,
heavy-duty trousers, gloves, protective eyewear, ear protection
and protective helmet (look pag. 12-13). Use clothing which is
close-tting but comfortable.
5 - Do not allow children to use the brush cutter.
6 - Do not allow other people to remain within 15 metres during
brush cutter use (Fig. 2).
7 - Before using the brush cutter, make sure that the blade xing bolt
is well-tightened.
8 - e brush cutter must be equipped with the cutting accessories
recommended by the manufacturer (look pag. 61).
9 - Never use the brush cutter without the blade guard or the head.
10 - Before starting the engine, make sure that the blade is free to
WARNING: e brush cutter, if properly used, is a quick,
confortable and ecient tool; if used improperly or without
the due precautions it could become a dangerous tool. So that
your work is always pleasant and safe, please respect the
followingsafetyprecautionsscrupulouslyandthroughoutthis
manual.
WARNING: The ignition system of your machine produces
an electromagnetic field of very low intensity. This field
could interfere with certain pacemakers. To reduce the risk
of serious or fatal injury, persons with pacemakers should
consult their doctor or the manufacturer of the pacemaker
before using this machine.
WARNING! – National regulations could limit use of the
machine.
8

English Français
SAFETY PRECAUTIONS
move and is not in contact with any foreign objects.
11 - Every now and then while working, stop the engine and check
the blade. Replace it at the rst sign of cracks or breaks (Fig. 3).
12 - Only use the machine in well-ventilated places, do not use in
explosive or ammable atmospheres or in closed environments
(Fig. 4).
13 - Never touch the blade or attempt any maintenance work while
the engine is running.
14 - It is prohibited to t any device other than that supplied by the
manufacturer.
15 - Do not use a machine that has been damaged, badly repaired,
improperly assembled or modied. Do not attempt to remove
or bypass any of the safety devices. Only use cutting attachments
indicated in the table.
16 - All labels with health hazards must be kept in good conditions.
In case of damage or deterioration, immediately substitute them
(see pag.4-5).
17 - Do not utilize the machine for uses different from the ones
specified in the manual (see pag. 30).
18 - Never leave the machine unattended with the engine running.
19 - Do not start the engine with the arm not mounted.
20 - Check the brush cutter daily to be sure that components and
safety devices are full functioning properly.
21 - Do not attempt to carry out operations or repairs that are not
part of the normal maintenance. See the authorised dealer.
22 - When disposing of the machine at the end of its useful life,
think of the environment. Take your old unit to your dealer
who will be able to dispose of it in a proper manner.
23 - Only experienced persons who are familiar with the operation
and safe use of this machine should use it. If you lend the
blower to someone, also give them the instruction manual and
ensure that they read it before using the machine.
24 - All saw service, other than the operations shown in the
present manual, should be performed by competent personnel.
25 - Keep this manual on hand and consult it before each use of
the tool.
26 - Please note that the owner or the user is responsible for any
accidents or damage to third parties or their property.
bien librement et s'il n'est pas en contact avec des corps étrangers.
11 - Pendant le travail contrôlez souvent le disque en arrêtant le moteur.
Changez de disque dès que vous remarquez des ssures ou des
cassures (Fig. 3).
12 - Utiliser la débroussailleuse exclusivement dans des endroits aérés,
ne pas l'utiliser en atmosphère explosive, inammable ou dans des
zones connées (Fig. 4).
13 - Quand le moteur tourne n'eectuez aucun entretien et ne touchez
pas au disque.
14 - Il est interdit d'appliquer sur la prise de force de la débroussailleuse
des dispositifs non fournis par le constructeur.
15 - Ne pas utiliser la débroussailleuse si elle est endommagée, mal
réparée, mal montée ou modiée de façon arbitraire. Ne pas enlever,
endommager ou rendre inecace l'un des dispositifs de sécurité.
Utiliser exclusivement les dispositifs de coupe indiqués dans le
tableau.
16 - Veillez à ce que les étiquettes portant les signaux de danger et de
sécurité soient toujours en parfait état. Si elles sont détériorées,
remplacez-les sans délai (voir pag. 4-5).
17 - N'utilisez pas la tronçonneuse dans un but autre que ceux
indiqués dans le manuel (voir pag. 30).
18 - N'abandonnez pas la machine moteur en marche.
19 - Ne faites pas démarrer le moteur sans que le bras soit monté.
20 - Contrôleztousles jours ladébroussailleuseet assurez-vous quetous
les dispositifs, de sécurité et autres, fonctionnent bien.
21 - N'eectuez pas d'opérations ou de réparations qui ne soient pas
d'entretien normal. Adressez-vous plutôt à des ateliers autorisés.
22 - S'il s'avère nécessaire de mettre la débroussailleuse hors service,
ne pas l'abandonner dans l'environnement mais la remettre au
Revendeur qui veillera ŕ son évacuation.
23 - Ne confier ou prêter la débroussailleuse qu'à des personnes
qualifiées et au courant du fonctionnement correct de l'appareil.
Remettre par la même occasion le manuel contenant le mode
d'emploi à lire avant de commencer les travaux.
24 - S’adresser a un revendeur pour toutes autres demandes ou pour
une intervention prioritaire.
25 - Conservez ce manuel soigneusement et consultez-le à chaque
foisque vous devrez utiliser la machine.
26 - Se rappeler que le propriétaire ou l’opérateur sont responsables
des accidents ou des dommages à tiers, aux biens de leur
propriété.
NORMES DE SECURITE
1 - Ne pas utiliser la débroussailleuse avant de s'être informé sur les
modalités spéciques d'utilisation. L'opérateur inexpert devrait
s'exercer avant d'utiliser la machine sur le terrain.
2 - La débroussailleuse ne peut être utilisée que par des personnes
majeures en bonne condition physique et bien informées de son
mode d'emploi.
3 - N'utilisez pas la débroussailleuse si vous êtes physiquement fatigué
ou sous l'inuence de l'alcool, de drogues ou de médicaments
(Fig. 1).
4 - Portez des vêtements adéquats et sûrs comme par exemple des
bottes,unpantalonrésistant,desgants,deslunettesdeprotection,un
casqueantichoc(voir pag. 12-13).Utilisez des vêtementsadhérents
mais commodes.
5 - Ne laissez pas les enfants utiliser la débroussailleuse.
6 - Veillez à ce que personne ne se trouve dans un rayon de 15 mètres
quand la débroussailleuse est en marche (Fig. 2).
7 - Avant d'utiliser une débroussailleuse vériez si le boulon de xage
du disque est bien serré.
8 - La débroussailleuse doit être équipée des outils de coupe conseillés
par le fabricant (voir pag. 61).
9 - N'utilisez pas la débroussailleuse sans la protection du disque.
10 - Avant de mettre le moteur en marche vériez si le disque tourne
ATTENTION:Sivousutilisezcorrectementladébroussailleuse
vous aurez un instrument de travail rapide, pratique et efficace
;utilisédefaçonnon correcteousans adopterles précautions
nécessaires,cetinstrument pourraits’avérerdangereux.Pour
que votre travail soit toujours agréable et sûr respectez
scrupuleusement les règles de sécurité reportées ci-dessous
et au cours du manuel.
ATTENTION : Le système de mise en marche de l'unité
produit un champ électromagnétique de très basse intensité.
Ce champ peut créer des interférences avec certains
pacemakers. Pour réduire le risque de lésions graves ou
mortelles, les porteurs de pacemaker devraient consulter leur
médecin et le fabricant du pacemaker avant d'utiliser cette
machine.
ATTENTION ! – Certains règlements nationaux pourraient
limiter l'utilisation de la tronçonneuse.
9

10
Italiano FrançaisEnglishDeutsch
SICHERHEITSVORKEHRUNG
Español
NORMAS DE SEGURIDAD
ACHTUNG: Bei richtiger Anwendung ist die Motorsense ein
schnelles, bequemes und wirkungsvolles Arbeitsgerät; falls Sie sie
falsch oder ohne die nötige Vorsicht einsetzen, kann sie zu einer
Gefahr werden. Beachten Sie bitte daher unbedingt die
SicherheitsvorschriftendieSienachstehendinderBetriebsanleitung
finden, damit ihre Arbeit immer angenehm und sicher ist.
ACHTUNG: Das Zündsystem Ihres Geräts erzeugt ein
elektromagnetisches Feld geringer Stärke. Dieses Feld kann unter
Umständen Herzschrittmacher beeinflussen. Um die Gefahr
ernster oder gar tödlicher Unfälle zu reduzieren, sollten Personen
mit Herzschrittmachern vor Benutzung dieser Maschine ihren
Arzt und den Hersteller des Herzschrittmachers zu Rate ziehen.
ACHTUNG! – Nationale Verordnungen können den Gebrauch
des Geräts einschränken.
1 - VerwendenSiedasGeräterst,wennSieinseinenGebraucheingewiesen
sind. Unerfahrene Benutzer müssen sich vor dem Arbeitseinsatz mit
dem Gerät vertraut machen.
2 - Das Gerätdarf nurvon Erwachsenen inguter körperlicherVerfassung
verwendet werden, die darüber hinaus in die Gebrauchsanleitungen
eingewiesen sind.
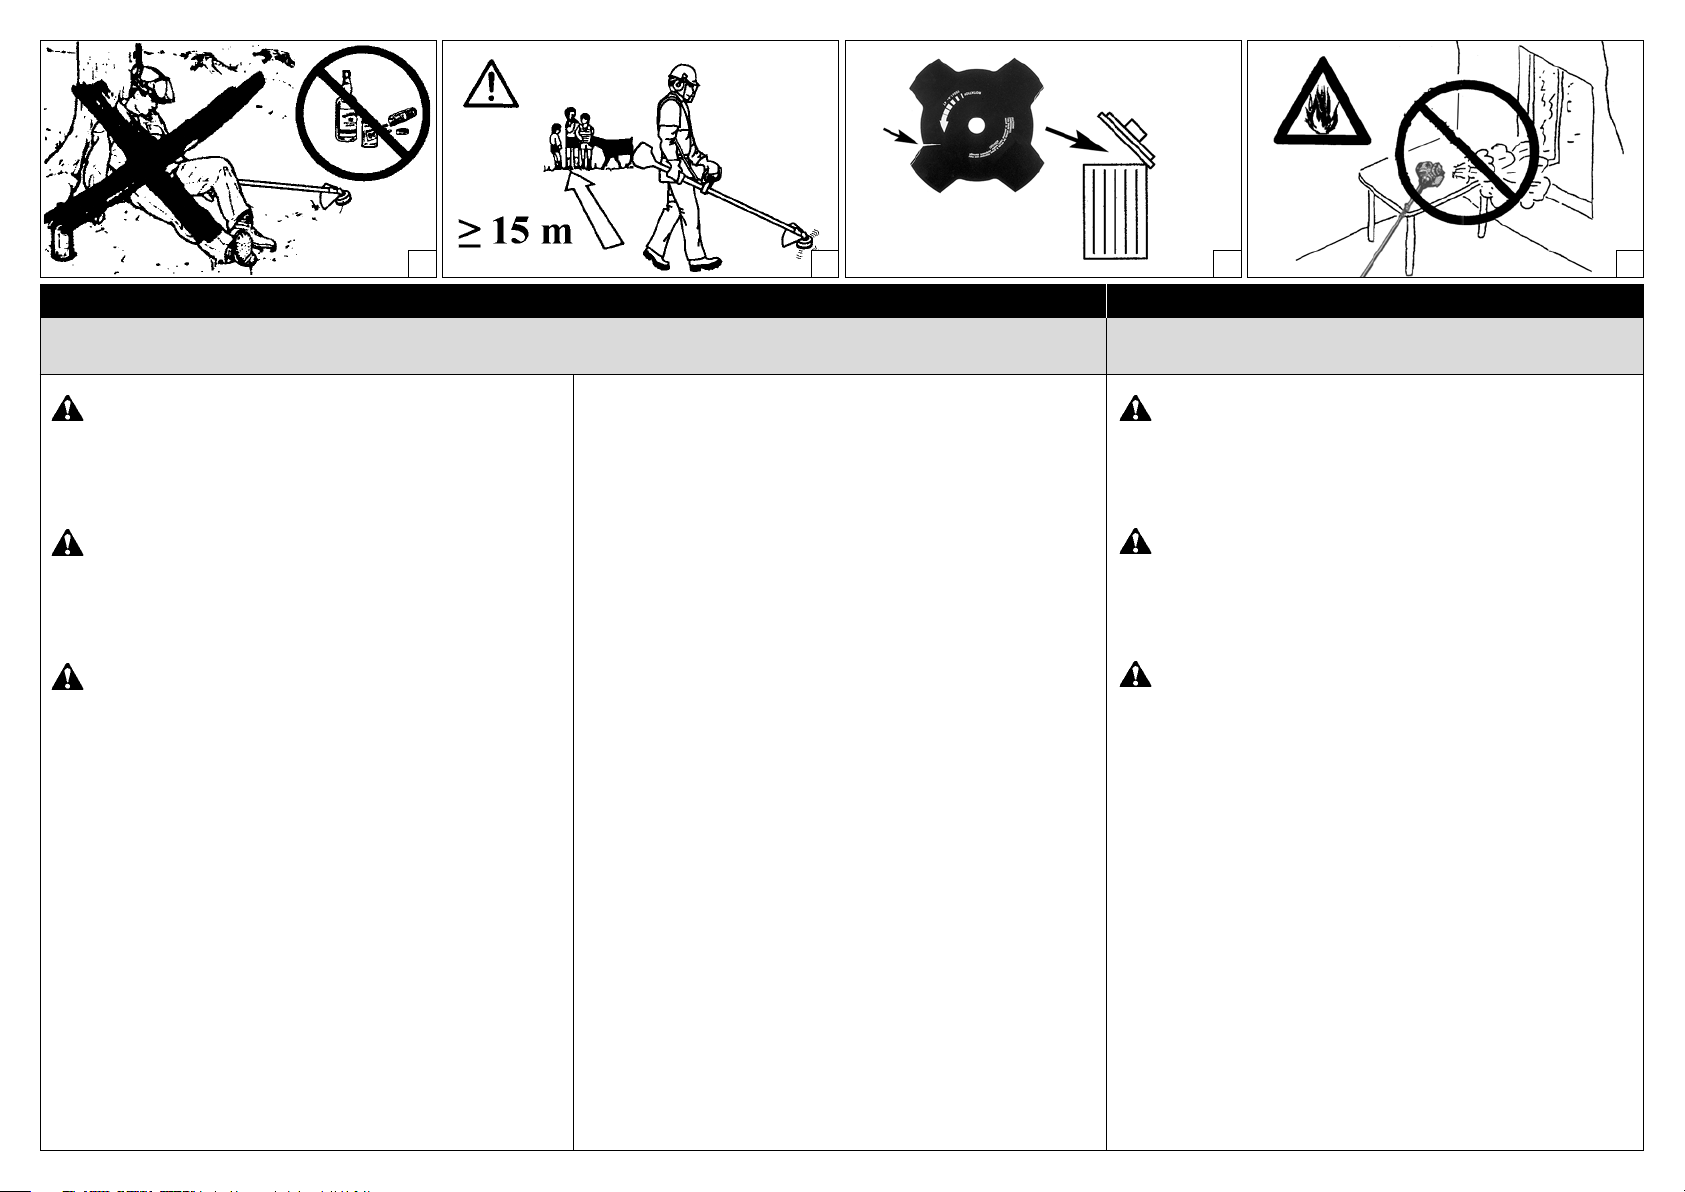
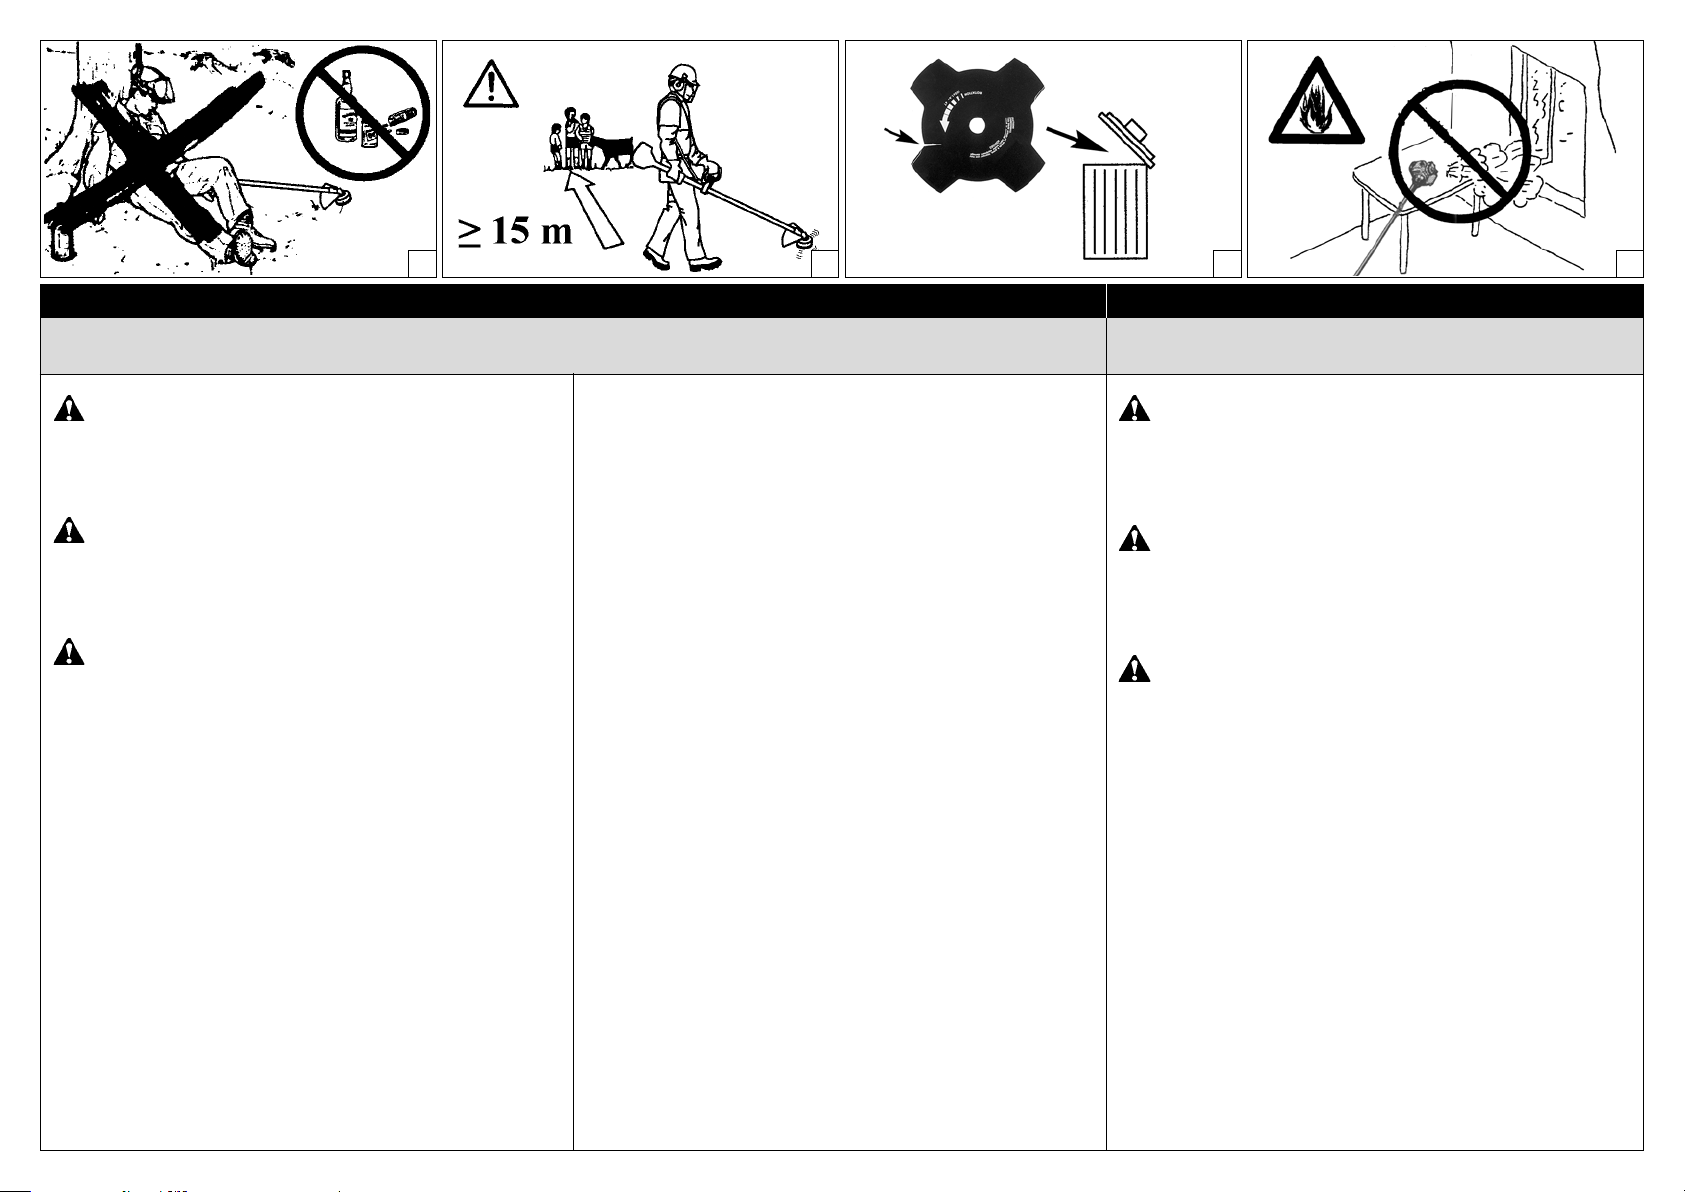
3 - Motorsense nur in gesundem und ausgeruhten Zustand gebrauchen
nicht unter dem Einuß von Alkohol, Drogen oder Medicamenten
(Abb. 1).
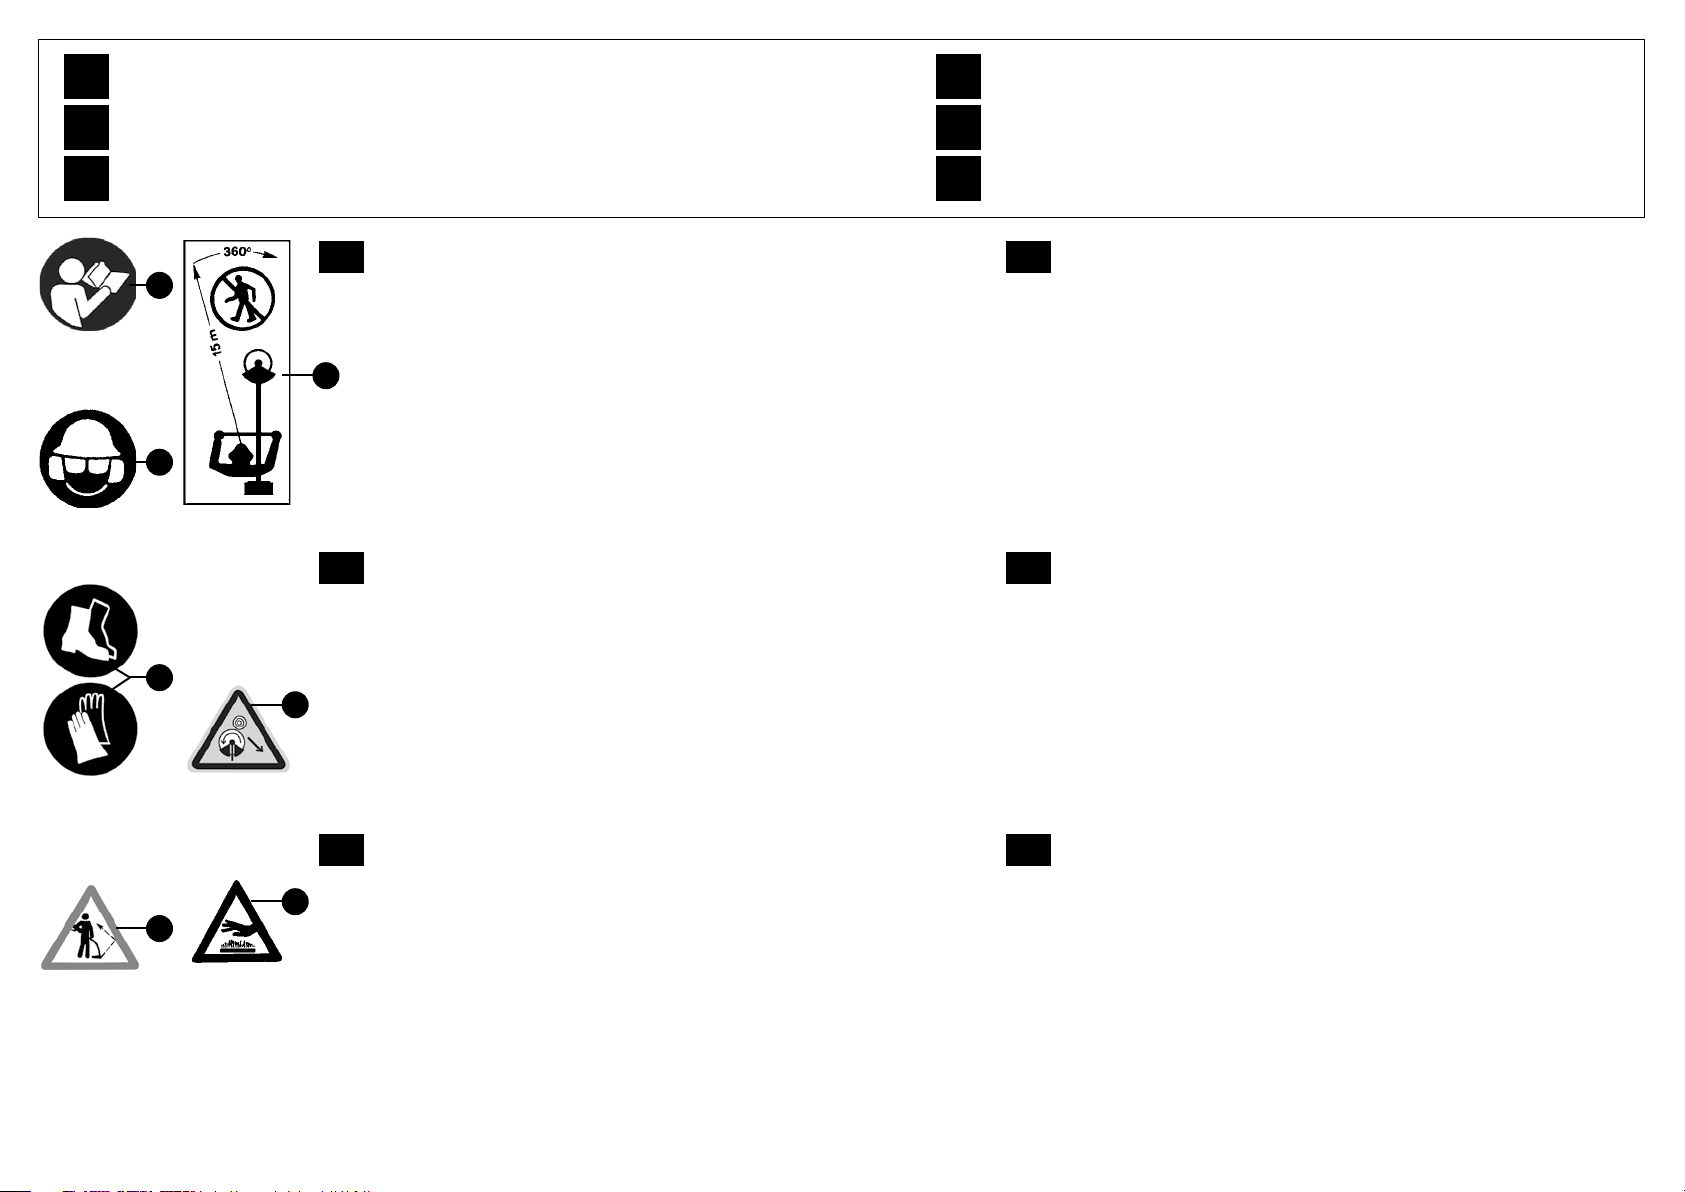
4 - Stets geeignete Schutzkleidung sowie rutschfestes Schuhwerk,
Handschuhe,Lärmschutz,SchutzbrilleundHelmtragen.DieKleidung
soll anliegend aber bequem sein (Siehe Seite 12-13).
5 - Kinder in sicherer Entfernung halten (Abb. 2).
6 - Beim Starten und beim Gebrauch der Motorsense dürfen sich im
Umkreis von mind. 15 m. des Arbeitsbereichs keine Personen oder
Tiere aualten.
7 - Vor jedem Gebrauch die Fixierungsschraube des Schneidwerkzeugs
auf festen Sitz überprüfen.
8 - NurSchneidwerkzenge undErsatzteileverwenden,dievom Hersteller
ausdrücklich empfohlen werden (Siehe Seite 61).
9 - Die Motorsense nur mit vorgesehener Schneidschutzvorrichtung
gebrauchen. Schultergurte müssen vor Arbeitsbeginn entsprechend
der Körpergrösse eingestellt werden.
10 - Vor dem Startvorgang darauf achten, daß das Schneidwerkzeug frei
ATENCION: La máquina desbrozadora, si se usa bien es un
instrumento de trabajo rápido, cómodo y ecaz; si se usa
incorrectamenteosinlasdebidasprecaucionespuedeconvertirse
en un instrumento peligroso. Para que su trabajo sea siempre
placentero y seguro, respete escrupulosamente las normas de
seguridad indicadas a continuación en el presente manual.
ATENCIÓN: El sistema de encendido de su unidad produce
un campo electromagnético de muy baja intensidad. Este
campo puede interferir con algunos marcapasos. Para reducir
el riesgo de lesiones graves o mortales, las personas con
marcapasos deberían consultar a su médico y al fabricante del
marcapasos antes de utilizar esta máquina.
¡ATENCIÓN! – El uso de la máquina puede estar limitado
por reglamentos nacionales.
1 - No utilizar la máquina sin antes instruirse sobre el modo de uso.
El operador deberá ejercitarse antes de utilizar la máquina por
primera vez.
2 - La máquina debe ser utilizada por personas adultas en buenas
condiciones físicas e instruidas sobre las normas de uso.
3 - No use nunca la desbrozadora cuando esté físicamente cansado
o se encuentre bajo ed efecto de alcohol, drogas o medicación
(Fig. 1).
4 - Use ropa apta y articulos de seguridad como botas, pantalones
resistentes, guantes, gafas y casco de protección (vea pág. 12-13).
No use ropa demasiado suelta, más bien adherente, pero cómoda.
5 - No permita que los niños usen la desbrozadora.
6 - No permita que otras personas permanezcan en el radio de acción
de 15 metros mientras está usando la desbrozadora (Fig. 2).
7 - Antes deemplear la desbrozadoracontroleque elpernode jación
del disco esté bien apretado.
8 - La desbrozadora tiene que estar equipada con las herramientas de
corte recomendadas por el constructor (vea pág. 61).
9 - No use nunca la desbrozadora sin la protección del disco o del
cabezal.
1 2 4
drehen kann und mit keinen Hindernissen oder Gegenständen in
Berührung kommt.
11 - Vor und in regelmäßig kurzen Abständen während des Betriebs ist
das Schneidwerkzeug -bei abgestelltem Motor - zu überprüfen. Bei
Brüchen oder Rissbildungen ist das Schneidblatt bei abgestelltem
Motor (Montageanleitung beachten) auszuwechseln (Abb. 3).
12 - Verwenden Sie das Gerät nur in ausreichend belüeter Umgebung,
nicht in explosions- oder entzündungsgefährdeten Bereichen oder in
geschlossenen Räumen (Abb. 4).
13 - Wartungs- und Reinigungsarbeiten dürfen nur bei abgestelltem
Motor vorgenommen werden (ausgenommen Vergaser- und
Leerlaufeinstellung), Zündkerzenstecker vorher abziehen.
14 - Rüsten Sie den Abtrieb des Geräts nur mit den Originalausrüstungen
des Herstellers aus.
15 - Arbeiten Sie nicht mit einem beschädigten, behelfsweise reparierten,
falsch montierten oder eigenmächtig umgerüsteten Gerät. Sie dürfen
die Sicherheitsvorrichtungen auf keinen Fall abnehmen, beschädigen
bzw. unwirksam machen. Verwenden Sie nur die in der Tabelle
angegebenen Schneidwerkzeuge.
16 - SämtlicheSchildermit denGefahrensymbolenundSicherheitszeichen
müssen sich in einwandfreiem Zustand befinden. Bei Beschädigung
oder Unleserlichkeit müssen sie rechtzeitig ersetzt werden
(siehe Seite 4-5).
17 - Das Gerät darf ausschließlich für die in der Betriebsanleitung
angegebenen Zwecke verwendet werden (siehe seite 31).
18 - Die Maschine nicht mit laufendem Motor liegen lassen.
19 - Den Motor nicht starten, bevor Motor und Scha fertig montiert sind.
20 - Vor jedem Einsatz alle Vorrichtungen (auch die an der Motorsense
vorgesehenen Sicherheitsvorrichtungen) auf korrekte Funktion
überprüfen.
21 - Reparaturen oderEingrieausserhalb dernormalen Wartungmüssen
vom Händler oder von der Vertragswerkstatt durchgeführt werden.
22 - Lassen Sie stillgelegte Geräte unbedingt durch Ihren Fachhändler
umweltgerecht entsorgen.
23 - Geben oder borgen Sie den Freischneider nur Personen, die über
Funktionsweise und Gebrauch genauestens informiert sind.
Händigen Sie in diesem Fall ebenso die Gebrauchsanleitungen aus.
24 - Wenden Sie sich für weitere Auskünfte stets an Ihren Fachhändler.
25 - Bewahren Sie dieses Handbuch sorgfältig auf und lesen Sie es vor
jeder Inbetriebnahme der Maschine.
26 - Der Besitzer bzw. Bediener ist in jedem Fall für die Unfälle oder
Risiken gegenüber Dritten oder deren Besitz verantwortlich.
3

11
EspañolDeutsch Slovensky
Slovensky
PRAVIDLÁ BEZPEČNOSTI
Español
NORMAS DE SEGURIDAD
11 - Počas práce kotúč často kontrolujte zastavením motora. V prípade
výskytu trhlín alebo prasklín kotúč okamžite vymeňte (Obr. 3).
12 - Stroj používajte iba na dobre vetraných miestach, nepoužívajte
ho vo výbušnom alebo horľavom prostredí ani v uzavretých
priestoroch (Obr. 4).
13 - Ak je motor spustený, nerobte žiadnu údržbu ani nechytajte kotúč.
14 - Na pohonnú jednotku stroja sa nesmie namontovať žiadne
zariadenie, ktoré nie je odporučené výrobcom.
15 - Nepracujte s poškodeným, zle opraveným, nesprávne
zmontovaným alebo ináč upraveným strojom. Neodstraňujte,
nepoškodzujte a nevyraďujte žiadne bezpečnostné zariadenie.
Používajte iba výrobcom odporučené rezné/kosiace nástroje, ktoré
sú uvedené v tabuľke.
16 - Všetky štítky a nálepky s výstražnou signalizáciou udržiavajte v
čitateľnom stave. V prípade poškodenia alebo opotrebovania ich
treba včas vymeniť (Pozrite str. 4-5).
17 - Stroj nepoužívajte na iné účely ako sú uvedené v návode (str. 31).
18 - Stroj nenechávajte bez dozoru, ak je zapnutý jeho motor.
19 - Motor neštartujte ak nie je krovinorez kompletne zložený.
20 - Vždy pred každým začatím práce kontrolujte krovinorez, aby ste
sa ubezpečili, či je každá súčiastka, bezpečnostné zariadenie úplne
funkčné a skrutkové spoje sú dotiahnuté.
21 - Nevykonávajte zásahy alebo opravy, ktoré nie sú súčasťou
normálnej údržby. V takomto prípade sa radšej obráťte sa na
autorizovaný servis.
22 - V prípade, že stroj budete musieť zlikvidovať, nevyhadzujte ho
voľne, ale odovzdajte ho v predajni, kde ste ho kúpili alebo v
zbernom stredisku.
23 - Vyžínač odovzdajte alebo požičiavajte len skúseným osobám,
ktoré sú oboznámené s jeho obsluhou. Stroj odovzdajte ďalším
používateľom aj s návodom na používanie, aby si ho mohli pred
použitím prečítať.
24 - V prípade potreby akéhokoľvek ďalšieho objasnenia alebo zásahu sa
vždyobráťtenavášhopredajcu,aleboautorizovanéservisnéstredisko.
25 - Tento návod starostlivo uschovajte a pred každým použitím stroja
si ho prečítajte.
26 - Nezabudnite, že majiteľ alebo obsluhujúci pracovník nesú
zodpovednosť za úrazy alebo riziká pre iné osoby, ako aj za ich
majetok.
10 - Antes de poner en marcha el motor controle que el disco gire
libremente y que no esté en contacto con cuerpos extraños.
11 - Durante el trabajo controle a menudo el disco y para ello pare
el motor. Cambie el disco en cuanto aparezcan grietas o roturas
(Fig. 3).
12 - Utilizar la máquina sólo en lugares bien ventilados; no utilizarla
en entornos explosivos o inamables o en ambientes cerrados
(Fig. 4).
13 - No realice ninguna operación de mantenimiento con el motor en
marcha, ni tampoco toque el disco.
14 - Estáprohibidoaplicaralatomadefuerzadelamáquinadispositivos
no suministrados por el fabricante.
15 - No trabajar con la máquina dañada, mal reparada, mal montada o
modicada arbitrariamente. No quitar, dañar o inutilizar ningún
dispositivo de seguridad. Utilizar únicamente los dispositivos de
corte que se indican en la tabla.
16 - Mantengatodaslasetiquetascon lasseñalesdepeligroyseguridad
en perfectas condiciones. Si alguna se estropea, sustitúyala de
inmediato (vea pag. 4-5).
17 - No utilice la máquina para una aplicación distinta de las que se
indican en el manual (vea pag. 31).
18 - No abandonar la máquina en el motor encendido.
19 - No ponga en marcha el motor sin haber antes montado el brazo.
20 - Controle diariamente la desbrozadora para asegurarse que todos
los dispositivos, de seguridad y no, funcionen perfectamente.
21 - No efectúe Ud. mismo las operaciones que no sean de
mantenimiento normal. Diríjase a talleres autorizados.
22 - Cuando la máquina se retire del uso, no abandonarla en el
medio ambiente; entregarla al revendedor.
23 - Entregar o prestar la desbrozadora sólo a personas expertas y
conocedoras del funcionamiento y del uso correcto de la
máquina. Entregar también el manual de instrucciones de uso,
cuya lectura es necesaria antes de comenzar el trabajo.
24 - Dirigirse siempre a su vendedor para cualquier otra aclaraciòn
o intervenciòn prioritaria.
25 - Conservar cuidadosamente el presente manual de instrucciones
y consultarlo en cada ocasión en que la máquina sea utilizada.
26 - El propietario o el usuario es responsable de los riesgos y
accidentes sufridos por terceros y de los daños sufridos por
bienes.
UPOZORNENIE - Ak je motorová kosa (ďalej len
"krovinorez") správne používaný, je rýchlym pomocníkom a
pohodlným a účinným nástrojom. Pokiaľ je stroj používaný
nesprávne alebo bez dodržiavania pravidiel bezpečnosti, môže
sa stať nebezpečným nástrojom. Aby bola vaša práca vždy
príjemná a bezpečná, dodržujte vždy prísne bezpečnostné
pravidlá, ktoré sú uvedené v tomto návode na použitiie.
POZOR:Štartovací systém jednotky vytvára elektromagnetické
pole veľmi nízkej intenzity. Toto pole môže rušiť činnosť
niektorých kardiostimulátorov (pacemakerov). Na zníženie
rizika vážnych alebo smrteľných poranení, by sa osoby s
kardiostimulátorom mali poradiťsosvojímlekáromavýrobcom
kardiostimulátora ešte pred používaním tohto stroja.
UPOZORNENIE! – Používanie tohto stroja môžu obmedzovať
vnútroštátne predpisy.
1 - Stroj nepoužívajte skôr, kým sa podrobne neoboznámite s jeho ob-
sluhou. Začiatočníci by si mali pred prácou obsluhu stroja vyskúšať.
2 - Stroj môžu používať iba dospelé osoby, v dobrom fyzickom stave,
ktoré sú oboznámené s jeho obsluhou v rozsahu tohto návodu.
3 - Nepoužívajte krovinorez, keď ste unavení alebo pod vplyvom
alkoholu, drog, iných, omamných látok alebo liekov (Obr. 1).
4 - Noste vhodný homologizovaný ochranný odev a aj iné ochranné
prostriedky, ako čižmy, hrubé nohavice, rukavice, slúchadlá a
protiúrazovú prilbu s ochranou tváre (pozri str. 12-13). Noste
priliehavé, ale pohodlné oblečenie.
5 - Nedovoľte používať krovinorez deťom.
6 - Nedovoľte iným osobám, aby sa zdržiavali v okruhu 15
metrov od krovinorezu počas jeho používania (Obr. 2).
7 - Pred použitím krovinorezu skontrolujte, či je upevňovacia
skrutka kotúča dobre utiahnutá.
8 - Krovinorez musí byť vybavený reznými nástrojmi, ktoré sú
odporúčané výrobcom (pozri str. 61).
9 - Nepoužívajte krovinorez bez ochranného štítu kotúča alebo
strunovej hlavice.
10 - Pred naštartovaním motora sa ubezpečte, či sa kotúč voľne točí a či
nie je v kontakte s cudzími predmetmi.

Italiano
ABBIGLIAMENTO PROTETTIVO DI SICUREZZA
Français
1 2 3
English
SAFETY PROTECTIVE CLOTHING
Quando si lavora con il decespugliatore usare
sempre un abbigliamento protettivo di sicurezza
omologato. L’uso dell’abbigliamento protettivo non
elimina i rischi di lesione, ma riduce gli eetti del danno
in caso di incidente. Fatevi consigliare dal vostro
rivenditore di ducia per la scelta dell’abbigliamento
adeguato.
L’abbigliamento deve essere adatto e non d’impaccio.
Indossare un abito aderente protettivo. La giacca (Fig.1)
e la salopette (Fig.2) di protezione Oleo-Mac sono
l’ideale. Non portare abiti, sciarpe, cravatte o monili
che potrebbero impigliarsi nella sterpaglia. Raccogliere i
capelli lunghi e proteggerli (per esempio con un foulard,
un berretto, un casco, ecc.)
Indossare scarpe di sicurezza munite di suole
antisdrucciolo e puntali d’acciaio (Fig.3).
Indossare gli occhiali o la visiera protettivi (Fig.4-5)!
Applicare protezioni dai rumori; per esempio le cue
(Fig.6)oitappi.L’usodelleprotezioniperl’uditorichiede
maggior attenzione e prudenza, perché la percezione di
segnaliacusticidipericolo(grida,allarmi,ecc.)èlimitata.
Calzare guanti (Fig.7) che permettano il massimo
assorbimento delle vibrazione.
Oleo-Mac offre una gamma completa di
equipaggiamento per la sicurezza.
While working with the brushcutter, always use
safetyprotectiveapprovedclothing.euseofprotective
clothing does not eliminate injury risks, but reduces the
injury eects in case of accident. Consult your trusted
supplier to choose an adequate equipment.
e clothing must be proper and not an obstacle. Wear
adherentprotectiveclothing.Oleo-Macprotectivejackets
(Fig.1) and dungarees (Fig.2) are ideal. Do not wear
clothes, scarfs, ties or bracelets that can stuck into twigs.
Tieupandprotect longhair (examplewith foulards, caps,
helmets, etc.).
Safety shoes having skid-proof sole and anti-piercing
insert (Fig.3).
Wear protective goggles or face screens (Fig.4-5)!
Use protections against noises; for example noise
reduction ear guards (Fig.6) or earplugs. e use of
protections for the ear requests much more attention and
caution, because the perception of danger audio signals
(screamings, alarms, etc.) is limited.
Wear gloves (Fig.7) that permit the maximum
absorption of vibrations.
Oleo-Macoersacompleterangeofsafetyequipments.
VÊTEMENTS DE PROTECTION
Toujours porter des vêtements de protection
homologuéspourutiliser unedébroussailleuse. Le port
de vêtements de protection n'élimine pas les risques de
blessure mais il peut en réduire les eets en cas d'accident.
Demandezconseilàvotrerevendeurhabituelpourchoisir
le vêtement qui répond le mieux à vos exigences.
Assurez-vous que le vêtement choisi ne gêne pas les
mouvements. Portez un vêtement de protection près du
corps.Laveste(Fig.1)etlasalopette(Fig.2)deprotection
Oleo-Mac sont l’idéal. Ne portez pas de vêtements,
écharpes,cravatesoubijouxquirisqueraientdes'accrocher
dans les buissons. Nouez les cheveux longs et protégez-les
(par exemple avec un foulard, un béret, un casque, etc...).
Portez des chaussures de protection avec semelles
antiglisse et pointes en acier (Fig. 3).
Portezdeslunettesouunevisièredeprotection(Fig.4-5)!
Utilisez des dispositifs protégeant contre les émissions
sonores; casque (Fig. 6) ou boules dans les oreilles.
Rappelez-vousd'êtreextrémementprudentslorsquevous
utilisezcegenredeprotectioncarlaperceptiondessignaux
acoustiques de danger (cris, alarmes, etc...) est réduite.
Portez des gants (Fig. 7) qui absorbent le plus possible
les vibrations.
Oleo-Mac ore une gamme complète d'équipements
de sécurité.
12

Español
Deutsch
457
6
Slovensky
SICHERHEITS-/SCHUTZKLEIDUNG
BeiderArbeitmitdemFreischneidermussderBediener
daher immer zugelassene Sicherheits-/Schutzkleidung
tragen. Durch die Benutzung der Schutzkleidung wird die
Verletzungsgefahrzwarnichtbeseitigt,aberdieAuswirkungen
des Schadens im Falle eines Unfalls reduziert. Ihr Fachhändler
berät Sie gern bei der Wahl der richtigen Schutzkleidung.
Die Kleidung muss geeignet sein und darf die Arbeit nicht
behindern. Tragen Sie anliegende Schutzkleidung. Die Jacke
(Abb.1) und die Schutzlatzhose (Abb.2) von Oleo-Mac
sind ideal. Tragen Sie keine Kleider, Schals, Krawatten oder
Schmuckstücke, die sich im Gestrüpp verfangen könnten.
Binden Sie langes Haar zusammen und schützen Sie es (zum
Beispiel mit einem Schal, einer Mütze, einem Helm usw.)
Tragen Sie Sicherheitsschuhe mit rutschfesten Sohlen und
Stahlkappen (Abb.3).
Benutzen Sie die Schutzbrille oder das Schutzvisier
(Abb. 4-5)!
Benutzen Sie einen Gehörschutz; zum Beispiel den
GehörschutzmitBügel(Abb.6)oderdieGehörschutzstöpsel.
Die Verwendung eines Gehörschutzes erfordert erhöhte
Aufmerksamkeit und Vorsicht, denn die Wahrnehmung
akustischer Warnsignale (Rufe, Alarme usw.) wird dadurch
eingeschränkt.
Tragen Sie Handschuhe (Abb.7), mit denen die Vibrationen
maximal gedämp werden.
Oleo-Mac bietet ein komplettes Sortiment von
Sicherheitsausrüstungen.
INDUMENTOS DE SEGURIDAD
Paratrabajarconladesbrozadora,colocarsesiempre
indumentos de seguridad homologados. El uso de
elementos de seguridad no elimina los riesgos de lesiones
pero reduce los daños en caso de accidente. Consultar con
elvendedordelamáquinasobrelosindumentosadecuados.
La ropa debe ser cumplir su función de protección y ser
cómoda.Utilizarropaadherenteyprotectora.Lachaqueta
(Fig. 1) y el peto (Fig. 2) de protección Oleo-Mac son
ideales. No llevar ropa, bufandas, corbatas o adornos que
puedan ser atrapados por la maleza. Recogerse el cabello
largo y cubrirse, por ejemplo con un pañuelo, una gorra
o un casco.
Utilizar zapatos de seguridad con suela antideslizante y
punteras de acero (Fig. 3).
¡Utilizar siempre las gafas o la visera de protección!
(Fig. 4-5)
Emplear elementos de protección contra el ruido, como
auriculares (Fig. 6) o tapones. El uso de las protecciones
para el oído exige mayor atención y prudencia porque
se reduce la percepción de las señales sonoras de peligro
(gritos, alarmas, etc.).
Ponerseguantes(Fig.7)queabsorbanelmáximoposible
las vibraciones.
Oleo-Mac ofrece un equipamiento de seguridad
completo.
OCHRANNÝ BEZPEČNOSTNÝ ODEV
Pri práci s krovinorezom vždy používajte
homologizovaný bezpečnostný ochranný odev.
Použitím ochranného odevu sa neodstráni
nebezpečenstvo úrazu, ale v prípade nehody zníži jeho
dôsledky. Pri výbere vhodného odevu si nechajte poradiť
svojím predajcom.
Odev musí byť vhodný k danej práci a pohodlný. Noste
priliehavý ochranný odev. Ideálny pracovný odev je
bunda (Obr. 1) a pracovné nohavice (Obr. 2) Oleo-
Mac. Nenoste odevy, šály, kravaty alebo prívesky, ktoré
by sa mohli zachytiť v kroví. Ak máte dlhé vlasy, dajte ich
do gumičky a zakryte ich (napr. šatkou, čiapkou, alebo
prilbou, atď.).
Noste ochranné topánky vybavené protišmykovou
podrážkou a oceľovými špičkami (Obr. 3).
Používajte ochranné okuliare alebo štít (Obr. 4-5)!
Používajte chrániče proti hluku, napr. slúchadlá
(Obr. 6) alebo ušné tampóny. Používanie pomôcok na
ochranu sluchu vyžaduje väčšiu pozornosť a opatrnosť,
pretože pracovník horšie vníma výstražné zvukové
signály (krik, zvukové výstrahy a pod.).
Používajte rukavice (Obr. 7), ktoré umožňujú
maximálne pohltenie vibrácií.
Oleo-Mac ponúka kompletnú radu bezpečnostných
vybavení.
13
p.n. 3155027R

14
Italiano FrançaisEnglish
ASSEMBLAGGIO ASSEMBLAGEASSEMBLY
MONTAGGIO PROTEZIONE SICUREZZA (Fig. 1 A-B)
Fissarelaprotezione(A)altuboditrasmissionetramiteleviti
(B), in una posizione che permetta di lavorare in sicurezza.
NOTA: utilizzare la protezione (C, Fig. 1 A) solamente
con la testina a li di nylon. La protezione (C) deve essere
ssata con la vite (G) alla protezione (A).
Per i dischi da legno (22-60-80 denti) utilizzare sempre
l’apposita protezione di metallo (Fig. 1B).
MONTAGGIO DISCO (Fig. 2)
Svitare in senso orario il dado (A); togliere la coppa (D) e
la angia inferiore (E). Montare il disco (R) sulla angia
superiore (F) assicurandosi del giusto senso di rotazione.
Montare la angia inferiore (E), la coppa (D) ed avvitare il
dado (A) in senso antiorario. Inserire il perno in dotazione
(L), nell’apposito foro per bloccare il disco e permettere il
serraggio del dado a 2.5 Kgm (25 Nm).
MONTAGE PROTECTION-SECURITE (Fig. 1
A-B
)
Fixer la protection (A) au tuyau de transmission à l'aide
des vis (B) en position telle à vous permettre de travailler
en toute sécurité.
NOTE : utiliser la protection (C, Fig.1 A) seulement avec
latêtelnylon.Leprotecteur(C)doitêtrexésurlecarter
de protection (A) au moyen de la vis (G).
Pour les disques à bois (22-60-80 dents) utiliser toujours la
protéction spéciale en métal (Fig. 1B).
MONTAGE DU DISQUE (Fig. 2)
Dévisser l'écrou (A) dans le sens des aiguilles d'une montre ;
ôter la coupelle (D) et le asque inférieur (E). Monter le
disque (R) sur le asque supérieur (F) en s'assurant que
le sens de rotation est correct. Monter le asque inférieur
(E), la coupelle (D) et visser l'écrou (A) dans le sens inverse
des aiguilles d'une montre. Introduire l'axe fourni (L) dans
l'orice prévu à cet eet pour bloquer le disque et permettre
de serrer l'écrou à 2,5 Kgm (25 Nm).
FITTING THE SAFETY GUARD (Fig. 1
A-B
)
Fit the blade guard (A) to the sha arm with screws in a
position allowing the operator to work safely (B).
NOTE: use the guard (C, Fig. 1 A) only with nylon head.
Secure the guard (C) to the protection (A) by means of
the screw (G).
When using discs for wood (22-60-80 teeth), always set up
metal guard (see Fig. 1B).
FITTING THE BLADE (Fig. 2)
Unscrew the nut (A) by turning it clockwise; remove the
cup (D) and lower ange (E). Fit the blade (R) onto the
upper ange (F), making sure that the rotation direction
is correct. Fit the lower ange (E) and cup (D) and tighten
the nut (A) anti-clockwise. Insert the pin supplied (L) in the
hole to secure the blade and allow the nut to be tightened
to 2.5 kgm (25 Nm).
1A 1B 23
C
ATTENZIONE–Ilcollare(vedifrecceC,Fig.3)deve
posizionarsi nel foro di montaggio del disco.
WARNING – Collar(see arrowsC, Fig.3)must locate
in blade’s mounting hole.
ATTENTION – Installer le collier (voir èches C,
Fig.3) dans l’orice de montage du disque.

15
EspañolDeutsch Slovensky
MONTAJE MONTÁŽ
´MONTAJE DE LA PROTECCION DE SEGURIDAD
(Fig. 1 A-B)
Fije la protección (A) al tubo de transmisión, por medio de
los tornillos (B) en una posición tal que permita trabajar
con seguridad.
NOTA: utilize el protector (C, Fig. 1
A
) solamente con la
cabeza con hilo de nylon. La protección (C) debe jarse
con el tornillo (G) a la protección (A).
Cuando se emplean discos para madera (22-60-80 dientes),
siempre se debe utilizar la protección metálica especial
(Fig. 1B).
MONTAJE DEL DISCO (Fig. 2)
Desenroscarlatuerca(A)ensentidohorario;quitarelcárter
(D) y la brida inferior (E). Montar el disco (R) sobre la brida
superior (F) comprobando que el sentido de rotación sea
correcto.Montarlabridainferior(E)yelcárter(D)yenroscar
la tuerca (A) en sentido antihorario. Colocar el perno en
dotación (L) en el oricio correspondiente para bloquear el
disco y permitir el apriete de la tuerca a 2,5 Kgm (25 Nm).
MONTÁŽ OCHRANNÉHO ŠTÍTU (Obr.1 A-B)
Pripevnite štít (A) k rúrke hriadeľa pomocou skrutiek (B)
v postoji, ktorý umožňuje bezpečnú prácu.
POZNÁMKA: používajte nadstavec štítu (C, Obr. 1 A)
iba pri použití strunovej kosiacej hlavice. Nadstavec štítu
(C) musí byť upevnený pomocou skrutky (G) ku krytu
(A).
Pri ozubených kotúčoch na drevo (22 - 60 - 80 zubov)
používajte vždy vhodný kovový kryt (Obr. 1B).
MONTÁŽ KOTÚČA (Obr.2)
Odskrutkujte maticu v smere doprava (A); vyberte kryt
(D) a spodný unášač (E). Nasaďte kotúč (R) na horný
unášač (F), dávajte pozor na smer rotácie. Namontujte
spodný unášač (E), kryt (D) a zaskrutkujte maticu (A)
otáčaním smerom doľava. Vsuňte kolík (dodaný) (L) do
príslušného otvoru, aby zablokoval kotúč a umožnilo sa
utiahnutie matice na 2,5 kgm (25 Nm).
MONTAGE
MONTAGE DER SCHNEIDSCHUTZVORRICHTUNG
(Abb. 1 A-B)
Die kunststo- oder Stahlschutzvorrichtung (A) mittels
Schrauben (B) am Scha befestigen.
ANMERKUNG: Schutzeinsatz (C, Abb. 1 A) nur mit
Nylonfedenkopf verwenden. Die Schutzverkleidung (C)
muss mit der Schraube (G) an der Schutzverkleidung (A)
befestigt werden.
Holzschneidblätter (22-60-80 Zähne) dürfen ausschlißlich
mit dem entsprechenden Metallschutz (Abb. 1B) eingesetzt
werden.
EINBAU DES SCHNEIDBLATTS (Abb. 2)
Die Mutter (A) im Uhrzeigersinn lösen; die Abdeckung (D)
und den unteren Flansch (E) abnehmen. Das Schneidblatt
(R)imrichtigenDrehsinnamoberenFlansch(F)anbringen.
Den unteren Flansch (E) und die Abdeckung (D) einbauen
und die Mutter (A) gegen den Uhrzeigersinn festziehen.
Den mitgelieferten Sti (L) in die entsprechende Bohrung
einführen, um das Schneidblatt zu sichern und die Mutter
auf 2.5 kgm (25 Nm) anzuziehen.
ACHTUNG!- Der Ring(siehe Pfeile C, Abb.3) muss
sichindieMontagebohrungdesSchneidblattseinpassen.
ATENCIÓN – El collar (echas C, Fig. 3) debe
ubicarse en el oricio de montaje del disco. POZOR – Objímka (pozri šípky C, Obr. 3) musí
zapadnúť do otvoru na namontovanie kotúča.

16
Italiano FrançaisEnglish
FITTING THE NYLON LINE HEAD (Fig. 9)
Put the upper (F) ange in place. Put the head xing
pin(L) intheappropriatehole (H)andtighten thehead
(N) anti-clockwise by hand.
FITTING THE HANDLE (Figs. 10-11)
Fit the handle onto the sha arm and secure it using
screws (A), washers, and nuts. e handle position
is calculated depending on the requirements of the
operator.
WARNING!:e handle must be xed between
thetwonotches(M,Fig.10)indicated onthe drivesha
tube.
ASSEMBLING THE SAFETY BOOM (Fig. 12)
When using the disc instead of nylon line head, it is
necessary to set up the “safety boom”. Fix the boom
(A) under the attachment of handle (C) by means of
the screws (B). Taking care to verify the “safety boom”
being on the le side of the brushcutter.
WARNING: Make sure that all components are
connected properly and all screws tightened.
ASSEMBLAGGIO ASSEMBLAGEASSEMBLY
MONTAGGIO TESTINA A FILI DI NYLON (Fig. 9)
Inserire la angia superiore (F). Inserire il perno fermo
testina (L) nell’apposito foro (H) ed avvitare in senso
antiorario la testina (N) con la sola forza delle mani.
MONTAGGIO IMPUGNATURA (Fig. 10-11)
Montare l'impugnatura sul tubo di trasmissione e
ssarla tramite viti (A), rondelle e dadi. La posizione
dell'impugnatura è registrabile in funzione all'esigenza
dell'operatore.
ATTENZIONE!:L’impugnaturadeveesseressata
all’internodelleduetacche(M,Fig.10)indicatesultubo
di trasmissione.
MONTAGGIOBARRIERADISICUREZZA(Fig.12)
Quando si utilizza il disco anziché la testina a li di
nylon è necessario montare la “barriera di sicurezza”.
Fissare la barriera (A) sotto l’attacco impugnatura (C)
tramite le viti (B), avendo l’accortezza di vericare che
la “barriera di sicurezza” stessa risulti sul lato sinistro
del decespugliatore.
ATTENZIONE: Assicurarsi che tutti i componenti
del decespugliatore siano ben collegati e le viti serrate.
MONTAGE DE LA TETE AUX FILS DE NYLON
(Fig. 9)
Enlez la bride supérieure (F). Enlez le goujon qui
va bloquer la tête (L) dans son orice (H) et vissez à la
main,dansle senscontrairedes aiguillesd'unemontre,
la tête (N).
MONTAGE DE LA POIGNEE (Fig. 10-11)
Montezlapoignéesurletuyaudetransmissionetxez-la
avec les vis (A), les rondelles et les écrous. La position
de la poignée se règle selon les exigences de l'opérateur.
ATTENTION! : Fixer la poignée à l’intérieur des
deux crans (M, Fig. 10) indiqués sur le tuyau de
transmission.
MONTAGE DE LA BARRIÈRE DE SÉCURITÉ
(Fig. 12)
En utilisant le disc à la place de la tête nylon, il est
nécessaire de monter la “barrière de sécurité”. Fixer
la barrière (A) sous le support de la poignée (C) au
moyen des vis (B), en prendant bien soin de vérier
pue la “barrière de sécurité” même sait du côte gauche
de la débroussailleuse.
ATTENTION : Veillez à ce que tous les
composants soient bien relié et les vis serrées.
910 11 12

17
EspañolDeutsch Slovensky
MONTAJE MONTÁŽ
MONTAJE DEL CABEZAL DE HILOS DE NYLON
(Fig. 9)
Introduzca la arandela superior (F). Ponga el perno
quebloqueaelcabezal(L)eneloriciocorrespondiente
(H) y atornille el cabezal (N) en sentido antihorario
ajustándolo con la sola fuerza de las manos.
MONTAJE DE LA EMPUÑADURA (Fig. 10-11)
Monte la empuñadura en el eje de transmisión y jela
mediante los tornillos (A), las arandelas y las tuercas.
La posición de la empuñadura es regulable en función
de las exigencias del operador.
ATENCIÓN: La empuñadura debe jarse entre
las dos marcas (M, Fig. 10) realizadas en el tubo de
transmisión.
MONTAJEDELABARRADESEGURIDAD (Fig.12)
Cuando se emplea el disco en vez del cabezal de hilos
de nylon, se debe montar la “barra de seguridad”. Para
ello coloque la barra (A) por debajo de la jación de la
empuñadura (C) mediante los tornillos (B). Vericar
che la “barra de seguridad” sea en el lado izquierdo de
la desbrozadora.
ATENCIÓN: Asegúrese que todos los
componentes se encuentren bien conectados y los
tornillos apretados.
MONTÁŽ STRUNOVEJ KOSIACEJ HLAVICE
(Obr. 9)
Nasaďte horný unášač (F). Vložte kolík (L) do
príslušného otvoru (H) hlavice a dotiahnite hlavicu
(N) rukou proti smeru hodinových ručičiek.
MONTÁŽ RUKOVÄTE (Obr. 10-11)
Nasaďte rukoväť na rúrku hriadeľa a upevnite ju
pomocou skrutiek (A), podložiek a matíc. Poloha
rukoväte je nastaviteľná podľa požiadaviek obsluhy.
UPOZORNENIE! – Rukoväť musí byť upevnená
medzi vyznačené šípky (M. Obr. 10) ), ktoré sú
vyznačené na rúrke hriadeľa.
MONTÁŽ BEZPEČNOSTNEJ OPIERKY (Obr. 12)
Akpoužívatenamiestonylonovejkosiacejstrunykotúč,
je potrebné namontovať “bezpečnostnú opierku”.
Upevnite opierku (A) pod úchytku rukoväte (C)
pomocou skrutiek (B), pritom dávajte pozor, aby bola
“bezpečnostná opierka” pripevnená na ľavej strane
krovinorezu.
UPOZORNENIE: Ubezpečte sa, či sú všetky
súčasti krovinorezu správne namontované a
skrutky dobre utiahnuté.
MONTAGE DES NYLONFADENKOPFS (Abb. 9)
Den oberen Flansch Fim vorgesehenen Nabensitz
einsetzen.DenArretierungssti(L)indievorgesehene
Bohrung (H) einsetzen und den Nylonfadenkopf (N)
nur von Hand entgegen Uhrzeigersinn festschrauben.
GRIFFMONTAGE (Abb. 10-11)
Den Gri auf den Scha montieren und mittels
Schrauben A, Unterlegscheiben und Muttern
gleichmässig und kreuzweise festschrauben. Die
Griposition ist entsprechend den Ansprüchen des
Bedieners verstellbar.
ACHTUNG: Der Gri muss zwischen den zwei
Markierungen (M, Abb. 10) am Übertragungsrohr
befestigt werden.
MONTAGE SCHUTZSTANGE (Abb. 12)
Bei Einsatz mit Schneidblatt anstelle des
Nylonfadenkopfesistdie“Schutzstange”zumontieren.
Schutzstange (A) unter der Griefestigung (C) durch
die Schrauben (B) befestigen. Versichern Sie Sich, daß
die“schutzstange”aufderLinkseitedesMotorsense ist.
ACHTUNG: Beachten, daß alle Bauteile sauber
angeschlossen und die Schrauben festgezogen sind.
MONTAGE

18
Italiano FrançaisEnglish
OPERAZIONI PRELIMINARI PREPARATION DE LA DEBROUSSAILLEUSE
PREPARING TO WORK
CINGHIAGGIO
Una corretta regolazione del cinghiaggio permette al
decespugliatorediavereunbuonbilanciamentoeduna
adatta altezza dal terreno (Fig. 16 A-B).
- Indossare il cinghiaggio di tipo semplice o doppio.
- Agganciare il decespugliatore al cinghiaggio tramite
il moschettone (A, Fig. 17 A-B)
- Posizionare il gancio (B, Fig. 17 A-B) per ottenere il
miglior bilanciamento del decespugliatore.
- Posizionare la bbia (C, Fig.18 A-B) per ottenere
la corretta altezza del decespugliatore.
ATTENZIONE! - Nel caso di utilizzo di lame da
legno (22-60-80 denti) è obbligatorio l’utilizzo di un
cinghiaggio doppio dotato di sgancio rapido.
LES COURROIES
Un bon réglage du système de courroies permet à la
débroussailleused'avoirunbonéquilibreetd'êtreàune
hauteur du sol adéquate (Fig. 16 A-B).
-Enlez la courroie simple ou la double.
-Accrochez la débroussailleuse à la courroie à l'aide
du crochet (A, Fig. 17 A-B).
-Positionnez le crochet (B, Fig. 17 A-B) de manière à
obtenir le meilleur équilibre pour la débroussailleuse.
- Placez la boucle (C, Fig. 18 A-B) de manière à ce que
la débroussailleuse soit à la bonne hauteur.
ATTENTION! - En cas d’utilisation des lames à
bois (22-60-80 dents), il est obligatoire d’utiliser une
courroie double équipée d’un dispositif de déblocage
rapide.
HARNESS
Correct adjustment of the harness permits the brush
cutter to be properly balanced and at an appropriate
height from the ground (Fig. 16 A-B).
- Put on the single or double harness.
- Hook the brush cutter to the harness using the hook
(A, Fig. 17 A-B).
- Position the hook (B, Fig. 17 A-B) to obtain the best
brush cutter balance.
- Position the buckle (C, Fig. 18 A-B) to obtain the
correct brush cutter height.
WARNING! – When using wood-cutting blades
(22-60-80 teeth) a double harness with quick-release
mechanism must be worn.
16A 16B 17A 17B
SPARTA 380 S - 440 S
SPARTA 380 T - 440T

19
EspañolDeutsch Slovensky
PRÍPRAVNÉ PRÁCE
PREPARATIVOS PARA USAR
VORBEREITUNGEN FÜR DIE ARBEIT
SCHULTERGURTE
Die richtige Einstellung des Gurtes ermöglicht de
Motorsense ein gutes Gleichgewicht und einen
geeigneten Abstand zum Boden (Abb. 16 A-B).
-Den einfachen oder doppelten Gurt verbinden.
-DieMotorsense durchden Haken(A,Abb. 17 A-B) mit
dem Gurt verbinden.
-Den Haken (B, Abb. 17 A-B) so einstellen, daß die
Motorsense gut ausbalanciert ist.
-Die Schnalle (C, Abb. 18 A-B) einstellen, um
die richtige Höhe des Schneidwerkzeugs zu erhalten.
ACHTUNG! – Bei Verwendung von Messern für
Holz (22-60-80 Zähne) müssen obligatorisch doppelte
Riemen mit Schnellaushängung benutzt werden.
CORREAJE
Una correcta regulación del correaje permite un buen
balanceo de la desbrozadora y una distancia correcta
entre el terreno y el aparato cortante (Fig. 16 A-B).
-Use siempre el correaje de tipo sencillo o doble.
-Enganche la desbrozadora al correaje mediante el
gancho (A, Fig. 17 A-B).
-Ponga el gancho (B, Fig. 17 A-B) en la posición justa
para obtener el mejor equilibrio de la desbrozadora.
-Ponga la hebilla (C, Fig. 18 A-B) en la posición justa
para una correcta altura de la desbrozadora.
¡ATENCIÓN! Cuando se emplean cuchillas para
madera (22, 60 u 80 dientes) es obligatorio utilizar un
arnés doble dotado de desenganche rápido.
NASTAVENIE POPRUHU
Správne nastavenie popruhu umožní náležité
vyváženie krovinorezu a vhodnú vzdialenosť od
zeme (Obr. 16 A-B).
- Používajte jednoduchý popruh.
- Spojte krovinorez s popruhom pomocou
karabínky (A, Obr. 17 A-B).
- Nastavte závesné oko (B, Obr. 17A-B), aby ste
dosiahli lepšie vyváženie krovinorezu.
- Nastavte dÍžku ramenného popruhu (C, Obr. 18
A-B), aby mal krovinorez potrebnú výšku nad
zemou.
UPOZORNENIE! - V prípade, že použijete
ozubené kotúče na drevo (22-60-80 zubov), je povinné
použiť dvojitý popruh s možnosťou rýchleho
uvoľnenia.
18A 18B

20
Italiano FrançaisEnglish
20 21 22
CARBURANTE
ATTENZIONE: la benzina è un carburante estremamente
infiammabile.Usareestremacautelaquandosimanipolalabenzina
o una miscela di combustibili. Non fumare o portare fuoco o
fiamme vicino al carburante o alla macchina (Fig. 20).
·Perridurreilrischiodiincendioedifarsibruciature,maneggiare
con cura il carburante. È altamente infiammabile.
· Agitare e mettere il combustibile in un contenitore approvato per
il carburante (Fig. 21).
· Miscelare di combustibile all'aperto dove non ci siano scintille o
fiamme.
· Posizionare su di un terreno sgombro, fermare il motore e lasciare
raffreddare prima di effettuare il rifornimento.
· Allentare il tappo del carburante lentamente per rilasciare la
pressione e per evitare la fuoriuscita di carburante.
· Serrare saldamente il tappo carburante dopo il rifornimento. Le
vibrazionipossonocausareunallentamentodeltappoelafuoriuscita
di carburante.
· Asciugare il combustibile fuoriuscito dall'unità. Spostare la
macchina a 3 metri di distanza dal sito di rifornimento prima di
avviare il motore (Fig. 22).
· Non tentare mai di bruciare combustibile fuoriuscito in qualsiasi
circostanza.
· Non fumare durante la manipolazione del combustibile o durante
il funzionamento della macchina.
· Stoccare il carburante in un luogo fresco, asciutto e ben ventilato.
· Non stoccare il combustibile in luoghi con foglie secche, paglia,
carta, ecc.
· Conservare l'unità e il carburante in luoghi in cui i vapori di
carburante non vengano a contatto con scintille o fiamme libere,
bollitori di acqua per riscaldamento, motori elettrici o interruttori,
forni, ecc.
· Non togliere il tappo del serbatoio quando il motore è in funzione.
· Non utilizzare combustibile per operazioni di pulizia.
· Fareattenzioneanonspargerecarburantesulproprioabbigliamento.
CARBURANT
ATTENTION : l'essence est un carburant extrêmement
inflammable. Manipulez l'essence ou le mélange de carburant avec
une extrême précaution. Ne pas fumer ni produire de flammes à
proximité du carburant ou de la débroussailleuse (Fig. 20).
·Pour réduire le risque d'incendie et de brûlures, manipulez le
carburant avec précaution. Il est extrêmement inflammable.
· Secouezetmettezlecarburantdansunrécipienthomologué(Fig.21).
· Mélangez le carburant en plein air dans un endroit sans risque
d'étincelles ou de flammes.
· Placezausol,coupezlemoteuretlaissez-lerefroidiravantdeprocéder
au ravitaillement.
· Desserrezlentementlebouchonducarburantpourévacuerlapression
et pour éviter que le carburant ne se déverse.
· Serrez fermement le bouchon après le ravitaillement. Sous l'effet
des vibrations, le bouchon risque de se desserrer et le carburant de
s'échapper.
· Essuyez le carburant qui aurait pu s'échapper. Écartez l'outil à 3
m du lieu de ravitaillement avant de démarrer le moteur (Fig. 22).
· Ne tentez en aucun cas de brûler le carburant déversé.
· Ne pas fumer durant le ravitaillement ou lorsque la débroussailleuse
est en marche.
· Stockez le carburant dans un endroit frais, sec et bien aéré.
· Ne stockez pas le carburant dans un endroit présentant des feuilles
sèches, de la paille, du papier, etc.
· Conservez l'outil et le carburant dans un endroit où les vapeurs
de carburant n'entreront pas en contact avec des étincelles ou des
flammes libres, des ballons d'eau pour le chauffage, des moteurs
électriques ou des interrupteurs, des fours, etc.
· N'ôtez pas le bouchon du réservoir lorsque le moteur tourne.
· N'utilisez pas de carburant pour les opérations de nettoyage.
· Assurez-vous de ne pas déverser de carburant sur vos vêtements.
FUELING
WARNING: Gasoline is an extremely flammable fuel. Use
extreme caution when handling gasoline or fuel mix. Do not smoke
or bring any fire or flame near the fuel or the unit (Fig. 20).
·To reduce the risk of fire and burn injury, handle fuel with care.
It is highly flammable.
· Mix and store fuel in a container approved for gasoline (Fig. 21).
· Mix fuel outdoors where there are no sparks or flames.
· Select bare ground, stop engine, and allow to cool before refueling.
· Loosen fuel cap slowly to release pressure and to keep fuel from
escaping around the cap.
· Tighten fuel cap securely after refueling. Unit vibration can cause
an improperly tightened fuel cap to loosen or come off and spill
quantities of fuel.
· Wipe spilled fuel from the unit. Move 3 metre away from refueling
site before starting engine (Fig. 22).
· Never attempt to burn off spilled fuel under any circumstances.
· Do not smoke while handling fuel or while operating the unit.
· Store fuel in a cool, dry, well ventilated place.
· Never place the mitblower in a combustible area such as dry leaves,
straw, paper, etc.
· Store the unit and fuel in an area where fuel vapors cannot reach
sparksoropenflamesfromwaterheaters,electricmotorsorswitches,
furnaces, etc.
· Never take the cap off the tank when the engine is running.
· Never use fuel for cleaning operations.
· Take care not to get fuel on your clothing.
AVVIAMENTO MISE EN ROUTESTARTING
This manual suits for next models
1
Table of contents
Other Oleo-Mac Trimmer manuals

Oleo-Mac
Oleo-Mac 25 Manual

Oleo-Mac
Oleo-Mac BCH 40 Manual

Oleo-Mac
Oleo-Mac BC 22 TR Manual

Oleo-Mac
Oleo-Mac BC240H-HL Manual

Oleo-Mac
Oleo-Mac BC 22 TR Manual

Oleo-Mac
Oleo-Mac 746 s Manual

Oleo-Mac
Oleo-Mac EH 24 User manual

Oleo-Mac
Oleo-Mac BC 380 Manual

Oleo-Mac
Oleo-Mac TR 61E Manual

Oleo-Mac
Oleo-Mac BC 260 4S Manual