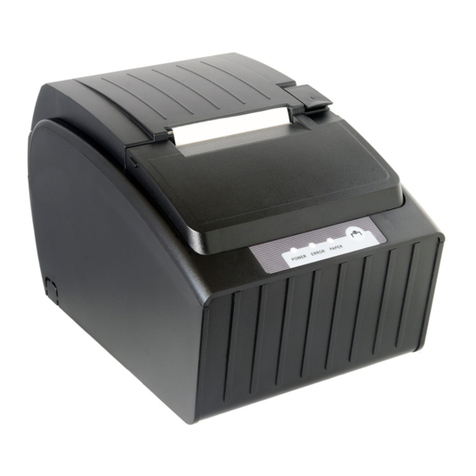
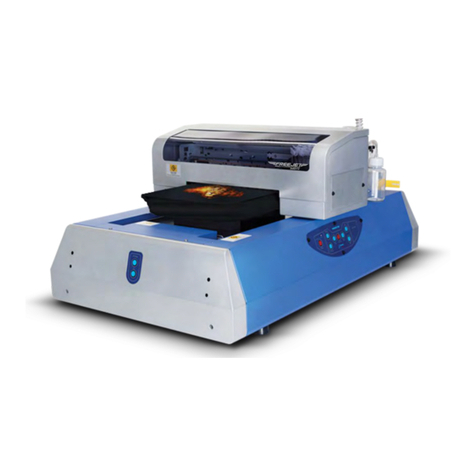
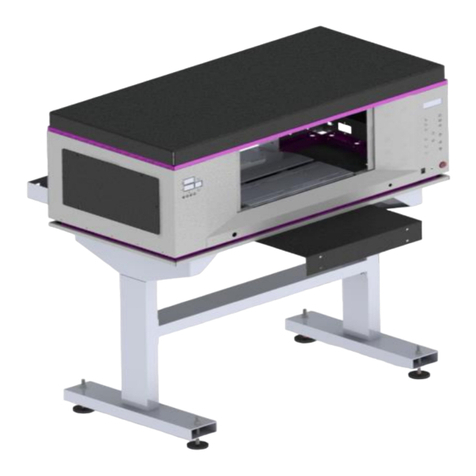
OmniPrint FREEJET 330TX User manual

FreeJet 330TX
Official User Manual
2019 Edition


Dear New FreeJet 330TX Owner:
Congratulations on becoming the owner of the #1 award-winning DTG
printer series in the industry! OmniPrint International has been
proudly serving our clients since 2004, providing cutting-edge direct
-to-garment print technology that has time and time again been
recognized by the industry as a leader.
We thank you for supporting a small, family-owned business that
continues to grow year after year. The OmniPrint family was built
on the dreams that created America as coined by Truslow Adams; the
dream of a land in which life should be better, richer, and fuller
for every man, with opportunity for each according to his ability
or achievement.
With the talented, hard-working efforts of the personnel team at
OmniPrint, we created the FreeJet 330TX; a DTG printer that not only
had the best quality in the industry, but the best production and
maintenance costs to enhance the user’s simplicity and profitability;
a service we pride ourselves in providing for our customers.
We wish you the best in this journey with your new 330TX Printer. All
of us at OmniPrint from the reps to the support department are happy
to assist you with anything you need to help you succeed with your
printer. Because at OmniPrint International, we don’t just create
printers; we create successful users.
Victor Hugo Peña
CEO & President
Victor Pena

Anatomy Of A FreeJet DTG Printer
Fig. 1: Side View
Fig. 2: Front View
Platen Gantry Wet Cap
System
Control Panel
Waste
Container
Gantry
Platen
Z-Jog Up &
Down Buttons
(Continued On The Next Page)
1

Anatomy Of A FreeJet DTG Printer (Cont’d)
Fig. 3: Under Gantry Cover
Fig. 4: Printing Components Close-Up
(Continued On The Next Page)
2

Anatomy Of A FreeJet DTG Printer (Cont’d)
Fig 5: Printhead & Ink Delivery Components Close-Up
Fig. 6: Back of Printer
3

Control Panel & Shortcuts List
Power Up: Hold down “POWER” button for 4 seconds or until you hear a beep
Auto Head Clean: Hold down “FEEDING” button for 4 seconds or until beep
Raise or Lower Platen Height: Hold “UP” or “DOWN” button
Move Gantry Forward: Press “FRONT” until half-way across the platen
Gantry to Print-Ready Position: Press “STAND-BY” once
Gantry to Home Position: Press “STAND-BY” once
Start Pump for Ink Fill/Prime: Press “POWER” and “DOWN” at the same time
Stop Pump: Press “FUNCTION” button once
Move Printhead From Wet Cap: Press “FUNCTION” and “UP” at the same time
Return Printhead to Wet Cap: Press “FUNCTION” button once
Change Layers: Press and hold fown the “FUNCTION” button for 4 seconds then release the
button. The Status light should now be purple. Press “UP” and “DOWN” to choose your layer.
Press “FUNCTION” once to confirm your layer selection. Refrain from using layers C & D!
Keypad Shortcuts List
Caution: Never use the “REAR” button when the Print Carriage is at the front in Print-Ready position. Never
use the “FRONT” button to put the printer in Print-Ready position. Always use the “STAND-BY” button.
POWER
Mainly used to turn
the printer on or off FUNCTION
Mainly used to change
the printer’s layer settings,
setting auto-height, & other
shortcut commands
FEEDING
Mainly used to auto-head
clean, stop a print job, &
other shortcut commands
FRONT
Mainly used to manually
move the gantry forward
to the front of the printer
STAND-BY
Mainly used to move the
gantry to the print-ready
position at the front of the
printer or back to standby
REAR
Mainly used to manually
move the gantry to
the back of the printer
UP
Mainly used to manually
move the platen up toward the
laser sensors on the printer
DOWN
Mainly used to manually
move the platen down
away from the laser sensors
on the printer.
LAYER SETTING
Used to signify what the layer
setting that your printer is set
to whether A or B. Layer A is for
light garments & Layer B is for
dark garments. Avoid using
C or D.
4

DTG Basics - An Introduction
Direct-to-Garment (DTG) Printing is a modern form of printing on garments, implementing a
digital inkjet printhead to produce vibrant images with impeccable detail on a wide range of
apparel. First introduced in 1994, DTG print technology has progressed to the worldwide phen-
omenon it has become today and it’s only getting started! OmniPrint’s critically acclaimed DTG
print technology has been recognized as one of the best in the industry for the last 3 years and
pride themselves in offering the best quality prints at the lowest production costs.
Like any machine ever, there will be a learning curve to mastering how to operate your printer.
The most important elements of a good DTG print depend on the quality of the garment as well
as the pretreatment application. Because of this, you will need to ensure that for every print, you
are choosing the right garment and properly pretreating the garment. A common misconception
is that bad prints result from the printer when in reality, the bad prints stem from a pretreatment
error or a bad garment all-around.
Choosing The Right Garment
Properly Pretreating The Garment
Choosing your garment will be the first most important aspect of DTG printing. Garments that
are too thin or that are coated with anti-stain guards, moisture wicking, etc will negatively affect
the overall quality of your print. The most important thing to keep in mind for this is that not all
garments will absorb the pretreatment and inks the same way. Your best bet is to choose a high
quality, tightly weaved (ringspun, combed ringspun, etc) garment that was pre-shrunk (if appli-
cable). Not choosing the right garment will result in color drop-outs, quality loss, and sometimes
even staining if the shirt’s dye was low quality.
Pretreatment assists with two important roles in the printing process. First as an adhesive layer
similar to primer and second as a chemical agent that flashes the white ink to be able to print the
color layer on top without the two layers mixing and ruining the print. If the garment is not pre-
treated properly, there will be insufficient amounts of pretreat to successfully achieve the adh-
esive or flashing properties required to achieve a good print.
As an operator in your beginner stages, you will run into some challenges along the way but
worry not, these are normal and will assist you in learning the operation of your printer. If at any
point you need assistance, it’s okay! We are here to help! Take advantage of your active warranty
and contact tech support whenever you run into something you need assistance with something
that cannot be resolved with the user manual or tutorial videos.
Take advantage of your active warranty! Contact Tech Support:
5

Pretreating Garments
Before we get into using the DirectRIP and printing, we need to cover the pretreatment of garments.
This way you’ll have some shirts ready when it’s time for the first prints. It is always a good idea to
start off with a white shirt to get familiar with the printing process.
When it comes to pretreating garments, there is a basic rule of thumb: If the print requires white ink,
you must use pretreatment. When printing a white cotton garment using the Light Cotton Pretreatment,
you will notice a vibrant print with great detail.
We highly recommend using pretreat on light garments in order to achieve the highest quality print.
All other garments apart from white need Dark Garment Pretreatment.
Pretreatment is a very important factor and should be done right to get the best looking prints. When
pretreating by hand you may have a small learning curve so it is important that a person masters the
process and is the only person that does it. This will keep things consistent.
The nice thing about a pretreat machine is that it is always consistent. If you have a machine you should
still learn the manual process just in case the machine is ever down. Take some time to practice, use
some old shirts, print on the front, back and even turn it inside out. Before you take on print jobs, you
should be completely comfortable with the process.
What You Will Need In Order To Pretreat A Garment:
Spraygun Pretreatment
Machine
or
DirectInk
Pretreatment Heat Press Curing
Sheets
Recommended Heat Press Temperature Settings
For Drying Wet Pretreatment On Garments:
Light Cotton: Dark Cotton
330°F 345°F
Pressure: 4-7 on a Stahls’ Heat Press or Medium-High for Other Heat Presses
(Continued On The Next Page)
There are many ways that a shirt can be pretreated: by hand with a spraygun or by using a
pretreatment machine. If you have a pretreatment machine, you will need to check with the
manufacturer’s recommended settings or try to achieve the volume used by spraying by hand.
Acrucial tool for pretreating as well as curing is the heat press. The heat press will be used to
dry the shirts after they have been sprayed. Before pretreating, your heat press must be turned
on. Even if you have a pretreat machine, the heat press will need to be on and ready at this point.
6

Pretreating Garments (Cont’d)
Types of Pretreatment:
Light Garment
Recommended For:
White & Light
Cotton Garments
Recommended For:
Dark & Black
Cotton Garments
Dark Garment
Pretreating Using A Spraygun:
For best results, follow the guidelines below when pretreating using a hand-held spraygun.
(Continued On The Next Page)
7

Pretreating Garments (Cont’d)
Pretreating Using A Spraygun (Cont’d):
Hand-Held Spraygun Guidelines:
MATERIAL PRETREATMENT WET WEIGHT TEMP PRESSURE DRYING TIME
White/ Light
Cotton DirectInk
Light Garment 18 grams 330°F 4-7 20 sec (2-3x)
Black/Dark
Cotton DirectInk
Dark Garment 25 grams 345°F 4-7 20 sec (3-5x)
Pearl Pretreatment Machine Guidelines:
MATERIAL PRETREATMENT PEARL DENSITY TEMP PRESSURE DRYING TIME
White/ Light
Cotton DirectInk
Light Garment 25-35 330
°F
4-7 20 sec (2-3x)
Black/Dark
Cotton DirectInk
Dark Garment 35-45 345
°F
4-7 20 sec (3-5x)
(Continued On The Next Page)
8

Powering On The Printer
IMPORTANT: PLEASE MAKE SURE YOU USE A 125V SURGE PROTECTOR WITH A CIRCUIT BREAKER.
DO NOT RUN THE PRINTER & THE HEAT PRESS ON THE SAME CIRCUIT!
•Plug the power cord into the back of the printer and the surge protector.
• Once you’ve plugged both cables into the printer, power on the printer by flipping
on the switch located at the back of the printer.
•To power on the control panel, press and hold the POWER button until you hear
the printer beep. Allow a moment for the printer engine to power up.
Performing A Head Clean
Head Cleans are a vital part of starting up your printer in order to ensure your printer is working
properly and efficiently. You may perform a Head Clean two different ways:
Automatic Button Shortcut:
You can automatically activate a head clean by holding the FEEDING button when the printer is
idle.
Using A PC (Recommended):
The recommended method of activating a head clean is through a PC, using the Printing Prefe-
rences located in the Devices and Printers section of the Control Panel.
(Continued On The Next Page)
9

Performing A Head Clean (Cont’d)
Using A PC (Recommended):
1. In your PC, open your Control Panel.
2. Under the Hardware and Sound category,
click on “View Devices and Printers”
3. Look for EPSON Stylus Photo R2400 &
right-click on it.
4. Right click on “Printing Preferences”
5. Click on the “Maintenance” tab to open
the maintenance menu.
6. Click on the “Head Cleaning” option to
open the Head Cleaning menu.
(Continued On The Next Page)
10

Performing A Head Clean (Cont’d)
6. Click on the “Head Cleaning” option to
open the Head Cleaning menu.
7. Click on the “Start” to initiate the Head
Clean.
8. Allow for the head cleaning to run as the
print head will make some movements.
9. The Power light will flash on and off
until this process has finished.
Setting The Platen Height
Knowing how to set the platen height will be one of the most important things to know how to
properly do during your start-up process as well as when setting up a print.
IMPORTANT: BEFORE SETTING THE PLATEN HEIGHT, ENSURE THE PLATEN IS LINED UP
WITH THE PLATEN FRAME ON THE PRINTER (SEE BELOW)
(Continued On The Next Page)
11

Setting The Platen Height (Cont’d)
Setting The Platen Height Manually
Setting the platen height manually is recommended when printing on thicker garments or when
using an interchangeable platen such as the hat platen, sleeve platen, toddler platen, etc.
1. Manually set your height by pressing and
holding DOWN until your platen hits the
lowest point it can go. It will stop once it
hits the lowest point.
2. Hold the FRONT button until the gantry has
moved above the center of the platen and
release the button to stop the gantry.
3. Push and hold the UP button until the platen
stops rising up toward the printhead.
4. Your platen height has now been manually
set.
12

Performing A Nozzle Check
Performing a Nozzle Check is the final stage of your start-up procedure. This test print will let
you know if all of the ink channels are printing properly, which aren’t (if any), and overall show
whether or not the printer is ready to properly print a clean graphic.
1. Set your platen height.
- Automatic: press FUNCTION+REAR
- Manual: press FRONT until gantry is above the middle
of the platen then UP until the platen stops rising. Then
push STANDBY to move to front.
2. Open the Maintenance tab in your printer’s
Preferences menu on your PC.
3. Click on the “Nozzle Check” option.
4. Click on the “Print” option to initiate the
Nozzle Check.
5. Analyze the print on your platen to ensure
there are no gaps in the lines.
6. Refer to the guide on your PC for good and
bad nozzle check prints
(Continued On The Next Page)
13

Performing A Nozzle Check (Cont’d)
7A. If your nozzle check print looks bad, you
will need to perform a head cleaning and
prime those specific ink lines if the nozzle
check still shows an excess of line gaps.
7B. If your nozzle check print looks good, you
may move on to the next step.
8. Wipe off the nozzle check print using
rubbing alcohol and a cloth.
Loading A Garment Onto The Platen
1. Lay the shirt onto the platen with the
collar facing the front of the printer.
2. Pull the collar about half an inch past
the edge of the platen. Make sure it is
centered.
3. Tuck the collar area into the platen
followed by the bottom of the shirt.
(Continued On The Next Page)
14

Loading A Garment Onto The Platen (Cont’d)
4. Gently tuck the sides into the platen.
Careful not to push it in tightly or this may
cause stretching during the print.
5. Tuck the extra sides of the shirt under
the platen. Do not block the area where
the printer’s gantry will be moving.
6. Ensure the print area is nice and flat
with no raised areas, folds, or wrinkles.
Then set your height (see page 11)
Setting Up A Print In DirectRIP
To set-up your print, you must use the DirectRIP software you installed during your set-up
session onto your PC. In order to use the DirectRIP, you will need to have your USB Dongle
connected to your PC. Do not lose the USB Dongle for your RIP program.
It is vital that you become very familiar with image quality when it comes to printing with
your Freejet. The ideal image criteria is a 300DPI image sized around the same size it needs
to be printed at. The image will also need a transparent background and be saved as a PNG,
TIFF, JPEG, or PSD file type.
For this first part, we will be going over the steps needed when printing on a white shirt.
Please load a print-ready pretreated white garment onto your platen. Ensure your print
height has been set and that your printer is in the print-ready position.
1. Make sure your USB Dongle key is
connected before opening DirectRIP.
(Continued On The Next Page)
15

Setting Up A Print In DirectRIP (Cont’d)
2. Open the DirectRIP program.
3. This is your workspace for DirectRIP. Here, you will set up
everything needed to successfully print a garment.
4. A vital tool you will need is the
Q Rip window, which is where you
can set your print size and position
on the platen. If this isn’t already
open, you may do so by clicking on
“View” in your taskbar and selecting
“Show Q Rip”.
(Shown Right)
5. Another vital tool needed is the
Channel Palette, where you can see
your RGB channels as well as your
White Underbase. If not already open,
click on “View” hover over Channel
Palette and selecting “Show”.
(Continued On The Next Page)
16

Setting Up A Print In DirectRIP (Cont’d)
6. Click on “File” on your taskbar then select “Open” or click on the opened
folder icon on the top left of the window to import the image you’d like to print.
You may also drag & drop the image into the program.
Once you’ve opened your graphic in the program, you will need to set your environment
before printing. The environments establish what you are printing & what kind of garment
you are using.
Under both the 330TX and 330TX Plus, there are Quality Mode and Production Mode
environments. Quality Mode gives you the best print possible and Production Mode gives
you faster prints but at a lower quality than you would get under Quality Mode.
B
A
Supported Image File Types:
PNG, TIFF, JPEG, & PSD
Guide To DirectRIP Environments
Environments are preset settings that have been optimized to provide you with the best print based on the
material you are printing. Each environment has unique settings, color strength, highlight levels, resolution
and much more. OmniPrint has provide a quick print solution to avoid adjusting and testing on your own.
Below are all the Environment provided for the 330TX.
FreeJet 330TX Environments:
Black Media - Should be used for Black Cotton garments only. This environment is set up to not print any
Black ink during the second pass. If the image has black, it will use the black garment to provide the black
tones, saving you ink where its not needed.
Color Media - Should be used for bright colored shirts only. This environment is set up to print a complete-
ly solid white underbase. This is optimized for bright colored shirts where the solid white underbase allows
for your image to be printed with full detail and color without the color of the shirt coming through your
artwork. Only use this environment if the Dark Media environment is not producing desired results.
Dark Media - Dark media is to be used for any other color shirt besides black and white. It is designed to
print all CMYK colors, including the black areas on your shirt. If your garment is any of the following colors,
you will be required to use Dark Media: Reds, Blues, Greens, Heather Grays, Dark Grays, Oranges, Pinks,
Camouflage Print, Yellow, Purples. Although it says Dark cotton you are still require to use this environment
for lighter colors like Yellow, Oranges, Light Greens, etc.
(Continued On The Next Page)
17
Other manuals for FREEJET 330TX
1
Table of contents
Other OmniPrint Printer manuals

OmniPrint
OmniPrint OM9500-II User manual

OmniPrint
OmniPrint FREEJET 330TX User manual

OmniPrint
OmniPrint OM9500 User manual

OmniPrint
OmniPrint OM9300 User manual

OmniPrint
OmniPrint FreeJet320 TX User manual

OmniPrint
OmniPrint OM-200 Owner's manual

OmniPrint
OmniPrint OM9500F User manual

OmniPrint
OmniPrint DTF User manual

OmniPrint
OmniPrint OM190 User manual

OmniPrint
OmniPrint OM5200 User manual