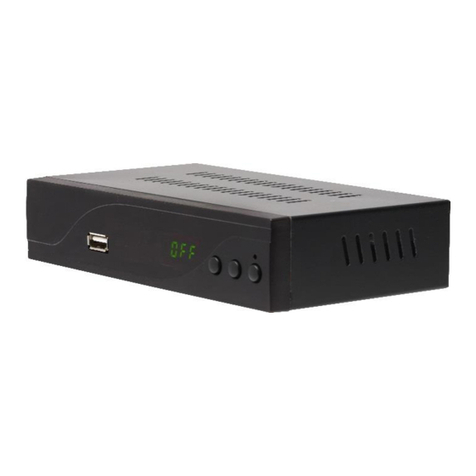
One Remote Radio PL7 User manual

OneRemote Radio PL7
For use with Bang & Olufsen Speakers
DAB/DAB+ –FM - Bluetooth - Internet Radio
Spotify Connect- Music Player
Setup Guide
Control with Bang & Olufsen Remotes
3001.2030.UK.S1

www.oneremote.dk
2
PREFACE
This OneRemote PL7 receiver has been equipped with advanced OneRemote circuitry enabling it
to be controlled with a Bang & Olufsen remote control terminal. This modified receiver is named
OneRemote Radio PL7.
OneRemote Radio PL7 connects directly to:
•any Bang & Olufsen powered speaker.
OneRemote Radio PL7 may be controlled with:
•any Bang & Olufsen remote control terminal from 1988 or later.
•iPhones, iPods, iPads and Android telephones and tablets using the UNDOK app.

www.oneremote.dk
3
Contents
PREFACE.........................................................................................................................................................2
QUICK GUIDE, INSTALLATION NOTES..................................................................................................4
Connecting hardware .........................................................................................................................................................4
Setting up the Oneremote radio PL7 ..................................................................................................................................4
MUSIC-SOURCE SELECTION .....................................................................................................................6
Control With Bang & Olufsen Remote Controls .................................................................................................................6
Control With the UNDOK App for Apple iOS –iPhone, iPad and MAC...............................................................................6
Control With the UNDOK App for Android Devices............................................................................................................6
Control With the Spotify App ............................................................................................................................................. 7
VOLUME..........................................................................................................................................................7
CONNECTIONS..............................................................................................................................................8
Speakers..............................................................................................................................................................................8
Antenna Dab & FM .............................................................................................................................................................9
Wireless Internet Connection, WiFi....................................................................................................................................9
Optical Out..........................................................................................................................................................................9
Line Out ..............................................................................................................................................................................9
OPTIONS...................................................................................................................................................... 10
LED Disable Option ........................................................................................................................................................... 10
Disable LED .......................................................................................................................................................................10
Source Idendity Options ................................................................................................................................................... 11
Source Key ........................................................................................................................................................................ 11

www.oneremote.dk
4
QUICK GUIDE, INSTALLATION NOTES
CONNECTING HARDWARE
Connect to the OneRemote Radio PL7 and you are ready to setup:
•Bang & Olufsen speaker.
•IR-receiver.
SETTING UP THE ONEREMOTE RADIO PL7
Refer to the OneRemote PL7 User Guide about which buttons to use on a Bang & Olufsen remote
control.
When PL7 is connected to power it will boot and the blue LED will flash for 8 seconds. This
indicates that an option may be entered. Ignore the flashing for now.
After booting the display will show the time 00:00 as it has not yet played music from any source
and therefore does not know what time it is.
1. When PL7 is connected to power for the first time, it will ask you to select the language
and to select the terms.
Press uon the Bang Olufsen Remote control and the Blue LED will light up in the
display, indication that PL7 is now accepting commands from the remote control.
Press 1 sec onO,por the Joystick, depending on which Bang & Olufsen remote
control that you are using, to make a selection.
2. When the Setup Wizard appears, then start it. Set the time and choose from where the
time shall be updated.
3. When asked ‘Keep Network connected’be sure to accept this. If this is not selected,
shifting between radio stations will take longer.
4. Now setup the WiFi connection. Select the network and enter its password.

www.oneremote.dk
5
5. Now that the WiFi is connected, the final steps are to search channels and setup the
presets of the needed Radio channels.
As the Radio PL7 is now connected to the WiFi network, any Smartphone or other device
on the WiFi network, that has the UNDOK App installed, now can see and control the PL7.
You can therefore use UNDOK to finalize the setup, as this is more convenient than using
the Bang & Olufsen remote.
If only DAB reception is needed, Internet radio setup can be skipped and so on. You only
need to setup what is needed.
PressQto choose the sources you want to access.
Press m to get access to installation menus.
Refer to the OneRemote Radio PL7 user guide, for more information about using the Bang
& Olufsen remote control.
6. Now presso7 and set the preferred Bass and Treble levels. UseEto
leave menu.
7. Finally save at least a few favorite radio channels as presets.

www.oneremote.dk
6
MUSIC-SOURCE SELECTION
The OneRemote Radio PL7 units may be controlled individually or in groups. Genuine multiroom.
Multiroom control is handled with the app UNDOK, available for Apple and Android devices. See
the chapter concerning apps.
A Multiroom system is achieved when more than one OneRemote Radio PL7 is installed, and it is
possible to listen to different sound sources in different rooms.
CONTROL WITH BANG & OLUFSEN REMOTE CONTROLS
Check the User Guide for daily control of the OneRemote Radio PL7 using a Beolink 1000, Beo4,
BeoRemote one etc.
CONTROL WITH THE UNDOK APP FOR APPLE IOS –IPHONE, IPAD AND MAC
The OneRemote Radio PL7 may be fully controlled via WiFi with the free UNDOK app for Apple
devices like iPhone, iPad and MAC computers. UNDOK is available from the App Store.
With more OneRemote Radio PL7 units in the home they may all be controlled with this app, even
in groups.
Start the UNDOK app and select the OneRemote Radio PL7 to be controlled. If its name has not
been changed during the initial installation, it is named ‘Digitradio 10 IR’.
With more than one OneRemote Radio PL7 in the home their names might have been changed to
more descriptive ones like ‘living room’, ‘bedroom’etc.
CONTROL WITH THE UNDOK APP FOR ANDROID DEVICES
The OneRemote Radio PL7 may be fully controlled via WiFi with the free UNDOK app for Android
devices like smart phones and tablets. UNDOK is available from Google Play.
With more OneRemote Radio PL7 units in the home they may all be controlled with this app, even
in groups.

www.oneremote.dk
7
Start the UNDOK app and select the OneRemote Radio PL7 to be controlled. If its name has not
been changed during the initial installation, it is named ‘Digitradio 10 IR’.
With more than one OneRemote Radio PL7 in the home their names have been changed to more
descriptive ones like ‘living room, bedroom’etc.
CONTROL WITH THE SPOTIFY APP
The original Spotify app is used for the OneRemote Radio PL7. Thus, no special app is needed.
When selecting Spotify music via the smart phone the phone may still be used for phone calls
simultaneously or even turned off completely. The selected music continues playing.
VOLUME
The volume level can be controlled using a Bang & Olufsen remote control. It is equally easy to
control the volume via a smartphone or tablet, using the UNDOK App from all over the house.
Note that the volume level may be altered in three different ways using:
•The B&O remote’s volume keys, controlling the PL7.
•The B&O remote’s left and right arrows.
•A smartphone/ tablet APP that controls the PL7 via a WiFi connection.

www.oneremote.dk
8
CONNECTIONS
SPEAKERS
The OneRemote Radio PL7 connects to Bang & Olufsen BeoLab speakers with an 8-pin cable. So
called PowerLink cables with DIN connectors. These connectors carry both right and left signals.
The speaker connection is like in any other Bang & Olufsen setup either:
1. One speaker connects to the OneRemote Radio PL7 with one PowerLink cable and the
second speaker connects in turn to the first one with another PowerLink cable.
2. Using a PowerLink splitter each speaker is connected separately with its own PowerLink
cable.
If the Bang & Olufsen BeoLab speaker is equipped with a RJ 45 socket instead of 8 pin DIN a
suitable converter cable must be used.
Tip: Share a Bang & Olufsen speaker with Bang & Olufsen another device,
using a OneRemote Powerlink Switch type 30017742.

www.oneremote.dk
9
ANTENNA DAB & FM
The OneRemote Radio PL7 needs an antenna signal of sufficient strength and quality. If the sender
is not far away, an external antenna might not even be needed.
The included small indoor antenna, a short wire, is sufficient in many places.
If both DAB and FM channels are received the antenna shall provide a signal containing both
frequency bands.
•If the FM signal does not provide a sufficient strength the reception is noisy and very poor.
•If the DAB signal is of a poor quality, the sound disappears intermittently.
The signal strength is shown at the left bottom of the main screen.
WIRELESS INTERNET CONNECTION, WIFI
Internet Radio, Podcasts and Spotify depend on an Internet connection with sufficient signal
quality.
Poor WiFi coverage results in the common WiFi connection problems:
oThe sound source does not connect.
oThe sound disappears now and then.
oOne becomes sad.
If these problems occur, try moving the Radio PL7 closer to the Wireless Router/ AP or have the
WiFi installation adjusted.
The WiFi signal strength is shown at the left bottom of the main screen.
OPTICAL OUT
This socket enables connection to equipment with optical sound input.
LINE OUT
This socket can be used in special installations.

www.oneremote.dk
10
OPTIONS
Options are used to activate or de-activate various special functions. Thus, it might be necessary to
add several options, in which case they are added one by one.
Option programming is only required during the initial installation, and it is carried out with a Bang
& Olufsen remote only.
When power is applied to OneRemote Radio PL7 and it is Booting, the LED in the upper left corner
of the display, will flash for 8 seconds. Within these 8 seconds an Option code-sequence may be
initiated. 5 Seconds are then available to enter each digit of the Option code, so there is no rush.
If the PL7 is already powered on, it can be soft-booted with the Bang & Olufsen remote control.
At any time a soft-boot can be made by pressing !u, see note below the tables.
The tables below show the available Options for OneRemote Radio PL7.
LED DISABLE OPTION
On the upper left side of front OneRemote PL7, a small Blue LED indicates when it is powered on.
Good to have for most people, to see when the PL7 is controllable.
Some find this light annoying and do not need it. Thus, we have made the Disable-LED Option.
Options may be programmed only at booting of the PL7, while the blue lamp is flashing.
DISABLE LED
Factory
Option
Disable the LED so it will not
light up when the Radio PL7 is
powered on.
*1 *2 L950w
Enable the LED so it will light
up when the Radio PL7 is
powered on.
x
*1 *2 L951w
*1 If the LED is flashing, enter the code.
Soft Boot PL7, make the LED flash press eu,!u or xu.
*2 If the Bang & Olufsen remote control used does not have a Lbutton, instead use g.

www.oneremote.dk
11
SOURCE IDENDITY OPTIONS
This Option is used to select which identity the PL7 shall take. Which Button on the Bang &
Olufsen remote control shall be used to power on the PL7.
The factory setting is uas the simplest use of PL7 is connected directly to a set of Bang &
Olufsen speakers.
Options may be programmed only at booting of the PL7, while the blue lamp is flashing.
SOURCE KEY
Factory
Option
Radio
X
*1 *2 L108w
NRADIO, PHONO
*1 *2 L106w
PC
*1 *2 L118w
AMEM, ATAPE
*1 *2 L102w
ATAPE2, AMEM2, NMUSIC
*1 *2 L103w
CD
*1 *2 L104w
AAUX, SHIFT-RADIO
*1 *2 L100w
DTV, SATELLITE
*1 *2 L116w
VMEM, VTAPE
*1 *2 L110w
VAUX
*1 *2 L112w
*1 If the LED is flashing, enter the code.
Soft Boot PL7, make the LED flash press eu,!u or xu.
*2 If the Bang & Olufsen remote control used does not have a Lbutton, instead use g.
Other manuals for Radio PL7
1
Table of contents
Other One Remote Receiver manuals

One Remote
One Remote Radio PL3 User manual

One Remote
One Remote DVBC-VI User manual

One Remote
One Remote Interface Type 2843 User manual

One Remote
One Remote Beo4 Installation guide

One Remote
One Remote Radio PL2 User manual

One Remote
One Remote Radio PL2 User manual

One Remote
One Remote 30014002 User manual

One Remote
One Remote Radio PL4 User manual