Grow Cube
Quick Guide Manual
A1. Check all accessories first
A. Assembly
C. Planting
C1.Mode setting:
C2.Grow Kit:
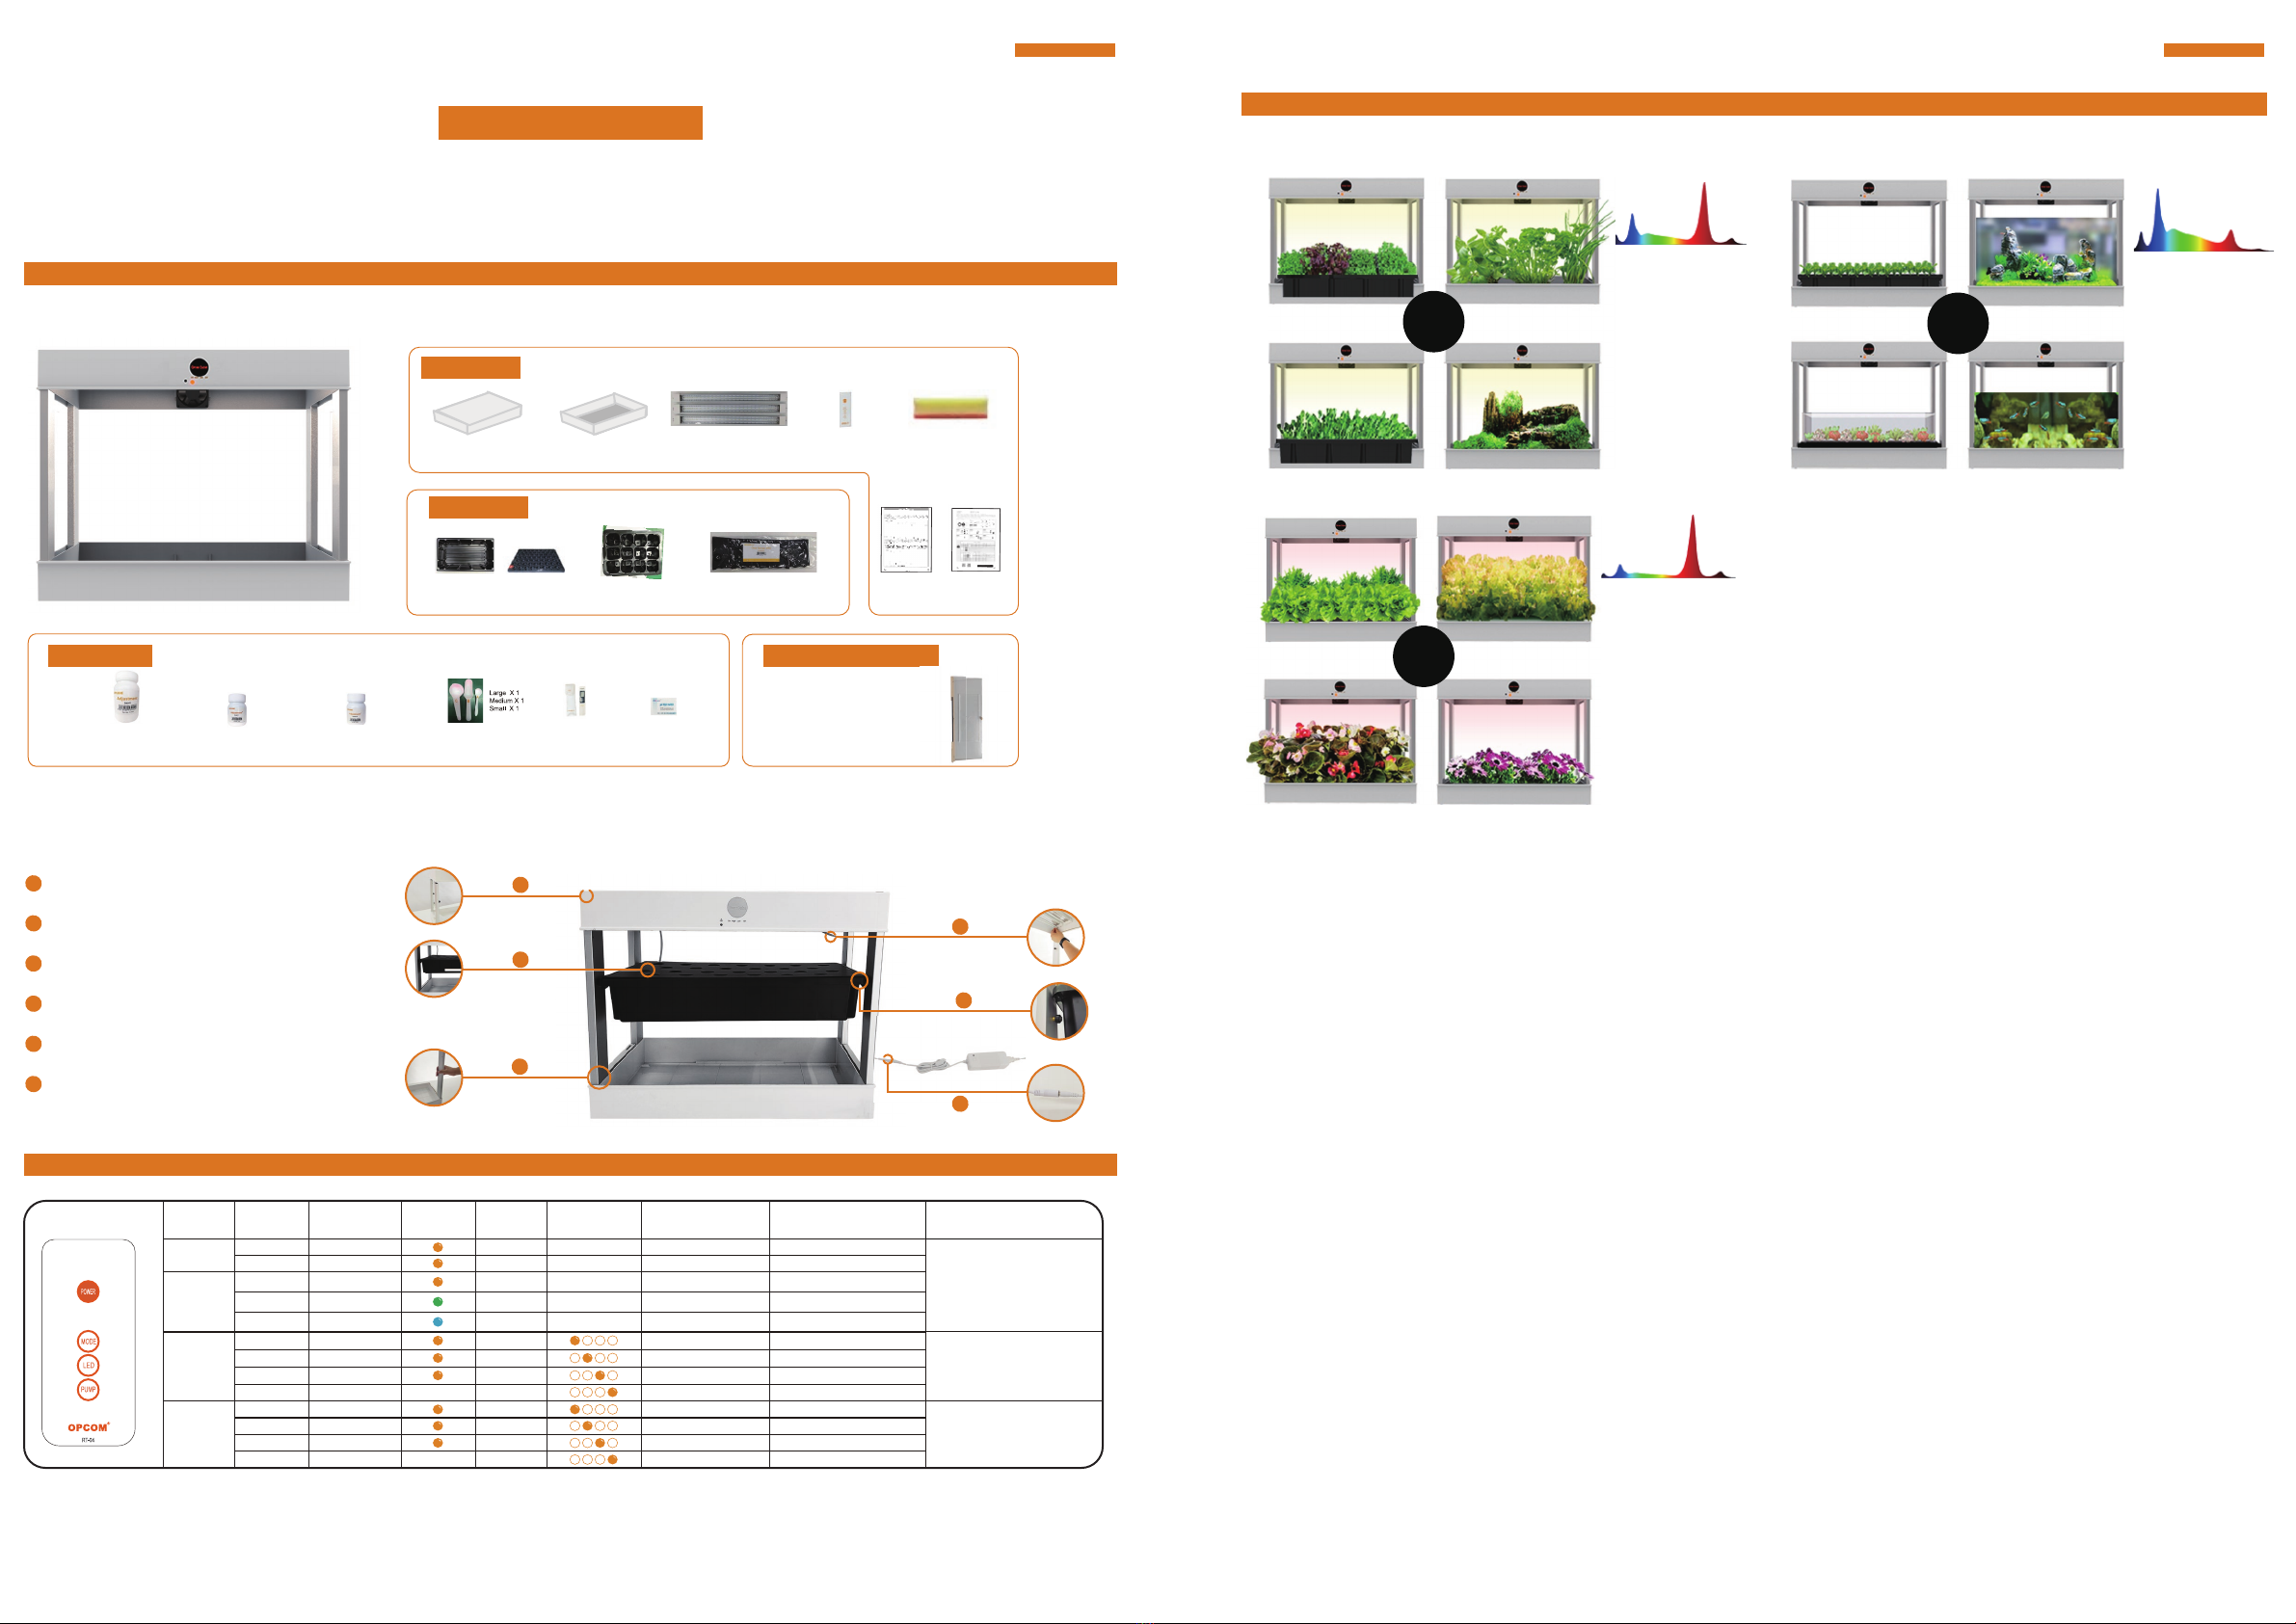
Please press mode button from remote controller according below for auto grow :
Soda #1 50mlx1 Lemon #1 50mlx1Salt #1 250mlx1 Scoop for Adjust
of Nutritio
EC Meter
x1pc
PH test paper
x1pc
Grow Sponge 30pk
2
Top COVER x 1 pcs L15T x 3 pcs Remote Controller
x 1 pcs
Cleaning Sponge
x 1 pcs
Bot COVER x 1 pcs
Planting Tray x 1 pcs Seedling Tray x 1 pcs
Assembly
2
Grow kit
Nutrition Optional Acessories
A2. Easy Set up
1
2
3
4
6
5
Install 4pcs column.
1
Install and fix the upper cover and column.
2
Connect the LED lamp DC jack.
3
Put the planting plate on the planting position.
4
Place the planting tray in the planting pot.
5
Connect the DC connector to adaptor.
6
L mode setting with high Red and IR wave lights
G mode setting with balance Red/Blue white/UV/IR wave lights S mode setting with High Bluewhite and UV less Red and IR
OPCOM
GrowCube
Model : OFG011
OPCOM
GrowCube
Thank you for purchasing OPCOM GrowCube, the indoor hydroponic growth system. It is designed with easy installation. Please read the
manual in detail before setting up. For further information.
Manual
Transparent Cover
(Front/back/left/right 4 pcs) x1set
Warranty Card
B. Remote Control Button
Status
On
Off
Operation
One Click
One Click
BB
B sec
Light SoundFuction
Power #1
Pump
Remarks
PUMPLEDLED Leval Description
#1 Set up the Wake-up(automatically turns on everyday) and Sleeping(automatically turns off everyday) modes through lighting time setting.
#2 Fan follow LEDon / off
A. Wake-up time setting: When light is on, press and hold for 5 seconds until it beeps.
B. Sleeping time setting: When light is off, press and hold for 5 seconds until it beeps.
L One Click B
18 hrs On / Daily 25min ON/ 5min OFF
Mode G(Default) One Click BB
18 hrs On / Daily 25min ON/ 5min OFF
S One Click BBB
Light On 5min ON/ 25min OFF
On One Click BB
Light On
In one day (24-hour)
cycle time
LED High One Click BBB
18 hrs On / Daily
Low One Click BBBB
9 hrs On / Daily
On One Click BBBB
55min ON/ 5min OFF
25min ON/ 5min OFF
5min ON/ 25min OFF
OFF
Off One Click B sec
High One Click BBB
Low One Click BBBB
Off One Click B sec
Light On
OPCOM grow kit supplies approx. half years planting materials, including planting trays, baskets, and sponges, for half a
year. Please insert 3 seeds into the cross on each sponge 5mm in depth, then fill up the tray with drinking water until the
waterline covers half of the sponge. Cover the tray up and place it in a dark, humid place. It will sprout within a week.
When the number of sprouts exceeds 70% (young plant stage), expose the tray under LED light or sunlight for it to grow.
Once the plant reaches 3" in height, it's ready to be planted with OPCOM farm machines with automatic settings and
preset modes. Make sure each young plant has roots that extended out of the bottom of the sponge to absorb the
nutrition reflowing in the machine.
C3. Hydroponics Nutrition Solution:
1. pH:
2. EC:
Keep the pH within the 5.5-6.5 range. To maintain the best hydroponics condition, please do not use tap water,
steam water, or drinking water.
Soda is for pH+ and Lemon is for pH-. You may test the water with the pH test paper provided.
Please grow the sprouts in the seedling tray with drinking water (no additional nutrition) and keep it in a dark and
highly humid environment (better with a cover)
2-B. Young plant stage:
2-A. Sprout Stage:
Once 70% of the seeds sprout, move the seedling tray under LED/sunlight and add Salt #1 to keep the EC at 0.8.
Please spray water daily to keep a highly humid environment for young plants.
2-D. Remark:
Salt #1 is food grade nutrition and for young plant stage and leafy stage.
OPCOM sorts out the nutritions with easier identification like traditional farmers.
2-C. Leafy stage:
Please add Salt #1 to increase EC from 0.8 to 1.2 to grow larger leaves
Leafy
Mini Garden
Lettuce
Mini Flower
Young Plants
Sprout
Herbs
Microlandscape
Grow Cube
Grow Cube Grow Cube
Seedling
Succulents
Aquarium plants
Aquarium fish


