manuals.online logo
Brands
  1. Home
  2. •
  3. Brands
  4. •
  5. OpenEye
  6. •
  7. IP Camera
  8. •
  9. OpenEye OE-C8213 User manual

OpenEye OE-C8213 User manual

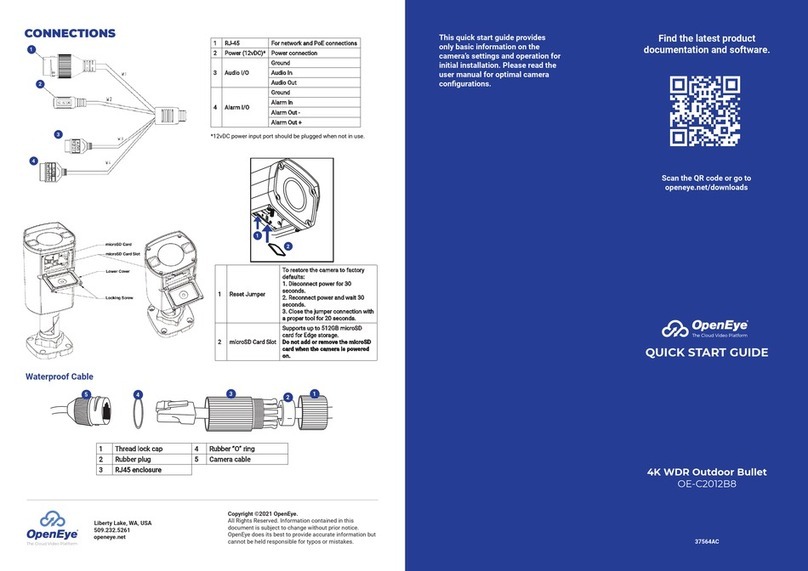
QUICK START GUIDE
OE-C8213 | 3MP IP PTZ Dome Camera
This quick start guide provides only basic information on the camera’s settings
and operation for initial installation. Please read the user manual for optimal
camera congurations.
36832AH openeye.net
Copyright ©2021 OpenEye.
All Rights Reserved. Information contained in this
document is subject to change without prior notice.
OpenEye does its best to provide accurate information but
cannot be held responsible for typos or mistakes.
RJ-45 11For network and PoE+
connections
Power (24vAC) 22Power supply to camera for
non-PoE installations
I/O Connections 33Alarm and RS-485
I/O connections
Reset Button 44
To restore the camera to
factory defaults:
1. Disconnect power for 30
seconds.
2. Reconnect power and
wait 30 seconds.
3. Press the reset button
with a proper tool for 20
seconds.
MicroSD Card Slot
(under dome)
Supports up to 128GB
microSD card for Edge
storage.
Do not add or remove the
microSD card when the
camera is powered on.
CONNECTIONS
Liberty Lake, WA, USA
509.232.5261
openeye.net
24vAC / PoE+
1 2
3
4
PRODUCT FEATURES
Camera
Maximum Resolution 2048x1536
Frame Rate at
Maximum Resolution 30FPS - H.264/H.265
Total Streams Quad Streaming
ONVIF Prole S / G / T
Day/Night True Day/Night
Wide Dynamic Range True WDR
Environmental and Power
Power
Consumption 25.4W
Input
Voltage 802.3at PoE+ / AC 24V ± 10%
Operating
Temperature -40°~122°F (-40°~50°C )
IP Rating IP66
Impact Rating IK10
CONTENTS
SEALING THREADED
CONNECTIONS
To ensure a watertight seal, the cable
entry hole of the outdoor mounting kit
needs to be sealed with thread seal
tape to avoid water from entering the
camera.
Alarm I/O Connection
1
8
2
9
4
11
3
10
5
12
6
13
7
14
1-8RS-485 D-
2-9Alarm In 4
3Alarm Out A1 10 Alarm In 3
4Alarm Out A2 11 Alarm In 2
5Alarm Out B1 12 Alarm In 1
6Alarm Out B2 13 GND (Alarm &
RS-485)
7RS-485 D+ 14 -
Mount Lock
Screw
TIP: Static IP is the recommended default.
Security Torx
Tool POWER CONNECTION
1AC24V L
2GND
3AC24V N
1
2
3
To power the camera, connect the
24vAC adaptor to the power connector
on the camera. Alternatively, users can
use PoE to power the camera if a PoE+
switch is available.
Threaded
Pendant
Alarm and RS-485
I/O Block
OE-C8213 IP
PTZ Camera
2-Pin Terminal
Power Block
3-Pin Terminal
Power Block
Threaded Mount
Adapter
ASSIGNING AN
IP ADDRESS
OpenEye IP cameras are set to DHCP
by default. If a DHCP server is not
detected after 4 minutes, the camera
will default to IP address 192.168.51.2.
If you are not using a DHCP server,
NCM will allow you to batch con gure a
static IP address.
The IP address for the camera network
on your Apex recorder is 192.168.51.1.
Selecting multiple cameras and enter-
ing IP address 192.168.51.2 will set
an IP address on all selected cameras,
starting at 192.168.51.2 and increase
per camera.
1. Open the Network Camera
Manager.
2. Select applicable camera(s).
NOTE: To change this IP address please refer
to your Apex recorder manual.
CONNECTING TO THE
IP CAMERA
To access the camera setup menu,
you need to open the Network Camera
Manager (NCM) utility. NCM is pre-
installed on all OpenEye Recorders,
and is also available for download on
the OpenEye website for installation on
your personal computer or laptop.
1. Open Network Camera Manager.
2. Locate your camera on the
Network Camera Manager list.
3. Input starting IP address, Subent
Mask, Gateway, DNS.
4. Apply changes.
5. Wait 60 seconds before refreshing
NCM.
NOTE: Refer to your Apex recorder manual
or quick start guide for instruction on
adding cameras. Passwords must
be 8-16 characters, contain at least 1
capital and 1 lower case letter, 1 number,
and 1 unique character.
NOTE: OpenEye IP cameras ship
without a default password.
DEFAULT USERNAME
AND PASSWORD
The admin user password can be set
using the following methods:
1. OpenEye recorders running Apex
2.1 or newer will automatically set
a new unique password if:
• Connected to an M-Series
recorder with a built in PoE
switch.
• Connected to a network
switch through the
camera network port
and selected then added in
setup, if a new password has
not already been set.
2. Connect to the camera directly
through a Web Browser and follow
the onscreen prompts.
3. Use the Network Camera Manager
(NCM) Utility.
Username: admin
NOTE: The NCM software manual can be found
at https://www.openeye.net/ncm-manual
POWER
This camera is compatible with 24vAC
and Power over Ethernet (PoE). Connect
power to the camera using the terminal
connector blocks.
CAUTION: Risk of explosion of battery is replaced
by an incorrect type. Dispose of used batteries
according to the instructions.
Other manuals for OE-C8213

2

Other OpenEye IP Camera manuals

OpenEye OE-C6413-AWR User manual

OpenEye

OpenEye OE-C6413-AWR User manual

OpenEye OE-C97512 User manual

OpenEye

OpenEye OE-C97512 User manual

OpenEye OE-C6412-R User manual

OpenEye

OpenEye OE-C6412-R User manual

OpenEye CM-650 User manual

OpenEye

OpenEye CM-650 User manual

OpenEye CM-711 User manual

OpenEye

OpenEye CM-711 User manual

OpenEye OE-C9616 User manual

OpenEye

OpenEye OE-C9616 User manual

OpenEye OE-C9616 User manual

OpenEye

OpenEye OE-C9616 User manual

OpenEye OE-C9616 User manual

OpenEye

OpenEye OE-C9616 User manual

OpenEye CM-710 User manual

OpenEye

OpenEye CM-710 User manual

OpenEye CM-816 User manual

OpenEye

OpenEye CM-816 User manual

OpenEye OE-C2012B8 User manual

OpenEye

OpenEye OE-C2012B8 User manual

OpenEye OE-C6412-RT User manual

OpenEye

OpenEye OE-C6412-RT User manual

OpenEye CM-722I User manual

OpenEye

OpenEye CM-722I User manual

OpenEye OE-C3012T4 User manual

OpenEye

OpenEye OE-C3012T4 User manual

OpenEye CM-816 User manual

OpenEye

OpenEye CM-816 User manual

OpenEye OE-C9518 User manual

OpenEye

OpenEye OE-C9518 User manual

OpenEye OE-C7312-AWR User manual

OpenEye

OpenEye OE-C7312-AWR User manual

Popular IP Camera manuals by other brands

H265 COMPANY TN-B200CE user manual

H265 COMPANY

H265 COMPANY TN-B200CE user manual

RolloHomeControl HomePilot 9487 Instruction manual for installation

RolloHomeControl

RolloHomeControl HomePilot 9487 Instruction manual for installation

Tenvis Mini316W user manual

Tenvis

Tenvis Mini316W user manual

FS CC3XU2 quick start guide

FS

FS CC3XU2 quick start guide

Overmax OV-CamSpot-3.2 user manual

Overmax

Overmax OV-CamSpot-3.2 user manual

Hawking Net-Vision HNC290G Specification sheet

Hawking

Hawking Net-Vision HNC290G Specification sheet

D-Link SECURICAM Network DCS-900W Quick installation guide

D-Link

D-Link SECURICAM Network DCS-900W Quick installation guide

Okina SW27HB-E48 user manual

Okina

Okina SW27HB-E48 user manual

Zonet ZVC7610 Product data

Zonet

Zonet ZVC7610 Product data

Lorex LNB9272 SERIES quick start guide

Lorex

Lorex LNB9272 SERIES quick start guide

Airlink101 ASP 34 quick start guide

Airlink101

Airlink101 ASP 34 quick start guide

Avipas AV-105 user manual

Avipas

Avipas AV-105 user manual

Novus NVIP-5000 series user manual

Novus

Novus NVIP-5000 series user manual

Konig SEC-CAMIP20 manual

Konig

Konig SEC-CAMIP20 manual

Wansview X SERIES user manual

Wansview

Wansview X SERIES user manual

DVDO C6-1 user manual

DVDO

DVDO C6-1 user manual

Dahua F Series DHI-ITC237-PU1B-IR user manual

Dahua

Dahua F Series DHI-ITC237-PU1B-IR user manual

Novus NVIP-12DN5060V/IRH-2P user manual

Novus

Novus NVIP-12DN5060V/IRH-2P user manual

manuals.online logo
manuals.online logoBrands
  • About & Mission
  • Contact us
  • Privacy Policy
  • Terms and Conditions

Copyright 2025 Manuals.Online. All Rights Reserved.