manuals.online logo
Brands
  1. Home
  2. •
  3. Brands
  4. •
  5. Oregon Scientific
  6. •
  7. Accessories
  8. •
  9. Oregon Scientific WS903 User manual

Oregon Scientific WS903 User manual

INTRODUCTION WSTĘP
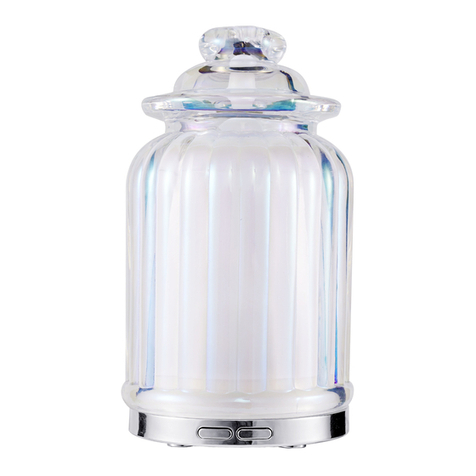
Thank you for your purchase of i.relax Aroma
Diffuser (WS903) Please read these instructions
carefully and keep the manual well for future
reference
By breaking up a mixture of water and essential
oils into millions of micro-particles, this aroma
diffuser allows you to easily breathe this scented
blend more easily This use of essential oils and
water – known as aromatherapy – helps ease
nerves and gradually hydrate any room for a
soothing effect
Dziękujemy z zakup rozpylacza zapachowego
i.relax (WS903) Uważnie przeczytaj tę instrukcję
obsługi i przechowuj ją jako źródło informacji w
przyszłości
Rozpylacz ułatwia wdychanie substancji
aromatycznych, rozbijając mieszaninę wody i
esencji zapachowych na miliony
mikrocząsteczek Takie stosowanie esencji
zapachowych w połączeniu z wodą – znane jako
aromaterapia – uspokaja nerwy i stopniowo
nawilża pomieszczenia, zapewniając kojący
efekt
IR RECEIVER: Receive IR remote control signal
LCD DISPLAY: Display all information of time
and setting
ODBIORNIK PODCZERWIENI: odbiera sygnały
pilota nadawane w podczerwieni
WYŚWIETLACZ LCD: pokazuje czas i wszystkie
ustawienia
REMOTE CONTROL: Remote control should be
placed here when unused
DC: Socket for connecting to AC/DC power
adaptor
RESET / SET CLOCK: Reset unit to default
settings and then enter clock setting
PILOT: nieużywany pilot należy umieścić w tym
miejscu
DC: gniazdko zasilacza
RESET / USTAWIANIE ZEGARA: przywraca
ustawienia domyślne urządzenia, po czym
można ustawić zegar
POWER : Turn on/off the unit
SLEEP : View remaining time; enable sleep
function with diffusing / nature sound / light; set
sleep timer
TIMER : View auto timer ON status; enter timer
settings
BRIGHTNESS / : Toggle high/low LCD
brightness; decrease values of the setting
DIFFUSE : Toggle through selection (ON /
REPEAT ON&OFF 30 seconds/ OFF)
LIGHT : Toggle through selection (Red / Orange /
Yellow / Green / Blue / Purple / Loop)
SOUND : Toggle through 5 soothing sounds
VOLUME / : Toggle through 3 sound volumes;
increase values of the setting
CR2025 batteries - already installed
ZASILANIE: włącza i wyłącza urządzenie
GOTOWOŚĆ: pokazuje pozostający czas;
aktywuje funkcję stanu gotowości z rozpylaniem /
dźwiękami przyrody / światłem; ustawia zegar
sterujący stanem gotowości urządzenia
ZEGAR: pokazuje stan zegara sterującego
włączaniem; ustawianie zegara
JASNOŚĆ / : przechodzi między wysoką/niską
jasnością wyświetlacza; zmniejsza wartości
ustawień
ROZPYLANIE: przechodzi między opcjami
(WŁĄCZ / WŁĄCZAJ I WYŁĄCZAJ co 30
sekund / WYŁĄCZ)
ŚWIATŁO: przechodzi między opcjami (czerwone
/ pomarańczowe / żółte / zielone / niebieskie /
purpurowe / wszystkie po kolei)
DŹWIĘK: przechodzi między 5 relaksującymi
dźwiękami
GŁOŚNOŚĆ / : przechodzi między 3 wartościami
głośności; zwiększa wartości ustawień
Baterie CR2025 - zainstalowane
Sleep mode is ON
Auto timer mode is ON
Soothing sound is ON
Lighting is ON
Diffusing is ON
Battery low / no battery
24HR clock format
AM/PM
Clock / settings
Tryb gotowości ustawiony na ON
Zegar sterujący automatycznym włączeniem
ustawiony na ON
Relaksujący dźwięk ustawiony na ON
Światło ustawione na ON
Rozpylanie ustawione na ON
Słaba bateria / brak baterii
Godzina w formacie 24h
AM/PM
Zegar / ustawienia
POWER SUPPLY ZASILANIE
Remove the battery insulator before use
Pour maximum 300ml tap water in room
temperature into the water tank
Add few drops of essential oils into the water
Put back the cover
Plug in the power adaptor
Press the infrared remote control on remote
control compartment to take it out
After using the remote control, insert it to the
remote control compartment
Press POWER to turn on the unit
Przed użyciem usuń pasek izolujący baterię
Wlej maksymalnie 300ml wody z kranu o
temperaturze pokojowej do zbiornika na wodę
Dodaj do wody kilka kropel esencji zapachowej
Załóż pokrywę
Podłącz zasilacz do gniazdka ściennego
Naciśnij pilot znajdujący się we wnęce na pilota,
aby go odblokować i wyjąć
Po użyciu pilota umieść go z powrotem we
wnęce na pilota
Naciśnij POWER aby włączyć urządzenie
NOTE Do not use distilled water with this
product
Water temperature should not exceed 40 ºC
Water soluble essential oil should be used
Switch off the unit and unplug from the mains
before moving or cleaning the unit
INFORMACJA Nie używaj z tym produktem wody
destylowanej
Temperatura wody nie powinna przekraczać
40ºC
Należy używać esencji zapachowych
rozpuszczalnych w wodzie
Przed przeniesieniem i rozpoczęciem
czyszczenia wyłącz urządzenie i odłącz je od
sieci elektrycznej
To pour the water out
1 Turn the unit around to view front of the product
(LCD facing you)
2 Pour the water out from the left edge
IMPORTANT
If water goes into the air tunnel during
transportation, it will be normal that water passing
out from the bottom The air tunnel inside is
designed as water resistant Please wait unit the
air tunnel is dry before use
Aby wylać wodę
1 Obróć urządzenie tak, by widzieć jego przód
(wyświetlacz LCD)
2 Wylej wodę z lewego narożnika
WAŻNE
Jeżeli w czasie transportowania urządzenia woda
dostanie się do tunelu powietrza, to normalnym
zjawiskiem będzie wyciekanie wody z dna
urządzenia Wewnętrzny tunel powietrza jest
wodoszczelny Przed użyciem urządzenia
zaczekaj, aż tunel powietrza wyschnie
FUNCTION SETTING
MANUALLY SET CLOCK
USTAWIANIE FUNKCJI
RĘCZNE USTAWIANIE ZEGARA:
Press RESET to enter setting mode
Press BRIGHTNESS or VOLUME to change the
settings or press and hold / to rapidly change the
settings
Press TIMER to confirm and move to next
setting
The setting order is: 12/24 hr format and time
Naciśnij RESET, aby uaktywnić tryb konfiguracji
Naciskaj BRIGHTNESS lub VOLUME, aby
zmienić ustawienie, albo naciśnij i przytrzymuj
odpowiedni przycisk, by szybko zmieniać
wartości
Naciśnij TIMER, aby potwierdzić ustawienie i
przejść do następnego
Kolejność ustawień jest następująca: format
godziny 12/24h i godzina
DIFFUSING SETTING USTAWIANIE FUNKCJI ROZPYLANIA
Press DIFFUSE to enter setting mode
Press DIFFUSE repeatedly to select desired
diffusing mode or to turn diffuser off
The setting order are:
- ON for 120 minutes,
- 30-second ON & 30-second OFF and
- OFF
Naciśnij DIFFUSE, aby uaktywnić tryb
konfiguracji
Naciskaj dalej DIFFUSE, aby wybrać
tryb rozpylania lub wyłączyć rozpylacz
Kolejność ustawień jest następująca:
- WŁĄCZ na 120 minut,
- 30 sekund WŁĄCZ i 30 sekund WYŁĄCZ oraz
- WYŁĄCZ
NOTE When there is no or not enough water, the
diffusing function will be automatically switched
OFF
The " " will continue flashing to indicate low water
level
Turn OFF the unit first and fill enough water and
then turn it ON again The mist output should not
INFORMACJA Jeżeli w urządzeniu nie ma wody
lub jest jej za mało, funkcja rozpylania będzie
automatycznie wyłączona (OFF)
Migający symbol " " będzie sygnalizować niski
poziom wody
Wyłącz (OFF) urządzenie, wlej dostateczną ilość
wody i włącz (ON) je ponownie Rozpylanej
be directed towards furniture or electrical
appliances
mgiełki nie należy kierować na meble ani
urządzenia elektryczne
LIGHTING SETTING USTAWIANIE FUNKCJI ŚWIATŁA
Press LIGHT to enter setting mode
Press LIGHT repeatedly to select desired lighting
mode or to turn lighting off
The setting order is: red, orange, yellow, green,
blue, purple, loop and OFF
Naciśnij LIGHT, aby uaktywnić tryb konfiguracji
Naciskaj dalej LIGHT, aby wybrać żądane światło
lub wyłączyć je całkowicie
Kolejność ustawień jest następująca: światło
czerwone, pomarańczowe, żółte, zielone,
niebieskie, purpurowe, wszystkie po kolei i
wyłączone
SOUND SETTING USTAWIENIA DŹWIĘKU
Press SOUND to enter setting mode
Press SOUND repeatedly to select desired
soothing sounds or to turn sound off
The setting order is: soothing sounds (1-5) and
OFF
Naciśnij SOUND, aby uaktywnić tryb konfiguracji
Naciskaj dalej SOUND, aby wybrać żądane
relaksujące dźwięki lub wyłączyć dźwięk
całkowicie
Kolejność ustawień jest następująca: relaksujące
dźwięki (1-5) i wyłączone
SLEEP TIMER SETTING USTAWIENIE ZEGARA STERUJĄCEGO
STANEM GOTOWOŚCI
Press SLEEP to enter setting mode
Press SLEEP repeatedly to change the sleep
timer setting or to turn it off
The setting (minutes) order is: 120, 90, 60, 30, 15
and OFF
Naciśnij SLEEP, aby uaktywnić tryb konfiguracji
Naciskaj dalej SLEEP, aby zmieniać ustawienie
zegara sterującego funkcją gotowości lub
wyłączyć go całkowicie
Kolejność ustawień (w minutach) jest
następująca: 120, 90, 60, 30, 15 i funkcja
gotowości wyłączona
To view time remaining:
Press
IMPORTANT Press SLEEP twice to change
sleep timer from OFF (OFF, 120, 90, 60, 30, 15,
0 min )
Wyświetlanie pozostającego czasu:
Naciśnij
WAŻNE Naciśnij SLEEP dwa razy, aby zmienić
ustawienie zegara sterującego ze stanu
wyłączonego (wyłączony (OFF), 120, 90, 60, 30,
15, 0 min)
AUTO TIMER ON SETTING
1 Press TIMER to enter setting mode
2 Press </>to change the settings or press
and hold</> to rapidly change the
settings
ADJUST LCD BRIGHTNESS
Press BRIGHTNESS to change the brightness
The setting order is: High and low
SOUND VOLUME
Press VOLUME to enter setting mode
Press VOLUME repeatedly to change the volume
setting or to turn it off
The setting order is: Volume level low, middle,
high
RESET
Press RESET to return to the default settings and
set clock
USTAWIANIE ZEGARA STERUJĄCEGO
AUTOMATYCZNYM WŁĄCZANIEM
3 Naciśnij TIMER, aby uaktywnić tryb
konfiguracji
4 Naciskaj </>, aby zmieniać ustawienia,
albo naciśnij i przytrzymuj</> aby szybko
zmieniać wartości ustawień
REGULACJA JASNOŚCI WYŚWIETLACZA
Naciśnij BRIGHTNESS, aby zmienić jasność
wyświetlacza
Kolejność ustawień jest następująca: wysoka i
niska
GŁOŚNOŚĆ DŹWIĘKU
Naciśnij VOLUME, aby uaktywnić tryb
konfiguracji
Naciskaj dalej VOLUME, aby zmieniać
ustawienie głośności lub wyłączyć funkcję
Kolejność ustawień jest następująca: głośność
niska, średnia, wysoka
RESET
Naciśnij RESET, aby przywrócić ustawienia
domyślne, a następnie ustawić zegar
Farbige Begriffe nicht übersetzen, das sind Tasten, die so beschriftet sind
Other manuals for WS903

3

Other Oregon Scientific Accessories manuals

Oregon Scientific UVN800 User manual

Oregon Scientific

Oregon Scientific UVN800 User manual

Oregon Scientific THC138 User manual

Oregon Scientific

Oregon Scientific THC138 User manual

Oregon Scientific Weather+ Basic Installation guide

Oregon Scientific

Oregon Scientific Weather+ Basic Installation guide

Oregon Scientific THR138 User manual

Oregon Scientific

Oregon Scientific THR138 User manual

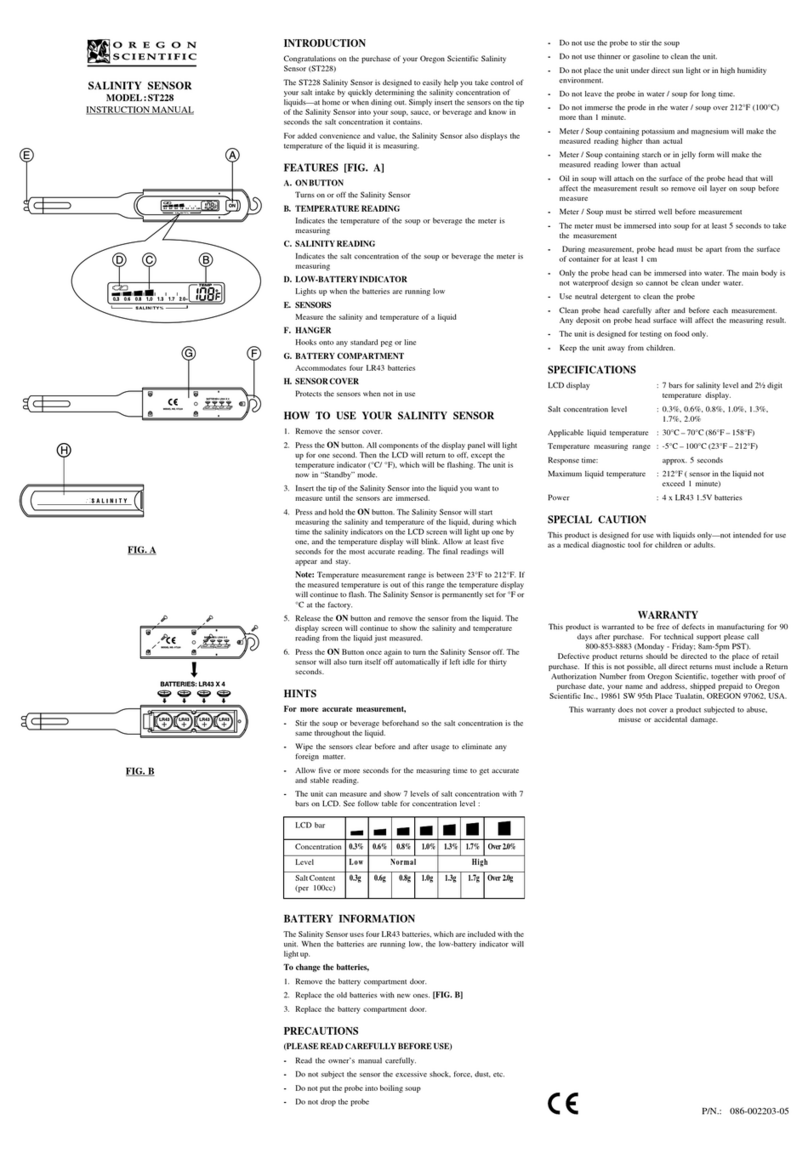
Oregon Scientific ST228 User manual

Oregon Scientific

Oregon Scientific ST228 User manual

Oregon Scientific THWR800 User manual

Oregon Scientific

Oregon Scientific THWR800 User manual

Oregon Scientific THWR288 User manual

Oregon Scientific

Oregon Scientific THWR288 User manual

Oregon Scientific THGR122NX User manual

Oregon Scientific

Oregon Scientific THGR122NX User manual

Oregon Scientific RTGN129 User manual

Oregon Scientific

Oregon Scientific RTGN129 User manual

Oregon Scientific RGR968 User manual

Oregon Scientific

Oregon Scientific RGR968 User manual

Oregon Scientific THR28 User manual

Oregon Scientific

Oregon Scientific THR28 User manual

Oregon Scientific THGR238NF User manual

Oregon Scientific

Oregon Scientific THGR238NF User manual

Oregon Scientific UVR138 User manual

Oregon Scientific

Oregon Scientific UVR138 User manual

Oregon Scientific UVN800 User manual

Oregon Scientific

Oregon Scientific UVN800 User manual

Oregon Scientific HWI0005 User manual

Oregon Scientific

Oregon Scientific HWI0005 User manual

Oregon Scientific GP123 User manual

Oregon Scientific

Oregon Scientific GP123 User manual

Oregon Scientific WA633 User manual

Oregon Scientific

Oregon Scientific WA633 User manual

Oregon Scientific THN122N User manual

Oregon Scientific

Oregon Scientific THN122N User manual

Oregon Scientific THGN122N User manual

Oregon Scientific

Oregon Scientific THGN122N User manual

Oregon Scientific THN132ES User manual

Oregon Scientific

Oregon Scientific THN132ES User manual

Oregon Scientific THC238 User manual

Oregon Scientific

Oregon Scientific THC238 User manual

Oregon Scientific THR138 User manual

Oregon Scientific

Oregon Scientific THR138 User manual

Oregon Scientific HWI0002 User manual

Oregon Scientific

Oregon Scientific HWI0002 User manual

Oregon Scientific THGN301 User manual

Oregon Scientific

Oregon Scientific THGN301 User manual

Popular Accessories manuals by other brands

Gutta ECO 120 Assembly instructions

Gutta

Gutta ECO 120 Assembly instructions

R&S RT-ZC31 user manual

R&S

R&S RT-ZC31 user manual

ERA Addmore WD80 Design and installation manual

ERA

ERA Addmore WD80 Design and installation manual

Tektronix P7225 user manual

Tektronix

Tektronix P7225 user manual

Sam SAMX DRAINER manual

Sam

Sam SAMX DRAINER manual

Lumi Ki quick start guide

Lumi

Lumi Ki quick start guide

INSTEON 2420M quick start guide

INSTEON

INSTEON 2420M quick start guide

Lightware SF20 product manual

Lightware

Lightware SF20 product manual

madebyzen GLO EW9630 manual

madebyzen

madebyzen GLO EW9630 manual

August LP106 user manual

August

August LP106 user manual

SICK GTE20 operating instructions

SICK

SICK GTE20 operating instructions

Panamax MIW-POWER installation instructions

Panamax

Panamax MIW-POWER installation instructions

KRAFTWERK 506.000.100 user manual

KRAFTWERK

KRAFTWERK 506.000.100 user manual

LI-COR LI-1500 installation guide

LI-COR

LI-COR LI-1500 installation guide

Enabling Technologies DYNAMIQUE owner's manual

Enabling Technologies

Enabling Technologies DYNAMIQUE owner's manual

Zwave Show Home ZW32 manual

Zwave

Zwave Show Home ZW32 manual

A&D AD4329A-DLC instruction manual

A&D

A&D AD4329A-DLC instruction manual

CARLO GAVAZZI DLI-P360L M Series instruction manual

CARLO GAVAZZI

CARLO GAVAZZI DLI-P360L M Series instruction manual

manuals.online logo
manuals.online logoBrands
  • About & Mission
  • Contact us
  • Privacy Policy
  • Terms and Conditions

Copyright 2025 Manuals.Online. All Rights Reserved.