manuals.online logo
Brands
  1. Home
  2. •
  3. Brands
  4. •
  5. Oregon Scientific
  6. •
  7. Thermometer
  8. •
  9. Oregon Scientific EW91 User manual

Oregon Scientific EW91 User manual

C8311A Size: A4
OVERVIEW
RECEIVER
1.LCD display:
• Displays the outdoor and indoor temperature
records, the current channel and the low battery
indicator.
2.Ice Alert indicator light:
• Flashes when the outdoor temperature is
between -2.0°C (28°F) and 3.0°C (37°F).
3.CHANNEL key:
• Press it once to turn on the backlight for 5
seconds, and press it again to switch among
Channel 1, 2 and 3.
• Press it once to turn on the backlight for 5
seconds, and then press and hold it for 2
seconds to view the channels automatically.
• When the channels are being shown
automatically, press it to exit the automatic
display mode.
4.MIN./MAX. key:
• Press it once to turn on the backlight for 5
seconds, and then press it again to show the
minimum and maximum temperature records
in the past 24 hours.
• Press and hold it for 3 seconds to delete the
minimum and maximum temperature records.
5.°C/°F slide switch:
• SlideittoswitchbetweenCelsiusandFahrenheit.
6.SENSOR key:
• Press it once to search a sensor.
• During the reception period, press and hold it
for 3 seconds to stop the reception.
7.RESET key:
• Press it to return all values to default values.
• In case of malfunction, the unit may be required
to reset.
8.BATTERYCOMPARTMENT:
• Accommodates 2 AAA size batteries.
9.BATTERY DOOR
LCD DISPLAY
1. Signal indicator
2. Channel
3. Outdoor temperature
4. Low battery indicator
5. Min and Max temperature
6. °C & °F
7. Indoor temperature
REMOTE SENSOR
1.LED indicator:
• Flashes when the remote unit sensor a reading.
2.Wall-mounting holder:
• Supports the sensor on the wall.
3.RESET key:
• Press it to restart the sensor and return all
values to default values.
4.CHANNEL slide switch:
• Assign the sensor to channel 1, 2 or 3.
5.BATTERYCOMPARTMENT:
• Accommodates 2 AAA size batteries.
6.BATTERY DOOR
RECEPTION OF SENSOR SIGNAL
OPERATING THE TEMPERATURE STATION
1. Remove the battery door and insert 2 new AAA
size batteries as per the polarity information
marked on the battery compartment.
2. Press “RESET” key to restart the main unit.
3. Slide “°C/°F” switch to select between °C and °F.
4. Slide the battery door back on.
5. Press “CHANNEL” key to select the desired
channel.
Note When the sensor signal is received, the icon
“” will be displayed on the LCD.
OPERATING THE SENSOR
1. Remove the battery door and slide the
“CHANNEL” switch to CH 1. (When using
additional sensors, make sure each sensor is
assigned a different CHANNEL number.
2. IInsert 2 new AAA batteries, matching polarities
(+/-).
3. Press the “RESET” key
4. Slide the battery door back on.
Note
•Place the sensor in location away from direct
sunlight and rain.
•Do not place the sensor more than 30 m (100
ft) from the main (indoor) unit.
•Position the sensor so that it faces the main
(indoor) unit, minimizing obstructions such as
doors, walls, and furniture.
•Place the sensor in a location with a clear view
to the sky, away from metallic or electronic
objects.
•Positionthe sensor closer to the mainunit during
cold winter months as below-freezing
temperatures may affect battery performance
and signal transmission.
Tip the transmission range may vary depending on
many factors. You may need to experiment with
various locations to get the best results.
StandardAlkalinebatteriescontainsignificantamounts
of water. Because of this they will freeze in low
temperatures of approximately -12°C (10°F).
Disposable Lithium batteries have a much lower
threshold for temperature with an estimated freezing
range of below -30°C (-22°F).
1
2
3 4
5
6
Wireless ranges can be impacted by a variety of
factors such as extremely cold temperatures. Extreme
cold may temporarily reduce the effective range
between the sensor and the base station. If the unit’s
performance fails due to low temperature, the unit will
resume proper functioning as the temperature rises to
within the normal temperature range (i.e. no permanent
damage will occur to the unit due to low temperatures).
USING THE BACKLIGHT FUNCTION
In normal mode, press “CHANNEL” or “MIN./MAX.”
key once to activate the backlight for 5 seconds.
SWITCHING BETWEEN ºC & ºF TEMPERATURE
FORMATS
Slide “ºC/ºF” switch to select between Celsius and
Fahrenheit.
VIEWING THE MINIMUM AND MAXIMUM
TEMPERATURE RECORDS
1. In normal mode, press “MIN./MAX.” key twice to
show the minimum indoor & outdoor temperature
records in the past 24 hours.
2. Press it again to show the maximum temperature
records.
3. Press it again to exit.
Note Press and hold it for 3 seconds to delete the
minimum and maximum temperature records.
USING ICE ALERT FUNCTION
If the outdoor temperature range is -2.0ºC ~ 3.0ºC
(28ºF ~ 37ºF), the Ice Alert indicator light will be turned
on and flash.
BATTERY REPLACEMENT
If the low battery indicator “” displays beside the
outdoor temperature, it means that the battery power
of sensor is not enough, and you should replace with
2 AAA size batteries at once.
While if the low battery indicator “ ” displays beside
the indoor temperature, it indicates that you should
replace batteries of the main unit with 2 new AAA size
batteries.
Note Attention! Please dispose of the used unit or
batteries in an ecologically safe manner.
PLACEMENT OF MAIN UNIT AND SENSOR
For the sensor, place the screw on the desired wall and
hang the sensor by the recessed hole in the back of it
or simply place it on the desktop.
For the main unit, you can just place it on the table by
itself.
Main unit is searching for the sensor(s)
(the icon will be flashing)
The sensor(s) cannot be found
Sensor 1 has been found
(the icon will be displayed,
but won't flash)
The sensor(s) cannot be found after
operating the main unit for 15 minutes
and “--.-”
(Outdoor
temperature
Area)
Indoor / Outdoor Thermometer
withIceAlert
Model: EW91
USERMANUAL
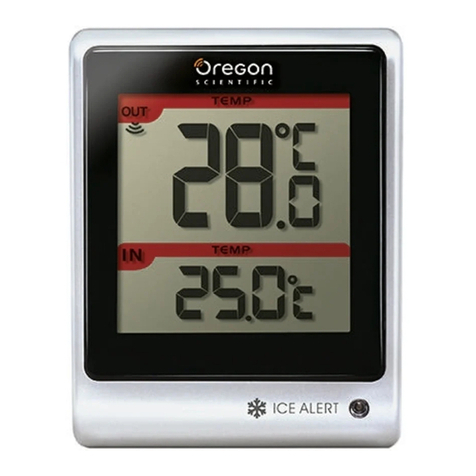
Thank you for your purchase of this Indoor /Outdoor
Thermometer. Please read these instructions carefully
and keep the manual well for future reference.
The receiver unit has a clear display that shows the
indoor temperature, the maximum & minimum
temperature records in the past 24 hours as well as the
outdoor temperature measured and transmitted from
the remote sensors. It is able to receive and display
readings from up to 3 remote sensors.
The 433 MHz technology means no wire installation is
required and you can place the sensor within 30m
(100ft) from the main (indoor) unit.
3
7
2
1
4
5
6
9
1
2
3
4
6
5
7
8
MAX.temperature records
MIN.temperature records
Low battery indicator
SPECIFICATIONS
Note We recommend that you use alkaline batteries
with this product for longer usage and lithium batteries
in temperatures below freezing.
PRECAUTIONS
• Do not subject the unit to excessive force,
shock, dust, temperature or humidity.
• Do not cover the ventilation holes with any items
such as newspapers, curtains etc.
• Do not immerse the unit in water. If you spill liquid
over it, dry it immediately with a soft, lint-free
cloth.
• Do not clean the unit with abrasive or corrosive
materials.
• Do not tamper with the unit’sinternalcomponents.
This invalidates the warranty.
• Only use fresh batteries. Do not mix new and old
batteries.
• Images shown in this manual may differ from
the actual display.
• When disposing of this product, ensure it is
collected separately for special treatment and
not as normal household waste.
• Placement of this product on certain types of
wood may result in damage to its finish for which
Oregon Scientific will not be responsible. Consult
the furniture manufacturer’s care instructions for
information.
• The contents of this manual may not be
reproduced without the permission of the
manufacturer.
• Do not dispose old batteries as unsorted municipal
waste. Collection of such waste separately for
special treatment is necessary.
• Please note that some units are equipped with a
battery safety strip. Remove the strip from the
battery compartment before first use.
Note The technical specifications for this product
and the contents of the user manual are subject to
change without notice.
ABOUT OREGON SCIENTIFIC
Visit our website (www.oregonscientific.com) to learn
more about Oregon Scientific products. If you’re in the
US and would like to contact our Customer Care
department directly, please visit:
www2.oregonscientific.com/service/support
For international inquiries, please visit:
www2.oregonscientific.com/about/international
FCC STATEMENT
This device complies with Part 15 of the FCC Rules.
Operation is subject to the following two conditions:
(1)This device may not cause harmful interference,
and (2)This device must accept any interference
received, including interference that may cause
undesired operation.
WARNING Changes or modifications to this unit not
expressly approved by the party responsible for
compliance could void the user’s authority to operate
the equipment.
Note This equipment has been tested and found to
comply with the limits for a Class B digital device,
pursuant to Part 15 of the FCC Rules. These limits are
designed to provide reasonable protection against
harmful interference in a residential installation.
This equipment generates, uses and can radiate radio
frequency energy and, if not installed and used in
accordance with the instructions, may cause harmful
interference to radio communications. However, there
is no guarantee that interference will not occur in a
particular installation. If this equipment does cause
harmful interference to radio or television reception,
which can be determined by turning the equipment off
and on, the user is encouraged to try to correct the
interference by one or more of the following measures:
• Reorient or relocate the receiving antenna.
• Increase the separation between the equipment
and receiver.
• Connect the equipment into an outlet on a circuit
different from that to which the receiver is
connected.
• Consult the dealer or an experienced radio / TV
technician for help.
DESCRIPTION
70 x 30 x 109 mm
(2.76 x 1.18 x 4.29 in)
433 MHz
-5°C to 50°C (23)°F to 122°F
0.1°C (0.2)°F
3°C to -2°C
(37)°F to 28°F
2 x AAA 1.5V batteries
58 x 23 x 100 mm
(2.28 x 0.9 x 3.94 in)
433 MHz
-20°C to 60°C (-4)°F to 140°F
2 x AAA 1.5V batteries
3
TYPE
MAIN UNIT
L x W x H
Signal frequency
Temperature
range
Temperature
resolution
Ice alert
temperature range
Power
REMOTE UNIT (EW-99)
L x W x H
Signal frequency
Temperature range
Power
Number of channel
Transmission range
30 m (98 ft) unobstructed
Weight
Weight
111g
52g
DECLARATION OF CONFORMITY
The following information is not to be used as contact
for support or sales. Please visit our website at
www2.oregonscientific.com/service/support for
all inquiries.
We
Name: Oregon Scientific, Inc.
Address: 19861 SW 95th AVe., Tualatin,
Oregon 97062 USA
Declare that the product
Product No.: EW91
Product Name: Indoor / Outdoor Thermometer
with Ice Alert
Manufacturer: IPM Concepts Limited
Address: Block C, 9/F, Kaiser Estate,
Phase 1,41 Man Yue St.,
Hung Hom, Kowloon,
Hong Kong
Telephone No.: 1-800-853-8883
is in conformity with Part 15 of the FCC Rules.
Operation is subject to the following two conditions:
1) This device may not cause harmful
interference.
2) This device must accept any interference
received, including interference that may cause
undesired operation.
C 2009 Oregon Scientific. All rights reserved

Other manuals for EW91

1

Other Oregon Scientific Thermometer manuals

Oregon Scientific RMR112 User manual

Oregon Scientific

Oregon Scientific RMR112 User manual

Oregon Scientific AW131 User manual

Oregon Scientific

Oregon Scientific AW131 User manual

Oregon Scientific RMR262 User manual

Oregon Scientific

Oregon Scientific RMR262 User manual

Oregon Scientific EMS100 User manual

Oregon Scientific

Oregon Scientific EMS100 User manual

Oregon Scientific SA880SSWR User manual

Oregon Scientific

Oregon Scientific SA880SSWR User manual

Oregon Scientific RAR232 User manual

Oregon Scientific

Oregon Scientific RAR232 User manual

Oregon Scientific THN122N User manual

Oregon Scientific

Oregon Scientific THN122N User manual

Oregon Scientific RMR683HGA User manual

Oregon Scientific

Oregon Scientific RMR683HGA User manual

Oregon Scientific EMR211 User manual

Oregon Scientific

Oregon Scientific EMR211 User manual

Oregon Scientific RAR213HG User manual

Oregon Scientific

Oregon Scientific RAR213HG User manual

Oregon Scientific RMR383HG User manual

Oregon Scientific

Oregon Scientific RMR383HG User manual

Oregon Scientific RAR681 User manual

Oregon Scientific

Oregon Scientific RAR681 User manual

Oregon Scientific MTR101 User manual

Oregon Scientific

Oregon Scientific MTR101 User manual

Oregon Scientific EMR201 User manual

Oregon Scientific

Oregon Scientific EMR201 User manual

Oregon Scientific EM-913 R User manual

Oregon Scientific

Oregon Scientific EM-913 R User manual

Oregon Scientific MTR101 User manual

Oregon Scientific

Oregon Scientific MTR101 User manual

Oregon Scientific EMR812A User manual

Oregon Scientific

Oregon Scientific EMR812A User manual

Oregon Scientific RAR621 User manual

Oregon Scientific

Oregon Scientific RAR621 User manual

Oregon Scientific MTR101 User manual

Oregon Scientific

Oregon Scientific MTR101 User manual

Oregon Scientific RMR683HG User manual

Oregon Scientific

Oregon Scientific RMR683HG User manual

Oregon Scientific RGR126 User manual

Oregon Scientific

Oregon Scientific RGR126 User manual

Oregon Scientific RMR802 User manual

Oregon Scientific

Oregon Scientific RMR802 User manual

Oregon Scientific EW91 User manual

Oregon Scientific

Oregon Scientific EW91 User manual

Oregon Scientific EW92 User manual

Oregon Scientific

Oregon Scientific EW92 User manual

Popular Thermometer manuals by other brands

VISIOMED bewell connect MyThermo Pocket BW-MTX1 manual

VISIOMED

VISIOMED bewell connect MyThermo Pocket BW-MTX1 manual

Rycom RC003 manual

Rycom

Rycom RC003 manual

ETI 810-925 operating instructions

ETI

ETI 810-925 operating instructions

Dostmann Electronic P300 Series Operating lnstructions

Dostmann Electronic

Dostmann Electronic P300 Series Operating lnstructions

Veridian Healthcare 08-370 Instructions for use

Veridian Healthcare

Veridian Healthcare 08-370 Instructions for use

Microlife MT 100 quick start guide

Microlife

Microlife MT 100 quick start guide

Sper scientific 800120 manual

Sper scientific

Sper scientific 800120 manual

Maverick OT-01 Features

Maverick

Maverick OT-01 Features

optris P20 Series manual

optris

optris P20 Series manual

TESTO 825-T1 instruction manual

TESTO

TESTO 825-T1 instruction manual

EMPORIA EMP-THERMO-22 quick start guide

EMPORIA

EMPORIA EMP-THERMO-22 quick start guide

iDevices Kitchen thermometer quick start guide

iDevices

iDevices Kitchen thermometer quick start guide

Omron ET6250 instruction manual

Omron

Omron ET6250 instruction manual

BROWIN 185909 Operation manual

BROWIN

BROWIN 185909 Operation manual

Fluke 62 MAX user manual

Fluke

Fluke 62 MAX user manual

TFA 30.2021 operating instructions

TFA

TFA 30.2021 operating instructions

Char-Broil 4885637 user manual

Char-Broil

Char-Broil 4885637 user manual

Braun NTF3000AR manual

Braun

Braun NTF3000AR manual

manuals.online logo
manuals.online logoBrands
  • About & Mission
  • Contact us
  • Privacy Policy
  • Terms and Conditions

Copyright 2025 Manuals.Online. All Rights Reserved.