4. If data upload is completed, the display will show
“ ”.
NOTE Computer system requirements:
• Operating system: Microsoft Windows XP SP2 or
Vista
• Processor: Pentium III or IV (recommended)
• RAM: Min. 256 MB or 512 MB (recommended)
• Hard disk free space: Min. 256 MB or 512 MB
(recommended)
• CD-ROM or DVD drive
NOTE The USB is only used for uploading temperature
data. It cannot be used for charging battery power.
RESET
Press RESET to return to the default settings.
PRECAUTIONS
• Do not subject the unit to excessive force, shock, dust,
temperature or humidity.
• Do not cover the ventilation holes with any items such
as newspapers, curtains etc.
• Do not immerse the unit in water. If you spill liquid over
it, dry it immediately with a soft, lint-free cloth.
• Do not clean the unit with abrasive or corrosive
materials.
• Do not tamper with the unit’s internal components.
This invalidates the warranty.
• Only use fresh batteries. Do not mix new and old
batteries.
• Images shown in this manual may differ from the
actual display.
• When disposing of this product, ensure it is collected
separately for special treatment and not as normal
household waste.
• Placement of this product on certain types of wood
may result in damage to its finish for which Oregon
Scientific will not be responsible. Consult the furniture
manufacturer’s care instructions for information.
• The contents of this manual may not be reproduced
without the permission of the manufacturer.
• Do not dispose old batteries as unsorted municipal
waste. Collection of such waste separately for special
treatment is necessary.
• Please note that some units are equipped with a
battery safety strip. Remove the strip from the battery
compartment before first use.
NOTE The technical specifications for this product and
the contents of the user manual are subject to change
without notice.
SPECIFICATIONS
TYPE DESCRIPTION
MAIN UNIT
L x W x H
80 g (2.8 oz) without battery
63 x 23 x 115 mm
(2.48 x 0.91 x 4.53 in)
Weight
Temperature range -5°C to 50°C (23°F to 122°F)
Resolution 0.1°C (0.2°F)
Signal frequency 433 MHz
Power 2 x UM-4 (AAA)
1.5 V batteries
REMOTE UNIT (THN132N)
L x W x H 96 x 50 x 22 mm
(3.78 x 1.97 x 0.87 in)
Weight 62 g (2.22 ounces)
Transmission range 30 m (100 ft) unobstructed
Temperature range -20°C to 60°C (-4°F to 140°F)
Power 1 x UM-3 (AA) 1.5 V batteries
ABOUT OREGON SCIENTIFIC
Visit our website (www.oregonscientific.com) to learn more
about Oregon Scientific products. If you’re in the US and
would like to contact our Customer Care department directly,
please visit: www2.oregonscientific.com/service/support
OR
Call 1-800-853-8883.
For international inquiries, please visit:
www2.oregonscientific.com/about/international
EU-DECLARATION OF CONFORMITY
Hereby, Oregon Scientific, declares that this Wireless
Indoor and Outdoor Thermometer with USB (Model:
EMS100) is in compliance with the essential requirements
and other relevant provisions of Directive 1999/5/EC. A
copy of the signed and dated Declaration of Conformity is
available on request via our Oregon Scientific Customer
Service.
FCC STATEMENT
This device complies with Part 15 of the FCC Rules.
Operation is subject to the following two conditions: (1) This
device may not cause harmful interference, and (2) This
device must accept any interference received, including
interference that may cause undesired operation.
WARNING Changes or modifications not expressly
approved by the party responsible for compliance could
void the user’s authority to operate the equipment.
NOTE This equipment has been tested and found to
comply with the limits for a Class B digital device, pursuant
to Part 15 of the FCC Rules. These limits are designed to
provide reasonable protection against harmful interference
in a residential installation.
This equipment generates, uses and can radiate radio
frequency energy and, if not installed and used in
accordance with the instructions, may cause harmful
interference to radio communications. However, there
is no guarantee that interference will not occur in a
particular installation. If this equipment does cause harmful
interference to radio or television reception, which can be
determined by turning the equipment off and on, the user
is encouraged to try to correct the interference by one or
more of the following measures:
• Reorient or relocate the receiving antenna.
• Increase the separation between the equipment and
receiver.
• Connect the equipment into an outlet on a circuit
different from that to which the receiver is
connected.
• Consult the dealer or an experienced radio / TV
technician for help.
DECLARATION OF CONFORMITY
The following information is not to be used as contact for
support or sales. Please call our customer service number
(listed on our website at www.oregonscientific.com, or on
the warranty card for this product) for all inquiries instead.
We
Name: Oregon Scientific, Inc.
Address: 19861 SW 95th Ave.,Tualatin,
Oregon 97062 USA
Telephone No.: 1-800-853-8883
declare that the product
Product No.: EMS100
Product Name: Wireless Indoor and Outdoor
Thermometer with USB
Manufacturer: IDT Technology Limited
Address: Block C, 9/F, Kaiser Estate,
Phase 1,41 Man Yue St.,
Hung Hom, Kowloon,
Hong Kong
is in conformity with Part 15 of the FCC Rules.Operation is
subject to the following two conditions: 1) This device may
not cause harmful interference.2) This device must accept
any interference received, including interference that may
cause undesired operation.
COUNTRIES RTTE APPROVED COMPLIED
All EU countries, Switzerland CH
and Norway N
Wireless Indoor and Outdoor Thermometer
with USB
Model: EMS100
USER MANUAL
OVERVIEW
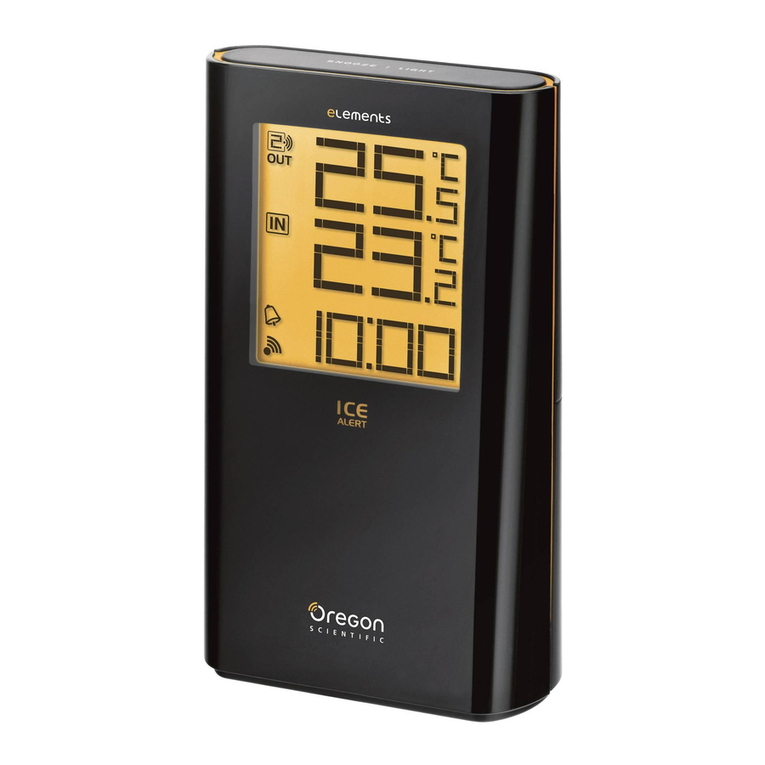
FRONT VIEW – FIG. 1
1. Remote sensor reception indicator
2. Outdoor temperature
3. Indoor temperature
4. Ice alert LED indicator
5. USB status indicator
6. USB port (at the side)
BACK VIEW – FIG. 2
1. °C / °F: Select temperature unit
2. RESET: Reset unit to default settings
REMOTE SENSOR – FIG. 3
1. LED status indicator
2. Wall mount hole
3. Battery compartment
4. RESET hole
5. CHANNEL switch
GETTING STARTED
INSERT BATTERIES
1. Remove the battery compartment.
2. Insert the batteries, matching the polarities (see FIG 2).
3. Press RESET after each battery change.
Indoor temperature
area
Outdoor temperature
area
Main unit batteries low
Sensor batteries low
LOCATION MEANING
REMOTE SENSOR
To set up the sensor:
1. Open the battery compartment (see FIG 3).
2. Select channel 1 then press RESET.
3. Close the battery door.
4. Place the sensor within 30 m (98 ft) of the main unit
using the table stand or wall mount.
NOTE Use alkaline batteries for longer usage and
consumer grade lithium batteries in temperatures below
freezing.
SENSOR DATA TRANSMISSION
To search for a sensor:
Reset the unit.
The sensor reception icon in the remote sensor area
shows the status:
TIP The transmission range may vary depending on
many factors. You may need to experiment with various
locations to get the best results.
ICE ALERT
If the temperature falls between 3°C to -2 °C (37°F to 28°F),
the green ice alert LED indicator will flash continuously,
and will stop flashing once the temperature is out of this
range.
CONNECTION TO PC
Temperature readings can be uploaded to the computer by
connecting the main unit to the computer.
To upload the temperature data to the computer:
1. Install the PC software.
2. Follow instructions in the software programme.
3. Plug one end of the USB cable into the USB port and
the other end into the computer.
ICON DESCRIPTION
Main unit is searching
for sensor(s).
A channel has been
found.
The sensor cannot be
found.
Termometro Interno-Esterno senza fili
con collegamento USB al PC
Modello: EMS100
MANUALE PER L’UTENTE
PANORAMICA
VISTA ANTERIORE – FIG. 1
1. Indicatore della ricezione del sensore remoto
2. Temperatura esterna
3. Temperatura interna
4. Indicatore LED allarme rischio gelate
5. Indicatore stato USB
6. Porta USB (sul lato)
VISTA POSTERIORE – FIG. 2
1. °C / °F: consente di selezionare l’unità di misura della
temperatura
2. RESET: consente di ripristinare i valori predefiniti
dell’unità
SENSORE REMOTO – FIG. 3
1. Indicatore LED di stato
2. Foro per fissaggio a parete
3. Vano batterie
4. Foro RESET
5. Selettore CHANNEL
OPERAZIONI PRELIMINARI
INSERIMENTO DELLE BATTERIE
1. Togliere il coperchio del vano batterie.
2. Inserire le batterie, rispettando la polarità indicata
(FIG. 2).
3. Premere RESET dopo ogni sostituzione di batteria.
4. Riposizionare il coperchio
POSIZIONE SIGNIFICATO
Area temperatura
interna
Batterie dell’unità principale in
esaurimento
Area temperatura
esterna
Batterie del sensore in
esaurimento
SENSORE REMOTO
Installazione del sensore:
1. Aprire il vano batterie (FIG. 3).
2. Selezionare un canale, quindi premere RESET.
3. Chiudere il vano batterie.
4. Posizionare il sensore entro 30 m dall’unità principale
utilizzando il supporto da tavolo o il foro per il
montaggio a parete.
NOTA Utilizzare batterie alcaline in caso di uso prolungato
e batterie al litio in ambienti con temperature inferiori allo 0.
TRASMISSIONE DEI DATI DEL SENSORE
Ricerca di un sensore:
Premere RESET.
L’icona di ricezione del sensore nell’area relativa al
sensore remoto ne indica lo stato:
ICONA DESCRIZIONE
L’unità principale è alla
ricerca del/i sensore/i.
È stato rilevato un canale.
Impossibile trovare il
sensore.
ALLARME GHIACCIO
Se la temperatura scende tra i 3°C e i -2 °C, l’indicatore
LED verde lampeggia di continuo e smette di lampeggiare
quando la temperatura esce da questa fascia. Questa
funzione è attiva solo sul canale 1; se si vuole escludere la
funzione posizionare il selettore posto all’interno del vano
batterie del sensore remoto sui canali 2 o 3.
COLLEGAMENTO AL COMPUTER
Le rilevazioni relative alla temperatura interna ed esterna
possono essere alla temperatura interna ed esterna
l’unità principale gestite tramite computer, collegando allo
stesso.
Caricamento dei dati meteo sul computer:
1. E’ necessario installare il software per PC.
IT
2. Seguire le istruzioni del software.
3. Collegare un’estremità del cavo USB alla porta USB e
l’altra estremità ad una delle porte USB del computer.
4. Se il caricamento dei dati viene completato, apparirà la
seguente visualizzazione “ ”.
NOTA Requisiti del sistema:
• Sistema operativo: Microsoft Windows XP SP2 o Vista
• Processore: Pentium III o IV (suggerito)
• RAM: almeno 256 MB o 512 MB (suggerito)
• Spazio libero su disco fisso: almeno 256 MB o 512 MB
(suggerito)
• Periferica CD-ROM o DVD
NOTA L’USB si usa solo per caricare dati meteo. Non può
essere usato per caricare le batterie.
FUNZIONE RESET
Premere RESET per ripristinare le impostazioni predefinite
dell’unità.
PRECAUZIONI
• Non sottoporre il prodotto a forza eccessiva, urti,
polvere, sbalzi di temperatura o umidità.
• Non otturare i fori di aerazione con oggetti come
giornali, tende, etc.
• Non immergere l’unità in acqua. Se si versa del liquido
sul prodotto, asciugarlo immediatamente con un
panno morbido e liscio.
• Non pulire l’unità con materiali abrasivi o corrosivi.
• Non manomettere i componenti interni. In questo
modo si invalida la garanzia.
• Utilizzare solo batterie nuove. Non mescolare batterie
nuove con batterie usate.
• Le immagini del manuale possono differire dalla realtà.
• Al momento dello smaltimento del prodotto, utilizzare
la raccolta differenziata.
• Oregon Scientific declina ogni responsabilità per
eventuali danni alle finiture causati dal posizionamento
del prodotto su determinati tipi di legno. Consultare le
istruzioni fornite dal fabbricante del mobile per ulteriori
informazioni.
• Il contenuto di questo manuale non può essere
ristampato senza l’autorizzazione del fabbricante.
• Non smaltire le batterie vecchie come rifiuto non
differenziato. È necessario che questo prodotto venga
smaltito mediante raccolta differenziata per essere
trattato in modo particolare.
• Alcune unità sono dotate di una striscia di sicurezza
per le batterie. Rimuovere la striscia dal vano batterie
prima del primo utilizzo.
NOTA Le specifiche tecniche del prodotto e il contenuto
del manuale per l’utente possono essere modificati senza
preavviso.
INFORMAZIONI AGLI UTENTI DEI PRODOTTI
DI TIPO “DOMESTICO”
INFORMAZIONE AGLI UTENTI
ai sensi dell’art. 13 del Decreto Legislativo 25 luglio
2005, n. 151”Attuazione delle Direttive 2002/95/CE,
2002/96/CE e 2003/108/CE, relative alla riduzione
dell’uso di sostanze pericolose nelle apparecchiature
elettriche ed elettroniche, nonché allo smaltimento dei
rifiuti”
Il simbolo del cassonetto barrato riportato
sull’apparecchiatura o sulla sua confezione indica che
il prodotto alla fine della propria vita utile deve essere
raccolto separatamente dagli altri rifiuti.
L’utente dovrà, pertanto, conferire l’apparecchiatura giunta
a fine vita agli idonei centri di raccolta differenziata dei
rifiuti elettronici ed elettrotecnici, oppure riconsegnarla
al rivenditore al momento dell’acquisto di una nuova
apparecchiatura di tipo equivalente, in ragione di uno a
uno.
L’adeguata raccolta differenziata per l’avvio successivo
dell’apparecchiatura dismessa al riciclaggio, al trattamento
e allo smaltimento ambientalmente compatibile contribuisce
ad evitare possibili effetti negativi sull’ambiente e sulla
salute e favorisce il reimpiego e/o riciclo dei materiali di cui
è composta l’apparecchiatura.
Lo smaltimento abusivo del prodotto da parte dell’utente
comporta l’applicazione delle sanzioni amministrative
previste dalla normativa vigente.
FR
Thermomètre intérieur et extérieur
sans fil avec port USB
Modèle : EMS100
MANUEL DE L’UTILISATEUR
VUE D’ENSEMBLE
VUE AVANT – FIG. 1
1. Indicateur de réception de la sonde sans fil
2. Température extérieure
3. Température intérieure
4. Indicateur LED du niveau de gel
5. Indicateur du statut USB
6. Port USB (sur le côté)
FACE ARRIERE – FIG. 2
1. C° / °F: Permet de sélectionner l’unité de mesure de la
température
2. RESET: Réinitialise l’appareil aux réglages par défaut
SONDE SANS FIL – FIG. 3
1. Indicateur LED
2. Trou de fixation murale
3. Compartiment des piles
4. Fente RESET (Réinitialiser)
5. Bouton CHANNEL (CANAL)
POUR COMMENCER
INSTALLATION DES PILES
1. Retirez le couvercle du compartiment des piles.
2. Insérez les piles, en respectant les polarités (voir FIG 2).
3. Appuyez sur RESET (REINITIALISER) après chaque
changement de piles.
EMPLACEMENT SIGNIFICATION
Zone de température
intérieure
Zone de température
extérieure
Piles faibles (Appareil principal)
Piles de la sonde faibles
SONDE SANS FIL
Installation de la sonde :
1. Ouvrez le couvercle pour accéder au compartiment
des piles (FIG 3).
2. Sélectionnez un canal puis appuyez sur RESET.
3. Fermez le couvercle du compartiment des piles.
4. Installez la sonde à 30 m maximum (98 pieds) de
l’appareil principal à l’aide du support de table ou de la
fixation murale.
REMARQUE Utilisez des piles alcalines pour un usage
prolongé et des piles au lithium pour la consommation lors
de températures inférieures au gel.
TRANSMISSION DES DONNEES DE LA SONDE
Recherche d’une sonde :
Réinitialisez l’appareil.
L’icône de réception de la sonde situé sur la zone de la
sonde sans fil vous indique le statut de la transmission :
ICONE DESCRIPTION
L’appareil principal est à la
recherche de la/des sonde(s).
Un canal a été trouvé.
La sonde est introuvable.
ALERTE DU NIVEAU DE GEL
Si la température chute entre 3°C et -2°C (37°F et
28°F), l’indicateur LED vert du niveau de gel clignotera
automatiquement, il s’arrêtera de clignoter une fois que la
température aura dépassé cette gamme.
CONNEXION À VOTRE PC
Vous pouvez télécharger les prévisions de température
et d’humidité sur votre ordinateur en connectant l’appareil
principal à votre PC.
Télécharger les prévisions sur votre ordinateur :
1. Installez le logiciel PC.
2. Suivez les instructions du logiciel.
3. Branchez l’extrémité du câble USB au port USB et
l’autre extrémité du câble à votre ordinateur.
4. Une fois le transfert de données achevé, l’écran
affichera “ ”.
REMARQUE Caractéristiques système :
• Système d’exploitation : Microsoft Windows XP SP2
ou Vista
• Processeur : Pentium III ou IV (recommandé)
• RAM: 256 MB au minimum ou 512 MB (recommandé)
• Espace libre sur le disque dur : 256 MB au minimum
ou 512 MB (recommandé)
• Lecteur de CD -Rom ou DVD
REMARQUE Le câble et le port USB ne sont utilisés
uniquement que pour le transfert des prévisions. Vous ne
pouvez les utiliser pour charger les piles.
RESET (RÉINITIALISER)
Appuyez sur RESET pour que l’appareil revienne aux
réglages par défaut.
PRECAUTIONS
• Ne pas soumettre le produit à une force excessive, au
choc, à la poussière, aux changements de température
ou à l’humidité.
• Ne pas couvrir les trous de ventilation avec des
journaux, rideaux etc.
• Ne pas immerger le produit dans l’eau. Si vous
renversez du liquide sur l’appareil, séchez-le
immédiatement avec un tissu doux.
• Ne pas nettoyer l’appareil avec des matériaux corrosifs
ou abrasifs.
• Ne pas trafiquer les composants internes. Cela
invalidera votre garantie.
• N’utilisez que des piles neuves. Ne pas mélanger des
piles neuves et usagées.
• Les images de ce manuel peuvent dif férer de l’aspect
réel du produit.
• Lorsque vous désirez vous débarrasser de ce produit,
assurez-vous qu’il soit collecté séparément pour un
traitement adapté.
• Le poser sur certaines surfaces en bois peut endommager
la finition du meuble, et Oregon Scientific ne peut en être
tenu responsable. Consultez les mises en garde du
fabricant du meuble pour de plus amples informations.
• Le contenu du présent manuel ne peut être reproduit
sans la permission du fabriquant.
• Ne pas jeter les piles usagées dans les containers
municipaux non adaptés. Veuillez effectuer le tri de
ces ordures pour un traitement adapté si nécessaire.
• Veuillez remarquer que certains appareils sont équipés
d’une bande de sécurité. Retirez la bande bande
ducompartiment des piles avant la première utilisation.
REMARQUE Les caractéristiques techniques de ce
produit et le contenu de ce manuel peuvent être soumis à
modifications sans préavis.
CARACTERISTIQUES
SONDE SANS FIL (THN132N)
L x l x H 96 x 50 x 22 mm
(3,78 x 1,97 x 0,87 pouces)
Poids 62 g (2,22 onces)
Distance de transmission 30 m (100 pieds) sans
obstruction
Plage de mesure de la -20°C à 60°C (-4°F° à 140 °F)
température
Alimentation 1 pile UM 3 (AA) 1,5 V
TYPE DESCRIPTION
APPAREIL PRINCIPAL
L x l x H 63 x 23 x 115 mm
(2.48 x 0.91 x 4.53 in)
Poids 80 g (2,8 onces) sans piles
Plage de mesure de la -5°C à 50°C (23°F à 122°F)
température
Résolution 0,1°C (0,2°F)
Fréquence du signal 433 MHz
Alimentation 2 piles UM-4 (AAA) 1,5 V
DE
Funkthermometer innen/ außen
mit USB-Anschluss
Modell: EMS100
BEDIENUNGSANLEITUNG
ÜBERSICHT
VORDERANSICHT – ABB. 1
1. Empfangsanzeige für Funksendeeinheit
2. Außentemperatur
3. Innentemperatur
4. LED-Indikator für Frostwarnung
5. USB-Statusanzeige
6. USB-Anschluss (seitlich)
RÜCKANSICHT – ABB. 2
1. °C / °F: Temperatureinheit auswählen
2. RESET: Gerät auf Standardeinstellungen zurücksetzen
FUNKSENDEEINHEIT – ABB. 3
1. LED-Statusindikator
2. Öffnung für Wandmontage
3. Batteriefach
4. RESET-Öffnung
5. CHANNEL-Schalter
ERSTE SCHRITTE
BATTERIEN EINLEGEN
1. Öffnen Sie das Batteriefach.
2. Legen Sie die Batterien ein und achten Sie auf die
Übereinstimmung der Polaritäten (siehe ABB. 2).
3. Nach jedem Batteriewechsel auf RESET drücken.
STELLE BEDEUTUNG
Innentemperatur-Bereich Batterien der Basiseinheit sind
schwach
Außentemperatur-Bereich Batterien der Sendeeinheit sind
schwach
FUNKSENDEEINHEIT
So richten Sie die Sendeeinheit ein:
1. Öffnen Sie das Batteriefach (siehe ABB. 3).
2. Wählen Sie einen Kanal aus und drücken Sie auf RESET.
3. Schließen Sie die Batterieklappe.
4. Platzieren Sie die Sendeeinheit mit dem Tischaufsteller
oder der Wandaufhängung innerhalb von 30 m von
der Basiseinheit entfernt.
HINWEIS Verwenden Sie Alkaline-Batterien für längere
Betriebsdauer sowie Lithium-Batterien für Endverbraucher
bei Temperaturen unter dem Gefrierpunkt.
DATENÜBERTRAGUNG DER SENDEEINHEIT
So suchen Sie nach einer Sendeeinheit:
Setzen Sie das Gerät zurück.
Das Sensor-Empfangssymbol im Bereich der Funksendeeinheit
zeigt den Status an:
SYMBOL BESCHREIBUNG
Basiseinheit sucht Sendeeinheit(en).
Ein Kanal wurde gefunden.
Die Sendeeinheit konnte nicht
gefunden werden.
FROSTWARNUNG
Wenn die Temperatur auf einen Wert zwischen 3 °C bis -2 °C
(37 °F bis 28 °F) abfällt, blinkt der grüne LED-Indikator für die
Frostwarnung fortlaufend; er hört auf zu blinken, sobald sich
die Temperatur wieder außerhalb dieses Bereichs befindet.
ANSCHLUSS AN DEN PC
Die Wetterdaten zu Temperatur und Luftfeuchtigkeit
können auf einen Computer hochgeladen werden, wenn
Sie die Basiseinheit an den Computer anschließen.
So laden Sie die Wetterdaten auf den Computer:
1. Installieren Sie die PC-Software.
2. Folgen Sie den Anweisungen des Installationsprogrammes.
3. Schließen Sie das eine Ende des USB-Kabels am USB-
Anschluss und das andere Ende an Ihren Computer an.
4. Wenn das Hochladen der Daten beendet ist, wird auf
dem Display “ ” angezeigt.
HINWEIS Systemanforderungen für Computer:
• Betriebssystem: Microsoft Windows XP SP2 oder
Vista
•
Prozessor: Pentium III oder IV (empfohlen)
• RAM: Min. 256 MB oder 512 MB (empfohlen)
• Freier Festplattenspeicher: Min. 256 MB oder 512 MB
(empfohlen)
• CD-ROM- oder DVD-Laufwerk
HINWEIS Das USB-Kabel ist nur für das Hochladen der
Wetterdaten vorgesehen. Es kann nicht für das Laden der
Batterie benutzt werden.
RESET
Drücken Sie auf RESET, um das Gerät auf die
Standardeinstellungen zurückzusetzen.
VORSICHTSMASSNAHMEN
• Setzen Sie das Gerät keiner extremen Gewalteinwirkung
und keinen Stößen aus, und halten Sie es von übermäßigem
Staub, Hitze oder Feuchtigkeit fern.
• Sie dürfen die Belüftungsöffnungen nicht mit Gegenständen
abdecken, wie z.B. Zeitungen, Vorhänge, usw.
• Tauchen Sie das Gerät niemals in Wasser. Falls Sie
eine Flüssigkeit über das Gerät verschütten, trocknen
Sie es sofort mit einem weichen, faserfreien Tuch.
• Reinigen Sie das Gerät keinesfalls mit scheuernden
oder ätzenden Mitteln.
• Machen Sie sich nicht an den internen Komponenten
des Geräts zu schaffen, da dies zu einem Verlust der
Garantie führen kann.
• Verwenden Sie nur neue Batterien. Verwenden Sie
keinesfalls neue und alte Batterien gemeinsam.
• Die in dieser Anleitung dargestellten Abbildungen
können sich vom Original unterscheiden.
• Entsorgen Sie das Produkt nicht im allgemeinen
Hausmüll, sondern ausschließlich in den dafür
vorgesehenen, kommunalen Sammelstellen, die Sie
bei Ihrer Gemeinde erfragen können.
• Wenn dieses Produkt auf bestimmte Holzflächen
gestellt wird, kann die Oberfläche beschädigt
werden. Oregon Scientific ist nicht haftbar für solche
Beschädigungen. Entsprechende Hinweise entnehmen
Sie bitte der Pflegeanleitung Ihres Möbelherstellers.
• Der Inhalt dieser Anleitung darf ohne Genehmigung
des Herstellers nicht vervielfältigt werden.
• Verbrauchte Batterien gehören nicht in den Hausmüll.
Bitte geben Sie sie bei einer Sammelstelle für
Altbatterien bzw. Sondermüll ab.
• Bitte beachten Sie, dass manche Geräte mit einem Btterieunt
erbrechungsstreifen bestückt sind. Vor dem ersten Gebrauch
müssen Sie den Streifen aus dem Batteriefach ziehen.
HINWEIS Die technischen Daten für dieses Produkt
und der Inhalt der Bedienungsanleitung können ohne
Benachrichtigung geändert werden.
TECHNISCHE DATEN
TYP BESCHREIBUNG
BASISEINHEIT
L x B x H 63 x 23 x 115 mm
Gewicht 80 g (ohne Batterie)
Temperaturbereich -5 °C bis 50 °C (23 °F bis 122 °F)
Auflösung 0,1 °C (0,2 °F)
Signalfrequenz 433 MHz
Stromversorgung 2 Batterien UM-4 (AAA) 1,5 V
FUNKSENDEEINHEIT (THN132N)
L x B x H 96 x 50 x 22 mm
Gewicht 62 g
Übertragungsreichweite 30 m (ohne Hindernisse)
Temperaturbereich -20 °C bis 60 °C (-4 °F bis 140 °F)
Stromversorgung 1 Batterie UM-3 (AA) 1,5 V
ÜBER OREGON SCIENTIFIC
Besuchen Sie unsere Website www.oregonscientific.de und
erfahren Sie mehr über unsere Oregon Scientific-Produkte. Auf
der Website finden Sie auch Informationen, wie Sie im Bedarfsfall
unseren Kundendienst erreichen und Daten herunterladen
können. Für internationale Anfragen besuchen Sie bitte unsere
Website: www2.oregonscientific.com/about/international.
EU-KONFORMITÄTSERKLÄRUNG
Hiermit erklärt Oregon Scientific, das Funkthermometer
innen/ außen mit USB-Anschluss (Modell: EMS100) mit
den grundlegenden Anforderungen und anderen relevanten
Vorschriften der Richtlinie 1999/5/ EG übereinstimmt. Eine
Kopie der unterschriebenen und mit Datum versehenen
Konformitätserklärung erhalten Sie auf Anfrage über
unseren Oregon Scientific Kundendienst.
KONFORM IN FOLGENDEN LÄNDERN
Alle Länder der EU, Schweiz CH
und Norwegen N
SPECIFICHE TECNICHE
TIPO DESCRIZIONE
UNITÀ PRINCIPALE
L x P x H 63 x 23 x 115 mm
Peso 80 g (batterie escluse)
Campo di misurazione da -5°C a 50°C
della temperatura
Risoluzione 0.1°C (0.2°F)
Frequenza segnale 433 MHz
Alimentazione 2 batterie UM-4 (AAA)
da 1,5 V
UNITÀ REMOTA (THN132N)
L x P x H 96 x 50 x 22 mm
Peso 62 g
Campo di trasmissione 30 m senza ostruzioni
Campo di misurazione della da -20°C a 60°C
temperatura
Alimentazione 1 batteria UM-3 (AA)
da 1,5 V
INFORMAZIONI SU OREGON SCIENTIFIC
Per avere maggiori informazioni sui nuovi prodotti Oregon
Scientific visita il nostro sito internet www.oregonscientific.
it, dove potrai trovare tutte le informazioni di cui hai
bisogno, oppure accedi a www.oregonscientificstore.it.
Per ricerche di tipo internazionale puoi visitare invece il
sito www2.oregonscientific.com/about/international.asp.
DICHIARAZIONE DI CONFORMITA’ UE
Con la presente Oregon Scientific dichiara che questo
prodotto (Modello: EMS100) è conforme ai requisiti
essenziali ed alle altre disposizioni pertinenti stabilite
dalla direttiva 1999/5/CE. Una copia firmata e datata della
Dichiarazione di Conformità è disponibile, su richiesta,
tramite il servizio clienti della Oregon Scientific.
PAESI CONFORMI ALLA DIRETTIVA R&TTE
Tutti I Paesi Ue, Svizzera CH
E Norvegia N
À PROPOS D’OREGON SCIENTIFIC
Pour plus d‘informations sur les produits Oregon Scientific
France, rendez-vous sur notre site:
www.oregonscientific.fr.
Si vous êtes aux Etats-Unis, vous pouvez contacter notre
support consommateur directement sur le site:
www2.oregonscientific.com/service/support.asp
OU
par téléphone au: 1-800-853-8883
Pour des renseignements internationaux, rendez vous sur le
site: www2.oregonscientific.com/about/international.asp.
EUROPE - DECLARATION DE CONFORMITE
Par la présente Oregon Scientific déclare que l’appareil
Thermomètre intérieur et extérieur sans fil avec port USB
(Modèle: EMS100) est conforme aux exigences essentielles et
aux autres dispositions pertinentes de la directive 1999/5/CE.
Une copie signée et datée de la déclaration de conformité est
disponible sur demande auprès de notre Service Client.
PAYS CONCERNÉS RTT&E
Tous les pays Européens, la Suisse CH
et la Norvège N


