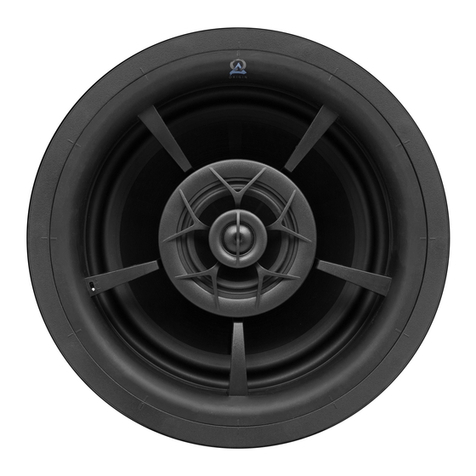
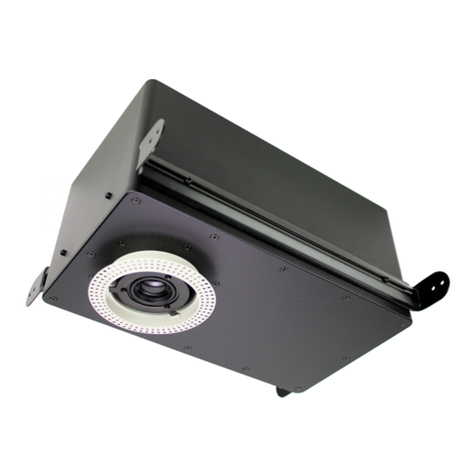
DIRECTOR COLLECTIONTM MANUAL • 8'' SERIES
1312
DIRECTOR COLLECTIONTM MANUAL • 10'' SERIESDIRECTOR COLLECTIONTM MANUAL • 10'' SERIES
Twist Speaker
15ᵒ
Counter - Clockwise
to Unlock
3
Li Speaker
out of
Bayonet
Ring
QUICK START GUIDE
REMOVAL OF SPEAKER FROM BAYONET RING
from the Bayonet Ring, before
removing loudspeaker from Bayonet Ring.
will release the Speaker
from the Bayonet Ring.
01-11-23
6975 S Decatur Blvd, Las Vegas, NV 89118 • www.originacoustics.com • 844-674-4461
©2023 Origin Acoustics. All copyrighted, trademarked and patented elements mentioned herein are the sole property of Origin Acoustics.
D109 install
SCALE:1:2
Origin Acoustics
6975 S Decatur Blvd
Suite 140
Las Vegas, NV 89118
844-ORIGIN1 (674-4461)
www.originacoustics.com
A C O U S T I C S
O R I G I N
®
The Speaker will arrive securely in its Bayonet Ring. Scan the QR Code
on the reverse of this page for full instructions for this product.
Note: If the Bayonet Zip-ClipsTM need
to be adjusted or removed, depress the
metal tabs along the rail and push up.
SPEAKER INSTALLATION
Push the Zip-Clip™ rails inwards from the
top, just enough, so they fit throughthe
ceiling hole opening,then
hole
within the ceiling surface.
To finalize the
installation,
the Bayonet Ring.
Note: Grille may not sit flush until this
Lock is properly engaged.
until the indicators on both the Bayonet
Ring & the Speaker are aligned.
Aer connecting wires, insert the Speaker
into the Bayonet Ring, with the
D109 install
SCALE:1:2
Origin Acoustics
6975 S Decatur Blvd
Suite 140
Las Vegas, NV 89118
844-ORIGIN1 (674-4461)
www.originacoustics.com
A C O U S T I C S
O R I G I N
®
A B 1
2
3
456
on all 4 Bayonet Zip-
ClipsTM to lower them along the Bayonet
rails.
PUSH Rails
Inwards
to Fit
through
Ceiling Hole
Reach through and
of the Bayonet
Zip-ClipTM to pull each Zip-ClipTM down
the rail.
Twist Speaker
15ᵒ
Counter - Clockwise
to Unlock
3
Li Speaker
out of
Bayonet
Ring
QUICK START GUIDE
REMOVAL OF SPEAKER FROM BAYONET RING
from the Bayonet Ring, before
removing loudspeaker from Bayonet Ring.
will release the Speaker
from the Bayonet Ring.
01-11-23
6975 S Decatur Blvd, Las Vegas, NV 89118 • www.originacoustics.com • 844-674-4461
©2023 Origin Acoustics. All copyrighted, trademarked and patented elements mentioned herein are the sole property of Origin Acoustics.
D109 install
SCALE:1:2
Origin Acoustics
6975 S Decatur Blvd
Suite 140
Las Vegas, NV 89118
844-ORIGIN1 (674-4461)
www.originacoustics.com
A C O U S T I C S
O R I G I N
®
The Speaker will arrive securely in its Bayonet Ring. Scan the QR Code
on the reverse of this page for full instructions for this product.
Note: If the Bayonet Zip-ClipsTM need
to be adjusted or removed, depress the
metal tabs along the rail and push up.
SPEAKER INSTALLATION
Push the Zip-Clip™ rails inwards from the
top, just enough, so they fit throughthe
ceiling hole opening,then
hole
within the ceiling surface.
To finalize the
installation,
the Bayonet Ring.
Note: Grille may not sit flush until this
Lock is properly engaged.
until the indicators on both the Bayonet
Ring & the Speaker are aligned.
Aer connecting wires, insert the Speaker
into the Bayonet Ring, with the
D109 install
SCALE:1:2
Origin Acoustics
6975 S Decatur Blvd
Suite 140
Las Vegas, NV 89118
844-ORIGIN1 (674-4461)
www.originacoustics.com
A C O U S T I C S
O R I G I N
®
A B
1
2 3
456
on all 4 Bayonet Zip-
ClipsTM to lower them along the Bayonet
rails.
PUSH Rails
Inwards
to Fit
through
Ceiling Hole
Reach through and
of the Bayonet
Zip-ClipTM to pull each Zip-ClipTM down
the rail.
1) Gently bend the Zip-Clip™ rails
inwards from the top, just enough,
so they fit through the ceiling hole
opening, then insert the Bayonet
Ring into the Cut-Out hole within the
ceiling surface.
2) Reach inside the Bayonet Ring,
placing 2 fingers on the grooves of
the Bayonet Zip-ClipTM to pull each
Zip-ClipTM down the rail, until it grips
the drywall securely. The Bayonet
Ring should be firmly in place, but
not too tight.
3) Pull down on all 4 Bayonet
Zip-ClipsTM to lower them along the
Bayonet rails.
Twist Speaker
15ᵒ
Counter - Clockwise
to Unlock
3
Li Speaker
out of
Bayonet
Ring
QUICK START GUIDE
REMOVAL OF SPEAKER FROM BAYONET RING
from the Bayonet Ring, before
removing loudspeaker from Bayonet Ring.
will release the Speaker
from the Bayonet Ring.
01-11-23
6975 S Decatur Blvd, Las Vegas, NV 89118 • www.originacoustics.com • 844-674-4461
©2023 Origin Acoustics. All copyrighted, trademarked and patented elements mentioned herein are the sole property of Origin Acoustics.
D109 install
SCALE:1:2
Origin Acoustics
6975 S Decatur Blvd
Suite 140
Las Vegas, NV 89118
844-ORIGIN1 (674-4461)
www.originacoustics.com
A C O U S T I C S
O R I G I N
®
The Speaker will arrive securely in its Bayonet Ring. Scan the QR Code
on the reverse of this page for full instructions for this product.
Note: If the Bayonet Zip-ClipsTM need
to be adjusted or removed, depress the
metal tabs along the rail and push up.
SPEAKER INSTALLATION
Push the Zip-Clip™ rails inwards from the
top, just enough, so they fit throughthe
ceiling hole opening,then
hole
within the ceiling surface.
To finalize the
installation,
the Bayonet Ring.
Note: Grille may not sit flush until this
Lock is properly engaged.
until the indicators on both the Bayonet
Ring & the Speaker are aligned.
Aer connecting wires, insert the Speaker
into the Bayonet Ring, with the
D109 install
SCALE:1:2
Origin Acoustics
6975 S Decatur Blvd
Suite 140
Las Vegas, NV 89118
844-ORIGIN1 (674-4461)
www.originacoustics.com
A C O U S T I C S
O R I G I N
®
A B 1
2 3
456
on all 4 Bayonet Zip-
ClipsTM to lower them along the Bayonet
rails.
PUSH Rails
Inwards
to Fit
through
Ceiling Hole
Reach through and
of the Bayonet
Zip-ClipTM to pull each Zip-ClipTM down
the rail.
PUSH Rails
Inwards
to Fit
through
Ceiling Hole
Depress the metal tabs on the inside of each Zip-ClipTM, while pushing /sliding the
Zip-ClipTM upwards along the rail to reset the clip.
*