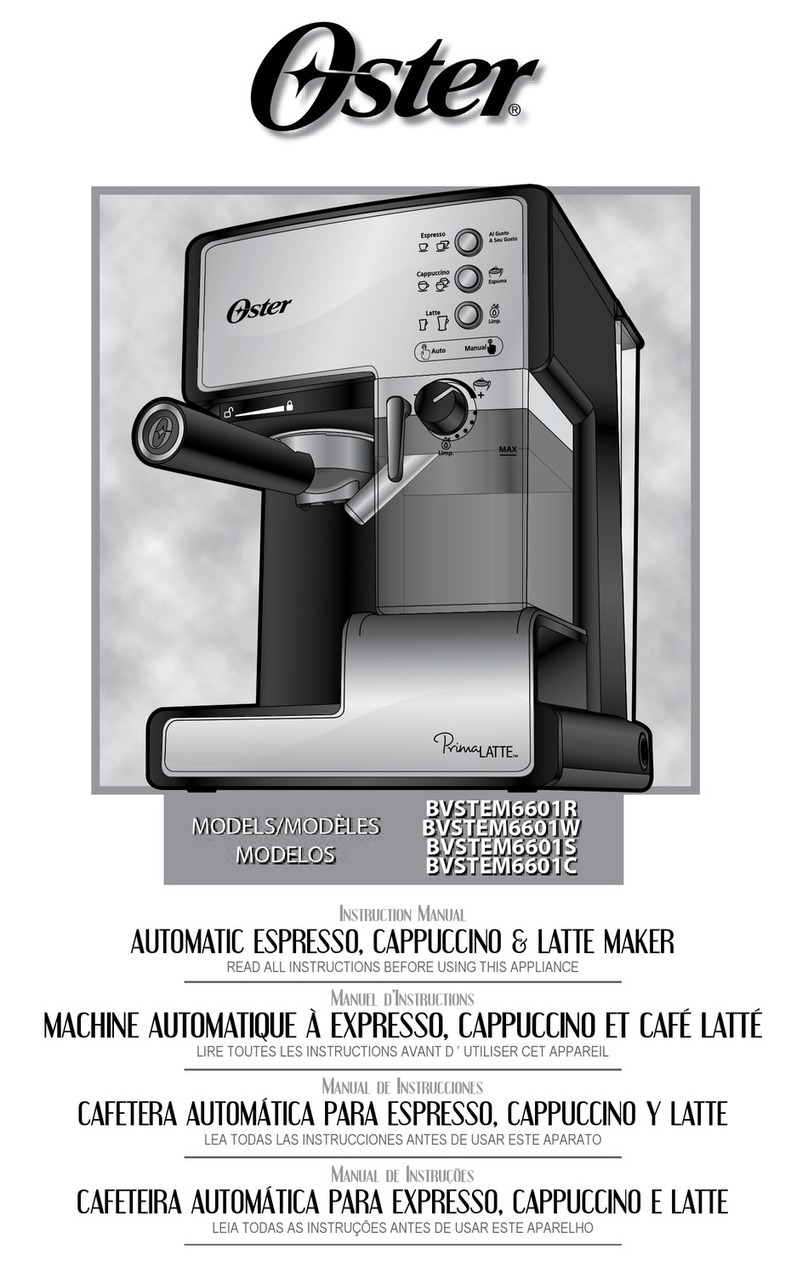
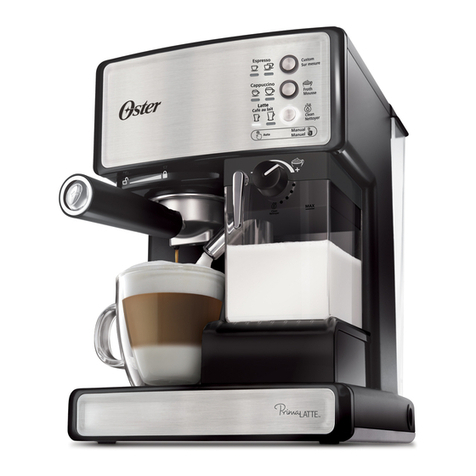
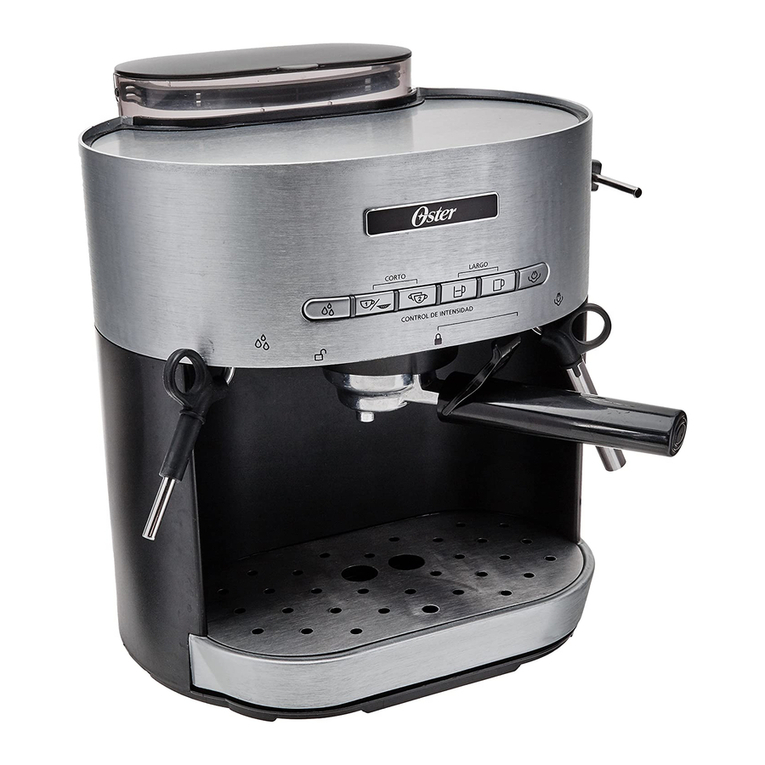
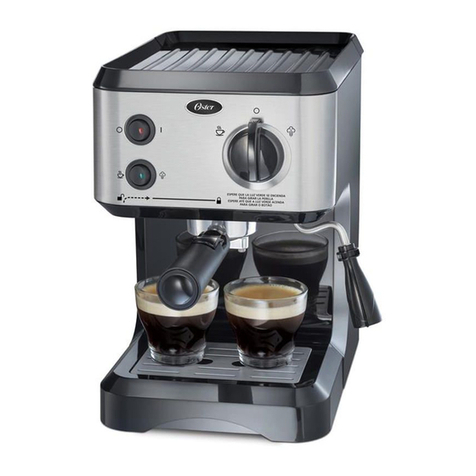
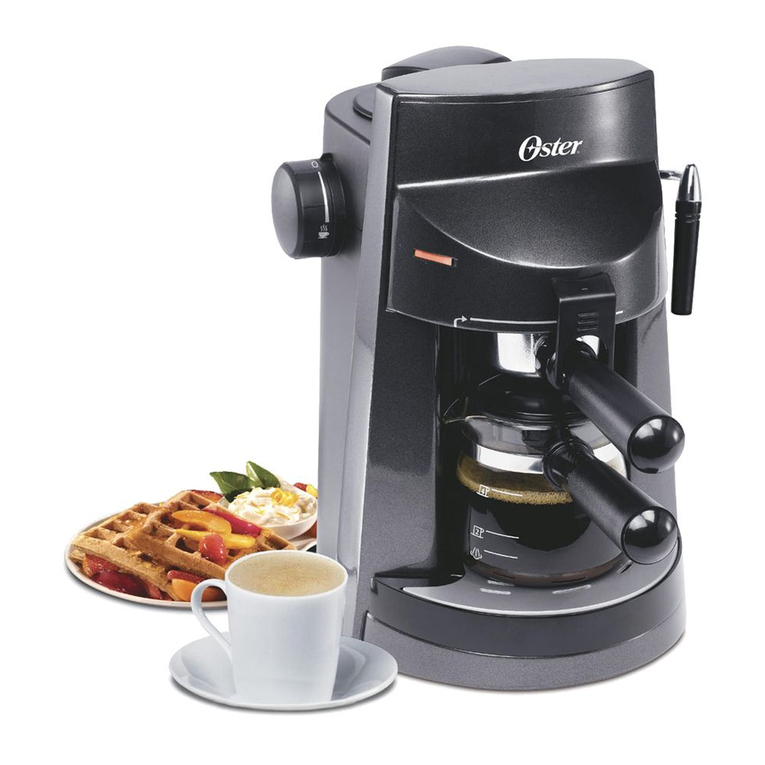
Oster BVSTEM6601 User manual

P.N. 9100460000070
BLSTPB-073_13ECM1
GCDS-OST27358-SZ
Instruction Manual 用户手册
AUTOMATIC ESPRESSO, CAPPUCCINO & LATTE MAKER
“咖啡师”意式特浓咖啡机
READ AND SAVE ALL INSTRUCTIONS BEFORE USING THIS APPLIANCE
使用产品前先阅读此用户手册并妥善保管
MODELS/型号 BVSTEM6601
Printed in China 中国印刷
© 2013 Sunbeam Products, Inc. doing business as Jarden Consumer Solutions.
All rights reserved. Distributed by Dongguan Huixun Electrical Products Co. Ltd.,
No. 30-32, Hu Jing Road, Hong Ye Industrial Estate, Tangxia Town, Dongguan,
Guangdong Province, PRC. 1-Year Limited Warranty - please see separate insert for
details. Sunbeam Products, Inc. and Dongguan Huixun Electrical Products Co. Ltd. are
subsidiaries of Jarden Corporation (NYSE: JAH).
版权所有。一年有限保修:详情请参阅另附保修卡。
有关产品及客户服务问题, 请联络:
Oster客户服务
国内专线:4008-622-268
www.oster.com.cn
产品中有毒有害物质或元素的名称及含量
Part Name
部件名称
Toxic and hazardous substances and elements
有毒有害物质或元素
铅
(Pb)
汞
(Hg)
镉
(Cd)
六价铬
(Cr(VI))
多溴联
苯 (PBB)
多溴二苯醚
(PBDE)
Plug pin(电源线插头片) Xo o o o o
Switch(开关) o o Xo o o
Relay(继电器) o o Xo o o
Chip resistor
(贴片电阻) Xo o o o o
Bidirectional control silicon
(双向可控硅) Xo o o o o
Diode(二极管) Xo o o o o
Chip steady voltage diode
(贴片稳压二极管) Xo o o o o
Resistor(电阻) Xo o o o o
○: 表示该有毒有害物质在该部件所有均质材料中的含量
均在SJ/T11363-2006 标准规定的限量要求以下。
×: 表示该有毒有害物质至少在该部件的某一均质材料中的含量
超出SJ/T11363-2006 标准规定的限量要求。

IMPORTANT SAFEGUARDS
When using electrical appliances, basic safety precautions should always
be followed to reduce the risk of fire, electric shock and/or injury to persons,
including the following:
1. READ ALL INSTRUCTIONS BEFORE USING THE APPLIANCE.
2. Check if the voltage indicated on the appliance corresponding to the local mains
voltage before you connect the appliance. For Mainland China, standard electrical
outlet is 220V~50Hz.
3. DO NOT touch hot surfaces . Use handles or knobs.
4. To protect against electric shock, DO NOT immerse cord, plug or appliance in water
or other liquids.
5. Press the switch located on the side of the unit to the off position “O” and unplug
unit from electrical outlet when not in use and before cleaning. Allow it to cool before
putting on or taking off parts and before cleaning it.
6. DO NOT operate any appliance with a damaged cord or plug or after the appliance
malfunctions or has been damaged in any manner.
7. The use of accessory attachments not recommended for Oster®products may result
in re, electric shock or injury to persons.
8. DO NOT use outdoors or for commercial purposes.
9. DO NOT let cord hang over edge of table or countertop or touch hot surfaces.
10. DO NOT place this appliance on or near a hot gas or electric burner or in a heated oven.
11. To disconnect, turn any control to the off position “O” then remove plug from wall outlet.
12. DO NOT use appliance for anything other than its intended use.
13. Use on a hard, at level surface only, to avoid interruption of airow underneath the
appliance.
14. Always be sure to place the water reservoir tightly back in the unit with its lid closed
and ll with water above the minimum before turning appliance on.
15. DO NOT remove the porta-lter while brewing coffee. Please make sure the three
lights are on before you remove the porta-lter to make additional coffee. Caution
should also be taken while removing the porta-lter since the metal parts will be hot.
Please make sure to hold it by the handle and to use the lter retention clip to dispose
the grounds. Caution should be taken when moving unit with hot liquids.
16. DO NOT remove the water reservoir until unit is turned off.
17. This appliance is not intended for use by persons (including children) with reduced
physical, sensory or mental capabilities, or lack of experience and knowledge, unless
they have been given supervision or instruction concerning use of the appliance by a
person responsible for their safety. Children should be supervised to ensure that they
DO NOT play with the appliance.
18. Close supervision is necessary when any appliance is used by or near children, or
incapacitated individuals.
19. This appliance is not intended to be operated by means of an external timer or
separate remote-control system.
20. This appliance is intended to be used in household and similar applications such as:
staff kitchen areas in shops, ofces and other working environments farm houses by
clients in hotels, motels and other residential type environments bed and breakfast
type environments.
THIS UNIT IS FOR HOUSEHOLD USE ONLY.
1
SAVE THESE INSTRUCTIONS
CAUTION: PRESSURE
In order to avoid possible burns to body parts and/or other injury from hot steam and
water or damages to the unit, never remove the water reservoir or the porta-lter while
your Oster®espresso, cappuccino and latte maker is brewing coffee or frothing.
Wait until the brew cycle is complete before removing any of these parts.
CORRECT USE OF GROUND COFFEE FOR ESPRESSO MAKERS
Do not use sugar roasted* ground coffee or sugar roasted coffee beans as these will clog
the lter and damage the appliance. If sugar roasted coffee is accidentally used, stop
using the unit and contact Oster®Consumer Service for maintenance.
We recommend descaling the machine periodically to keep it in good working condition.
Contact our Consumer Service number as listed on the back page of this manual to learn
about this process.
(*) GROUND WITH SUGAR
2
15
1. Brew Head
2. Porta-Filter
3. Frothed Milk Dispensing Tube
4. Cup Height Adjusting Drawer
5. Removable Drip Tray and Drip Grid
6. Drip tray Overflow Indicator
7. Porta-Filter Retention Clip
8. Filter for Single Shot of Espresso
9. Filter for Double Shot of Espresso
10. Measuring Scoop/Tamper
11. Milk Reservoir Lid
12. Froth Control Knob
13. Frothing Tube Lever
14. Removable /Clear Milk Reservoir
15. On/off Switch “I/O” (right side of appliance)
16. Water Reservoir Lid
17. Removable Water Reservoir
DESCRIPTION OF THE APPLIANCE
1
16
17
3
13
12
11
14
7
2
2
4
5
6
8 9 10
3 4
Control panel
A
B
C
ED
Understanding the Controls
Your control panel is divided into 2 parts. The left side of each button indicates the automatic
brewing functions (See D in Figure). The right side indicates the manual function of each
button (See E in Figure).
Lights Indicate:
-Button Light Pulses
- Unit is heating up
- Unit is brewing/frothing/cleaning
-Button Light Remains Illuminated
- Unit is ready for use
-Cappuccino and Latte Button Lights do not illuminate
- Milk Reservoir not fully inserted in unit.
-Icon Lights illuminate
-Indicates your brew selection
-Button Light Flashes
-Water Reservoir is empty
-Function selected before unit is ready
Espresso (Button A):
-Automatic: Select espresso size.
-Manual: Customize the amount of espresso in your beverage.
Cappuccino (Button B):
-Automatic: Select cappuccino size.
-Manual: Customize the amount of frothed milk in your beverage.
Latte (Button C):
-Automatic: Select latte size.
-Manual: The manual function of this button controls the cleaning cycle for
the frothed milk dispensing tube.
NOTE: Please read the rest of the instructions before operating the Oster®espresso,
cappuccino & latte maker.

BEFORE USING YOUR
APPLIANCE FOR THE FIRST TIME
CLEANING AND PRIMING THE UNIT PRIOR TO FIRST USE
Please refer to the “Description of the Appliance” section to familiarize with the
product and identify all parts.
1. Please make sure the unit is off “O” by pressing the on/off “I/O” button located on the
side of the unit. Make sure it is unplugged from the electrical outlet.
2. Remove stickers and labels from the unit.
3. First remove and then wash the water reservoir, the milk reservoir, the porta-lter, the
3 lters and measuring scoop in a mixture of mild detergent and water. Rinse each
thoroughly and place them back into the unit.
4. Refer to the instructions on “PLACING THE PORTA-FILTER” section before placing
or removing the porta-lter and lter from the unit.
5. To clean the inside of the appliance, follow the steps listed on the “PREPARING
CAPPUCCINO” section using water in both reservoirs and no coffee in the lter. Do
not immerse the appliance in water or attempt to reach any of its internal parts.
IMPORTANT - PRIME THE UNIT
To prime unit, run the steam cycle for 90 seconds by following the steps below:
1. Fill water reservoir up to the “MAX” level.
2. Fill the milk reservoir with water up to the “Max Fill” level and slide the milk reservoir
in place. Be sure to push rmly in place.
3. Select one of the lters and place it on the porta-lter. Place the porta-lter in the unit
ensuring it is properly locked and place a cup under it. Also, make sure the tip of the
frothed milk dispensing tube is pointing inside the cup.
4. Plug the appliance into the appropriate outlet.
5. Turn the power button on “I”.
6. The 3 control panel lights will start blinking. Once these lights become solid, press the
Espresso button “ ” and hold it for 3 seconds, then release it. Once the pump starts,
let the water ow for up to 90 seconds.
7. Press the Espresso button “ ” once again to stop the process.
8. Press the Cappuccino button “ ” and hold it for 3 seconds, then release it. Once the
pump starts, let the water ow for up to 90 seconds.
9. Press the Cappuccino button “ ” once again to stop the process.
10. The 3 control panel lights will turn on solid indicating that the unit is ready to be used.
Now your unit has been primed and is ready to be used.
SELECTING THE RIGHT CUP
Before preparing your beverage, please make sure to select the right cup size according
to the following table:
Ratios by Beverage Type
Espresso Single (
Custom
Sur mesure Clean
Nettoyer
Froth
Mousse
Manual
Manuel
)
Double (
Custom
Sur mesure Clean
Nettoyer
Froth
Mousse
Manual
Manuel
)
40 ml
80 ml
Cappuccino Single (
Custom
Sur mesure Clean
Nettoyer
Froth
Mousse
Manual
Manuel
)
Double ( )
180 ml
300 ml
Latte Single (
Custom
Sur mesure Clean
Nettoyer
Froth
Mousse
Manual
Manuel
)
Double (
Custom
Sur mesure Clean
Nettoyer
Froth
Mousse
Manual
Manuel
)
350 ml
450 ml
6
INTRODUCTION
Congratulations! You have selected the new and innovative Oster®Automatic Espresso,
Cappuccino, and Latte Maker. This unique appliance has been designed to help
you prepare delicious espressos, cappuccinos and lattes quickly, conveniently, and
automatically with the touch of a button.
ESPRESSO
A unique method of coffee brewing in which hot water is forced through nely ground
coffee. Popular in Europe, it is a far richer and more full-bodied brew than regular drip
coffee. Because of its richness, espresso is usually served in 44 to 59 mL portions, in
demitasse cups.
CAPPUCCINO
A drink made with about ⅓espresso, ⅓steamed milk, and ⅓frothed milk.
LATTE
A drink made with about ¼espresso and ¾steamed milk.
Please read ALL of the instructions, cautions, notes and warnings included in this
instruction manual carefully before you begin to use this appliance. When this unit is
used, some parts and accessories get hot and need to cool down. Proper care and
maintenance will ensure the long life of the Oster®Automatic Espresso, Cappuccino,
and Latte Maker and its trouble-free operation. Save these instructions and refer to them
often for cleaning and care tips.
Your Oster®Automatic Espresso, Cappuccino, and Latte Maker can be used with ground
coffee, making it exceptionally practical and versatile to prepare single shots of espresso,
cappuccino and latte.
IMPORTANT SAFETY INSTRUCTIONS
Please follow these important safety instructions while using your unit:
1. Before removing any of the parts and accessories, make sure the three lights are on,
press the on/off switch to the off position “O” and unplug the appliance.
2. Do not remove the porta-lter at any time during the brewing process.
3. Use caution when removing the porta-lter. The metal parts may still be very hot.
Also, there may be hot water oating on the top of the lter. Hold it only by its handle
and dispose of the brewed coffee ground by using the lter retention clip.
4. If coffee does not drip, the lter is blocked. Turn off the appliance and allow it to cool
down. The blockage may be caused by the coffee being too nely ground. See the
“PROBLEMS AND CAUSES” section.
5. WHEN CLEANING THE FROTHED MILK DISPENSING TUBE: Place a large cup
under the tube. Fill the milk reservoir with water and place it back on the unit. Turn
the Froth Control Knob clockwise to the clean position “ ” then press the latte/clean
button for 3 seconds and release to activate the clean function. Let the unit dispense
the water through the tube for approximately 30 seconds and then press the Latte/
Clean Button once to stop the process.
NOTE: In order for your unit to work properly time after time, clean it after every use.
5

CHOOSING THE FILTER
Select the lter to be used as follows:
a. FOR A SINGLE SHOT – use the lter for a single shot of espresso if using ground
coffee.
b. FOR A DOUBLE SHOT OR TWO SINGLE SHOTS – use lter for a double shot.
INSERTING THE FILTER
a. To insert the selected lter in the porta-lter, make sure to align the notch on the lter
with the groove inside the porta-lter.
b. Turn the lter to the left or right to lock in place. This will help secure the lter in the
porta-lter.
NOTE: To remove and clean the lter, turn lter to the left or right to align the lter notch
with the groove inside the porta-lter.
WARNING: Make sure the lter has cooled before attempting to remove the lter.
8
SELECTING THE RIGHT COFFEE
THE COFFEE
The coffee should be freshly ground and dark roasted. You may want to try a French
or Italian roast ground for espresso. Pre-ground coffee will only retain its flavor for
7 – 8 days, provided it is stored in an airtight container and in a cool, dark area. Do
not store in a refrigerator or freezer. Whole beans are recommended to be ground
just before use. Coffee beans stored in an airtight container will keep its flavor for up
to 4 weeks.
THE GRIND
This is a vital step in the espresso making process if you are grinding your own coffee
and takes practice. The coffee must be of a ne grind.
• The correct grind should look like salt.
• If the grind is too ne, the water will not ow through the coffee even under pressure.
These grinds look like powder and feel like our when rubbed between ngers.
• If the grind is too coarse, the water ows through the coffee too fast, preventing a
full-avored extraction.
Be sure to use a quality grinder for uniform consistency.
OPERATING INSTRUCTIONS
FILLING THE WATER RESERVOIR
A. Fill the reservoir with water, you may either use a jar to ll it
up or remove it from the unit and then ll it up under the tap. If
you have removed it from the unit to ll up with water, please
make sure to place it back tightly in its place. Fill the reservoir
with the desired amount of water ensuring NOT past the
“MAX” line on the reservoir. Never use warm or hot water to
ll the water reservoir.
B. Close the water reservoir lid and place it back in the unit
ensuring it ts tightly.
FILLING THE MILK RESERVOIR
If you plan to prepare cappuccino or latte, remove the milk
reservoir from the unit and open the lid then pour the quantity
of cold milk you estimate you will need , ensuring NOT past the
“Max” level. When done, place the milk reservoir back in the unit
ensuring it ts tightly, and the Cappuccino and Latte buttons are
illuminated or pulsing.
NOTE: You can use any type of milk per your preference, i.e.
whole milk, low fat milk, organic or soy milk.
Figure 1
Figure 2
7

FILLING WITH COFFEE
a. Fill the lter with fresh, ne ground espresso coffee (do not overll).
b. Tamp and compress rmly and evenly ground coffee. Coffee should be 3mm below
top of lter after tamping.
c. Clean any excess coffee from the rim to ensure proper t under brew head and avoid
leaks.
a. b. c.
PLACING THE PORTA-FILTER
a. Position porta-lter underneath the brew head, attach porta-lter by rst moving
retainer clip back.
b. Position handle so that the handle lines up with the open lock icon “
Custom
Sur mesure Clean
Nettoyer
Froth
Mousse
Manual
Manuel
” on the unit
and ts into the groove.
c. Then, slowly turn it to the right until the retention clip is aligned with the closed lock
symbol “
Custom
Sur mesure Clean
Nettoyer
Froth
Mousse
Manual
Manuel
” on the unit.
a. c.b.
PLACING THE CUP(S)
a. Pull out the height adjustment tray if you are using a small “demitasse” cup to brew
espresso.
b. Keep the height adjustment tray inside its compartment if you are using a larger cup to
brew cappuccino.
c. Keep the height adjustment tray inside its compartment if you are using a larger cup
to brew latte.
CAUTION: When brewing cappuccino or latte, please make sure to adjust the frothing
tube lever in order to position the froth milk dispensing tube to point inside
the cup to be used.
c.
b.
a.
9
TURNING THE UNIT ON
a. Make sure unit is plugged in.
b. Turn unit on “I”.
a. b.
The 3 control panel lights will start blinking during heating and until the water reaches the
perfect temperature. Once these lights become solid, the unit is ready to use.
NOTE: It is normal for the Espresso function to be ready before the Cappuccino and
Latte functions.
NOTE: If you leave your unit on for 15 minutes without using, your unit will go into sleep
mode. Press any button to reactivate.
SELECT THE FUNCTION
PREPARING ESPRESSO
a. Press the Espresso Button “
Custom
Sur mesure Clean
Nettoyer
Froth
Mousse
Manual
Manuel
” once to brew one single shot.
b. Press the Espresso Button “
Custom
Sur mesure Clean
Nettoyer
Froth
Mousse
Manual
Manuel
” twice to brew a double shot.
c. Press and hold the Espresso Button “ ” for 3 seconds to customize the brewing to
your preference. When done, press the Espresso Button “
Custom
Sur mesure Clean
Nettoyer
Froth
Mousse
Manual
Manuel
” once again to stop it. For
safety, the unit will automatically stop after brewing 148ml (5 ounces).
a.
x1
b.
x2
c.
hold for
3 sec.
The unit will start brewing the espresso according to your selection. The unit will turn
off automatically and the lights will become solid indicating that the cycle has been
completed. Your delicious espresso is ready to be enjoyed.
NOTE: To brew less coffee than the preset serving, press the function button to stop
the brewing process when the amount of coffee desired is reached.
10

PREPARING CAPPUCCINO
Prior to preparing your cappuccino, adjust the quantity of frothed milk according to your
preference by turning the Froth Control Knob to the right for more froth and to the left for
less froth. MORE FROTH LESS FROTH
NOTE: The froth intensity can be adjusted during the brewing cycle.
a. Press the Cappuccino Button “
Custom
Sur mesure Clean
Nettoyer
Froth
Mousse
Manual
Manuel
” once to brew a small cup of cappuccino.
b. Press the Cappuccino Button “ ” twice to brew a large cup of cappuccino.
a.
x1
b.
x2
NOTE: For a small cup, use the single shot lter. For a large cup, use the double shot
lter.
PREPARING LATTE
Prior to preparing your cappuccino, adjust the quantity of frothed milk according to your
preference by turning the Froth Control Knob to the right for more froth and to the left for
less froth. MORE FROTH LESS FROTH
a. Press the Latte Button “
Custom
Sur mesure Clean
Nettoyer
Froth
Mousse
Manual
Manuel
” once to brew a small cup of latte.
b. Press the Latte Button “
Custom
Sur mesure Clean
Nettoyer
Froth
Mousse
Manual
Manuel
” twice to brew a large cup of latte.
a.
x1
b.
x2
NOTE: For a small cup, use the single shot lter. For a large cup, use the double shot
lter.
PREPARING FROTH MILK
The Oster®Automatic Espresso, Cappuccino, and Latte Maker also allows you to prepare
froth milk only. Press and hold the Cappuccino Button “ ” for 3 seconds if you wish to
add more froth to your beverage or to prepare froth milk for any other beverage, e.g.
macchiato, hot chocolate, chai latte, etc. When done, press the Cappuccino Button “ ”
once again to stop it.
hold for
3 sec.
AFTER PREPARING YOUR BEVERAGES WITH MILK
Once you are done preparing your beverage with milk, you can either store the unit’s milk
reservoir directly in the refrigerator (ready to be used for the next time) or dispose of the
leftover milk.
1211

CLEANING YOUR AUTOMATIC ESPRESSO,
CAPPUCCINO, AND LATTE MAKER
CLEANING THE MILK RESERVOIR AND FROTHING TUBE
Even though you can store the milk reservoir with left over milk in the refrigerator, it is
important to clean the reservoir and frothing tube regularly to avoid clogging and building
residues. In order to clean the milk reservoir, please follow the instructions listed below:
1. Place a large empty cup under the frothing tube and make sure there is water in the
water reservoir.
2. Aim the Frothed Milk Dispensing Tube into the empty cup.
3. Adjust the Froth Control Knob to Clean “ ”.
4. Press and hold the Clean “ ” button for 3 seconds and then release it. The clean
function will run for 30 seconds. Once completed, throw the contents in the cup
away.
5. Discard any remaining milk, rinse and wash the milk reservoir and its lid thoroughly
with warm soapy water. Rinse and dry well. Do not use abrasive cleaners and
scouring pads, as they will scratch the nish. The milk reservoir and lid is also
dishwasher safe (top rack).
CLEANING THE BREW HEAD, THE PORTA-FILTER AND FILTER
1. Switch the power button on the side of the unit to the off position “O” and unplug the
power cord from the electrical outlet.
2. Some of the metal parts might still be hot. Do not touch them with your hands until
they have cooled.
3. Remove the porta-lter and discard the coffee grounds. Wash both the porta-lter
and lter with warm soapy water and rinse them well. Do not wash the porta-lter and
lters in the dishwasher.
4. Wipe lower part of the brew head in the unit with a damp cloth or paper towel to
remove any coffee grounds that might have been left.
5. Place the porta-lter (without any lter) back in the brew head in the unit.
6. Place an empty large cup under the porta-lter.
7. Press the espresso “
Custom
Sur mesure Clean
Nettoyer
Froth
Mousse
Manual
Manuel
” button once and let the unit brew with water only until it
stops automatically.
8. Make sure to let porta-lter dry completely after cleaning.
CLEANING THE WATER RESERVOIR
Discard the remaining water by removing the reservoir and turning it upside down over
the sink. It is recommended to empty the water reservoir between uses. Wash the water
reservoir with soapy water, rinse it well and wipe it dry. Do not wash the water reservoir in
the dishwasher.
CLEANING THE UNIT
1. Wipe housing with a soft wet cloth. Do not use abrasive cleaners or scouring pads, as
they will scratch the nish.
2. Do not store the porta-lter in the brew head. This can adversely affect the seal
between the brew head and the porta-lter while brewing espresso.
CAUTION: Do not immerse appliance in water.
13
DELIMING
Mineral deposits built-up in the unit will affect the operation of the appliance. Your
appliance must be delimed when you begin to notice an increase in the time required to
brew espresso, or when there is excessive steaming. Also, you may notice a build-up of
white deposits on the surface of the brew head.
The frequency of cleaning depends upon the hardness of the water used. The following
table gives the suggested cleaning intervals.
SUGGESTED CLEANING INTERVALS
Type of Water Cleaning Frequency
Soft Water (Filtered Water) Every 80 Brew Cycles
Hard Water (Tap Water) Every 40 Brew Cycles
TO DELIME WATER RESERVOIR:
1. Fill the reservoir with fresh, undiluted white household vinegar.
2. Allow appliance to sit overnight with the vinegar solution in the water reservoir.
3. Discard vinegar by removing the reservoir and turning it upside down over the sink.
4. Rinse the water reservoir thoroughly with tap water by lling reservoir half full with
water and then pouring the water back out into the sink, repeating this step twice.
TO DELIME INTERNAL PARTS:
1. Make sure you delime the inside of the water reservoir rst by following the “Deliming”
steps above.
2. Make sure to switch the on/off button to the off “O” position and the power cord is
disconnected from the electrical outlet. Fill the reservoir with white vinegar above the
minimum level of the reservoir.
3. Insert the porta-lter (with lter and no coffee) and place jar/carafe or regular cup on
top of the drip tray and under the porta-lter.
4. Plug the power cord into the electrical outlet.
5. Press the on/off button to switch the unit on “I”, once the 3 control panel lights turn
solid blue press the Espresso/Custom Button twice. The vinegar will start owing
through the unit and it will stop automatically.
6. Place a pitcher or large cup (with at least 325 mL/ 11-ounce capacity) under the
tube. Fill the milk reservoir with water and place it back on the unit. Turn the Froth
Control Knob clockwise to the clean position “ ” then press the latte/clean button for
3 seconds to activate the clean function. Let the unit dispense the water through the
tube for approximately 30 seconds and then press the Latte/Clean Button once to
stop the process.
7. Repeat Steps 1 – 6 as necessary using only tap water to rinse any remaining traces
of vinegar out of the machine.
14

PROBLEMS, CAUSES AND SOLUTIONS
PROBLEM CAUSES SOLUTIONS
Coffee does not
come out.
• No water in reservoir.
• Coffee grind is too ne.
• Too much coffee in the lter.
• Appliance was not turned on
or plugged in.
• Coffee has been tamped/
compressed too much.
• Add water.
• Grind medium ground coffee.
• Fill lter with less coffee.
• Plug unit into electrical outlet
and turn it on.
• Rell lter basket with coffee
DO NOT TAMP too much.
Coffee comes out
around the edge of
the porta-lter.
• Porta-lter not rotated to full
lock position.
• Coffee grounds around the
lter basket rim.
• Too much coffee in the lter.
• Rotate lter holder to full
lock position.
• Wipe off rim.
• Fill with less coffee.
Milk is not foamy
after frothing or it is
not coming out of
the frothing tube.
• Ran out of steam.
• Milk is not cold enough.
• Frothing tube is blocked.
• Ensure there is enough water
in the water reservoir.
• Chill milk and frothing pitcher
prior to making cappuccino
or latte.
• Follow the instructions to
clean the milk reservoir &
frothing tube.
Coffee comes out
too quickly.
• Ground coffee is too coarse.
• Not enough coffee in lter.
• Use a ner grind.
• Use more coffee.
Coffee is too weak. • Using small lter for double
shot of espresso.
• Ground coffee is too coarse.
• Use large lter for double shot
of espresso.
• Use a ner grind.
The three control
panel lights
are ashing
alternatively.
• Water reservoir is out of
water.
• Add water to reservoir.
15
重要安全注意事项
为减少起火、电击和人身伤害的风险,在使用本电器产品时应
遵循以下基本的安全注意事项:
1. 在使用本产品前,先阅读此用户手册.
2. 在接通电源前,请先检查当地的供电电压是否与本电器产品
上标示的电压相符。在中国大陆,插座上输出的标准电源为
220V~50Hz。
3. 切勿触摸灼热表面 。请使用手柄或旋钮。
4. 为了防止触电,切勿将电线、插头或本产品置于水中或其它液
体中。
5. 当不使用及清洁本产品之前,请按下本产品旁边的开关至关闭
位置“O”,然后从电气插座上将本产品的电源插头拔掉。在安
装或取下零件之前以及清洁本产品前,请冷却本产品。
6. 切勿使用损坏的电源线或插头。在本产品出现故障或者已经损
坏后,请勿进行任何操作。
7. 本公司不推荐使用那些非厂家生产的附件,因为使用此等附件
可能会导致危险或人身伤害。
8. 请勿将咖啡机用于户外或商业目的。
9. 请勿让电线悬挂在桌子或柜台边缘,也不要让电线与高温表面
接触。
10. 请勿将咖啡机放在煤气炉或电炉之上或其附近,也不要放到加
热的烤箱内。
11. 如果要切断电源,请将控制开关调到关闭位置“O”,然后再从
墙壁插座上拔下电源插头。
12. 请按照本手册中所述,将本产品用于预期用途。
13. 为了避免中断本产品底部的气流,只能在硬质、平整的水平面
上使用本产品。
14. 在接通本产品电源之前,请确保水箱始终紧紧地安装在本产品
上及盖子必须紧盖着,而且装入的水高于最低水位线。
15. 在煮咖啡时,切勿取下便携式过滤器。在您取下便携式过滤器另
煮咖啡之前,请确保三个灯均亮起。在取下便携式过滤器时,
由于金属件会烫手,务必请注意。请确保拿着过滤器的手柄,
而且使用过滤器的固定夹处理滤渣。当移动装有滚烫液体的咖
啡机时,务必请注意。
16. 在本产品电源切断之前,切勿取下水箱。
16

注意:压力
为了防止热蒸汽和热水烫伤身体或造成其它人身伤害,也为了防止
损坏本产品,在您使用Oster®意式特浓咖啡机煮咖啡或发泡时,请
勿取下水箱、牛奶箱或便携式过滤器。
在冲煮过程中,请勿移走或取下任何附件。
用于意式浓缩咖啡机时,正确使用咖啡粉的方法:
请勿使用糖焙炒的(*)咖啡粉或糖焙炒的咖啡豆,因为这些咖啡粉会
堵塞过滤器并损坏本产品。如果不小心使用了糖焙炒的咖啡,请停
止使用本产品,并联络 Oster® 客户服务查询。
建议定期清除本产品中的污垢,使本产品保持良好的性能。详情可
联络我们的客户服务专线(印在此用户手册封底)。
(*)加糖研磨咖啡粉
17
1. 冲煮头
2. 便携式过滤器
3. 发泡管/嘴
4. 可移动滴水盘
5. 可拆卸滴水盘及格板
6. 溢流水位指示
7. 便携式过滤器固定夹
8. 单份意式浓缩咖啡滤网
9. 双份意式浓缩咖啡滤网
10. 咖啡勺
11. 奶箱盖
12. 发泡控制旋钮
13. 发泡管控制杆
14. 可拆卸/透明牛奶箱
15. 电源开关“I/O””
16. 水箱盖
17. 可拆卸水箱
产品介绍
18
15
1
16
17
3
13
12
11
14
7
2
2
4
5
6
8 9 10
17. 本产品不适合那些体能差、敏感度或智力较弱者,或者缺乏使
用经验和不了解本产品的人士(包括小孩)使用,除非已有负
责安全的人员监管他们或者告知他们本产品的正确使用方法。
需对小孩进行监管,确保他们不要玩弄本产品。
18. 当小孩或残疾人士使用本产品,或者在小孩或残疾人士旁边使
用本产品时,必须进行严密监管。
19. 本产品不适合使用外部计时器或者独立的遥控系统进行操作。
20. 本产品适合居家以及类似的环境中应用,如:商店中的员工厨
房区、办公室和其它工作环境,农庄、酒店、汽车旅馆和其它
居住环境中的客人使用,以及其他住宿内附早餐的环境使用。
本产品仅适合居家使用。
请保存这些说明

介绍
祝贺您选择了这款创新的Oster® 意式特浓咖啡机。这款独特的产品
经过专门设计,您只须按下一个按钮,就可以快速、方便、自动地
冲煮美味可口的意式浓缩咖啡、卡布奇诺以及拿铁。
意式浓缩咖啡 (ESPRESSO)
一种独特的咖啡冲煮方法。使用此种方法,高压热水萃取细磨咖啡
粉。意式浓缩咖啡风靡整个欧洲,与常规的滴滤咖啡相比,其气息
更香浓、口感更醇厚。由于这种咖啡气息香浓,所以需用小型咖啡
杯盛载,每杯的份量一般为44至59毫升。
卡布奇诺 (CAPPUCCINO)
这种饮料,使用⅓的意式浓缩咖啡、⅓的发泡牛奶、以及⅓的奶泡调
配而成。
拿铁 (LATTE)
这种饮料,使用约¼的意式浓缩咖啡和¾的发泡牛奶调配而成。
在您开始使用本产品之前,请仔细阅读本用户手册中所有的操作说明、
注意事项、备注以及警告。在使用本产品时,某些零件和附件会变得高
温烫手,需让其冷却。正确维护与保养可确保咖啡机使用寿命更长和减
少故障。请保存这些操作说明作参考,以了解其清洁与维护指示。
您的Oster® 意式特浓咖啡机可与咖啡粉配套使用,因此实用性强、
功能多,可冲煮单份的意式浓缩咖啡、卡布奇诺以及拿铁。
重要安全指示
使用本产品时,请遵守这些重要的安全指示:
1. 在取下任意零件和附件之前,确保三个灯亮起,按下电源开关
至“O”位置,并拔下本产品的电源插头。
2. 在冲煮咖啡期间,切勿取下便携式过滤器。
3. 当取下便携式过滤器时,务必小心,金属件可能仍然非常烫手。
此外,过滤器顶端的水可能还是热的。拿住它的手柄,然后使用
过滤器固定夹处理冲煮的咖啡渣。
4. 如果咖啡没有滴下,代表过滤器被堵塞了。关闭本产品的电源,
然后让它冷却。堵塞可能是咖啡磨得太细引起的,参考“故障与
解决方法”一节。
5. 当清洁发泡管/嘴时:请于管子的下方放置一个大的杯子。往牛
奶箱中倒入水,然后将其装回本产品。顺时针方向转动“发泡控
制旋钮”至清洁 “ ” 位置,然后按下“拿铁/清洁按钮”并维持3
秒钟,最后释放此按钮以启动清洁功能。让本产品将水分配到此
管子约30秒后,按 “拿铁/清洁按钮”一次,以停止清洁动作。
备注:为了让您的咖啡机能正确发挥功能,请在每次使用后进行清洁。
2019
控制面板
A
B
C
ED
控制面版
您的控制面板分为两部份, 每个按钮的左边显示自动冲煮功能(见上图
中指示D); 右边显示手动冲煮功能(见上图中指示E)。
指示灯:
-当按钮灯逐渐闪亮时:
- 产品正在加热中。
- 冲煮/发泡/清洁过程进行中。
-当按钮灯亮时:
- 产品已经进入最佳操作状态,您可以随时使用了。
-当卡布奇诺(Cappuccino)/拿铁(Latte)按钮灯没有亮时:
- 奶箱还没有完全装好。
-当标志灯亮时:
-显示您的选择。
-当按钮灯快速闪动时:
-水箱没有水。
-产品未进入最佳操作状态前已选择了某些功能。
Espresso意式浓缩咖啡(见上图中指示A):
-自动: 选择意式浓缩咖啡份数(单/双份)。
-手动: 自选您需要的意式浓缩咖啡量。
Cappuccino卡布奇诺(见上图中指示B):
-自动: 选择卡布奇诺份数(单/双份)。
-手动: 自选您需要的奶泡量。
Latte拿铁(见上图中指示C):
-自动: 选择拿铁份数(单/双份)。
-手动: 此手动按钮控制发泡管控制杆的清洗过程。
注意:在操作此产品前,请先阅读本手册内的所有说明。

选择正确的咖啡
咖啡
咖啡应该为新鲜磨制的,并要经过深度烘焙。您可能需要为意式浓
缩咖啡使用法式或意式的烘焙咖啡粉。预磨咖啡粉仅能保持香味7至
8天,除非将其存放在一个密封容器内,而且放置在一个阴凉的地
方。切勿将咖啡存放在冰箱或冷藏库中。使用之前,建议将所有咖
啡豆磨碎成粉。存放在密封容器中的咖啡豆香味能保持4个星期。
研磨
如果您正在为自己磨制咖啡,则此步骤是意式浓缩咖啡制作过程中
的关键步骤,需要多加练习。咖啡必须进行细磨。
• 正确的磨粉应该看起来像盐一样。
• 如果粉磨得太细,即使加压力,水也不会流过咖啡。这些磨粉看
起来像粉末,而且用手指揉擦时,感觉像面粉。
• 如果粉磨得太粗,水会很快地流过咖啡,有碍提取其浓郁的香味。
为了获得均匀、一致的咖啡,请务必使用高品质的研磨机。
操作说明
为水箱装水
A.为水箱装水时,您可以使用一个瓶子加水
或者将水箱从机器上取下放在水龙头下面加
水。请确保装入水箱中的水不可高于“最大
量”(MAX)水位线。
切勿加入温水或热水。
B.盖上水箱的盖子,并将其紧密地装回原位。
为牛奶箱装奶
如果你打算冲煮卡布奇诺或拿铁,请将牛奶箱取
下并打开盖子,然后倒入冷牛奶。所倒入的牛奶
量不可高于“最大量”(Max Fill)水位线。装完牛
奶之后,将牛奶箱紧密地装回本产品。
备注:您可以使用您喜爱的牛奶,例如:全脂牛
奶、低脂牛奶、有机牛奶或豆奶。
图1
图2
22
首次使用本产品之前
在首次使用之前,清洁本产品以达到最佳的操作状态
请参考“产品介绍”一节,了解本产品与认知所有的零件。
1. 请按下本产品旁边的“I/O”电源按钮,确保本产品位于关闭位
置“O”。确保从电源插座上拔下了本产品的插头。
2. 从本产品上撕下贴纸与标签。
3. 先将水箱、牛奶箱、便携式过滤器、2个滤网以及量匙取下,然
后将它们放入含有温和清洁剂的清水中进行清洗。彻底清洗每个
零件,然后将它们装回本产品。
4. 在将便携式过滤器与滤网装回本产品或从本产品上将它们取下之
前,请参考“放置便携式过滤器”一节的说明指示。
5. 如果要清洁本产品的内部,请遵守“冲煮卡布奇诺”一节中列出
的步骤,于两个储存器中放入水,勿将咖啡放入过滤网中。切勿
将本产品浸入水中或触及它的任何内部零件。
重要事项 - 令本产品进入最佳的操作状态
如果要令本产品进入最佳状态,按照下列步骤运行蒸汽90秒:
1. 为水箱装水至“最大量”(MAX)水位线。
2. 为牛奶箱装至“最大量”(MAX Fill)水位线。
3. 选择其中一个滤网,并将其置于便携式过滤器上。将便携式过滤
器置于本产品中,确保其正确锁定,然后于其下方放置一个杯
子。此外,确保 发泡嘴的端部指向杯子的内部。
4. 将本产品的电源插头插入合适的电源插座中。
5. 按下电源按钮为“I”。
6. 三个控制面板灯会开始闪亮。一旦这些灯完全亮起时,按下“意式
浓缩咖啡”(Espresso) “ ” 并持续三秒钟再放手, 当水泵开始操作, 让
水流动90秒。
7. 再按下”意式浓缩咖啡按钮”(Espresso) “ ” 以停止运作。
8. 按下“卡布奇诺按钮”(Cappuccino) “ ” 并持续三秒钟再放手,当
水泵开始运作,让水流动90秒。
9. 再按下”卡布奇诺按钮”(Cappuccino) “ ” 以停止运作。
10. 三个控制面板灯会完全亮起,显示产品已经进入最佳操作状态了。
现在本产品已经进入最佳操作状态,您可以随时使用了。
选择正确的杯子
准备饮料之前,请确保根据下表选择了大小合适的杯子:
饮料类型比例
意式浓缩咖啡
Espresso
单份 (
Custom
Sur mesure Clean
Nettoyer
Froth
Mousse
Manual
Manuel
)
双份 (
Custom
Sur mesure Clean
Nettoyer
Froth
Mousse
Manual
Manuel
)40 毫升
80 毫升
卡布奇诺
Cappuccino
单份 (
Custom
Sur mesure Clean
Nettoyer
Froth
Mousse
Manual
Manuel
)
双份 ( ) 180 毫升
300 毫升
拿铁
Latte
单份 (
Custom
Sur mesure Clean
Nettoyer
Froth
Mousse
Manual
Manuel
)
双份 (
Custom
Sur mesure Clean
Nettoyer
Froth
Mousse
Manual
Manuel
)350 毫升
450 毫升
21

放置便携式过滤器
a. 将便携式过滤器置于冲煮头下面,先向后移动固定夹连接便携式过滤器。
b. 放置好手柄,以便手柄与本产品上的开锁图标 “
Custom
Sur mesure Clean
Nettoyer
Froth
Mousse
Manual
Manuel
”对齐,并装入沟槽中。
c. 然后,慢慢地向右转动手柄,直至固定夹与本产品上的闭锁图标
“
Custom
Sur mesure Clean
Nettoyer
Froth
Mousse
Manual
Manuel
” 对齐为止。
a. c.b.
放置咖啡杯
a. 如果您使用一只小的“小型咖啡杯”冲煮意式浓缩咖啡,请将高
度调节盘拉出来。
b. 如果您使用一只大的杯子冲煮卡布奇诺,让高度调节盘位于其隔间中。
c. 如果您使用一只更大的杯子冲煮拿铁,让高度调节盘位于其隔间中。
注意:当冲煮卡布奇诺或拿铁时,请确保调节发泡管控制杆,使发
泡嘴指向待用杯子的内部。
c.
b.
a.
开启本产品电源
a. 确保插入了本产品的电源插头。
b. 按下本产品的电源开关至“I”位置。
a. b.
加热期间,三个控制面板灯会开始闪亮,直至水温达到理想温度为
止。一旦这些灯完全亮起,您就可以使用本产品了。
备注:意式浓缩咖啡(Espresso)功能一般会比卡布奇诺 (Cappuccino)
及拿铁(Latte)快进入操作状态。
备注:若持续十五分钟没有任何操作,产品会进入睡眠状态,按下任
何按钮可重新操作。 24
选择滤网
选择如下所示的滤网:
a.单份咖啡 - 如果使用咖啡粉,请使用单份意式浓缩咖啡滤网:
b.双份咖啡或两杯单份咖啡 - 使用双份滤网:
安装滤网
a. 将选择的滤网置于便携式过滤器上,确保滤网上的槽口对准过滤
器的沟槽。
b. 将滤网向左或右转动直至锁定,以确保滤网固定于过滤器上。
注意:要取下并清洗滤网,将滤网向左或右转动直至滤网上的槽口
对准过滤器的沟槽。
警告: 请确保滤网已完全冷却才准备取下滤网。
加入咖啡:
a. 将新鲜、细磨的意式浓缩咖啡粉装入滤网(勿装得太满)。
b. 将咖啡粉紧密、均匀地夯实和压紧,压紧后应于滤网顶端预留3毫米空间。
c. 清除边缘上多余的咖啡,确保咖啡正确地放于冲煮头下以防溢漏。
a. b. c.
23

备注:要冲煮小杯咖啡,请使用单份咖啡滤网;要冲煮大杯咖啡,
请使用双份咖啡滤网。
冲煮拿铁 LATTE
冲煮拿铁之前,请根据您的喜好调节奶泡份量。将发泡控制旋钮调
到右边,泡沫更多;调到左边,泡沫更少。
泡沫更多 泡沫更少
a. 按下“LATTE拿铁按钮”“
Custom
Sur mesure Clean
Nettoyer
Froth
Mousse
Manual
Manuel
” 一次,冲煮小杯的拿铁。
b. 按下“LATTE拿铁按钮”“
Custom
Sur mesure Clean
Nettoyer
Froth
Mousse
Manual
Manuel
” 两次,冲煮大杯的拿铁。
a.
x1
b.
x2
备注:要冲煮小杯咖啡,请使用单份咖啡滤网;要冲煮大杯咖啡,
请使用双份咖啡滤网。
26
功能选择
冲煮意式浓缩咖啡ESPRESSO
a. 按下“ESPRESSO意式浓缩咖啡按钮”“
Custom
Sur mesure Clean
Nettoyer
Froth
Mousse
Manual
Manuel
” 一次,冲煮单份咖啡。
b. 按下“ESPRESSO意式浓缩咖啡按钮”“
Custom
Sur mesure Clean
Nettoyer
Froth
Mousse
Manual
Manuel
” 两次,冲煮双份咖啡。
c. 按住“ESPRESSO意式浓缩咖啡按钮”“ ” 3秒钟,自选您喜好的
冲煮份数。完成此步骤时,再按一次“ESPRESSO意式浓缩咖啡
按钮”“
Custom
Sur mesure Clean
Nettoyer
Froth
Mousse
Manual
Manuel
” 停止工作。
a.
x1
b.
x2
c.
hold for
3 sec.
本产品会根据您的选择开始冲煮意式浓缩咖啡,并会自动关闭,
灯会停止闪亮,指示冲煮过程已完成。您现在可以享受美味可口
的意式浓缩咖啡了!
备注:如果要冲煮比预设份数少的咖啡,当获得所需的咖啡量
时,请按下自选按钮,停止冲煮过程。
冲煮卡布奇诺 CAPPUCCINO
冲煮卡布奇诺之前,请根据您的喜好调节奶泡份量。将发泡控制旋
钮调到右边,泡沫更多;调到左边,泡沫更少。
泡沫更多 泡沫更少
备注:冲煮期间,可调节泡沫的多少。
a. 按下“CAPPUCCINO卡布奇诺按钮”“
Custom
Sur mesure Clean
Nettoyer
Froth
Mousse
Manual
Manuel
” 一次,冲煮小杯的卡布奇诺。
b. 按下“CAPPUCCINO卡布奇诺按钮”“” 两次,冲煮大杯的卡布奇诺
a.
x1
b.
x2
25

清洁意式特浓咖啡机
清洁意式特浓咖啡机
尽管您可以将装有剩余牛奶的牛奶箱存放在冰箱中,但还是需定期
清洁牛奶箱与发泡管,避免堵塞和堆积残渣。为了清洁牛奶箱,请
遵守以下所列出的操作说明:
1. 在发泡管下放一只大的空杯子, 并确保水箱已装水。
2. 将发泡管嘴对准空杯子。
3. 将发泡控制旋钮调到清洗“ ”。
4. 按下清洗按钮并持续3秒钟再放手,清洗过程会运作30秒,完
成后请倒清杯中残留物。
5. 倒掉剩余的牛奶,然后用温肥皂水彻底冲洗并清洗牛奶箱与盖子,
冲洗并完全弄干。切勿使用研磨性清洁剂和百洁布,因为它们会划
伤面漆。牛奶箱与奶箱盖也可用洗碗机(放在顶架上方)清洗。
清洁冲煮头,便携式过滤器以及滤网
1. 将本产品旁边的电源按钮切换到关闭位置“O”,然后从电源插
座上拔掉插头。
2. 某些金属件可能仍然烫手,在它们冷却之前,切勿用手触摸。
3. 取下便携式过滤器,扔掉咖啡粉。用温肥皂水清洗便携式过滤器
与滤网,并完全冲洗干净。切勿将便携式过滤器与滤网放入洗碗
机中清洗。
4. 用湿布或纸巾擦拭位于本产品中的冲煮头下端,清除任何可能残
留的咖啡粉。
5. 将便携式过滤器(无任何滤网)装回冲煮头。
6. 在便携式过滤器的下面放置一只大的空杯子。
7. 按下“ESPRESSO意式浓缩咖啡按钮”“
Custom
Sur mesure Clean
Nettoyer
Froth
Mousse
Manual
Manuel
” 一次,仅让本产品煮
水,直至其自动停止。
8. 于清洗便携式过滤器后,请确保完全弄干。
清洁水箱
取下水箱并将剩余的水倒掉,然后用肥皂水清洗干净并擦干。建议
在使用前后倒空水箱。切勿将水箱放入洗碗机中清洗。
清洁本产品
1. 用一块湿软布擦拭外壳,切勿使用研磨性的清洁剂或百洁布,因
为它们会划伤面漆。
2. 切勿将便携式过滤器存放在冲煮头中,因为这样在冲煮意式浓缩咖
啡时会对冲煮头和便携式过滤器之间的密封性能造成不利的影响。
注意:切勿将本产品浸入水中。
27 28
冲煮奶泡
本咖啡机也可以用于冲煮奶泡。如果您想要为您的饮料增加更多的
泡沫或者为其它饮料准备奶泡(如黑糖玛奇朵咖啡、巧克力热饮、
印度茶拿铁等),请按住“CAPPUCCINO卡布奇诺/泡沫 ”按钮
3秒钟。完成此步骤之后,再按一次“CAPPUCCINO卡布奇诺/泡沫
”按钮,停止工作。
按住
3秒钟
冲煮配有牛奶的饮料后
当您冲煮好了配有牛奶的饮料,您可以将本产品的牛奶箱直接存放
在冰箱中(以备下次使用)或者扔掉剩余的牛奶。

故障、原因以及解决方法
故障 原因 解决方法
无咖啡流出。 • 水箱中无水。
• 咖啡粉太幼细。
• 滤网中有过多的咖啡。
• 本产品电源没有开启或
电源线插头没有插入。
• 咖啡夯得/压得过紧。
• 加入水。
• 将咖啡磨至中等颗粒。
• 在滤网中减少咖啡量。
• 将本产品的电源线插
头插入电源插座,然
后开启电源开关。
• 重新在滤网中装入咖
啡,切勿夯得太紧实。
咖啡流到便携
式过滤器的边
缘。
• 便携式过滤器没有转
动到完全锁定位置。
• 滤网周边有咖啡粉。
• 滤网中咖啡过多。
• 转动滤网座至完全锁
定位置。
• 洗刷边缘。
• 仅仅加少量咖啡。
牛奶发泡之后
没有泡沫,或
发泡管中没有
牛奶流出。
• 蒸汽用完。
• 牛奶不够冷。
• 发泡管被堵塞。
• 确保水箱中有足够的水。
• 冲煮卡布奇诺或鲜奶
咖啡之前,冷冻牛奶
和发泡罐。
• 按照牛奶箱与发泡管
清洁说明进行清洁。
咖啡出得太
快。
• 咖啡粉太粗。
• 滤网中咖啡量不够。
• 磨得更幼细。
• 使用更多的咖啡。
咖啡出得太
慢。
• 使用小型滤网取双份
意式浓缩咖啡。
• 咖啡粉太粗。
• 使用大型滤网取双份
意式浓缩咖啡。
• 磨得更幼细。
三个控制面板
灯交替闪亮。
• 水箱中没有水。 • 加水到水箱中。
29 30
除钙
沉积在本产品中的矿物质会影响电器的操作性能。当您发现冲煮意
式浓缩咖啡所需的时间开始延长,或者蒸汽过多时,您必须对本产
品进行除钙处理。此外,您可能会发现冲煮头的表面上堆有白色的
沉淀物。
清洁的次数取决于水的硬度。下表列出了推荐的清洁间隔时间:
推荐的清洁间隔时间
水的类型 清洁次数
软水(过滤的水) 每80个冲煮周期
硬水(自来水) 每40个冲煮周期
如果要对水箱除钙:
1. 往水箱中装入新鲜的、未稀释的家用白醋。
2. 将醋溶液倒入水箱中并静置一个晚上。
3. 取下水箱,然后将醋溶液倒进水槽。
4. 在水箱中装一半的自来水,然后将水倒进水槽中,重复此步骤两
次,直至将水箱冲洗干净。
如果要对内部零件除钙:
1. 确保先按照上述的“除钙”步骤对水箱的内部进行了除钙操作。
2. 确保将电源开关切换至关闭位置“O”,并且将插头从电源插座
上拔下。往牛奶箱中倒入白醋,倒入的白醋量应盖过牛奶箱的最
低水位线。
3. 插入便携式过滤器(装入滤网,但没加咖啡),然后将瓶子、玻
璃水瓶或普通杯子放在滴水盘的顶端和过滤器的下方。
4. 将电源线插头插入电源插座中。
5. 将电源开关切换至“I”位置。当三个控制面板灯发出蓝光,按
下“ESPRESSO意式浓缩咖啡/自选按钮”两次,醋溶液将流过
本产品后就会自动停止。
6. 在管子的下方放入一个大水罐或大杯子(容量至少为325毫升/11
盎司)。往牛奶箱中倒入水,然后将其装回本产品。顺时针方
向转动“发泡控制旋钮”至清洁 “ ” 位置,然后按下“LATTE拿
铁/清洗按钮”3秒钟,启动清洗功能。让本产品将水分配至管子
约30秒后,按下“LATTE鲜奶咖啡/清洗按钮”一次,停止此过
程。
7. 如果有必要,请仅用自来水重复步骤1-6,将任何残留的醋溶液
从本产品中冲洗掉。
Other manuals for BVSTEM6601
1
Table of contents
Other Oster Coffee Maker manuals

Oster
Oster Counterforms 4281 User manual

Oster
Oster BVSTDC12 User manual

Oster
Oster BVSTEM6601R User manual

Oster
Oster BVSTEM6701B User manual

Oster
Oster 3291 User manual

Oster
Oster 3305-33 User manual

Oster
Oster BVSTDC4403 User manual

Oster
Oster BVSTPSTX97 Series User manual

Oster
Oster BVSTDC4411 User manual

Oster
Oster BVSTEM6601 User manual

Oster
Oster BVSTDCDR5B User manual

Oster
Oster Designer 3274 User manual

Oster
Oster BVSTEM6601R User manual

Oster
Oster BVSTEM3199 User manual

Oster
Oster BVST-RDXSS43 User manual

Oster
Oster BVSTECMP65 User manual

Oster
Oster 3262 User manual

Oster
Oster BVSTDC10SS User manual

Oster
Oster BVSTEJX Series User manual

Oster
Oster BVSTEM3299 User manual