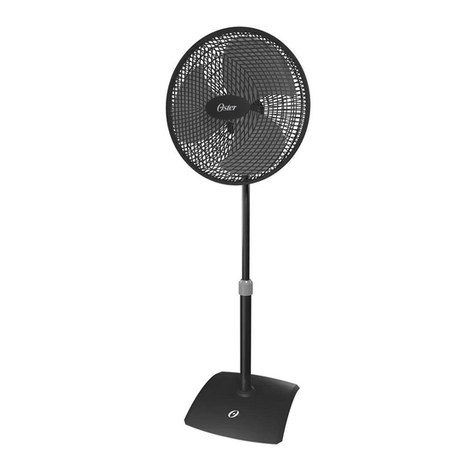
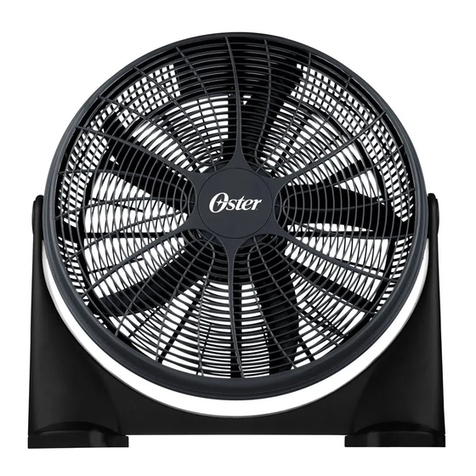
Oster OSF818 User manual

OSF818
Instruction Manual
STAND FAN
READ ALL INSTRUCTIONS BEFORE USING THIS APPLIANCE
Manual de Instrucciones
VENTILADOR DE PEDESTAL
LEA TODAS LAS INSTRUCCIONES ANTES DE USAR ESTE APARATO
MODELO /
MODEL

ESPAÑOL -1
ESPAÑOL-2
Gracias por la compra de su Ventilador de Pedestal Oster®, un producto de alta tecnología, seguro
y eciente. Es muy importante que lea detenidamente este Manual de Instrucciones, la información
contenida en este manual lo ayudará a aprovechar mejor todas las funciones del producto y usarlo
de manera segura. Por favor, mantenga este manual para futuras referencias.
Importante: los materiales utilizados en el embalaje de este producto pueden reciclarse.
Cuando los deseche, sepárelos para reciclarlos.
• Lea las instrucciones antes de usar el aparato.
• Para evitar accidentes. Una vez que haya desempacado el producto, mantenga el material de
embalaje y el producto fuera del alcance de los niños.
• Asegúrese de que el voltaje del tomacorriente corresponde al voltaje de su artefacto.
• Use el ventilador sólo para los propósitos descritos en el manual de instrucciones.
• Mantenga el producto y el cable de alimentación lejos del calor, la luz solar y la humedad, así
como de supercies aladas o similares.
• No conecte el producto a adaptadores con múltiples dispositivos conectados o cables de extensión
sobrecargados, ya que una sobrecarga podría dañar el producto y causar accidentes. Evite usar
un cable de extensión. Los cables de extensión de energía eléctrica pueden sobrecalentarse y
causar riesgo de incendio.
• Para evitar descargas eléctricas, NUNCA coloque el cable debajo de alfombras, cerca de amas
abiertas, ni cerca de aparatos para cocinar ni de aparatos calentadores.
• No haga funcionar el ventilador hasta que esté completamente ensamblado y con todas las
piezas colocadas en su lugar correspondiente.
• El uso de accesorios no recomendados o vendidos por el fabricante puede causar riesgos.
• No opere ningún aparato con el cable o clavija dañados, después de un mal funcionamiento
del aparato o si ha sido dañado de alguna manera. Llévelo a un Centro de Servicio Autorizado.
• Su recibo de compra y la garantía que vino con el producto son documentos importantes y deben
de conservarse en caso de que alguna vez necesite solicitar reparaciones bajo garantía.
• Este artefacto eléctrico no está destinado para ser usado por personas (lo que incluye niños)
cuyas capacidades físicas, sensoriales o mentales estén disminuidas, o carezcan de experiencia
y conocimientos, a menos que una persona responsable de su seguridad los supervise o les dé
instrucciones para usar este electrodoméstico. Los niños deberán estar bajo supervisión para
cerciorarse de que NO jueguen con el electrodoméstico.
• Es necesaria supervisión directa cuando la unidad sea operada por o cerca de niños.
1 - PRECAUCIONES IMPORTANTES
PRECAUCIÓN: Siempre que utilice artefactos eléctricos debe seguir ciertas medidas de
seguridad básicas, incluyendo las siguientes:
• No modique este producto de ninguna manera. Úselo solo como se describe en este manual.
Cualquier otro uso no recomendado por el fabricante puede provocar incendios, descargas
eléctricas o lesiones a las personas.
• No deje el producto desatendido.
• No deje que el cable cuelgue del borde de una mesa o mostrador, ni que entre en contacto con
supercies calientes.
• Siempre use el aparato en una supercie plana y seca.
• No utilice ningún aparato eléctrico con un cable o enchufe dañados, ni después de haberse
estropeado, o si se ha caído o dañado de alguna manera.
• Para protección en contra de una descarga eléctrica no sumerja la unidad, el cable o la clavija
en agua ni rocíe líquido. Conecte el ventilador a un contacto de pared.
• Evite el contacto con partes móviles.
• No inserte ni permita la entrada de objetos extraños entre las rejillas del producto, ya que esto
puede causar accidentes o daños al producto.
• No se opere en presencia de gases explosivos y/o inamables.
• Desconecte el aparato del contacto de pared cuando no esté en uso, cuando lo mueva de un
lugar a otro, antes de quitarle o ponerle partes o antes de limpiarlo.
• Para desconectar, nunca jale del cable, jale directamente de la clavija.
• Nunca transporte el producto por el cable de alimentación. Cuando lo transporte o almacene,
guárdelo en un lugar fresco y seco.
• Desenchufe el cable del tomacorriente cuando no esté utilizando el artefacto, antes de colocarle
o retirarle piezas y antes de limpiarlo.
Este producto está diseñado para su uso en interiores SOLAMENTE y no para aplicaciones
industriales o comerciales.
¡Atención! Para reducir el riesgo de una descarga eléctrica, no utilice objetos sólidos en
este circulador para desacelerar la hélice.
¡Atención! Para reducir el riesgo de descargas eléctricas y lesiones a las personas, no se
use en ventanas.

Se deben seguir todas las instrucciones y recomendaciones de este manual para asegurar un
ensamblaje correcto. El no cumplir con estas instrucciones de ensamblaje podría ocasionar un mal
funcionamiento del producto y podría perderse la garantía.
Un ensamblaje correcto garantizará un buen rendimiento del producto y evitará daños al producto,
accidentes y/o lesiones.
Para poder utilizar su ventilador, es necesario ensamblarlo.
Necesitará un destornillador para ensamblar la unidad.
[01] Coloque la carcasa del motor sobre una supercie plana y resistente. Coloque la rejilla trasera y
asegúrela usando la tuerca de jación de la rejilla trasera.
[02] Inserte las aspas del ventilador y luego fíjela con la tuerca de la hélice. Sostenga la tuerca y gire
la hélice del ventilador hacia la derecha.
[03] Coloque la rejilla frontal. Tenga en cuenta que la rejilla frontal cuenta con una serie de pestillos
para asegurar y garantizar que se adhiere correctamente a la rejilla trasera.
[Figura 1] [Figura 2]
[Figura 3] [Figura 4]
[04] Coloque el poste en la base y je el ensamblaje en la parte inferior de la base con los 4 tornillos
y las 4 tuercas.
[05] Retire la rosca de ajuste de altura e inserte la cubierta de la base a través de la parte superior
del poste.
[06] Gire el tornillo de ajuste de altura para colocar el poste a la altura deseada.
¡Atención! Al ensamblar las aspas del ventilador, asegúrese de que ésta se encuentre en
la posición correcta y de que la tuerca de la aspas esté asegurada y apretada. Si las aspas
del ventilador no está colocada en la posición correcta, puede raspar la rejilla frontal o
trasera o quedar descentrada, generando vibración.
3 - ENSAMBLAJE
ESPAÑOL-4
2 - DESCRIPCIÓN DEL ARTEFACTO
1. Rejilla frontal
2. Tuerca de cuchilla
3. Aspas del ventilador
4. Parrilla trasera Tornillos (4)
5. Rejilla trasera
6. Pin de oscilación
7. Carcasa del motor
8. Perilla de ajuste vertical
9. Columna
10. Patas Base (4)
11. Base
1 2 3456
7
8
9
10
11
ESPAÑOL-3
2]

Presione el botón de apagado “O” en el selector de velocidad y desenchufe la unidad del tomacorriente.
Limpie la base del ventilador con una esponja o paño suave humedecido en agua tibia, jabón
neutro o detergente. Séquelo con un paño limpio y seco.
Retire la rejilla frontal desbloqueándola de los pestillos de seguridad.
Limpe a hélice, a grade frontal e a grade traseira com uma esponja ou pano macio umedecido em
água morna com detergente ou sabão neutros. Seque com um pano limpo e seco.
Retire la rejilla frontal desbloqueándola de los pestillos de seguridad.
Limpie las aspas del ventilador, la rejilla frontal y la rejilla trasera con una esponja o paño suave
humedecido con agua tibia con jabón neutro o detergente. Séquelo con un paño limpio y seco.
Coloque la rejilla frontal hacia atrás y únala a la rejilla trasera utilizando los pestillos de seguridad.
Nunca sumerja el producto, la base, el enchufe o el cable eléctrico en el agua, ya que podría dañar
el artefacto o provocar un riesgo de descarga eléctrica.
Mantenimiento
Mantenga su producto funcionando en buenas condiciones. Cuando no lo esté utilizando,
apáguelo, desenchúfelo del tomacorriente eléctrico y manténgalo en un lugar seco, seguro
y alejado de los niños y las mascotas. Preferiblemente en su empaque original. El cable de
alimentación no debe estar torcido, estirado o enrollado alrededor de la unidad para evitar rupturas
de los cables internos.
Si el cable de alimentación está torcido, enderécelo antes de usar o guardar el producto.
NOTA: la actualización de partes y componentes de los artefactos se realiza de forma
continua. Por lo tanto, algunas de las instrucciones e imágenes especícas de este
manual pueden diferir ligeramente de su unidad.
Eliminación adecuada de materiales
Este símbolo indica que este producto no debe ser eliminado con otros desechos
domésticos. Esto es importante para evitar posibles daños al medio ambiente o
causar problemas relacionados con perjuicios a la salud humana como resultado de
su eliminación con basura regular. Es importante reciclar de manera responsable para
promover la sostenibilidad y la reutilización de recursos y materiales. Para reciclarlo,
comuníquese con el departamento de desechos de su ciudad. Los productos eléctricos
y electrónicos contienen sustancias nocivas y deben ser debidamente reciclados.
¡Atención! Lea todas las instrucciones en este manual antes de usar el producto,
respetando siempre las instrucciones de seguridad y siguiendo las instrucciones para
evitar accidentes y/o lesiones.
¡Atención! Nunca utilice disolventes o materiales abrasivos (jabón, acero o cepillos) al
limpiar el producto. Estos materiales pueden dañar su producto.
5 - MANTENIMIENTO Y LIMPIEZA
ESPAÑOL-6
Asegúrese de que el esté montado y colocado sobre una supercie plana, sólida y seca. Presione el botón
de apagado “O” en los botones de selección de velocidad y luego enchúfelo a la toma de corriente.
Encienda la unidad presionando el botón de velocidad deseado.
0
0
MAX
ECO
MAX ECO
[Figura 7
1 - Apagado 2 - Velocidad Eco
3 - Modo nocturno 4 - Velocidad Máxima
5 - Velocidad Máxima 6 - Velocidad Eco
Su ventilador puede funcionar jo en una posición u oscilar,
distribuyendo el aire a través del ambiente. Para activar y
desactivar la oscilación, simplemente apriete/tire del pasador
de oscilación.
[07] Fije el cuerpo del ventilador, usando el tornillo de jación, a la columna ajustable ya montada en la base.
[Figura 5] [Figura 6]
[Figura 8]
¡Atención! Enchufe la unidad en un tomacorriente de pared con el mismo voltaje que el
de su unidad.
4 - INSTRUCCIONES DE USO
ESPAÑOL-5
5
3 421
6

ENGLISH-2
ENGLISH -1
• Do not leave the product unattended.
• Do not let the mains cable hang over the edge of a table or counter, or come into contact with
hot surfaces.
• Always use on a dry, level surface.
• Do not operate any appliance with a damaged mains cable, plug, after the appliance malfunctions,
or has been dropped/damaged in any manner.
• To protect against electrical shock do not immerse unit, plug or cord in water or spray with liquids
and plug the appliance directly into an electrical outlet.
• Avoid contact with moving parts.
• Do not insert or allow foreign objects between product grids as this may cause accidents or
damage to the product.
• Do not operate in the presence of explosive and/or ammable fumes.
• Unplug from outlet when not in use, when moving fan from one location to another, before putting
on or taking off parts and before cleaning.
• To disconnect, grip plug and pull from wall outlet. Never yank on cord.
• Never carry the product by electric cable. When transporting or storing, store in a cool, dry place.
• Unplug from outlet when not in use, before putting on or taking off parts, and before cleaning.
This product is intended for household use ONLY and not for commercial or industrial
applications.
Attention! To reduce the risk of electric shock, do not use solid objects in this circulator to
slow the propeller.
Attention! To reduce the risk of electrical shock and injury to persons, do not use in window.
Thank you for purchasing the Oster® Pedestal Fan, a high-tech, safe and efcient product. It is
very important to read this instruction manual carefully, the information contained herein will help
you to better take advantage of all the functions of the product and use it safely. Please keep this
manual for future reference.
Important: The materials used in the packaging of this product may be recycled. When
discarding them, separate them to be recycled.
• Read all instructions before using this appliance.
• In order to avoid accidents. After unpacking the product, keep the packaging material and the
product out of the reach of children.
• Make sure that the voltage in your outlet is the same as the voltage indicated on the appliance.
• Use fan only for purposes described in the instruction manual.
• Keep the product and the power cord away from heat, sunlight, moisture and sharp or similar
surfaces.
• Do not connect the product to adaptors with multiple devices connected to it or overloaded power
extension cords, as overcharging may damage the product and cause accidents. Avoid using an
extension cord. Electrical power extension cords may overheat and cause re hazard.
• To avoid re hazard, NEVER place the cord under rugs or any parts near an open ame, cooking
or other heating appliance.
• Do not operate fan until fully assembled with all parts properly in place.
• The use of attachments not recommended or sold by the appliance manufacturer may cause
hazards.
• Do not operate any appliance with a damaged cord or plug after the appliance malfunctions, or
has been dropped/damaged in any manner. Discard fan or return to an authorized service facility
for examination and/or repair.
• The invoice and the warranty insert that came with the product are important documents and
should be kept for if you ever need to claim repairs under warranty.
• This appliance is not intended for use by persons (including children) with reduced physical,
sensory or mental capabilities, or lack of experience and knowledge, unless they have been given
supervision or instruction concerning use of the appliance by a person responsible for their safety.
Children should be supervised to ensure that they do NOT play with the appliance.
• Close supervision is necessary when any appliance is used by or near children.
• Do not modify this product in any way. Use it only as described in this manual. Any other use not
recommended by the manufacturer may cause re, electric shock, or injury to persons.
1 - IMPORTANT SAFEGUARDS
Attention! When using electrical appliances, basic safety precautions should always be
followed, including the following:

All instructions and recommendations in this manual must be followed to ensure the proper assembly.
Failure to follow the assembly instructions may cause the product to malfunction and it could forfeit
the warranty.
The proper assembly will ensure good product performance and prevent damages to the product,
accidents and/or injuries.
In order to use your fan, it is necessary to assemble it.
You will need an screwdriver to assemble the unit.
[01] Position the motor housing on a at and sturdy surface. Attach the rear grill and secure it using
the rear grill attaching nut.
[02] Insert the fan blade and then attach it with the blade nut. Hold the nut and turn the fan blade
clockwise.
[03] Place the front grill. Please note that the front grill has a series of latches to secure and guarantee
it attaches properly to the rear grill.
[Figure 1] [Figure 2]
[Figure 3] [Figure 4]
[04] Position the column on the base and secure the assembly to the bottom of the base to the base
with the 4 screws and 4 nuts.
[05] Remove the height adjustment thread and insert the base cover through the top of the column.
[06] Turn the height adjustment screw to position the column to the desired height.
Attention! When assembling the fan blade, make sure it is in the right position and that the
blade nut is secure and tight. If the fan blade is not mounted in the right position, it may
scrape on the front or rear grill or be out of balance thus generating vibration.
3 - ASSEMBLY
ENGLISH-4
2 - DESCRIPTION OF THE APPLIANCE
1. Front grill
2. Blade nut
3. Fan blades
4. Rear grill Screws (4)
5. Rear grill
6. Motor housing screw
7. Motor housing
8. Height adjustment thread
9. Column
10. Base Legs (4)
11. Base
ENGLISH-3
1 2 3456
7
8
9
10
11

Press the off “O” button on the speed selector and unplug the unit from the electrical outlet.
Clean the fan base with a sponge or soft cloth damp with warm water neutral soap or detergent.
Dry it with a clean, dry cloth.
Remove the front grill by unlatching it from the safety latches.
Clean the fan blade, front grill and rear grill with a sponge or soft cloth damp with warm water with
neutral soap or detergent. Dry it with a clean, dry cloth.
Place the front grill back by attaching it to the rear grill using the safety latches.
Never immerse the product, the base, the plug or the electrical cord in the water, as this may
damage the appliance or cause the risk of electric shock.
Maintenance
Keep your product in good working condition. When not in use, turn it off, unplug it from the
electrical outlet and keep it in a dry, safe place and away from children and pets. Preferably in its
original packaging. The power cord must not be twisted, pulled, or rolled around the unit to avoid
ruptures of the internal wires.
If the power cord is twisted, untwist it before using or storing the product.
NOTE: The updating of parts and hardware components is done continuously. Therefore,
some of the specic instructions and images of this manual might differ slightly from
your unit.
Correct disposal of materials
This symbol indicates that the product should not be eliminated with other domestic
waste. The is important in order to avoid possible damage to the environment or
cause issues related to damaging human health as a result of disposing it with
regular garbage. It is important to responsively recycle to promote sustainability
and the reutilization of resources and materials. To recycle it, contact the waste
department of your city. Electrical and electronic products contain harmful
substances and should be properly recycled.
Attention! Read all instructions in this manual before using the product, always observing
the safety instructions and following the instructions to prevent accidents and/or injuries.
Attention! Never use solvents or abrasive materials (soap, steel or brushes) when cleaning
the product. These materials can damage your product.
5 - CLEANING AND MAINTENANCE
ENGLISH-6
Ensure that the fan is mounted and placed on a at, sturdy and dry surface. Turn the on/off dial to
the preferred speed and then plug into the electrical outlet. Switch unit on by pressing the desired
speed button.
0
0
MAX
ECO
MAX ECO
[Figure 7]
1 - OFF Setting 2 - Eco Mode
3 - Night Mode 4 - Maximum Speed
5 - Maximum Speed 6 - Eco Mode
Your fan can operate xed in one position or oscillate, distributing
the air through the environment. To turn on and off the oscillation,
simply tighten/pull the oscillation pin.
[07] Attach the fan body, using the xing screw, to the adjustable column already mounted on the base.
[Figure 5]
[Figure 6]
[Figure 8]
Attention! Plug unit to a wall electric outlet with the same voltage of the one from your unit.
4 - OPERATING INSTRUCTIONS
ENGLISH-5
5
3 421
6

VENTILADOR DE PEDESTAL OSTER®
MODELO: OSF818-LA013, OSF818
LEA EL INSTRUCTIVO ANTES DE USAR EL APARATO
LA SIGUIENTE INFORMACIÓN ES PARA MÉXICO:
IMPORTADOR: NEWELL BRANDS DE MÉXICO S.A. DE C.V.
AVE. JUÁREZ Nº 40-201, COLONIA EX HACIENDA SANTA MÓNICA,
TLALNEPANTLA 54050, ESTADO DE MÉXICO
TEL: 5366-0800
RFC SME570928G90
PAÍS DE ORIGEN: CHINA
PAÍS DE PROCEDENCIA: CHINA, E.U.A.
CONTENIDO: 1 PIEZA
CARACTERÍSTICAS ELÉCTRICAS
60 Hz 127 V 65 W
Características eléctricas de los modelos de la serie:
Electric characteristics of series models:
Voltaje/Voltage Frecuencia/Frequency Potencia/Power
127 V 60 Hz 65 W
220 V 60 Hz 60 W
220 V 50/60 Hz 60 W
XXX en donde X es cualquier numero entre 0 y 9 o cualquier letra entre A y Z.
XXX where X is any number between 0 and 9 or any letter between A and Z. .
OSF818-LAXXX
Impreso en China
Printed in China
P.N. 200598
© 2019 Sunbeam Products, Inc. Todos los derechos reservados.
Garantía limitada de un año – por favor consulte los detalles en el inserto.
© 2019 Sunbeam Products, Inc. All rights reserved.
One year limited warranty – please see insert for details.
www.oster.com
La siguiente información es para México solamente.
The following information is intended for Mexico only.
Table of contents
Languages:
Other Oster Fan manuals