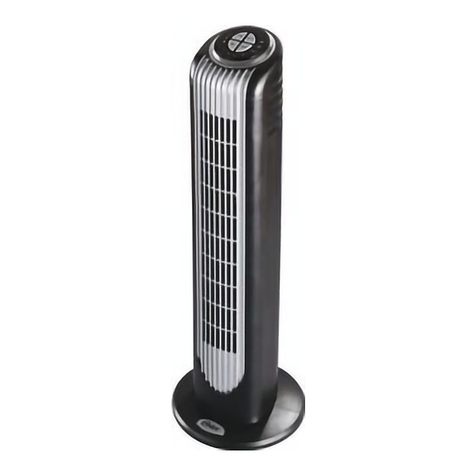
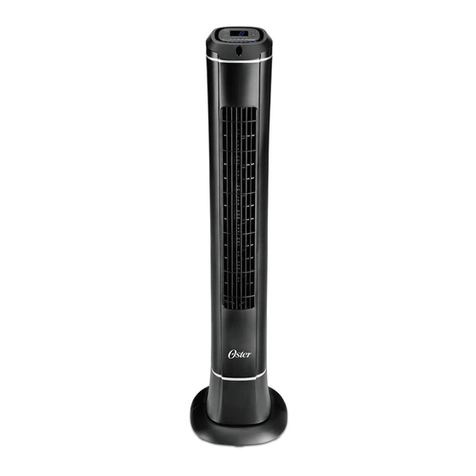
Oster OTF3813M User manual

MODEL /
MODELO
OTF3813M & OTF3813E
Manual de Instrucciones
Instruction Manual
VENTILADOR DE TORRE
TOWER FAN
LEA TODAS LAS INSTRUCCIONES ANTES DE USAR ESTE APARATO
READ ALL INSTRUCTIONS BEFORE USING THIS APPLIANCE
OTF3813M_OTF3813E_18ESM1 (LA).indd 1 9/7/18 10:15

When using electrical appliances, basic safety precautions should always be
followed to reduce the risk of re, electric shock, and injury to persons. These
precautions include:
1. Read all instructions before using this appliance.
2. Use fan only for purposes described in the instruction manual.
3. To protect against electrical shock do not immerse unit, plug or cord in water or spray
with liquids. Plug the appliance directly into electrical outlet.
4. Unplug from outlet when not in use, when moving fan from one location to another,
before putting on or taking off parts and before cleaning.
5. Avoid contact with moving parts.
6. Do not operate in the presence of explosive and/or ammable fumes.
7. To avoid re hazard, NEVER place the cord under rugs or any parts near an open
ame, cooking or other heating appliance.
8. Do not operate any appliance with a damaged cord or plug after the appliance
malfunctions, or has been dropped/damaged in any manner. Take it to an
Authorized Service Center for its examination and/or repair.
9. The use of attachments not recommended or sold by the appliance manufacturer
may cause hazards.
10. Do not use outdoors. Do not let the cord hang over the edge of a table, counter or
come in contact with hot surfaces or leave exposed to high trafc areas.
11. To disconnect, grip plug and pull from wall outlet. Never yank on cord.
12. Always use on a dry, level surface.
13. Do not operate fan until fully assembled with all parts properly in place.
14. This product is intended for household use ONLY and not for commercial or
industrial applications.
15. This appliance is not intended for use by persons (including children) with reduced
physical, sensory or mental capabilities, or lack of experience and knowledge,
unless they have been given supervision or instruction concerning use of the
appliance by a person responsible for their safety. Children should be supervised to
ensure that they do not play with the appliance.
16. Close supervision is necessary when any appliance is used by or near children, or
incapacitated individuals.
IMPORTANT SAFEGUARDS
SAVE THESE INSTRUCTIONS
ENGLISH - 1
OTF3813M_OTF3813E_18ESM1 (LA).indd 2 9/7/18 10:15

DESCRIPTION OF THE APPLIANCE
1. Speed Control Buttons
2. Timer Control Knob
3. Oscillation Control Button
1
3
2
ENGLISH - 2
Fig. 1
Fig. 2
OPERATING INSTRUCTIONS (SEE FIG. 1 & 2)
To turn unit ON (continuous use):
To turn unit OFF:
To use Timer Control:
To use Oscillation Control:
1. Plug in unit.
2. Turn Timer Control Knob (2) to I (ON).
3. Select speed setting button 1 (Low), 2 (Med), 3 (High) (1).
1. Select Speed Button O (1) (OFF) or turn timer (2) to (OFF)
1. Select a Speed Button (1) 1, 2 or 3 and turn Timer (2) to desired time
(up to 120 minutes)
1. Press (3) = Oscillation On, Off
OTF3813M
OTF3813M_OTF3813E_18ESM1 (LA).indd 3 9/7/18 10:15

DESCRIPTION OF THE APPLIANCE
1. Speed Indicator Lights
2. Power/Speed Button
3. Breeze/Sleep Mode Buttons
4. Breeze /Sleep Mode Indicator Lights
5. Oscillation Indicator Light
6. Oscillation Control Button
7. Timer Indicator Lights
8. Timer Control Button
14
5
68 7
2 3
ENGLISH - 3
Fig. 3
Fig. 4
OTF3813E
OPERATING INSTRUCTIONS (SEE FIG. 3 & 4)
To turn unit ON (continuous use):
1. Press
(2)- Select a speed 1 (Low), 2 (Med), 3 (High) shown by the
Speed Indicator lights (1). Ref. to Fig.4.
OTF3813M_OTF3813E_18ESM1 (LA).indd 4 9/7/18 10:15

Remote Control requires 2 AAA batteries for operation. There is a slot on the back of
the unit (Refer to Fig. 6) to store the remote when not in use.
To turn unit OFF:
To use Timer Control:
To use Oscillation Control:
To use Breeze/Sleep Modes:
1. Press
(2)
1. Press (8) to select desired time for Power to turn OFF in 1, 2, 4, 8 hours
shown by the Timer Indicator lights (7). Ref. to Fig.4.
1. Press (6) = Oscillation On, Off
1. Press
(3) to Select Breeze or Sleep shown by the Indicator lights (4).
2. Breeze Mode will randomly cycle through the fan speed settings from
High, Medium, Low & OFF to simulate a natural breeze until the user turns
the unit OFF.
3. Sleep Mode will automatically cycle through the fan speed settings,
starting at High for 3 hours, then Medium for 2 hours, then on Low until user
turns the unit OFF.
REMOTE CONTROL (MODEL OTF3813E ONLY)
Fig. 5
Fig. 6
1
3 4
2
1. Power/Speed Button
2. Breeze/Sleep Mode Button
3. Timer Control Button
4. Oscillation Control Button
ENGLISH - 4
OTF3813M_OTF3813E_18ESM1 (LA).indd 5 9/7/18 10:15

ASSEMBLY INSTRUCTIONS
1. Fan housing
2. Rear base
3. Front base
4. Screws (4)
5. Power cord
6. Crosshead screws (2)
7. Cord clamp
4
2
1
3
5
6
7
ENGLISH - 5
Fig. 7
Fig. 8
BASE / CORD ASSEMBLY (FOR BOTH OTF3813M/OTF3813E)
1. Assemble Base (2 and 3) to Fan Housing (1) making sure the cord is
enclosed between base (2 and 3). Secure together with 4 Screws (4).
Refer to Fig. 7 for proper alignment of assembled Base to Fan Housing.
2. Secure Power Cord (5) to bottom of Base (2 and 3) using the
Cord Clamp (7) with 2 crosshead screws (6). Refer to Fig. 8.
OTF3813M_OTF3813E_18ESM1 (LA).indd 6 9/7/18 10:15

Follow these instructions to correctly and safely care for your Oster®fan.
Please remember:
Your fan can be stored either partially disassembled or assembled. It is important to
keep it in a safe, dry location.
ENGLISH - 6
CLEANING AND MAINTENANCE
FAN STORAGE
1. Always unplug the fan before cleaning or assembly.
2. Do not allow water to drip on or into the fan motor housing.
3. Be sure to use a soft cloth, moistened with a mild soap solution.
4. Do not use any of the following as a cleaner: petrol, thinners or benzene.
1. If stored disassembled, we recommend using the original (or appropriately
sized) box.
2. If stored assembled or partially assembled, remember to protect the fan head
from dust.
OTF3813M_OTF3813E_18ESM1 (LA).indd 7 9/7/18 10:15

Para disminuir el riesgo de incendio, descarga eléctrica y lesiones personales, se
deben seguir siempre las precauciones básicas de seguridad al utilizar artefactos
eléctricos. Dichas precauciones comprenden:
1. Leer todas las instrucciones antes de utilizar este artefacto eléctrico.
2. Utilice el ventilador sólo para los nes que se describen en el manual de
instrucciones.
3. Para protegerse contra descargas eléctricas, no sumerja la unidad, el enchufe ni el
cable en agua, ni en ningún otro líquido. Enchufe el electrodoméstico directamente
en un tomacorriente.
4. Desconéctelo del tomacorriente cuando no esté en funcionamiento, cuando vaya a
trasladar el ventilador de un lugar a otro, antes de colocar o quitarle piezas y antes
de limpiarlo.
5. Evite el contacto con piezas en movimiento.
6. No haga funcionar en presencia de gases explosivos o inamables.
7. Para evitar riesgos de incendios, NUNCA coloque el cable por debajo de alfombras,
ni coloque ninguna de sus piezas cerca de llamas vivas, artefactos de cocina, ni de
ningún otro electrodoméstico que despida calor.
8. No utilice un electrodoméstico que tenga un cable o un enchufe dañado, o después
de que el artefacto haya presentado fallas, se haya caído o haya sufrido cualquier
otro daño. Llévelo a un Centro de Servicio Autorizado para su inspección o
reparación.
9. El uso de aditamentos no recomendados o vendidos por el fabricante del artefacto
eléctrico puede ocasionar peligros o lesiones.
10. No utilice al aire libre. No permita que el cable cuelgue del borde de una mesa o
mesada, ni que entre en contacto con supercies calientes o quede expuesto en
áreas muy concurridas.
11. Para desconectar, sujete el enchufe y sáquelo del tomacorriente. Nunca lo hale por
el cable.
12. Coloque siempre sobre una supercie seca y nivelada.
ESPAÑOL - 1
PRECAUCIONES IMPORTANTES
OTF3813M_OTF3813E_18ESM1 (LA).indd 8 9/7/18 10:15

CONSERVE ESTAS INSTRUCCIONES
13. No haga funcionar el ventilador hasta que esté completamente ensamblado y con
todas las piezas colocadas en su lugar correspondiente.
14. Este producto está destinado ÚNICAMENTE para uso doméstico, no para
aplicaciones comerciales o industriales.
15. Este artefacto eléctrico no está destinado para ser usado por personas
(incluyendo niños) cuyas capacidades físicas, sensoriales o mentales estén
disminuidas, o carezcan de experiencia y conocimiento, a menos que una persona
responsable por su seguridad les haya supervisado o instruido en el uso de este
electrodoméstico. Los niños deberán estar bajo supervisión para cerciorarse de que
no jueguen con el artefacto eléctrico.
16. Se requiere estricta supervisión cuando las personas discapacitadas o los niños
utilicen cualquier electrodoméstico o estén cerca de él.
ESPAÑOL - 2
OTF3813M_OTF3813E_18ESM1 (LA).indd 9 9/7/18 10:15

DESCRIPCIÓN DEL ARTEFACTO
1. Botones de Control de Velocidad
2. Perilla de Control de Temporizador
3. Botón de Control de Oscilación
1
3
2
ESPAÑOL - 3
Fig. 1
Fig. 2
DESCRIPCIONES (CONSULTE LAS FIG. 1 & 2)
Para encender la unidad (uso continuo):
Para apagar la unidad:
Para usar el Control del Temporizador:
Para usar el Control de Oscilación:
1. Enchufe la unidad.
2. Gire el temporizador (2) a la posición de encendido I (ON).
3. Seleccione el botón de ajuste de velocidad 1 (Baja), 2 (Media) o 3 (Alta) (1).
1. Seleccione el Botón de Velocidad O (1) (OFF) o gire el Temporizador (2)
a la posición de apagado (OFF).
1. Seleccione el Botón de Velocidad (1) 1, 2 o 3 y gire el Temporizador (2)
al tiempo deseado (hasta 120 minutos).
1. Presione (3) = Oscilación encendida On, apagada Off.
OTF3813M
OTF3813M_OTF3813E_18ESM1 (LA).indd 10 9/7/18 10:15

DESCRIPCIÓN DEL ARTEFACTO
1. Luces de Indicación de Velocidad
2. Botón de Encendido/Velocidad
3. Botones de Modo de Brisa/Modo de Nocturna
4. Luces de Indicación de Modo de
Brisa/Modo de Espera
5. Luz de Indicación de Oscilación
6. Botón de Control de Oscilación
7. Luces de Indicación de Temporizador
8. Botón de Control de Temporizador
14
5
68 7
2 3
ESPAÑOL - 4
Fig. 3
Fig. 4
OTF3813E
DESCRIPCIONES (CONSULTE LAS FIG. 3 & 4)
Para encender la unidad (uso continuo):
1. Presione
(2)- Seleccione la velocidad 1 (Baja), 2 (Media) o 3 (Alta)
como indican las luces de Indicación de Velocidad (1). Consulte la Fig. 4.
Para apagar la unidad:
1. Presione
(2)
OTF3813M_OTF3813E_18ESM1 (LA).indd 11 9/7/18 10:15

El Control Remoto requiere 2 baterías AAA para su funcionamiento. Hay un
compartimento en la parte posterior de la unidad (consulte la Fig. 6) para guardar el
control remoto cuando no se lo está utilizando.
Para usar el Control del Temporizador:
Para usar los Modos de Brisa/Nocturna:
To use Breeze/Sleep Modes:
1. Presione (8) y seleccione el tiempo deseado para que se apague
la unidad entre 1, 2, 4 u 8 horas como indican las luces de Indicación del
Temporizador (7). Consulte la Fig. 4.
1. Presione (6) = Oscilación encendida (ON), apagada (OFF)
1. Presione
(3) y seleccione Brisa o Nocturna como indican las Luces de
Indicación (4).
2. El Modo de Brisa realizará ciclos aleatorios por los ajustes de velocidad
del ventilador desde Alto, Medio, Bajo y Apagado simulando una brisa natural
hasta que el usuario apague la unidad.
3. El Modo de Nocturna realizará ciclos automáticos por los ajustes de
velocidad del ventilador, comenzando en Alto durante 3 horas, después Medio
durante 2 horas y después Bajo hasta que el usuario apague la unidad.
CONTROL REMOTO (SOLO MODELO BT3813E)
Fig. 5
Fig. 6
1
3 4
2
1. Botón de Encendido/Velocidad
2. Botón de Modo de Brisa/Modo
de Nocturna
3. Botón de Control de Temporizador
4. Botón de Control de Oscilación
ESPAÑOL - 5
OTF3813M_OTF3813E_18ESM1 (LA).indd 12 9/7/18 10:15

INSTRUCCIONES DE INSTALACIÓN
1. Carcasa de Ventilador
2. Base posterior
3. Base frontal
4. Tornillos (4)
5. Cable de alimentación
6. Tornillos de cruz (2)
7. Abrazadera del cable
4
2
1
3
5
6
7
ESPAÑOL - 6
Fig. 7
Fig. 8
INSTALACIÓN DE BASE/CABLE (PARA AMBOS OTF3813M/OTF3813E)
1. Coloque la Base (2 y 3) a la Carcasa del Ventilador con el cable
introducido entre la base (2 y 3). Asegure la base y la carcasa con
4 tornillos (4). En la Fig. 7 se muestra la alineación correcta del la Base
instalada a la Carcasa del Ventilador.
2. Asegure el Cable de Alimentación (5) a la Base (2 y 3) utilizando la
abrazadera del cable (7) con 2 tornillos de cruz (6). Consulte la Fig. 8.
OTF3813M_OTF3813E_18ESM1 (LA).indd 13 9/7/18 10:15
Seguir estas instrucciones para cuidar correctamente con seguridad de su
ventilador Oster®. Por favor recordar:
Su ventilador puede almacenarse montado o parcialmente desmontado.
Es importante mantenerlo seguro en un lugar seco y seguro.
ESPAÑOL - 7
LIMPIEZA Y ALMACENAMIENTO
ALMACENAMIENTO DEL VENTILADOR
1. Desenchufar siempre el ventilador antes de su limpieza o montaje.
2. No permitir que entre agua en la carcasa del motor de ventilador.
3. Utilizar un paño suave humedecido en una solución de jabón suave.
4. No utilizar lo siguiente como producto de limpieza: gasolina,
aguarrás o bencina.
1. Si se almacena desmontado, recomendamos utilizar la caja original
(o de un tamaño apropiado).
2. Si se almacena montado o parcialmente montado, recordar proteger el
cabezal del ventilador contra la entrada de polvo.
OTF3813M_OTF3813E_18ESM1 (LA).indd 14 9/7/18 10:15
VENTILADOR DE TORRE OSTER®
MODELOS: OTF3813M, OTF3813E, OTF3813M-LA013,
OTF3813E-LA013
LEA EL INSTRUCTIVO ANTES DE USAR EL APARATO
LA SIGUIENTE INFORMACIÓN ES PARA MÉXICO:
IMPORTADOR: NEWELL BRANDS DE MÉXICO S.A. DE C.V.
AVE. JUÁREZ Nº 40-201, COLONIA EX HACIENDA SANTA MÓNICA,
TLALNEPANTLA 54050, ESTADO DE MÉXICO
TEL: 5366-0800
RFC SME570928G90
PAÍS DE ORIGEN: CHINA
PAÍS DE PROCEDENCIA: CHINA, E.U.A.
CONTENIDO: 1 PIEZA
CARACTERÍSTICAS ELÉCTRICAS
60 Hz 120 V 40 W
The following information is intended for Mexico only.
La siguiente información es para México solamente.
Electric characteristics of series models:
Características eléctricas de los modelos de la serie:
Voltage/Voltaje Frequency/Frecuencia Power/Potencia
120 V 60 Hz 40 W
220 V 50/60 Hz 40 W
XXX where X is any number between 0 and 9 or any letter between A and Z.
XXX en donde X es cualquier numero entre 0 y 9 o cualquier letra entre A y Z.
OTF3813M & OTF3813E
© 2018 Sunbeam Products, Inc. All rights reserved.
One year limited warranty – please see insert for details.
© 2018 Sunbeam Products, Inc. Todos los derechos reservados.
Garantía limitada de un año – por favor consulte los detalles en el inserto.
www.oster.com
Printed in China
Impreso en China
P.N.
195041 Rev. A
GCDS-OST373282-JC
OTF3813M_OTF3813E_18ESM1 (LA).indd 15 9/7/18 10:15
This manual suits for next models
1
Table of contents
Languages:
Other Oster Fan manuals

Oster
Oster OTF361E User manual

Oster
Oster OT14BS-049 User manual

Oster
Oster OSF816 User manual

Oster
Oster TF1600 User manual

Oster
Oster OTF9115R User manual

Oster
Oster 1696 User manual

Oster
Oster OBF851 User manual

Oster
Oster OSF1614P Series User manual

Oster
Oster OT16RBS-049 User manual

Oster
Oster OSF804 User manual
Popular Fan manuals by other brands

Kichler Lighting
Kichler Lighting 54 Skye LED instruction manual

NuTone
NuTone QT DC Series instructions

Skov
Skov DA 1700 Technical user guide

LMF Clima
LMF Clima HPX Series Installation, operation & maintenance manual

Supra
Supra SERENA Instructions for use

Bosch
Bosch DRR18BS25 User manual and installation instructions