OTOFONIX Encore User manual

Encore
User Guide

Contents
What’s In the Box 2
Features 3
Batteries 4
About Eartips/Domes 6
Eartip Information 8
Programs & Volumes 9
Memory Presets 10
Sound Tube Choices 11
Replacing Sound Tube 12
Earhook Power Kit 13
Earhook Tube Installation 14
Earhook Tube Installation 15
TELECOIL (Program 4) 16
Daily Care & Maintenance 17
Wearing & Using a Hearing Device 18
Troubleshooting 20
Otofonix Encore Technical Data 21
Warranty and Repairs 22
Return Policy 23
Warning to Hearing Aid Dispensers 24
Important Notice for Users 26
X-ray, MRT, CT, PET Scanning, Electro-therapy 27

Congratulations on your Otofonix hearing device!
Your new hearing hearing device is about to open up an amazing
new world for you. Enjoy the sounds around you and
conversation with your family and friends again.
Please read this User Manual in its entirety.
If you need help, our hearing instrument specialists are ready to
provide assistance with any questions you may have. Please
contact us at [email protected] or watch the instructional
videos at our website
www.otofonix.com.
3
1

4
What's in the Box
Assortment of open
and closed ear domes
#312 Batteries
EarHook Power Kit
otofonJz
Assembled hearing device
with 2 sound tubes
Not shown: Protective Travel Case & English User Manual
2
What’s in the Box

3

6
Batteries
The battery compartment located on the bottom of the hearing device also
acts as the on-off switch. When closed the unit is
ON
and when open the
unit is
OFF.
We recommend that you fully or completely open the battery
door when you go to bed at night in order to conserve battery power.
\ Oto
ON
4
Batteries

Baeries
The proper battery size for your Otofonix Encore hearing device is a zinc-air #312. Before
inserting the battery into your hearing aid, remove the brown tab and wait 1-2 minutes to
allow the battery to air activate. Your hearing aid has a low current drain and the battery
should last approximately 7 (16 hour) days or longer. Loud noises drain the battery more
than quieter sounds.
Tab
Low power: You will hear a series of melodie double beeps when the battery is low.
You may also hear increasing static. You will have approximately 30 minutes to
change the battery (this can vary,depending on the hearing settings and battery).
We recommend that you always have a new battery on hand.
5
Batteries

6
About Eartips/Domes

7
About Eartips/Domes

8
Eartip Information

Programs & Volumes
4 Memory Programs
10 Volume Levels
Volume Up (Quick Press once)
3 rapid beeps heard when Level 10 is
reached Program Up (Press and hold for 3
seconds)
Volume Down (Quick Press once)
3 rapid beeps heard when Level 1 is reached
Program Down (Press and hold 3 seconds)
When your hearing device is initially turned on, it
will automatically default to Program1 and Volume
Level 5.
9
Programs & Volume

Memory Presets
Your hearing device includes 4 pre-configured memory programs and 10 volume
levels to quickly adjust to your hearing loss and and different environments.
Volume Settings:
Bach time you press the rocker switch either up or down you will hear one
beep and the volume will change by 3 dB. When you reach level 1 (15 dB
gain) or level 10 (42 dB gain) you will then hear three rapid beeps.
When you
initially turn your aid on it will default to volume level 5 and Program 1.
Program Settings:
To change the Program Setting push and hold the rocker switch either up or
down fur 3 seconds. The number of beeps you hear is the program chosen.
1 Quiet setting - every day use with Low noise reduction
2 Noisy setting - Medium noise reduction (restaurant, wind noise)
3 Extreme Noisy setting - High noise reduction setting
4 Telecoil setting - compatible with ali venues having "induction or audio loops".
10
Memory Presets

11
Sound Tube Choices

Replacing Sound Tube
To attach new tubing,
gently turn the base of
the tubing onto the
hearing device body in
a clockwise direction.
Approximately 3-4
complete rotations
are necessary to
complete the
installation.
Tue tube base should be
flush with the hearing
device body. Tue above
example requires one
more rotation.
To remove the tubing simply turn the tubing base in a counter-clockwise direction
(like removing a bottle cap) .
Please note: The hearing device body can be utilized for either ear. Only the thin
sound tubing is ear-specific. Tubing can be ordered at www.otofonix.com.
12
Replacing Sound Tube

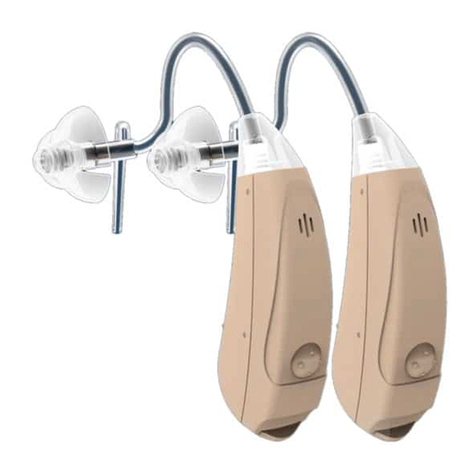
EarHook Power Kit
For those with a severe to pro
found hearing loss or who would
just like more volume that the
open fit can not provide, the
power kit has been included
in your Encore package. The
earhook and traditional thicker
tubing provides you with
increased sound output
Your hearing device was sent to you with the standard thin tubing
already attached. If you need to get the maximum volume out of your
Otofonix Encore, you will first need to remove the thin tube and
replace it with the earhook. See "EarHook Tube lnstallation" on page
15.Replacement parts may be purchased on www.otofonix.com.
13
Earhook Power Kit

Earhook Tube lnstallation
Your Otofonix Encore was sent to you pre-assembled with a thin sound
tube and medium sized hybrid (magie) dome. If you need to get the
maximum volume out of your hearing aid, we suggest attaching the
Earhook kit with the traditional thick sound tube and a closed dome.
This will require removing the thin tubing. See page 15.
The Earhook package includes:
3 sizes of
closed
domes (8, 11 & 13mm) to reduce feedback 1 thick
tube to allow full volume from the hearing aid
1 Earhook Adapter to connect to the thick tube
Place the hearing aid with the attached
earhook aver the ear and the assembled thick
tube with dome into the ear canal. Trim the
tube as illustrated and insert the cut end into
the earhook. See page 15.
14
Earhook Tube Installation

Earhook Tube lnstallation
Attach earhook to aid
body. Turn hook clock
wise 3-4 rotations
The earhook should be
flush with the aid body
Insert ear dome onto
thick tubing connector
Assembled thick
tube and dome
Cut the tube at the
Mark a line on the tube
just
ABOVE
the bottom
marked line
Push the cut end of
the tube onto the
ear-hook
For those requiring more amplification, an earhook kit has been included with your
hearing device. Simply replace the thin sound tubing with the earhook and traditional
thick tubing as shown above.
of the earhook
15
Earhook Tube Installation

16
TELECOIL (Program 4)

Daily Care
&
Maintenance
Your Otofonix hearing device is a delicate and sensitive digital electronic device. So it
is very important that you keep it clean and dry. Any moisture can have a negative
impact on the hearing devise. Moisture prevention is helpful to extent the lifetime of the
device.
Use a soft dry cloth to clean the body oils, sweat and water from the casing. Do not wear
it when showering, swimming, in the rain or in a wet environment such as a sauna.
Never subject your device to hairspray, sunscreen or other cosmetic/medical products
If you spent a considerable amount of time in a high humidity environment, you should
consider placing your device in a drying box over night such as Stay-Dri Hearing Aid
Dehumidifier.
Do not wear your device during short-wave diathermy, X-ray, MR scans, CT scans or
similar radiation treatments.
Be aware that occupancy sensors in some public restrooms can generate strong
electromagnetic interference that produce a rapid loud chirping or clicking sound when
wearing your hearing device.
17
Daily Care & Maintenance

WEARING & USING A HEARING AI
D
Tips
People learn at a different rate. Some people need a week or two to adjust to their hearing
amplifiers andothers may need a few months. Medical studies show that your brain
requires approximately 21 days to adjust to your new HearingAid. We recommend that you
wear your unit for a few hours on the first day and gradually increasingthetime over a
period of one week. Eventually,you will be wearing them most of the waking hours.
Squealing or Feedback
Feedback occurs when theamplified sound coming out of the eartip or open dome
returns to the microphone and is re-amplified. Tue most common cause is a high volumes
setting.Werecommendsettingthe volume no higher than level 8. Alternatively,youcan
use a smaller vented dome or a closed dome which will almost always eliminate feedback
or whistling
Realistic Expectations
The first thing many new users notice is that sounds seem strange. Remember that
even the best hearing aids are not as good as natural hearing, so sounds aren't
completely norma l, much as your voice doesn't sound the same on a tape recorder or
a telephone as it does in person. Your own voice may sound deeper to you than
normal.
20
18
Tips
People learn at a different rate. Some people need a week or two to adjust to their hearing
devices and others may need a few months. Medical studies show that your brain requires
approximately 21 days to adjust to your new Hearing Device. We recommend that you wear
your unit for a few hours on the rst day and gradually increasing the time over a period of
one week. Eventually, you will be wearing them most of the waking hours.
Squealing or Feedback
Feedback occurs when the amplied sound coming out of the ear tip or open dome returns to
the microphone and is re-amplied. The most common cause is a high volumes setting. We
recommend setting the volume no higher than level 8. Alternatively, you can use a smaller
vented dome or a closed dome which will almost always eliminate feedback or whistling
Realistic Expectations
The rst thing many new users notice is that sounds seem strange. Remember that even the
best hearing aids are not as good as natural hearing, so sounds aren’t completely normal,
much as your voice doesn’t sound the same on a tape recorder or a telephone as it does in
person. Your own voice may sound deeper to you than normal.
Wearing & Using A Hearing Device
Other manuals for Encore
2
Table of contents
Other OTOFONIX Hearing Aid manuals

OTOFONIX
OTOFONIX Encore User manual
OTOFONIX
OTOFONIX HELIX User manual

OTOFONIX
OTOFONIX GROOVE User manual
OTOFONIX
OTOFONIX GROOVE User manual
OTOFONIX
OTOFONIX Apex User manual

OTOFONIX
OTOFONIX OTOFONIX User manual

OTOFONIX
OTOFONIX HELIX User manual

OTOFONIX
OTOFONIX HELIX User manual
OTOFONIX
OTOFONIX Sona User manual

OTOFONIX
OTOFONIX Encore User manual


