manuals.online logo
Brands
  1. Home
  2. •
  3. Brands
  4. •
  5. Panasonic
  6. •
  7. Projector Accessories
  8. •
  9. Panasonic ET-LAD57 Guide

Panasonic ET-LAD57 Guide

Lamp unit for DLPTM Projector Commercial Use
Replacement Instructions
Read these instructions completely before replacing Lamp unit.
TQZH 919-3
Model No. ET-LAD57 (1 pc.)
ET-LAD57W (2 pcs.)
WARNING!
When replacing the lamp, allow it
to cool for at least one hour before
handling it.
NOTICE:
For USA only
Hg -LAMP CONTAINS MERCURY,
Manage in Accord with Disposal Laws,
See: www.lamprecycle.org or 1-888-411-1996
WARNING!
Make sure that two lamp units are
always installed.
Information for Users on Collection and Disposal of Old Equipment and used Batteries
Cd
These symbols on the products, packaging, and/or accompanying documents mean that used electrical and electronic
products and batteries should not be mixed with general household waste.
For proper treatment, recovery and recycling of old products and used batteries, please take them to applicable collection
points, in accordance with your national legislation and the Directives 2002/96/EC and 2006/66/EC.
By disposing of these products and batteries correctly, you will help to save valuable resources and prevent any potential
negative effects on human health and the environment which could otherwise arise from inappropriate waste handling.
For more information about collection and recycling of old products and batteries, please contact your local municipality,
your waste disposal service or the point of sale where you purchased the items.
Penalties may be applicable for incorrect disposal of this waste, in accordance with national legislation.
For business users in the European Union
If you wish to discard electrical and electronic equipment, please contact your dealer or supplier for further information.
[Information on Disposal in other Countries outside the European Union]
These symbols are only valid in the European Union. If you wish to discard these items, please contact your local authorities
or dealer and ask for the correct method of disposal.
Note for the battery symbol (bottom two symbol examples):
This symbol might be used in combination with a chemical symbol. In this case it complies with the requirement set by the
Directive for the chemical involved.
TQZH919-5
3
After turning the power off following the Operating Instructions of the projector,
remove the power plug and check that the surroundings of the lamp unit have cooled
off.
Check that the fan has stopped running.
Have a Phillips screwdriver ready ahead of time.
Remove the screw securing the lamp unit
cover, and then slide the lamp unit cover
a little toward the left, and remove it.
Remove the two screws securing the
fan unit.
Lamp unit cover
Open the fan unit as shown in the
figure.
Remove the screws securing the lamp
units (two for each unit), take hold of
the handles, and remove the lamp units.
Install the new lamp unit.
Use a Phillips screwdriver to securely
tighten the 2 lamp unit fixing screws
(two for each unit).
Lamp unit 2
Handle Lamp unit 1
Lamp unit
Fixing screws
Secure the two screws for securing the
fan unit tightly.
Slide the cover a little toward the right,
and secure it using the screw for
securing the lamp unit cover tightly.
• Firmly install the lamp unit and lamp
unit cover. If not installed firmly, a
protection circuit will function and the
power will not be turned on.
Attention
• The lamp units are constructed in such a
way that the screws in step will not fall
through completely.
Note
Lamp unit replacement procedures
CAUTION
The lamp unit will be hot after it
has been used.
You might get burned if you touch it while it is
still hot.
2
Remove the power plug and confirm that the surroundings of the lamp unit have cooled off.
Be careful when handling a light source lamp. The lamp unit has high internal pressure. If improperly handled,
explosion might result.
A used lamp unit may burst if it is handled violently.
For disposition of used lamps, request an industrial waste disposal contractor.
If you continue to use a lamp after the replacement time, the lamp may break.
Philips screwdriver is necessary when replacing a lamp unit.
Take care not to slip your hand when using a screwdriver.
Accessories
Air filter : 2 pcs.
Precautions on lamp unit replacement
Timing of lamp unit replacement
The lamp units are consumable parts. The lamp brightness decreases gradually as the cumulative operating time
increases, so periodic replacement is necessary. The replacement guideline is 2 000 hours*1, although the lamp
may become dead (will not light) before 2 000 hours*1is reached depending on the characteristics of individual
lamps and other factors such as the operating conditions and the installation environment. Therefore, it is
recommended for the user to keep a spare lamp unit.
The risk of the lamp bursting increases after 2 000 hours*1of operation, so the lamp unit turns off automatically.
After
1 800 hours*2
The indication appears for 30
seconds or until any control button
is pressed.
On-screen indication
After
2 000 hours*1
The indication will not disappear
unless a control button is pressed.
The lamp monitor lights up red
even in standby mode.
REPLACE THE LAMP
Lamp monitor
LAMP
*1This is the operating time if the lamp has only been used at the LAMP POWER “HIGH” setting. If the lamp
has only been used at the LAMP POWER “LOW” setting, the operating time is 3 000 hours. When the lamp
has been switched from LAMP POWER “HIGH” to “LOW”, the cumulative operating time from the
conversion formula below will be 2 000 hours.
Lamp operating time = LAMP POWER “HIGH” operating time + (LAMP POWER “LOW” operating time x 2 ÷ 3).
*2This is the operating time if the lamp has only been used at the LAMP POWER “HIGH” setting. If the lamp
has only been used at the LAMP POWER “LOW” setting, the operating time is 2 700 hours. When the lamp
has been switched from LAMP POWER “HIGH” to “LOW”, the cumulative operating time from the
conversion formula below will be 1 800 hours.
Lamp operating time = LAMP POWER “HIGH” operating time + (LAMP POWER “LOW” operating time x 2 ÷ 3).
• It is not possible to turn on the power unless two lamp units are installed.
Note
WARNING!
Before replacing the lamp, be sure
to disconnect the power cord plug
from the wall outlet.
WARNING!
Do not disassemble the lamp unit.
CAUTION!
Do not use the old lamp unit.
Printed in Japan
M0507-3059
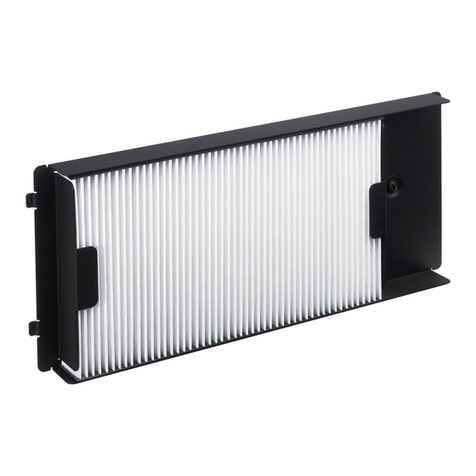
Air filter replacement procedures
When replacing the lamp unit, also replace the air filter.
After turning the power off following the Operating Instructions of the projector,
remove the power plug.
Remove the air filter.
The projector has two same
air filters, one at the right
and the other at the left.
Pull the air filter tab toward
you, and remove it from the
main unit.
Set the air filter.
Install the air filter in the reverse order to step .
Install the air filter into place with the filter material facing the back.
• The air filter must be installed in place when using the projector.
Using the projector without the air filter installed inside, dirt and dust are sucked into the projector,
causing failure.
• Clean the air filter section once every 100 hours or so as a guideline depending on the location of
projector operation.
• Do not rinse off the air filter with water. Doing so will impair the filter’s ability to provide protection
from dust.
Attention
SS0507AM5047 -PS
https://panasonic.net/cns/projector/

This manual suits for next models

1

Other Panasonic Projector Accessories manuals

Panasonic ET-LAL510 User manual

Panasonic

Panasonic ET-LAL510 User manual

Panasonic PressIT TY-WPS1 User manual

Panasonic

Panasonic PressIT TY-WPS1 User manual

Panasonic ET-ELW02 Use and care manual

Panasonic

Panasonic ET-ELW02 Use and care manual

Panasonic ET-LAD10000 User manual

Panasonic

Panasonic ET-LAD10000 User manual

Panasonic ET-UW100 User manual

Panasonic

Panasonic ET-UW100 User manual

Panasonic ET-PFD465 User manual

Panasonic

Panasonic ET-PFD465 User manual

Panasonic ET-LAD40 Guide

Panasonic

Panasonic ET-LAD40 Guide

Panasonic ET-LAV200C User manual

Panasonic

Panasonic ET-LAV200C User manual

Panasonic ET-PKE300 User manual

Panasonic

Panasonic ET-PKE300 User manual

Panasonic ET-PKD75 User manual

Panasonic

Panasonic ET-PKD75 User manual

Panasonic ET-DLE020 User manual

Panasonic

Panasonic ET-DLE020 User manual

Panasonic ET-MWP100G Quick start guide

Panasonic

Panasonic ET-MWP100G Quick start guide

Panasonic Panaboard KX-BP535 User manual

Panasonic

Panasonic Panaboard KX-BP535 User manual

Panasonic ET-LAEF100 User manual

Panasonic

Panasonic ET-LAEF100 User manual

Panasonic ET-LEC701 Guide

Panasonic

Panasonic ET-LEC701 Guide

Panasonic ET-EMF320 User manual

Panasonic

Panasonic ET-EMF320 User manual

Panasonic ET-LAL330 User manual

Panasonic

Panasonic ET-LAL330 User manual

Panasonic ET-D75MC1 User manual

Panasonic

Panasonic ET-D75MC1 User manual

Panasonic ET-D3QW200 User manual

Panasonic

Panasonic ET-D3QW200 User manual

Panasonic ET-SFR330C User manual

Panasonic

Panasonic ET-SFR330C User manual

Panasonic ET-PKL420B User manual

Panasonic

Panasonic ET-PKL420B User manual

Panasonic ET-PAD310 User manual

Panasonic

Panasonic ET-PAD310 User manual

Panasonic ET-LAE200C User manual

Panasonic

Panasonic ET-LAE200C User manual

Panasonic ET-MD77NT User manual

Panasonic

Panasonic ET-MD77NT User manual

Popular Projector Accessories manuals by other brands

QualGear QG-PRO-PM-CA-B installation manual

QualGear

QualGear QG-PRO-PM-CA-B installation manual

MTC MTC-5000 quick start guide

MTC

MTC MTC-5000 quick start guide

XLT Systems XCU 190 installation instructions

XLT Systems

XLT Systems XCU 190 installation instructions

Elite Screens Manual Tab-Tension 2 Series user guide

Elite Screens

Elite Screens Manual Tab-Tension 2 Series user guide

Epson PowerLite 450W Replacement guide

Epson

Epson PowerLite 450W Replacement guide

Screen Research CLCTS installation manual

Screen Research

Screen Research CLCTS installation manual

CHIEF HB-35B installation instructions

CHIEF

CHIEF HB-35B installation instructions

Cisco MX200 G2 installation guide

Cisco

Cisco MX200 G2 installation guide

Barco CM 100 manual

Barco

Barco CM 100 manual

Elite Screens CineGrey 5D Care and use

Elite Screens

Elite Screens CineGrey 5D Care and use

Sanyo LNS-S02K Series Lens Replacement Manual

Sanyo

Sanyo LNS-S02K Series Lens Replacement Manual

Cirrus Tauten Tab Tension Screen user manual

Cirrus

Cirrus Tauten Tab Tension Screen user manual

IOGear Share Pro GWHD101KIT quick start guide

IOGear

IOGear Share Pro GWHD101KIT quick start guide

Audipack Quatro-Fix QFIX-1000TG installation guide

Audipack

Audipack Quatro-Fix QFIX-1000TG installation guide

Espedeo PM-2000A user manual

Espedeo

Espedeo PM-2000A user manual

Draper AeroLift 35 INSTRUCTIONS INSTALLATION & OPERATION

Draper

Draper AeroLift 35 INSTRUCTIONS INSTALLATION & OPERATION

Sharp AN-L10T Operation manual

Sharp

Sharp AN-L10T Operation manual

Kramer VIA GO2 user manual

Kramer

Kramer VIA GO2 user manual

manuals.online logo
manuals.online logoBrands
  • About & Mission
  • Contact us
  • Privacy Policy
  • Terms and Conditions

Copyright 2025 Manuals.Online. All Rights Reserved.