Pandora 3126 User manual

Pandora DXL
Hyundai Solaris (2017-)
This instruction has the status of a recommendation
pandorainfo.com
1
Installation manual
of Pandora service-security systems
with integrated CAN/LIN-bus adapter
for Hyundai Solaris II with RF key
model code 3126.

Pandora DXL
Hyundai Solaris (2017-)
This instruction has the status of a recommendation
pandorainfo.com
2
Before installation
1. Determine the model and car configuration before installation.
2. Connect a security system to PC via a USB cable. Windows (XP, 7, 8, 10) operating
system must be installed on your PC. The PC must have a connection to the
Internet.
3. Enter the programming mode on the system.
4. Run Pandora Alarm Studio (it can be downloaded from
http://pandorainfo.com/support/alarmstudio-firmware/ )
5. Make sure the actual version of firmware is installed on your system. Update the
firmware if it is required.
Carmaker can make changes in electrical schemes of cars and CAN commands.
Therefore, test whether reading of CAN statuses and CAN command execution are
performed correctly before installation. If any CAN status is not read or any CAN
command is not executed, make analog connection and disable CAN status or CAN
command in Alarm Studio.
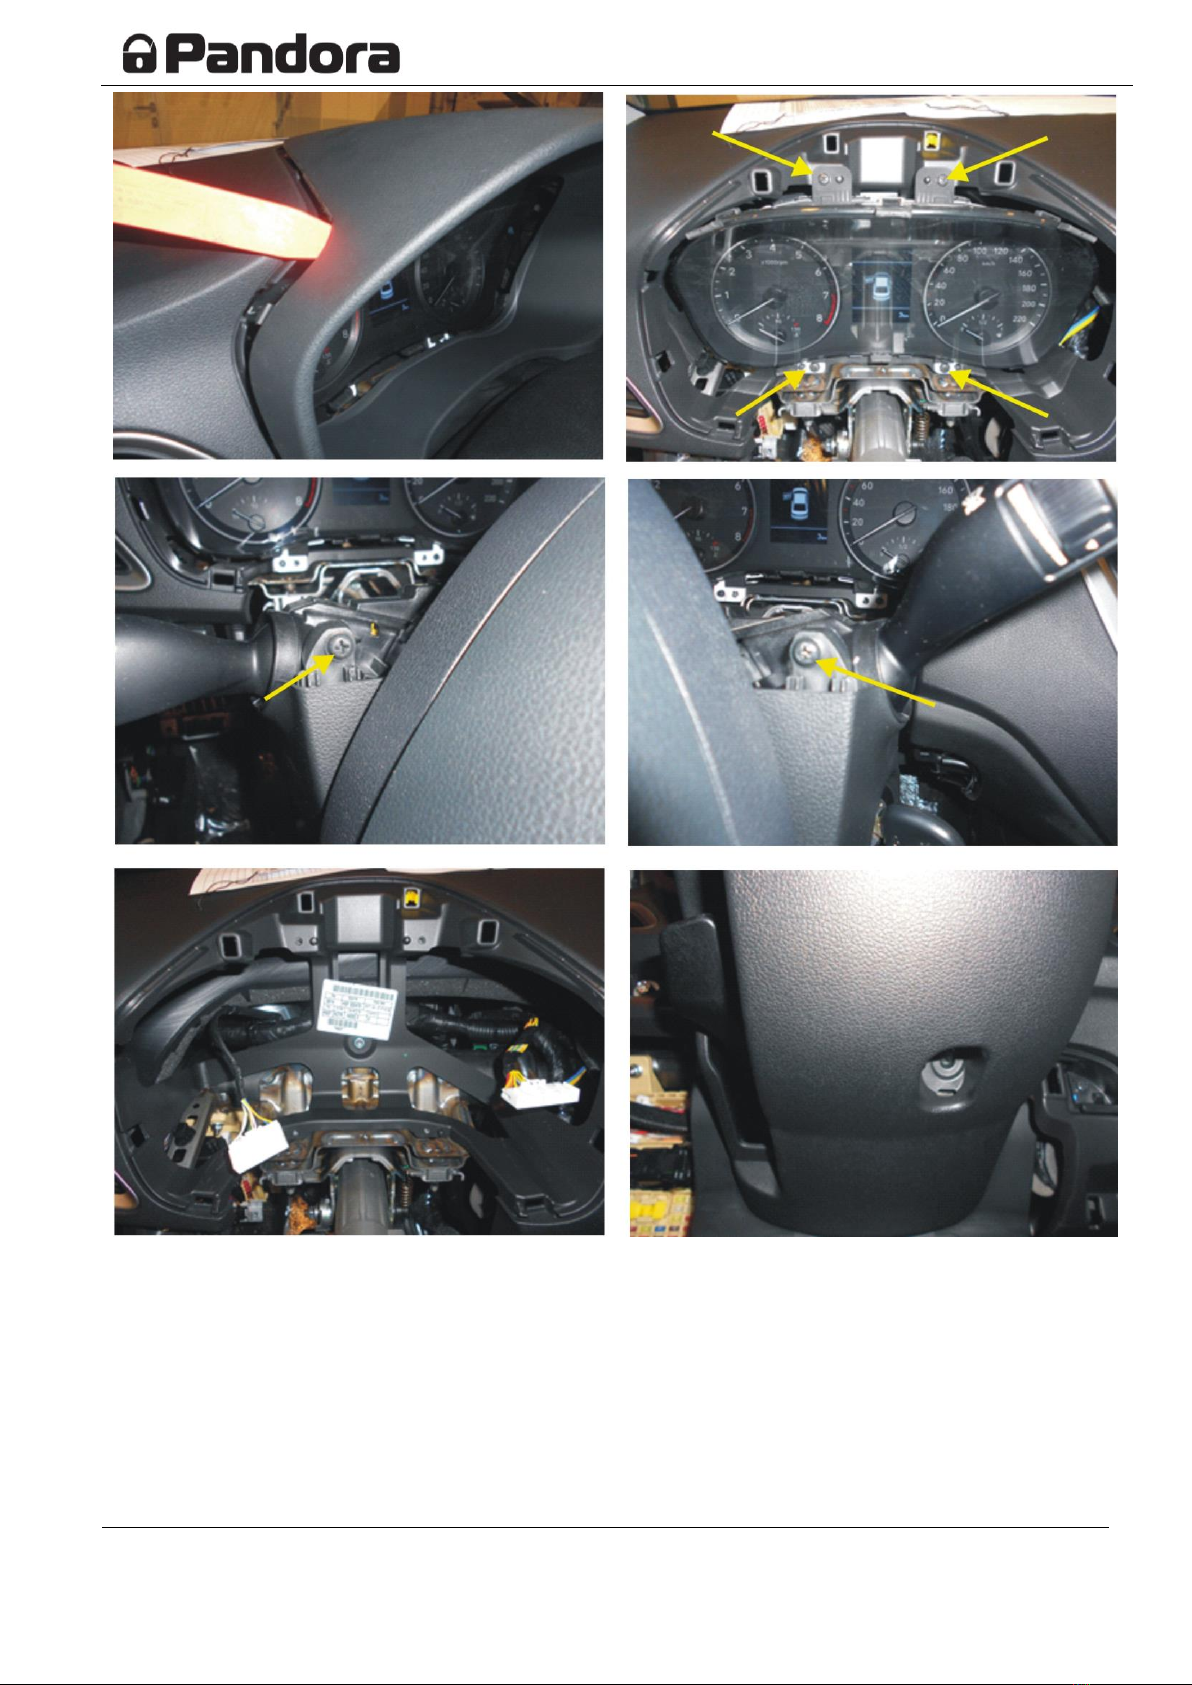
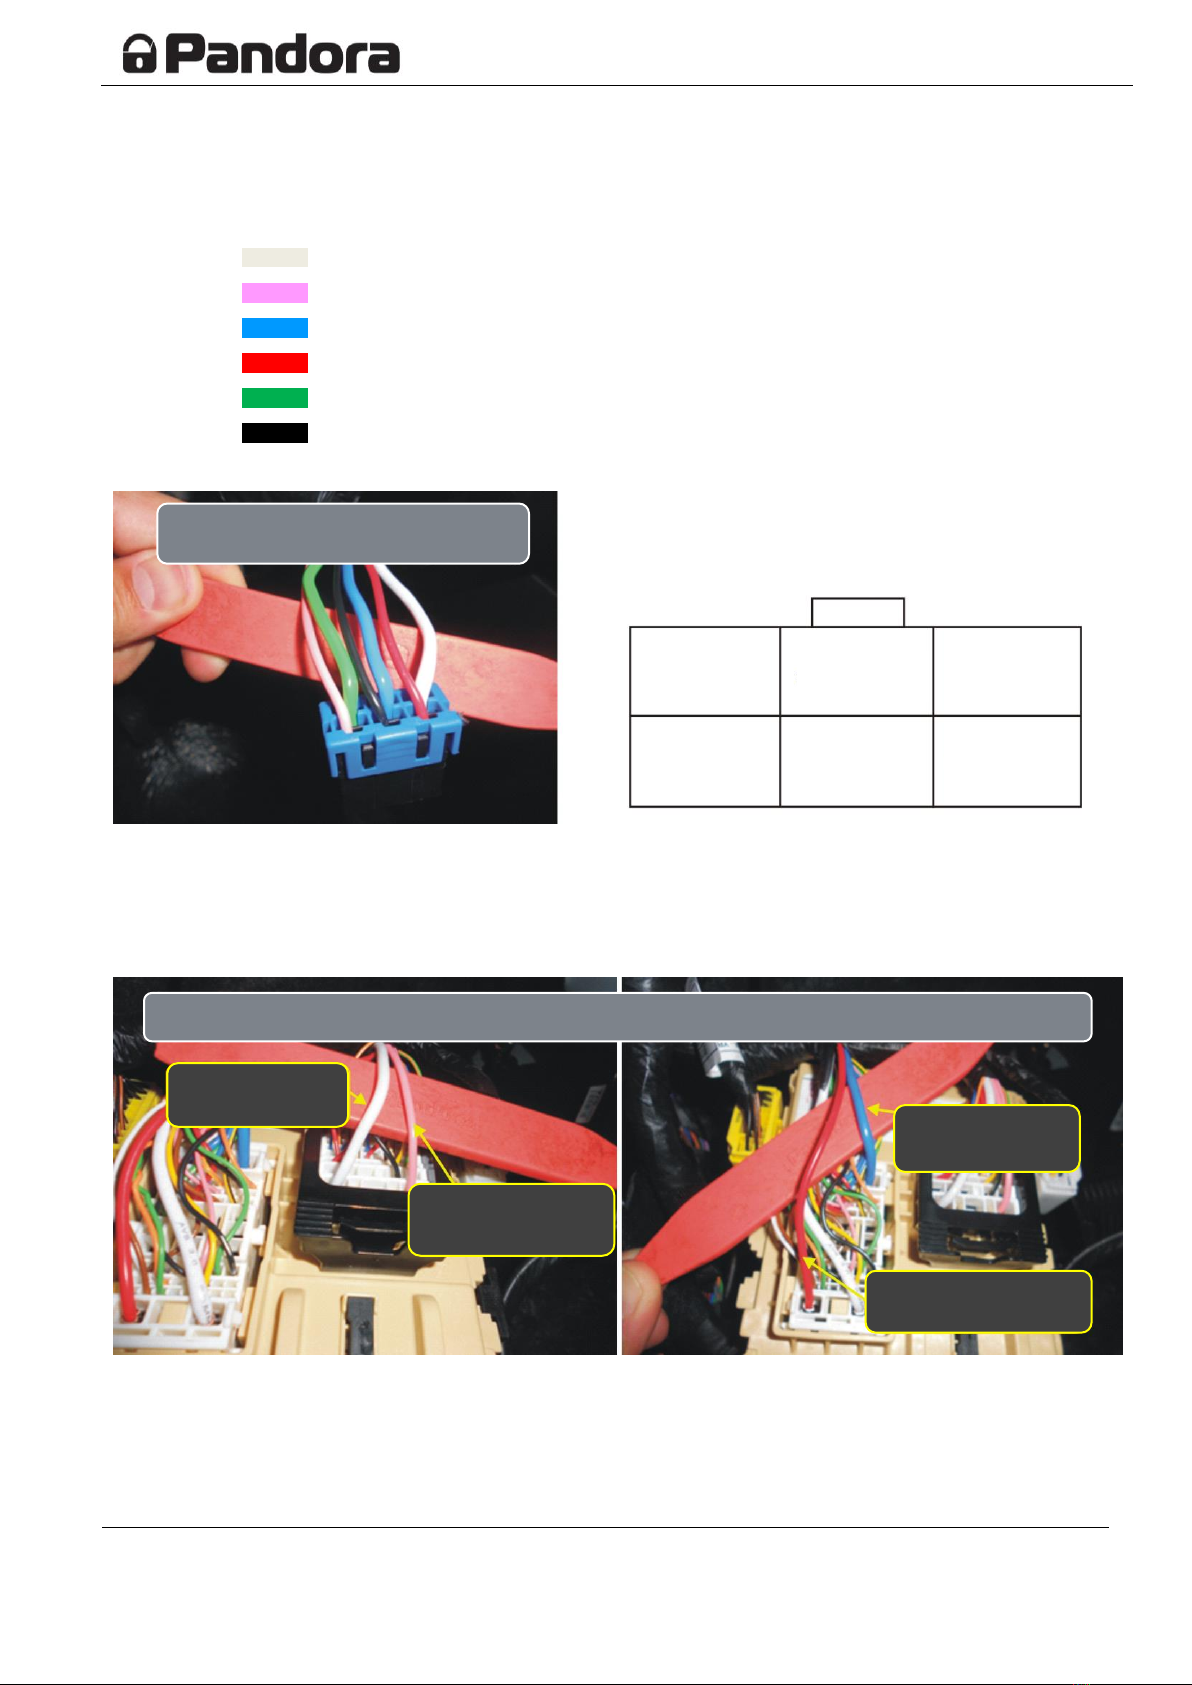
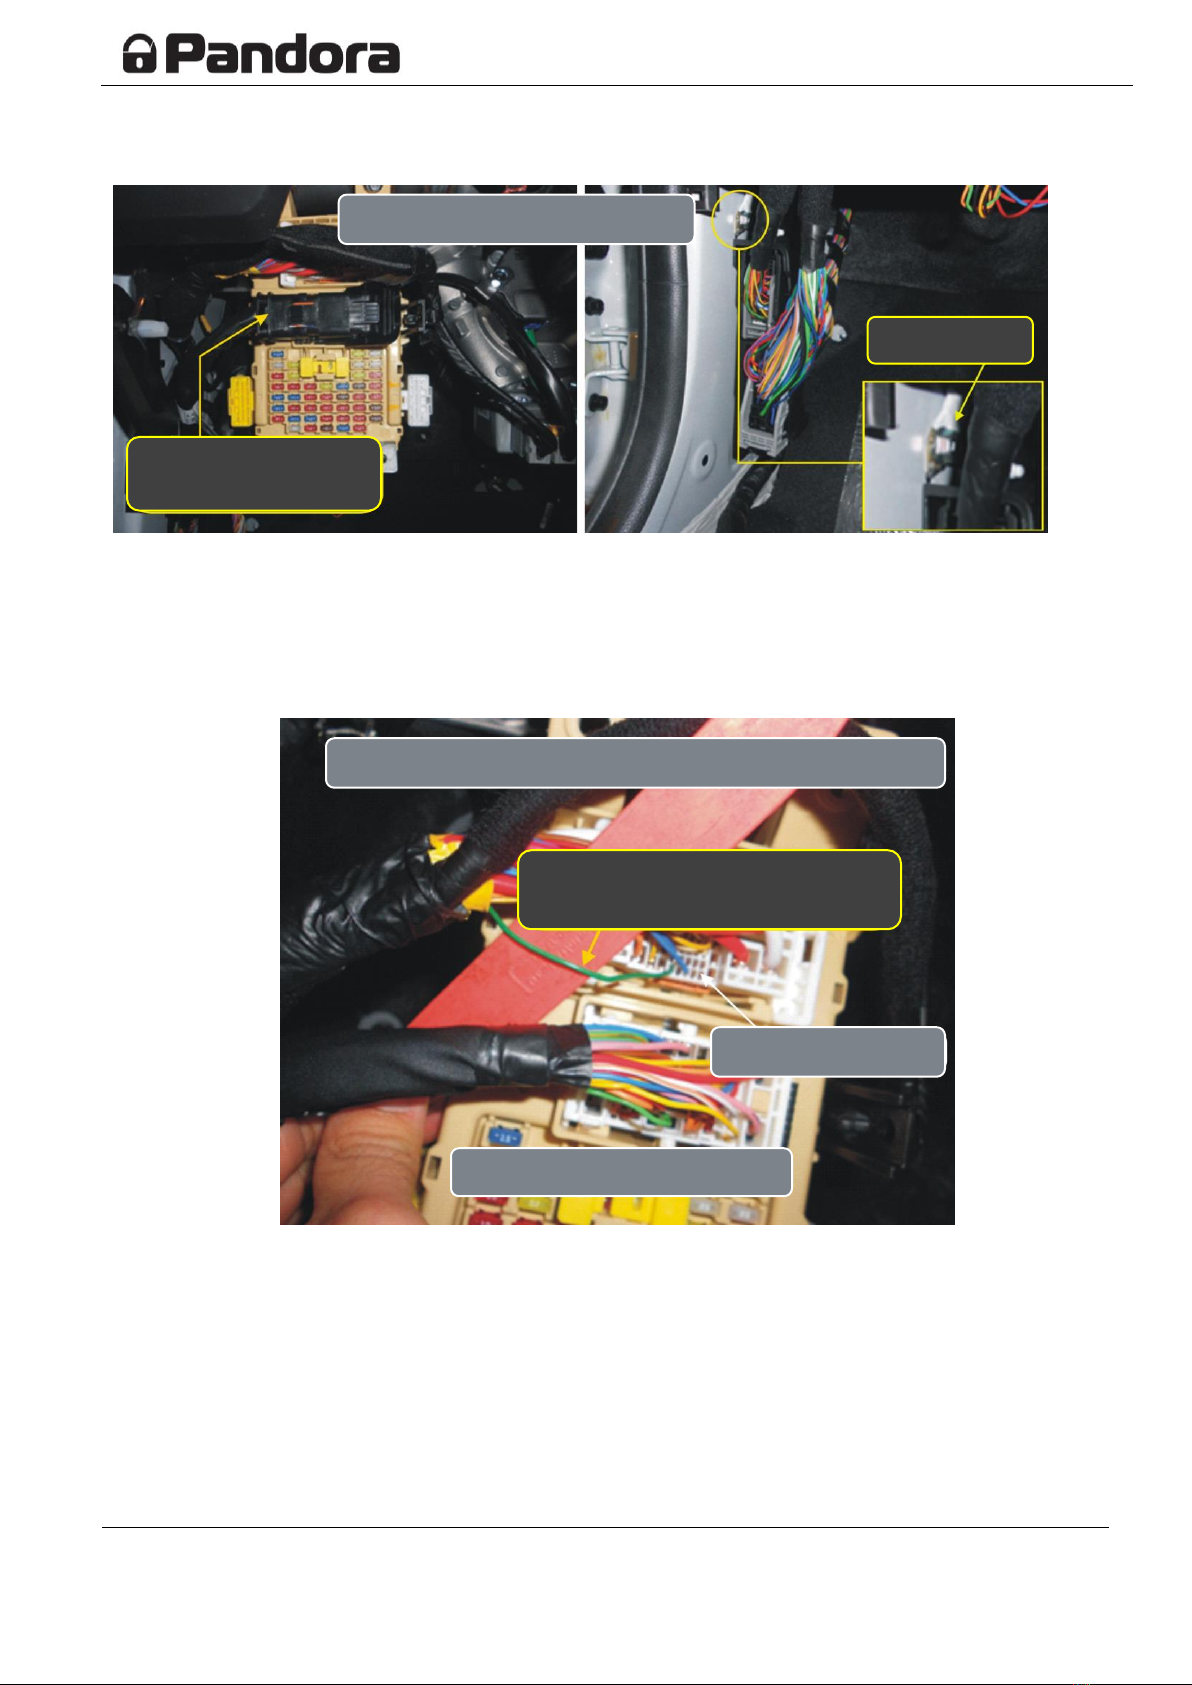
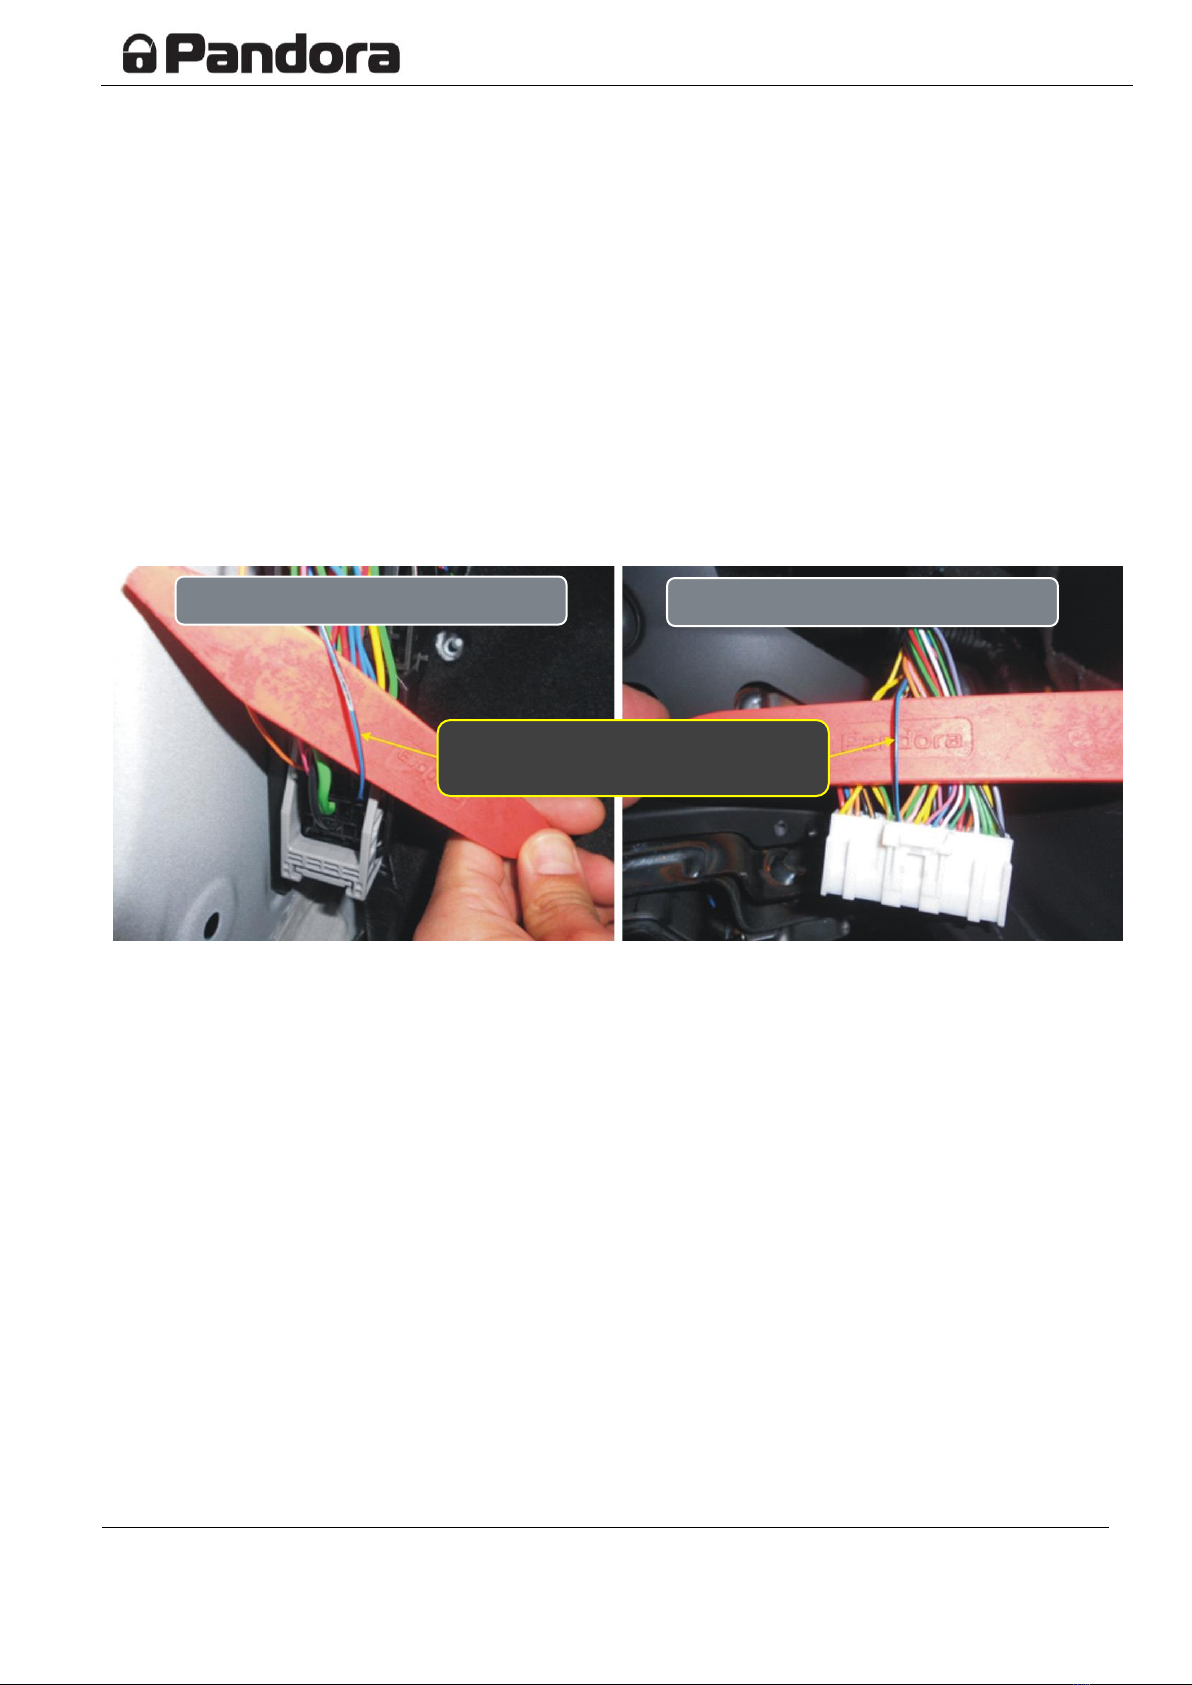
WARNING! This installation manual has the status of recommendations. The system
must be installed by a certified technician. Wires connections and insulation must be
carried out in accordance with the requirements of the automaker. It is permitted to
place wires near sharp elements and moving parts of a car. Wiring through the holes
must be carried out using special rubber bushings. The car electrical scheme and color
of wires can be changed by automaker, so suggested connection points should be
checked before installation.

Pandora DXL
Hyundai Solaris (2017-)
This instruction has the status of a recommendation
pandorainfo.com
3
Readable statuses, commands that are performed via CAN-bus
Readable STATUSES of car state
Executable COMMANDS
Notes
Driver’s door
Front right door
Rear left door
Rear right door
Front hood
Trunk
Ignition
Brake pedal
Marker lights
Hand brake
Parking (automatic transmission)
Tachometer
Slave mode
Slave mode via trunk
Original security system status
Speed
Fuel level
Interior temperature
Engine temperature
Outside temperature м
Locking/unlocking doors
Lifting (closing) all windows
Light indication
Arming original security system
Disarming original security system
Opening trunk
Door opening simulation after
remote start
Engine blocking via CAN
Validator buttons
H –hazard lights,
P –Parking lamps
●
●
●
●
●
CAN2: CanHigh-red wire,
CanLow- blue wire;
●
●
●
●
●
●
●
—
●
●
●
—
●
●
—
—
—
—
—
—
●
●
P
—
—
●
●
—
—
CAN1: CanHigh-yellow
wire, CanLow- black
wire;
Placing units (modules) and connections
RF-module
location
Base unit
location
Main points of
connection

Pandora DXL
Hyundai Solaris (2017-)
This instruction has the status of a recommendation
pandorainfo.com
4
Removing plastic panels to install and connect

Pandora DXL
Hyundai Solaris (2017-)
This instruction has the status of a recommendation
pandorainfo.com
5

Pandora DXL
Hyundai Solaris (2017-)
This instruction has the status of a recommendation
pandorainfo.com
6
Connecting circuits for remote start
There are 2 options for remote start connection: ignition switch and fuse box.
Option №1. Ignition switch connection.
Wires of ignition switch connector:
White
+12V
Starter
Pink
+12V
Ignition 1
Blue
+12V
Ignition 2
Red
+12V
ACC
Green
+12V
Power
Black
+12V
Power
Option №2. Fuse box connection.
Remote start circuits can be also connected in the fuse box. The connection is performed to the wires
of connectors from the engine side. Wire colors are the same as the wires in the ignition switch.
Clutch pedal pressing simulation (for cars with manual transmission)
Cars with manual transmission require to simulate clutch pedal pressing during remote start
procedure. To do this, apply +12V to pink wire of the clutch pedal pressing detector connector at the
moment of starter rotation (use “Starter” channel).
Ignition switch connector
Remote start circuits in the fuse box
Pink (+12V)
Ignition 1
White (+12V)
Starter
Blue (+12V)
Ignition 2
Red (+12V)
ACC
Pin assignment of the ignition switch connector
View from the wires side
+ 12V
Ignition 2
Starter
Ignition 1
+ 12V
ACC

Pandora DXL
Hyundai Solaris (2017-)
This instruction has the status of a recommendation
pandorainfo.com
7
The main connection circuits
CAN buses connection
CAN1 connection
White connector of the dashboard:
Yellow
CAN-H
Black
CAN-L
CAN2 connection
Diagnostic connector:
Red
CAN2-H
Blue
CAN2-L
Clutch pedal pressing detector
Pink
+12V
Additional relay
(-) “Ground” on switching
on immobilizer bypass or
rotating starter
CAN1 connection
CAN2 connection
Black CAN-Low
Yellow CAN-High
Red CAN-High
Blue CAN-Low

Pandora DXL
Hyundai Solaris (2017-)
This instruction has the status of a recommendation
pandorainfo.com
8
+12V and Ground connections
Power (+12V) can be connected to red thick wire of the fuse box socket.
Ground (-) can be connected to the terminal on the front kick panel (connection under the nut).
Handbrake trigger
Handbrake trigger can be connected in the top connector of the fuse box. Green wire becomes
grounded when handbrake is activated.
Power connection
Red thick wire
(+12V)
(-) Ground
Handbrake trigger connection
Green
(-) handbrake trigger
The top connector
The fuse box

Pandora DXL
Hyundai Solaris (2017-)
This instruction has the status of a recommendation
pandorainfo.com
9
Engine operation control
Tachometer
This configuration of cars allows to control tachometer signal via CAN bus. The other option is analog
connection to generator status wire.
Generator
To determine whether the engine is running, connect to blue-black wire of the dashboard connector or
to the blue-black wire of the left kick-panel connector. These wires become grounded when the
generator is working.
Use one of the system inputs (-) (INP).
Apply the next settings in Alarm Studio:
-Disable “Control via tachometer” and enable “Control according to battery charge light” in
Automatic start settings
-Assign any free input as “Charger light”
The left kick panel connector
The dashboard connector
Blue-black (-)
on generator operation starting

Pandora DXL
Hyundai Solaris (2017-)
This instruction has the status of a recommendation
pandorainfo.com
10
Light signalization connection (Hazard lights)
Hazard light signalization can be connected in the BCM module above the accelerator pedal.
For configuration with CL control buttons located on the key: the wire is located in the BCM module
connector on the engine compartment side. The orange wire, impulse control by negative potential (-)
(Ground).
For base configuration cars: the wire is located in the connector of the BCM bottom side. The orange
wire, impulse control by negative potential (-) (Ground).
The BCM module
above the
accelerator pedal
For cars with CL control buttons
located on the key
For base configuration of cars
Orange (-) Ground

Pandora DXL
Hyundai Solaris (2017-)
This instruction has the status of a recommendation
pandorainfo.com
11
Doors and trunk triggers (base configuration of a car)
The connection of triggers is performed in the harness of sill plate wires.
Green
(-)
Doors opening trigger
Pink
(-)
Trunk opening trigger
Brake pedal pressing trigger
Brake pedal pressing trigger can be connected to the blue wire of the brake pedal connector. +12V
appears on this wire when the pedal is pressed.
Doors and trunk opening triggers
Green (-) trunk
trigger
Pink (-) doors
trigger
Blue wire +12V on
brake pressing
Brake pedal pressing trigger
Brake pedal connector

Pandora DXL
Hyundai Solaris (2017-)
This instruction has the status of a recommendation
pandorainfo.com
12
Control over central lock
Central lock control connects in the front driver kick panel connector. The control is performed by a
short negative pulse (-).
Yellow
(-)
Close CL
White
(-)
Open CL
Bypass of original immobilizer
Connect green-orange LIN wire or white LIN OUT wire (see wiring diagram) of Pandora system to
Blue-Orange wire of EMS COM going to the kick panel connector from the driver side.
CL control connection
Yellow wire
(-) Close CL
White wire
(-) Open CL
Left front kick-
panel
Bypass of original immobilizer
Blue-orange
EMS COM

Pandora DXL
Hyundai Solaris (2017-)
This instruction has the status of a recommendation
pandorainfo.com
13
System settings
Apply the next settings in Pandora Alarm Studio:
1. Remote engine start logic is configured as standard start logic of analog key ignition switch.
2. Enable “Use LIN for Bypass of KIA/Hyundai configuration with Start/Stop button and key (the
new version of immobilizer)” item in the Original immobilizer bypass settings.
Menu
(number, name)
Submenu
(number, name)
Function
(number, name)
Value
2. Automatic start
2.3. Original
immobilizer bypass
2.3.5. Use LIN for bypass
on KIA, HYUNDAI
KIA/ HYUNDAI
Start/Stop and
key (new
immobilizer
version)
3. Engine operation control configuring.
If the engine operation control is performed by tachometer via CAN, this function
Menu
(number, name)
Submenu
(number, name)
Function
(number, name)
Value
2. Automatic start
2.1. Automatic
start settings
2.1.3. Control via
tachometer
Digital CAN
If the engine operation control is performed by generator status, enable “Control according to
battery charge light” item.
Menu
(number, name)
Submenu
(number, name)
Function
(number, name)
Value
2. Automatic start
2.1. Automatic
start settings
2.1.4. Control according to
battery charge light
Enable
4. Enter programming level 17 or 21 (it depends on the system), LED indicator will be lit green.
Switch on the ignition. The system will confirm correct connection (EMS COM wire) with green
LED indicator flashes for several seconds. Press VALET button to save.
Other Pandora Automobile Accessories manuals
Popular Automobile Accessories manuals by other brands

Nokia
Nokia HF-33W - Wireless Plug-in Car Handsfree user guide

Becker
Becker IL-BKR Quick start installation guide

Digitax
Digitax X-One android Installation and programming manual

EUFAB
EUFAB AMBER 3 operating instructions

Crux
Crux SWRGM-49L manual

Discount Car Stereo
Discount Car Stereo CORVETTE IL-C5 Quick start installation guide