manuals.online logo
Brands
  1. Home
  2. •
  3. Brands
  4. •
  5. panthera
  6. •
  7. Wheelchair
  8. •
  9. panthera Micro User manual

panthera Micro User manual

Micro
panthera
panthera
INSTRUCTIONS FOR
INSTRUCTIONS FOR
USE
USE
Instructions for use Micro Instructions for use Micro
12
Contents
Intended use s 2
Adaptation s 3
Maintenance s 6
Safety s 7
Intended use
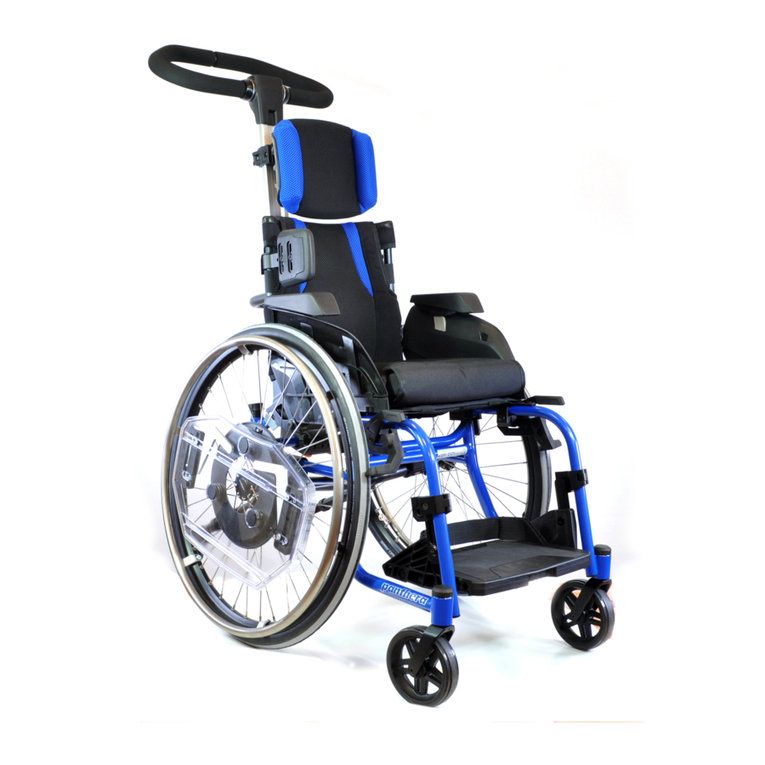
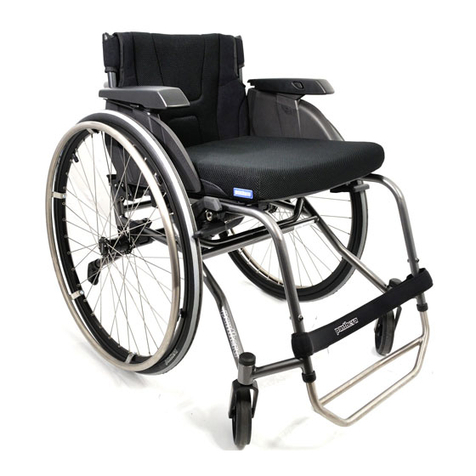
Panthera Micro is a wheelchair for our youngest users. We have done everything
possible to make this wheelchair easy to manoeuvre. It is designed for use indoors
and should not be used outdoors. Users of the Panthera Micro are probably bet-
ween one and five years old and find it difficult to manoeuvre other wheelchairs by
themselves. The child may have an electric wheelchair for outdoor use.
It is especially important that you read page 7 in these instructions since they
concern your safety.
Make sure you receive the chair you ordered:
Check the width of the chair. Measure the outer dimensions of the seat. These
should be 24 or 27 cm according to your order.
Conduct a technical inspection of the chair:
The rear wheel axles should move smoothly in and out of the casing.
The button at the centre of the hub should spring out when the rear wheels
have been inserted.
The caster fork can be easily rotated.
The anti-tip-device is fastened.
If any of the points above are not satisfactory please contact us at Panthera Produc-
tion AB before proceeding to use the chair.
•
•
•
•
•
Assembly and dismantling
When transporting the chair you should remove
the rear wheels.
To remove the rear wheels, press in the button
at the centre of the hub as in figure 1. Then pull
the wheel straight out. To insert the wheels, press
in the button and push the axle into the hole in
the casing. Then push the wheel all the way in,
release the button and pull out to check that the
wheel is securely in place and the button springs
back out.
Figure 1. Button for quick
release hub.
Instructions for use Micro Instructions for use Micro
3 4
3) Height of the footrest
The footrest (see figure 3) can be adjusted up or down by
changing the hole for the attachment. Remove the screws
attaching the foot plate. You will now be able to move
the footrest up or down to one of the alternative height
positions. You should have the footrest at a height which
provides support for the thighs on the seat at the same
time as the feet are supported on the footrest.
4) Length of the footrest
The footrest can be turned round so that the supporting
plate faces backwards or forwards. Remove the two
screws attaching the footrest. Turn the plate round and
replace and tighten the screws.
2) Tension of the seat upholstery
The rear section of the seat upholstery can be made
tighter or looser by adjusting the Velcro band under-
neath the seat as shown in figure 2. This allows you
to vary the sitting height by about 2 cm up or down. Figure 2. Band for tighte-
ning seat upholstery.
Figure 3. Screw for the footrest.
Adaptation
When adapting the chair to suit the child’s sitting position and provide the desired
mobility, it is important that you make the following adjustments in the correct
order. First, adjust the sitting position and after that adjust the balance of the chair.
This sequence is important since when you change the sitting position in the chair
the balance of the chair is also affected.
You should make these adjustments in the following order:
1) Length of the seat upholstery
2) Tension of the seat upholstery
3) Height of the footrest
4) Length of the footrest
5) Tension of the back upholstery
6) Balancing the wheelchair
1) Length of the seat upholstery
Lift the flap on the topside of the seat and move
it backwards or forwards along the frame tubing
till the seat is of suitable length. Re-attach the
flap to the Velcro on the topside of the seat.
5) Tension of the back uphol-
stery
The back upholstery can be tightened or loosened
by adjusting the Velcro band at the back.The back
upholstery also has a flap fastened with Velcro
under the seat upholstery. This can be moved back
or forwards to obtain the required tension in the
lower section of the back upholstery (known as
the seat bucket). By adjusting these things you
can form the lower part of the back upholstery to
suit the shape of your back and obtain good sup-
port for your lower back. Start by loosening the
band and sit as far back in the chair as you can.
Then tighten the band to give you good support.
If it feels as though you are not sitting far back
enough in the chair it may be because the back
upholstery flap is fastened too far forward under
the seat. Relax this flap and move it back.
Figure 4. Back upholstery.
Figure 5. Back axle attachment.
6) Balancing the wheelchair
The balance of the wheelchair can be ad-
justed by moving the rear wheels back or
forwards (see figure 5). The further forward
you position the rear wheels the more the
chair will be ‘rear balanced’. This makes the
chair easier to manoeuvre and it will also
be easier to tip up onto the rear wheels, for
instance, when negotiating curbs, thresholds
and so on. The chair should not be balanced
too far to the rear because this may feel
unstable due to increased risk of tipping
backwards. It is important that you take
time trying out a balance that suits the body
and driving technique so that you adapt the
chair to be as easy to drive as possible.
Instructions for use Micro Instructions for use Micro
5 6
Figure 6. Balancing.
How to move the rear wheels:
First remove the rear wheels.
Loosen the bolts under the back axle attachment on both sides as shown in
figure 5.
You will now be able to push the wheel attachment forward or back along the
horizontal frame tubing. It is important that you have the wheel attachment
in the same forward position on both sides of the chair. You can check this by
measuring the distance between the forward section of the vertical tubing and
the rear section of the wheel attachment using a tape measure or ruler, and
check that the distance is the same on both sides as shown in figure 6.
Tighten the bolts to ensure the back axle is securely attached.
Consider that the effort you put into adapting the chair will provide long-term be-
nefits. Try out different adaptations over a few days and make sure that you have
found the best sitting position and balance of the chair. After a month or so you
should check again to make sure that everything is working correctly.
1.
2.
3.
4.
Maintenance
Your Panthera is constructed to be virtually maintenance free. A few parts do re-
quire regular checking however.
Once a month you should:
Lubricate the rear wheel axles. Remove the wheel and distribute some drops
of oil over the axle. You should do this more often if you rarely remove the
wheels.
Pump up the tyres. The tyres can be pumped by screwing the top off the valve
and filling with air using an appropriate valve adapter. The tyre can take 8 kg
of pressure.
Clean the caster fork casing (between the wheel and the fork). Hair and dust
collect here which can damage the bearing. Loosen the nut using key no. 10
while holding the bolt with key no. 10. Remove the bolt and then the wheel.
Clean the washers between the wheel and the fork and wipe the outside of the
wheel bearing with a cloth. Drop some oil into each bearing. Reassemble the
parts.
Wash the seat upholstery, the back upholstery and the cushion cover in 40 de-
grees machine wash when necessary.
Wipe the chair chassis over with car shampoo or washing-up liquid and a
damp cloth. If very dirty you can use a degreasing agent. Lubricate all movea-
ble parts with a universal lubricant (5-56, WD-40) after cleaning.
Guarantee and lifetime
The life of a Panthera depends on how much wear and tear it is exposed to and how
thorough you are with maintenance.
Guarantee: We offer a seven year factory guarantee on the chassis. For other parts
there is a guarantee of 12 months.
Maximum weight: 30 kilos.
•
•
•
•
•
panthera
Panthera Production AB
Gunnebogatan 26, 163 53 Spånga
Telefon 08-761 50 40 Fax 08-621 08 10
[email protected] www.panthera.se
Safety
A Panthera wheelchair is designed to be as easy to drive as possible and because of
this it reacts quickly to the actions you perform. If you perform the wrong actions the
chair can tip backwards if you don’t have anti-tips. The chair can potentially tip up and
it is not possible to issue a warning regarding all the circumstances in which that might
occur. The most important safety measures you can take include ensuring that you
have tested the chair thoroughly and spend time practicing your wheelchair technique.
If you have any questions about wheelchair technique you should contact the person
who prescribed the chair/your therapist. If they are unable to help you, please do not
hesitate to contact us at Panthera Production AB. We would like to include some points
here that may be helpful for your safety.
Intended for indoor use only
The reason why the chair only has a single front caster is to make turning easier,
but this also means that the chair can tip sideways more easily if driven at speed
over an obstacle or a dip in the surface. This may also happen indoors but is con-
siderably less likely.
Most small children need a safety belt to stop them loosing their balance and
falling out of the chair. A simple belt is provided with the chair but if this is not
sufficient the child should not use the chair until a prescriber has obtained an alter-
native safety belt that ensures adequate protection.
Sitting posture
Incorrect sitting posture can result in pressure sores. If you are unsure you should
contact an approved prescriber immediately.
The seat is intended for use with a cushion.
Other children may hurt themselves on the wheels
Spoke guards make the chair heavier to drive and for this reason they are not
supplied as standard equipment. However, if the child spends time with other
children there is a risk that other children may get their fingers/hands caught bet-
ween the spokes so spoke guards may be necessary.
Technical check
Once the chair has been adapted for the user you should check that all the screws
and nuts are securely tightened.
Always check that the rear wheels are securely in place after being inserted.
•
•
•
•
•
•
•
Bruksanvisning Micro eng - 2005-06-01
Artikelnummer 881 21 10

Other panthera Wheelchair manuals

panthera Freewheel User manual

panthera

panthera Freewheel User manual

panthera Bambino User manual

panthera

panthera Bambino User manual

panthera Bambino 3 User manual

panthera

panthera Bambino 3 User manual

panthera S2 User manual

panthera

panthera S2 User manual

panthera Freewheel-kit Bambino 3 User manual

panthera

panthera Freewheel-kit Bambino 3 User manual

panthera S2 User manual

panthera

panthera S2 User manual

panthera 3302510 User manual

panthera

panthera 3302510 User manual

panthera X User manual

panthera

panthera X User manual

panthera Bambino 3 User manual

panthera

panthera Bambino 3 User manual

panthera S3 Operating instructions

panthera

panthera S3 Operating instructions

panthera Freewheel User manual

panthera

panthera Freewheel User manual

panthera MICRO 3 User manual

panthera

panthera MICRO 3 User manual

panthera U3 Light Y-Front User manual

panthera

panthera U3 Light Y-Front User manual

panthera CARBON 4 User manual

panthera

panthera CARBON 4 User manual

panthera S3 User manual

panthera

panthera S3 User manual

panthera X User manual

panthera

panthera X User manual

panthera S2 User manual

panthera

panthera S2 User manual

panthera S3 User manual

panthera

panthera S3 User manual

panthera MICRO 3 User manual

panthera

panthera MICRO 3 User manual

panthera S3 User manual

panthera

panthera S3 User manual

panthera S3 User manual

panthera

panthera S3 User manual

panthera 4420730 User manual

panthera

panthera 4420730 User manual

panthera BRAKE BAMBINO 3 User manual

panthera

panthera BRAKE BAMBINO 3 User manual

panthera MICRO 3 User manual

panthera

panthera MICRO 3 User manual

Popular Wheelchair manuals by other brands

Karma KP-80 owner's manual

Karma

Karma KP-80 owner's manual

Handicare Emineo Assembly instructions

Handicare

Handicare Emineo Assembly instructions

Etac M100 manual

Etac

Etac M100 manual

RGK CHROME user manual

RGK

RGK CHROME user manual

AAT CR2304 Translation of the original user manual

AAT

AAT CR2304 Translation of the original user manual

Permobil BodiLink HS Operation manual

Permobil

Permobil BodiLink HS Operation manual

Care & Independence COMFORT VALUE CVSC/ATT user guide

Care & Independence

Care & Independence COMFORT VALUE CVSC/ATT user guide

alerta ALT-1100 user manual

alerta

alerta ALT-1100 user manual

Pride JAZZY 614 series owner's manual

Pride

Pride JAZZY 614 series owner's manual

Decon wheel R82 Kudu Assembly instructions

Decon wheel

Decon wheel R82 Kudu Assembly instructions

Invacare AVIVA FX user manual

Invacare

Invacare AVIVA FX user manual

Tendercare MINI TILT user manual

Tendercare

Tendercare MINI TILT user manual

GODONNIER 134700 manual

GODONNIER

GODONNIER 134700 manual

KMINA K30018 manual

KMINA

KMINA K30018 manual

progeo JOKER ENERGY user manual

progeo

progeo JOKER ENERGY user manual

NRS Healthcare N29210 User instructions

NRS Healthcare

NRS Healthcare N29210 User instructions

Decon wheel MED3056 Assembly instructions

Decon wheel

Decon wheel MED3056 Assembly instructions

CareCo Lynx 4 user manual

CareCo

CareCo Lynx 4 user manual

manuals.online logo
manuals.online logoBrands
  • About & Mission
  • Contact us
  • Privacy Policy
  • Terms and Conditions

Copyright 2025 Manuals.Online. All Rights Reserved.