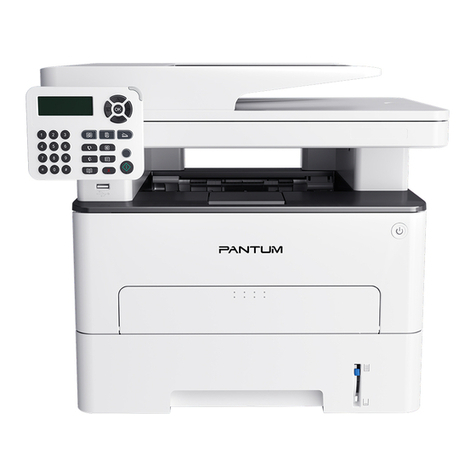
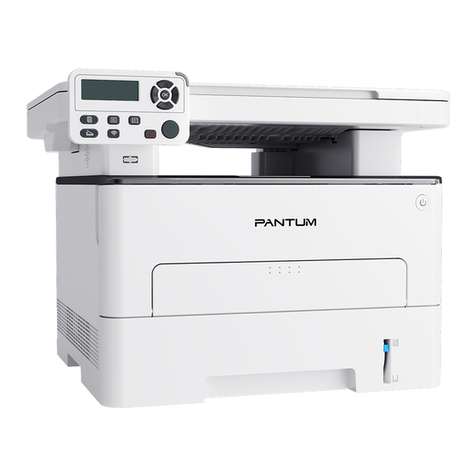
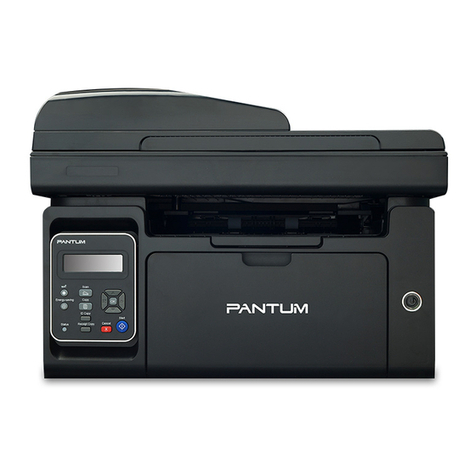
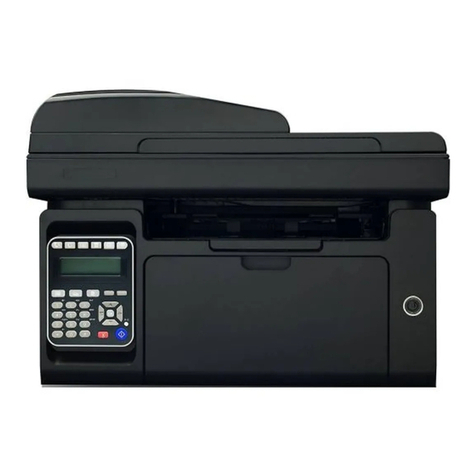
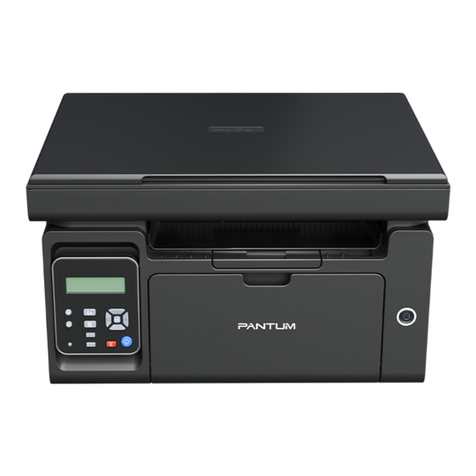
Pantum M6700 Series User manual

Pantum M6700/M6800 Series
Pantum M7100/M7200 Series
Monochrome Laser MFP
User Guide
It is recommended that you read this Guide carefully before using the printer

I
Welcome to the Pantum series products!
We heartily appreciate your using of Pantum series products!
To protect your vital interests, please carefully read the following statements.
7UDGHPDUN
Pantum and Pantum logos are registered trademarks of Zhuhai Pantum Electronics Co.,Ltd.
Microsoft®, Windows®, Windows Server® and Windows Vista® are trademarks registered by
Microsoft Corporation in the United States or other countries/regions.
Mopria®, the Mopria® Logo and the Mopria® Alliance logo are registered trademarks and
service marks of Mopria Alliance, Inc. in the United States and other countries. Unauthorized
use is strictly prohibited.
Mac and the Mac logo are trademarks of Apple Inc., registered in the U.S. and other
countries.
AirPrint and the AirPrint logo are trademarks of Apple Inc.
Wi-Fi Direct,Wi-Fi Protected Setup(WPS),WPA,WPA2,and Wi-Fi Protected Access are marks
of the Wi-Fi Alliance.
The ownership to the names of the software in this User Guide belongs to their respective
companies in accordance with corresponding license agreement, and they are referred for
instructions only.
&RS\ULJKW
The Copyright of this User Guide is owned by Zhuhai Pantum Electronics Co.,Ltd.
It is prohibited to copy, translate, modify and transmit this User Guide by any means or in any
form without the prior written consent of Zhuhai Pantum Electronics Co.,Ltd.
Version:V1.0
3UHIDFH
/HJDO1RWLFH
All other product and brand names herein may be the registered trademarks, trademarks or
service marks of their respective owners, and they are referred for instructions only.

II
'LVFODLPHU
For a better user experience, Zhuhai Pantum Electronics Co.,Ltd. reserves the right to make
changes to the User Guide. The information contained herein is subject to change without
notice.
Users are responsible for any damages arising from failing to follow this User Guide.
Meanwhile, except the express warranty made in the product maintenance manual or service
commitment, Zhuhai Pantum Electronics Co.,Ltd. does not make any express or implied
warranty or guarantee to this User Guide (including composing or words).
Using this product to copy, print, scan certain documents or images or make other forms
of operations may be prohibited by the local laws. If you are uncertain about the legality of
using this product for certain documents or images, you should consult your legal advisor in
advance.
The product can only be used safely in the non-tropical areas at an altitude no higher than
2000 meters.

III
/DVHU6DIHW\
The laser radiation is harmful to the human body. Since laser components are completely
sealed in the printer, laser radiation will not leak. To avoid laser radiation, please do not
randomly disassemble the printer!
The printer follows the provisions of Class 1 laser products under CFR standard. The printer
has a Class III b laser diode, which has no laser radiation leakage among laser components.
The laser components shall complies with the requirements of: U.S. Code of Federal
Regulations, 21 CFR 1040, IEC 60825-1
The following label is attached to the laser components inside the printer:
6DIHW\:DUQLQJ
Please note the following safety warnings before using the printer:
There is high-voltage electrode inside the printer. Before
cleaning the printer, make sure the power is turned off!
Plugging and unplugging the power cord plug with a
wet hand can result in an electric shock.
The fuser unit is attached with a high temperature
warning label. Please do not remove or damage
this label.
The fuser unit is hot when and after
printing. Touching the fuser unit (the
shaded area as shown) may cause burns!
:DUQLQJ
6DIHW\3UHFDXWLRQV

IV
3UHFDXWLRQVEHIRUH8VLQJWKH3ULQWHU
1.Read and understand all instructions.
2.Familiarize yourself with the basic principles associated with operating electrical appliances.
3.Comply with all warnings and instructions marked on the equipment or specified in th
manual supplied with the equipment.
4.If the operating instructions conflict with the safety information, please refer back to
the safety information, as you may have misunderstood the operating instructions. If you
cannot resolve the conflicts, please call the Customer Service Hotline or contact a servic
representative for help.
5.Before cleaning the equipment, remove the power cord from the AC power supply outlet.
Do not use liquid or aerosol cleaners.
6.Please make sure that the equipment is put on a stable desktop surface to avoid serious
damage caused by the falling of the equipment.
7.Do not put the equipment near a radiator, an air conditioner, or a ventilation pipe.
8.Do not put any articles on the power cord. Do not put the equipment at the place where its
power cord could be stepped on by people.
9.Outlets and extension cords must not be overloaded. This may reduce performance and
could result in fire or electric shock.
10.Do not allow pets to chew on the AC power cord or the computer interface cable.
11.Do not allow sharp objects piercing equipment slot, so as to avoid contact with the high-
voltage device, which otherwise may result in fire or electric shock. Take care not to spill
liquids onto the equipment.
12.Do not disassemble the equipment so as to avoid the risk of electric shock. Necessary
repairs may only be carried out by professional maintenance personnel. Opening or removing
the cover could result in an electric shock or other potential hazards. Incorrect disassembly
and assembly could also result in an electric shock during future use.
13.If any one of the following occurs, disconnect the equipment from the computer and pull
out the power cord from the AC wall socket and contact a qualified member of the service
personnel for maintenance:
• Liquid has been spilled into the equipment.
• The equipment has been exposed to rain or water.
• The equipment falls, or the cover is damaged.
• Significant changes in the equipment s performance.
14.Only adjust the control mentioned in the instructions. Incorrect adjustment of other controls
may result in damage and mean that professional maintenance personnel need to spend
more time fixing it.
3UHFDXWLRQV

V
15.Do not use the equipment in a thunderstorm so as to avoid the risk of an electric shock. If
possible, pull out the AC power cord during a thunderstorm.
16.If you continuously print multiple pages, the surface of the tray will become very hot. Take
care not to touch this surface, and keep children away from this surface.
17.The signal wire of the device connected with the printer can not be connected to the
outdoors.
18.Please ensure timely ventilation in case of a prolonged use or printing huge amounts of
documents in a poorly ventilated room.
19.In standby status, the product will automatically enter into the power saving (sleep) mode if
it does not receive any job order for a while (such as 1 minute); and it can realize zero power
consumption only if it has not been connected with any external input power supply.
20.As the Class 1 equipment, the product must be connected to the power supply outlet with
protective grounding line when using.
21.This product should be placed according to the shipping marks on the product package
box during delivery.
22.This product is a kind of low-voltage equipment. When using this product below the
specified voltage range,please refer to the product precautions or call Pantum Aftersales
Service Centre, if the toner comes off the printed contents, or the equipment starts slowly.
23.This product is sold as a complete machine. The consumers can go to Pantum Aftersales
Service Centre to purchase parts they need. If the product sold is inconsistent with the
package list, please go to the specified Aftersales Service Centre to solve the problem.
24.Install this product in a place with the temperature between 10℃ and 35℃ and the relative
humidity between 20% and 80%.
25. For security and other reasons the printer may switch to intermittent printing after a certain
amount of continuous printing.
26.This device complies with Part 15 of the FCC Rules and Industry Canada licence-exempt
RSS standard(s). Operation is subject to the following two conditions:
(1) this device may not cause harmful interference, and
(2) this device must accept any interference received, including interference that may cause
undesired operation.
27.IC Radiation Exposure Statement:
This equipment complies with Canada and FCC radiation exposure limits set forth for
uncontrolled environments.
This equipment should be installed and operated with a minimum distance of 20cm between
the radiator and your body.
This transmitter must not be co-located or operating in conjunction with any other antenna or
transmitter.

VI
28.This equipment has been tested and found to comply with the limits for a Class B digital
device, pursuant to Part 15 of the FCC Rules. These limits are designed to provide reasonable
protection against harmful interference in a residential installation. This equipment generates,
uses and can radiate radio frequency energy and, if not installed and used in accordance with
the instructions, may cause harmful interference to radio communications.However, there is no
guarantee that interference will not occur in a particular installation.
If this equipment does cause harmful interference to radio or television reception, which can
be determined by turning the equipment off and on, the user is encouraged to try to correct the
interference by one or more of the following measures:
• Reorient or relocate the receiving antenna.
• Increase the separation between the equipment and receiver.
• Connect the equipment into an outlet on a circuit different from that to which the receiver is
connected.
• Consult the dealer or an experienced radio/TV technician for help.
29.Changes or modification not expressly approved by the party responsible for complianc
could void the user’s authority to operate the equipment.
30.The power consumption of the product with wireless function is 2.366W / without wireless
function is 1.888W in networked standby if all wired network ports are connected and all
wireless network ports are activated.
31.Shielded cables must be used with this unit to ensure compliance with the Class B FCC
limits.
32.This Class B digital apparatus complies with Canadian ICES-003.
33. This equipment complies with Part 68 of the FCC rules and the requirements adopted by
the ACTA. On the back of this equipment is a label that contains, among other information,
a product identifier in the format US: VFC A01A5103M .If requested, this number must be
provided to the telephone company. This equipment uses the following USOC jacks: RJ-11,
RJ-45, USB jacks and power jacks.
34. REN (RINGER EQUIVALENT NUMBERS) STATEMENT
This product meets the applicable Innovation, Science and Economic Development
Canada technical specifications.
Notice: The Ringer Equivalence Number(REN: 0.1A ) assigned to each terminal device
provides an indication of the maximum number of terminals allowed to be connected to a
telephone interface. The termination on an interface may consist of any combination of devices
subject only to the requirement that the sum of the Ringer Equivalence Numbers of all the
devices does not exceed 5.

VII
Before installing this equipment, users should ensure that it is permissible to be connected to
the facilities of the local telecommunications company. The equipment must also be installed
using an acceptable method of connection. The customer should be aware that compliance
with the above conditions may not prevent degradation of service in some situations.
Repairs to certified equipment should be coordinated by a representative designated b
the supplier. Any repairs or alterations made by the user to this equipment, or equipment
malfunctions, may give the telecommunications company cause to request the user to
disconnect the equipment. Users should ensure for their own protection that the electrical
ground connections of the power utility, telephone lines and internal metallic water pipe
system, if present, are connected together.
This precaution may be particularly important in rural areas.
Caution: Users should not attempt to make such connections themselves, but should contact
the appropriate electric inspection authority, or electrician, as appropriate.
36. This product meets the applicable Industry Canada technical specifications
37.Please keep this User Guide properly.
35. ATTACHMENT LIMITATIONS STATEMENT
Notice: This equipment meets telecommunications network protective, operational and safety
requirements as prescribed in the appropriate Terminal Equipment Technical Requirements
document(s). This is confirmed by marking the equipment with the Industry Canad
certification number. The Department does not guarantee the equipment will operate to the
user’s satisfaction.

VIII
This symbol indicates that, at the end of your product’s life, it must not be
discarded as domestic waste. Instead, you should dispose of your used
equipment at a designated collection point for the recycling of waste electrical
and electronic equipment. Ref: EU Directive 2002/96/EC on Waste Electrical
and Electronic Equipment (WEEE). Please contact your distributor / supplier
for further information.
This product is suitable for indoor use only.
This printer is fully compliant with the ROHS Directive 2009/95/EC and the
requirements of the revised Directive 2011/65/EU for managing toxic and
hazardous substances.
When the product battery is scraped, it should never be disposed with other
household waste. In order to protect the natural resources and promote the
reuse of materials, please separate the battery from other types of waste,
and deliver it to your local battery recycling systems for recycling.
Warning: 1. The battery of this product is non-rechargeable, and it should
never be dismantled, crushed, heated or burned. Improper replacement
operations may cause fire and burns; 2. The battery should be placed
beyond the reach of children to prevent them swallowing.
This product contains a battery, in order to protect the natural resources and
promote the reuse of materials, please separate the battery from other types of
waste, and deliver it to your local battery recycling systems for recycling.
Warning: 1. The battery of this product is non-rechargeable, and it should
never be dismantled, crushed, heated or burned. Improper replacement
operations may cause fire and burns; 2. The battery should be placed
beyond the reach of children to prevent them swallowing.
/HJDO,QIRUPDWLRQ
European Community (EC) directives conformity
This product complies with the protection requirements of EC directives
2014/35/EU and 2014/30/EU on the approximation and harmonization of the
laws of the Member States relating to electromagnetic compatibility and
safety of electrical equipment designed for use within certain voltage limits.
The manufacturer of this product is: Zhuhai Pantum Electronics Co.,Ltd.,
No.3883, Zhuhai Avenue, Zhuhai, Guangdong, China 519060.
A declaration of conformity to the requirements of the Directives is available
upon request from the Authorized Representative.
This product satisfies the Class B limits of EN 55032 and safety
requirements of EN60950

IX
Table of Contents
1. Before Using the Printer ....................................................................................................................1
1.1. Product series introduction .........................................................................................................1
1.2. Supplied Accessories..................................................................................................................2
1.3. Product View...............................................................................................................................3
1.4. Laser Toner Cartridge .................................................................................................................5
1.5. Control Panel ..............................................................................................................................6
1.5.1. Overview of control panel ....................................................................................................6
1.5.2. Function of numeric keyboard..............................................................................................9
1.6. Function of status indicator.......................................................................................................10
1.7. Function of power indicator.......................................................................................................10
2. Paper and Print Media..................................................................................................................... 11
2.1. Paper Specification................................................................................................................... 11
2.2. Special Paper ...........................................................................................................................12
2.3. Non-printing Area and Non-scanning Area ...............................................................................13
2.4. Loading Paper ..........................................................................................................................14
2.4.1. Loading into the Automatic Feeder Tray ............................................................................14
2.4.2. Install manual feed tray......................................................................................................16
2.5. Paper and Manuscript Use Process .........................................................................................18
2.5.1. Scanning With Tablet .........................................................................................................18
2.5.2. Scan with the automatic document feeder (ADF) .............................................................20
3. Driver installation and uninstallation................................................................................................21
3.1. Driver installation based on Windows system ..........................................................................21
3.1.1. Installation via USB connection .........................................................................................21
3.1.2. Installation via wired network connection...........................................................................22
3.1.3. Installation by wireless network connection mode (Wi-Fi) .................................................24
3.1.4. Driver uninstallation ...........................................................................................................28
3.2. Driver installation based on Mac system ..................................................................................28
3.2.1. Driver installation................................................................................................................28
3.3. Add printer to Mac system ........................................................................................................30
3.3.1. Add in USB connection mode ............................................................................................30
3.3.2. Addition in wired network connection mode.......................................................................30
3.3.3. Add in wireless network connection mode .........................................................................31
3.3.4. Add AirPrint printer .............................................................................................................31
4. Wired network setup (applicable to wired network models) ............................................................32
4.1. Set IP Address ..........................................................................................................................32
4.1.1. Automatic Setting ...............................................................................................................32
4.1.2. Manual Setting ...................................................................................................................32
5. Wireless network setup (applicable to Wi-Fi models) .....................................................................33
5.1. Basic structure mode ................................................................................................................33
5.1.1. Wireless network setup tools .............................................................................................33
5.1.2. Wi-Fi Protected Setup (WPS) setup...................................................................................37
5.1.3. How to disable the Wi-Fi network connected.....................................................................38
5.2. Wi-Fi Direct mode .....................................................................................................................38
5.2.1. Preliminary preparations ....................................................................................................38
5.2.2. Wi-Fi Direct connection......................................................................................................38
5.2.3. How to disable the Wi-Fi Direct..........................................................................................40
5.3. Wireless network setup FAQs...................................................................................................40
6. Web server .....................................................................................................................................41
6.1. Visit the embedded Web server................................................................................................41
6.2. Use Web server to manage printer...........................................................................................41
6.2.1. IP address setup ................................................................................................................42

X
6.2.2. Wireless setup....................................................................................................................43
6.2.3. Machine setup....................................................................................................................44
6.2.4. Recover factory settings via Web server............................................................................46
7. Print .................................................................................................................................................47
7.1. Print Function............................................................................................................................47
7.2. Print Settings ............................................................................................................................48
7.3. Cancel printing..........................................................................................................................48
7.4. Printing Mode............................................................................................................................48
7.4.1. Printing with the Automatic Feeder Tray ............................................................................48
7.4.2. Printing with manual feed tray............................................................................................49
7.5. Automatic Two-Sided Printing...................................................................................................49
7.5.1. Duplex printing unit setup ..................................................................................................50
7.5.2. How to carry out auto duplex printing ................................................................................51
7.6. Fine mode printing ....................................................................................................................53
7.7. Mute printing .............................................................................................................................54
7.8. Auto shut-off setting ..................................................................................................................55
7.9. Open Help Document ...............................................................................................................56
8. Copying ...........................................................................................................................................57
8.1. Copying function .......................................................................................................................57
8.2. Copying method........................................................................................................................57
8.3. Copying cancel .........................................................................................................................57
8.4. Common copying setting ..........................................................................................................58
8.4.1. Image quality......................................................................................................................58
8.4.2. Intensity..............................................................................................................................58
8.4.3. Resizing .............................................................................................................................59
8.4.4. Multipage............................................................................................................................59
8.4.5. Clone..................................................................................................................................60
8.4.6. Poster.................................................................................................................................60
8.4.7. Collated copy .....................................................................................................................61
8.4.8. Manual duplex copying ......................................................................................................61
8.4.9. Paper setting......................................................................................................................63
8.5. ID card copying setting .............................................................................................................63
8.5.1. Arrangement mode ............................................................................................................64
8.5.2. Intensity..............................................................................................................................64
8.5.3. Paper dimension ................................................................................................................64
8.6. Receipt setting ..........................................................................................................................65
8.6.1. Intensity..............................................................................................................................65
8.6.2. Paper setting......................................................................................................................65
9. Scan ................................................................................................................................................66
9.1. Pull Scan...................................................................................................................................66
9.1.1. Pantum Scan Application ...................................................................................................66
9.1.2. TWAIN Scan Driver............................................................................................................67
9.1.3. WIA Scan Driver.................................................................................................................69
9.2. Mac System Scan.....................................................................................................................74
9.2.1. ICA Scan ............................................................................................................................74
9.2.2. TWAIN Scan.......................................................................................................................77
9.3. Push Scan ................................................................................................................................78
9.3.1. Scan to PC.........................................................................................................................78
9.3.2. Scan to E-mail....................................................................................................................79
9.3.3. Scan to FTP .......................................................................................................................80
9.3.4. Scan to U disk....................................................................................................................81
9.4. Cancel Scan Job.......................................................................................................................81

XI
10. Fax.................................................................................................................................................82
10.1. Connect Devices.....................................................................................................................82
10.2. Fax Settings............................................................................................................................82
10.3. Fax Functions .........................................................................................................................84
10.3.1. Send Fax..........................................................................................................................84
10.3.2. Receive Fax .....................................................................................................................85
10.3.3. Set the interference and the telephone line compatibility of VoIP system........................86
10.3.4. Other Fax Functions ........................................................................................................87
10.4. PC-Fax....................................................................................................................................88
10.4.1. Sending Fax with PC-Fax ................................................................................................88
11. Mobile Print/Scan/Fax....................................................................................................................90
11.1. "Pantum" APP .........................................................................................................................90
11.1.1. Operating systems supported ..........................................................................................90
11.1.2. How to download Pantum App .........................................................................................90
11.1.3. How to use this "Pantum" APP.........................................................................................90
11.2. Mopria mobile print .................................................................................................................93
11.2.1. The operating systems and applications which support Mopria mobile printing ..............93
11.2.2. How to download Mopria Print Service ............................................................................93
11.2.3. Preliminary preparations ..................................................................................................93
11.2.4. How to use Mopria mobile printing ...................................................................................93
11.3. NFC function ...........................................................................................................................94
11.3.1. Preliminary preparations ..................................................................................................94
11.3.2. How to use NFC function to print .....................................................................................94
11.4. AirPrint mobile print .................................................................................................................95
11.4.1. Operating systems supported by AirPrint mobile print .....................................................95
11.4.2. Preliminary preparations ..................................................................................................95
11.4.3. How to use AirPrint mobile printing ..................................................................................95
12. General Settings............................................................................................................................96
12.1. System Settings......................................................................................................................96
12.1.1. Ink saving setting .............................................................................................................96
12.1.2. Language Setting.............................................................................................................97
12.1.3. Restore Factory Settings .................................................................................................97
12.1.4. Sleep Time Setting...........................................................................................................98
12.1.5. Mute printing ....................................................................................................................98
12.1.6. Auto shut-off setting .........................................................................................................99
12.1.7. Sound/volume (applicable to machine with the fax feature) ..........................................100
12.1.8. Time/date (applicable to machine with the fax feature)..................................................100
12.2. Network Settings...................................................................................................................101
12.3. Network Information..............................................................................................................101
12.4. Print information report .........................................................................................................102
12.5. Residual amount of toner......................................................................................................102
12.6. Configure the e-mail address book.......................................................................................103
12.7. Configure the FTP address book..........................................................................................103
12.8. Online upgrade .....................................................................................................................103
13. Routine Maintenance...................................................................................................................104
13.1. Cleaning the Printer ..............................................................................................................104
13.2. Toner cartridge and drum component component maintenance ..........................................107
13.2.1. About toner cartridge and drum component component................................................107
13.2.2. Replace toner cartridge and drum component...............................................................107
14. Troubleshooting........................................................................................................................... 112
14.1. Cleaning Jammed Paper ...................................................................................................... 112
14.1.1. Middle jam...................................................................................................................... 112

XII
14.1.2. Paper Jam in the Fuser Unit .......................................................................................... 114
14.1.3. Duplex Unit Jam............................................................................................................. 117
14.1.4. A paper jam occurs on the automatic document feeder (ADF) ...................................... 118
14.2. Software Failure....................................................................................................................120
14.3. Error Message ......................................................................................................................120
14.4. Common Troubleshooting.....................................................................................................121
14.4.1. Common Trouble ...........................................................................................................121
14.4.2. Image Defects................................................................................................................124
14.5. Fax faults ..............................................................................................................................127
15. Menu Structure............................................................................................................................129
16. Product Specifications.................................................................................................................130
16.1. Overview of the Specifications..............................................................................................130
16.2. Print Specifications ...............................................................................................................132
16.3. Copy Specifications ..............................................................................................................132
16.4. Scan Specifications ..............................................................................................................132
16.5. Fax specification (applicable to machine with a fax).............................................................133

%HIRUH8VLQJWKH3ULQWHU
3URGXFWVHULHVLQWURGXFWLRQ
USB ● ● ● ● ● ● ●
NET ● ● ● ● ● ●
Wi-Fi ● ● ● ●
GDI ●● ●
PDL ● ● ● ● ●
LCD ●● ● ● ● ● ● ●
A4
30ppm ●●
33ppm ● ● ● ● ●
Letter
● ●
35ppm ● ● ● ● ●
● ● ● ● ● ● ●
● ● ● ●
● ● ● ● ● ● ● ●
●● ● ● ● ● ● ●
●● ● ● ● ● ● ●
● ● ● ●
● ● ● ● ● ●
ADF ● ● ● ● ● ●
32ppm
●
Interface
type
Print
Language
Control
Panel
●
●
Print
Speed
Automatic
Two-Sided
Printing
●
NFC function
Mute printing
Copy
Scan
Fax
Scan to U-disk
(●: Support; Blank: Unsupport)
Note: · This product series is subject to additions or changes without prior notice.
·
For machine with the fax feature, it needs to execute language, system
and fax settings following instructions on the panel in first startup
or after restoring to factory settings.
·For this user manual, the "ADF" is short for automatic document feeder.
M6700DW
/
M6760DW
series
M7100DN
series M7100DW
series
M6800FDW
/
M6860FDW
series
M7200FD
series M7200FDN
series M7200FDW
series
M6700D
series
Product
series
parameters
1

Cover of automatic
document feeder
1.3.Product View
Side view
This is used to remove the paper jammed in scanning for
the ADF.
Feed tray of automatic
document feeder
1
2This is used to place originals scanned from the ADF.
3 Exit tray of automatic
document feeder
Prevent originals scanned from falling off.
4 Cover of scanner Open the cover of scanner to place the scanned originals
on its glass plate.
5 Output Bin For storing the printed paper.
6 Front USB interface This is used to scan to an U-disk without a computer.
7 Control Panel Indicate printer status to conduct set operation.
8 NFC (Near Field
Communication) label
Touch this label on mobile device to download or start
Pantum printer App and connect Wi-Fi Directly.
9 Glass Platen This is used to place originals scanned from platen.
10 Output Tray To prevent the printed paper from falling.
3

To open the front cover to take out the laser toner cartridge.
For placing mediums that are printed in manual feed tray.
Turn the power on or off and press this button under
Ready state to enter energy-saving mode. Press and hold
this button for more than 2s to turn the printer power off.
14 Automatic Feeder Tray For placing mediums that are printed in auto feed tray.
15
Slide paper width deflector to adapt to paper
width.
Slide paper length deflector to adapt to paper
length.
18 For adjustment of length extension
of the tray .
Rear View
For connecting product to computer with USB cable.
3 USB Interface
4 Network Interface For connecting product to network with network cable.
5 Power Interface
6 Rear Cover
7 Duplex Printing Unit
For connecting product to power with power cord.
For paper release when it gets jammed.
Telephone line interface, used for connection of this product
to the telephone circuit.
Extension interface, used for connection with external extension
telephone.
Note: ·Printer appearance may differ because of various models and functions,
11 Front Cover
12 Manual feed tray
13 Power switch
Slide paper deflector to adapt to paper width
For paper feed at duplex printing and paper release when
paper gets jammed at duplex printing.
so the schematic diagram is only for your reference.
Paper deflector of
manual feed tray
16 Paper width deflector of
auto feed tray
17 Paper length deflector of
auto feed tray
Clip of extended tray of
auto feed tray
1
2
LINE interface (only for
machine with the fax
feature.)
EXT. interface (only for
machine with the fax
feature.)
4

Type Average Print Volume
Longevity of drum
component
Service life of toner cartridge
Type Average Print Volume
Standard-volume
toner cartridge
High-volume toner
cartridge
About 3000 Pages(Based
on ISO 19752 standard)
Note: · The model is subject to increase without notice.
·Consumables capacity may vary with different using types.
·
The Company does not recommend using consumables other than the original
consumables provided, as any damages caused by non-original consumables are
not covered by the scope of warranty.
·
Toner cartridge appearance may differ because of multiple volume and models,
so the schematic diagram is only for your reference.
1.4.Laser Toner Cartridge
Laser toner cartridge is composed of drum component and toner cartridge.
Service life of drum component
About 12000
Pages(Based on ISO
19752 standard)
About 1500 Pages(Based
on ISO 19752 standard)
5

1.5.Control Panel
1.5.1.Overview of control panel
The layout of the printer control panel is shown below:
Control panel without the fax feature
No. Name Functions
1LCD Display Display operation interface and product information.
2Copy Button Press this button to enter into copy mode.
3Scan Button Press this button to enter into scan mode.
4 ID Card Copy Button Press this button to enter into ID Card Copy mode.
5Wi-Fi button
Start Wi-Fi function (applicable to Wi-Fi model only).
Press this button for more than 2s during Wi-Fi connection to
cancel connection;
press this button for more than 2s after Wi-Fi is connected to
disconnect Wi-Fi (applicable to Wi-Fi model only).
Open save toner function(applicable to non-Wi-Fi model only).
6Bill Copy Button Press this button to enter into Bill Copy mode.
7Cancel Execute cancel operation
Idle state interface under copy mode, to reset the "Number of
Copies" to 01.
8Start Button
This is used to start relevant operations after finishing operation
settings.
In case of a feed failure, please press this key for pick-up and
printing again.
6

9 Menu Open the main menu of control panel
10 Back Return to the previous menu.
11 OK Confirm the selection on screen.
12 UP Scroll through the menus and options .
Increase 1 copy on the ready interface of Copy mode.
13 Down Scroll through the menus and options .
Decrease 1 copy on the ready interface of Copy mode.
14 Status Light Indicate the status of printer. (Please see Chapter 1.6).
Control panel with the fax feature
No. Functions
1LCD Display Display operation interface and product information.
Dial or input letters, numbers or characters. (Please see
Chapter 1.5.2).
3Press this button to enter into the Fax mode.
4Press this button to enter into copy mode.
Name
5Press this button to enter into scan mode.
6
Speaker This is used to manually receive and send faxes under
Fax mode, or for phone calls.
7 ID Card Copy Button Press this button to enter into ID Card Copy mode.
2 Numeric keyboard
Fax
Copy Button
Scan Button
7
Other manuals for M6700 Series
3
This manual suits for next models
3
Table of contents
Other Pantum All In One Printer manuals

Pantum
Pantum M6500W User manual

Pantum
Pantum CM2200 User manual

Pantum
Pantum M6503 Series User manual

Pantum
Pantum M6600 series User manual

Pantum
Pantum M7200 Series User manual

Pantum
Pantum M9106 Series User manual

Pantum
Pantum M6550 series User manual

Pantum
Pantum CM9106 Series User manual

Pantum
Pantum M6500NW Plus Series User manual

Pantum
Pantum M7300 Series User manual