"bypass enabled". The system will not arm if any open zones
have not previously been defined as stay zones. The fire zone
cannot be programmed as a "STAY" zone. If an alarm is generat-
ed, or a zone that was not designated as a "stay" zone is opened
while the system is armed, system reset can only be activated
from a keypad and not with a key switch/push button.
FAST ARMING KEY [10]
Fast arming (regular mode) is enabled at address 36. If activated,
when the
"READY"
light is on, pressing key [10] for 2 seconds auto-
matically arms the system. There's no need to enter an access
code. This feature can be used to permit selected individuals (i.e.
maintenance workers, repair personnel) to arm the system when
leaving the protected area.
Fast arming (stay mode) is enabled at address 36. When activa-
ted, no "READY" light is required to arm the system. Pressing key
[10] for 2 seconds automatically "STAY" arms the system. (See
"STAY" arming features described above.) Also, when system is
stay armed, pressing key [10] will activate an exit delay and then
return the system to STAY ARM status, eliminating the need to dis-
arm and then STAY ARM the system again.
MANUAL BYPASS ARMING [BYP]+ACCESS CODE (PRIORITY 2, 3)
Bypassed zones will not generate an alarm and are not displayed
on the keypad. Manual bypass arming is employed when the sys-
tem user chooses not to arm the entire protected area. Only
zones that have been defined as "bypass enabled" (address 31)
can be selected during manual bypass arming. (Zone 8 is always
bypass-enabled.) The user manually selects specific zones that
will not be armed, rather than bypassing the zones defined by the
installer as part of the "stay-arming" feature. Defective zones can
also be temporarily bypassed until repairs are made, so that the
system can still be armed.
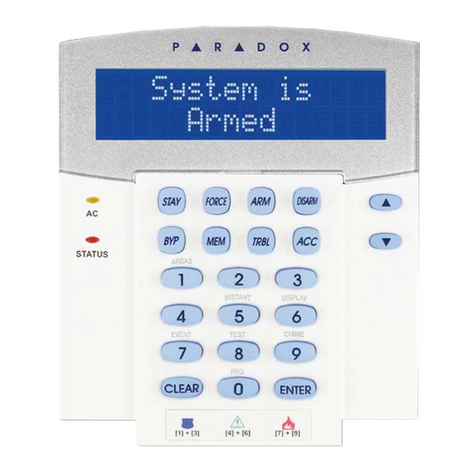
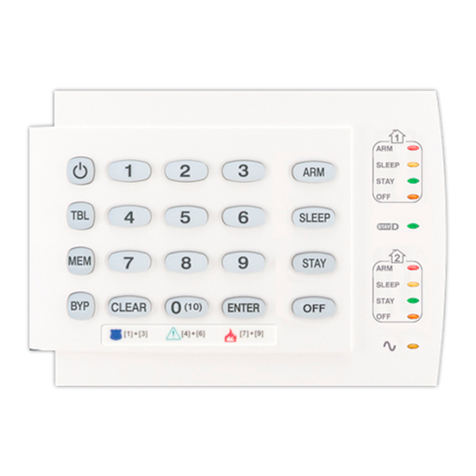
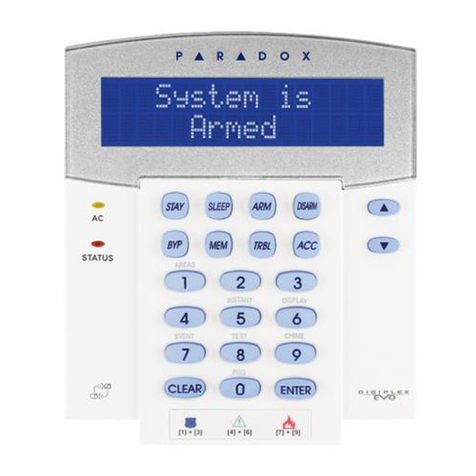
To bypass zones, enter [BYP]+ a valid access code. [BYP]and
[ENTER]keys will illuminate. (Zone bypassing can only be
accessed by the master user code, and user codes 1-3.). Zone
numbers to be bypassed (1,2,3,4,5,6) should be keyed in. When
a zone light is on, it indicates a zone that will be bypassed.
Pressing [CLEAR]erases all bypass entries. Zones to be bypassed
should then be re-entered. (Pressing [CLEAR]again will exit the
bypass mode without saving any bypass information in memory.)
If bypass information is correct, press [ENTER]to end and save
bypass function being programmed. [BYP]light will remain illumi-
nated, indicating that zones have been bypassed. To cancel the
zone bypass "status" just entered, press [BYP]+ user code +
[CLEAR]+ [ENTER]. Zone bypasses are automatically cancelled
every time the system is disarmed.
Bypass recall:This feature permits the system users to reinstate
latest zone bypass instructions saved in memory. By pressing
[BYP]while in bypass programming mode, previous bypass status
is re-established. Even if user is in process of entering new
bypass information on keypad, one touch of [BYP]key overrides
new information and reinstates the preceding zone bypass
instructions saved. Reminder: The fire zone cannot be bypassed.
"AWAY" AUTO BYPASS ARMING [AWAY]+ACCESS CODE (PRIORITY 2, 3)
System users wishing to arm the system rapidly without manually
entering zones to be bypassed, can make use of the "Away" auto-
bypass feature. [AWAY]+ access code should be keyed in. (The
"READY" light does not have to be on, but all open zones must be
"bypass-enabled".) Once the exit delay expires, any open zones
will automatically be bypassed and the system will be armed.
(The fire zone cannot be bypassed.) If any zones have been left
open, the [BYP]light will illuminate to indicate that zones have
automatically been bypassed. Please note: This feature is not
recommended for regular use because bypassing zones can
reduce the efficiency of system protection.
KEY SWITCH ARMING/DISARMING
To provide one button system arming/disarming, key switch oper-
ation must be enabled (Refer to "System Options"). The key
switch should be connected, and a push button connected in
place of a keypad. The panel can be programmed to activate
"regular" or "stay" arming from the key switch/push button. If
"READY" and "ARMED" LED status indicators are required, LEDs
can be connected to the 2 PGM outputs. The two programmable
outputs should then be set as follows: (please refer to
"Programmable Output Options" for further explanation.)
1)
PGM 1 should be programmed to indicate "
EXIT
+
ARMED
" status
(Option #8, PGM 1)
2) PGM 2 should be programmed to indicate "READY" status
(Option #2, PGM 2)
If a buzzer is required for the entry delay, Option #8 (ENTRY +
ALARM) should be programmed for PGM2.
SYSTEM DISARMING
Enter the protected area using the designated entry-exit door.
The keypad sounder will beep to remind user to disarm system.
Key in the 6 or 4-digit access code on the keypad, before the
allotted entry time expires. If the access code is entered incorrect-
ly, press [CLEAR]and re-enter it. The
"
ARMED
"
light will extinguish
and the sounder will change to the
"
CONF
"
beep before silencing.
ALARM MEMORY [MEM]
When disarming the system (or resetting the alarm), the memory
light [MEM]will illuminate if any alarm situations took place during
the preceding armed period. A record of all alarm situations that
occurred while the system was armed is stored in memory. After
disarming the system, pressing once on the [MEM]key brings up
the last
"
alarm event
"
, which is displayed on the keypad.
Up to 15 levels of alarm history can be stored in memory, and are
retrieved by repeated pressing of the [MEM]key. When the final
entry is reached, the
"
END/REJ
"
beep is heard and the [MEM]light
extinguishes. This indicates that maximum level of alarm history
has been reached. To review alarm history again, press [MEM].
The last 15 events are stored in memory. When the memory is
full, the newest event takes the place of the oldest one in memo-
ry. After pressing of the [MEM]key, events will be displayed in
order from the most recent to the oldest. The memory will not
clear upon arming. Exiting memory mode at any level is achieved
by pressing [CLEAR], which will be followed by the
"
END/REJ
"
beep.
The [MEM]key will also extinguish. (The system will exit memory
mode automatically following display of the last alarm event.)
SYSTEM ALARMS:
General alarms:
Important: In the event of a burglar alarm, the alarm output gen-
erates a continuous alarm signal to activate a siren driver. To stop
the alarm signal, enter a valid disarming code. The
"
CONF
"
beep
will be heard, and the alarm signal (and siren) will cease. If the
system was armed, it will also automatically disarm.
If the alarm is generated in a 24 hour zone, the siren will be
silenced for 30 seconds when a valid access code is entered.
After this 30 second period, if the 24 hour zone is still open, the
siren will re-activate.
If no valid access code is entered, the siren will automatically shut
off after a pre-programmed time period elapses. (See
"
PRO-
GRAMMING REFERENCE
"
section:
"
alarm duration
"
.) However,
if a protected zone is still open, the alarm will immediately resume.
Fire alarms: (Zone 7)
During a fire alarm, the alarm output generates an intermittent
alarm signal. Fire alarm reset conditions are the same as 24 hour
zone reset. The fire alarm siren will shut off automatically after the
programmed alarm duration time. Fire alarm will be recorded in
memory and displayed as zone 7.
