manuals.online logo
Brands
  1. Home
  2. •
  3. Brands
  4. •
  5. PASCO
  6. •
  7. Laboratory Equipment
  8. •
  9. PASCO ME-9454 User manual

PASCO ME-9454 User manual

Other PASCO Laboratory Equipment manuals
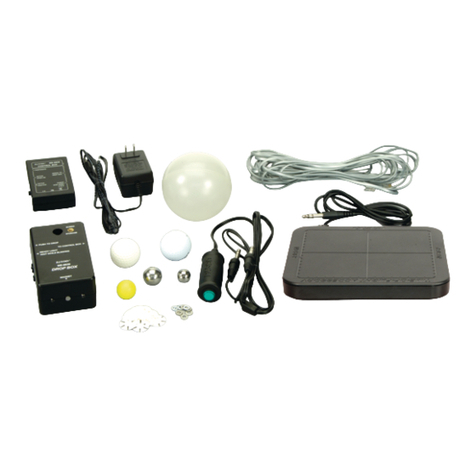
PASCO TD-8570A User manual

PASCO

PASCO TD-8570A User manual

PASCO Brolight SE-9629 User manual

PASCO

PASCO Brolight SE-9629 User manual

PASCO PASCObot Gripper PS-3325 User manual

PASCO

PASCO PASCObot Gripper PS-3325 User manual

PASCO PS-2600A User manual

PASCO

PASCO PS-2600A User manual

PASCO ME-9889 User manual

PASCO

PASCO ME-9889 User manual

PASCO ES-9057C User manual

PASCO

PASCO ES-9057C User manual

PASCO CI-6512 User manual

PASCO

PASCO CI-6512 User manual

PASCO ME-9847 User manual

PASCO

PASCO ME-9847 User manual
PASCO EM-8678A User manual

PASCO

PASCO EM-8678A User manual

PASCO PS-3516 User manual

PASCO

PASCO PS-3516 User manual

PASCO EM-6720 User manual

PASCO

PASCO EM-6720 User manual
PASCO WA-9406 User manual

PASCO

PASCO WA-9406 User manual

PASCO ES-9059C User manual

PASCO

PASCO ES-9059C User manual

PASCO PS-3401 User manual

PASCO

PASCO PS-3401 User manual

PASCO ME-9207B User manual

PASCO

PASCO ME-9207B User manual

PASCO ES-9080A User manual

PASCO

PASCO ES-9080A User manual

PASCO TD-8498A User manual

PASCO

PASCO TD-8498A User manual

PASCO ME-6810A User manual

PASCO

PASCO ME-6810A User manual

PASCO ME-5707A User manual

PASCO

PASCO ME-5707A User manual

PASCO h/e Apparatus User manual

PASCO

PASCO h/e Apparatus User manual

PASCO ES-9047 User manual

PASCO

PASCO ES-9047 User manual

PASCO AP-8210A User manual

PASCO

PASCO AP-8210A User manual
PASCO ME-9892 User manual

PASCO

PASCO ME-9892 User manual

PASCO OS-9255A User manual

PASCO

PASCO OS-9255A User manual

Popular Laboratory Equipment manuals by other brands

Radleys Carousel 6 Plus instructions

Radleys

Radleys Carousel 6 Plus instructions

Hemotherm 400MR Operation & technical manual

Hemotherm

Hemotherm 400MR Operation & technical manual

mrclab DVO Series Operation manual

mrclab

mrclab DVO Series Operation manual

CoolLED pE-800 quick start guide

CoolLED

CoolLED pE-800 quick start guide

Luminex Guava easyCyte Maintenance Guide

Luminex

Luminex Guava easyCyte Maintenance Guide

IKA A10 basic operating instructions

IKA

IKA A10 basic operating instructions

Belden HIRSCHMANN RPI-P1-4PoE installation manual

Belden

Belden HIRSCHMANN RPI-P1-4PoE installation manual

Koehler K1223 Series Operation and instruction manual

Koehler

Koehler K1223 Series Operation and instruction manual

Globe Scientific GCM-12 quick start guide

Globe Scientific

Globe Scientific GCM-12 quick start guide

Getinge 86 SERIES Technical manual

Getinge

Getinge 86 SERIES Technical manual

CORNING Everon 6000 user manual

CORNING

CORNING Everon 6000 user manual

Biocomp GRADIENT MASTER 108 operating manual

Biocomp

Biocomp GRADIENT MASTER 108 operating manual

Cole Parmer Stuart SB3/1 instruction manual

Cole Parmer

Cole Parmer Stuart SB3/1 instruction manual

BEVS 2501/2A user manual

BEVS

BEVS 2501/2A user manual

Qiagen DML 3000 user manual

Qiagen

Qiagen DML 3000 user manual

Queensgate NANOSCAN OP400 Quick start instructions

Queensgate

Queensgate NANOSCAN OP400 Quick start instructions

Parr Instrument 4560 Operating instructions manual

Parr Instrument

Parr Instrument 4560 Operating instructions manual

Integra DOSE IT operating instructions

Integra

Integra DOSE IT operating instructions

manuals.online logo
manuals.online logoBrands
  • About & Mission
  • Contact us
  • Privacy Policy
  • Terms and Conditions

Copyright 2025 Manuals.Online. All Rights Reserved.

Instruction Manual
Manual No. 012-04966D
Collision Cart
Model No. ME-9454
®
Model No. ME-9454 Collision Cart
1
Collision Cart
Model No. ME-9454
Equipment List
*Use Replacement Model Numbers to expedite replacement orders.
Included Equipment Replacement
Model Number*
1. Collision Cart (1) ME-9454
2. 500 g Mass (1) 648-0636
Additional Equipment Required
Dynamics Cart Track, 1.2 meters or 2.2 meters ME-9435A or ME-9458
Replacement Parts
Wheel-Axle Assembly (2) 003-05311
End cap (2) 648-04969
End cap plug (2) 648-04694
Suspension spring (4) 632-034
Base Plate (1) 648-04651
1/2” Velcro®loop (2) 616-074
1/2” Velcro®hook (2) 616-075
Magnet (4) 634-022
Foam Retainer (4) 648-04702
12
Collision Cart Model No. ME-9454
2
®
Note: Experiments
using the Collision Cart
are described in the
Experiment Guide for the
ME-9458 and ME-9435
Dynamics Track
Accessory Sets.
Introduction
The PASCO Model ME-9454 Collision Cart is designed specifically
for collision experiments in conjunction with any of the PASCO
Dynamics Cart and Dynamics Track systems. It differs from the ME-
9430 Classic Plunger Cart in two ways:
1. The Collision Cart has no spring plunger.
2. The Collision Cart has magnets and Velcro®pads installed on both
ends of the cart.
Like the Plunger Cart, the Collision Cart has a mass of approximately
500 g and holes in each end-cap for attaching string or springs. An
additional mass of approximately 500 g is included with the cart and
fits into the mass tray on top of the cart.
Advantages of the Collision Cart
• The cart comes supplied with Velcro®pads attached, so a Collision
Cart will stick to a Plunger Cart during an inelastic collision. (Note:
The end of the ME-9430 Plunger Cart used in the inelastic collision
must not have magnets attached, or the two carts will not stick
together due to the repulsive properties of the magnet assemblies.)
• The Collision Cart has magnets attached, so the cart will bounce off
any other cart’s magnetic bumpers in an elastic collision, with very
little frictional loss. (Note: If you place magnets on the end of the
ME-9430 Plunger Cart, the magnets must be placed in the same
orientation of polarity as the magnets in the ME-9454 Collision
Cart, or they will attract rather than repel during collisions.)
• The Collision Cart can be used against the plunger end of the
Plunger Cart to perform explosions.
• Multiple inelastic and elastic collisions may be performed using
three or more carts.
Tip: For best
results, measure
the mass of the cart and
any added mass with an
accurate balance or
scale.
Collision Cart Model No. ME-9454
3
®
Removing the Magnet Bumpers
1. Detach each end cap by removing the two screws from the rear of the
end cap (See Figure 1).
Note: The screws that secure the end caps to each end of the Collision
Cart are thread-forming screws and may require substantial force to
remove and reinstall. A #1 Phillips point screw driver is required.
2. Remove the two magnet bumper assemblies from the cavities on the
inside of the end cap as shown.
Note: When attaching the magnet assemblies, first slide the magnets
into the end cap cavities.
3. Replace the rear end cap with the two screws.
CAUTION!: Each magnet assembly consists of a foam pad
attached to a neodymium magnet. The neodymium magnets
are extremely strong. Although only the north end of the
magnet is exposed, they can still be a hazard. When opposite poles are
brought close to each other, they will accelerate rapidly and can pinch
fingers or be easily chipped. They can also erase computer disks and
distort computer monitors and television sets.
Figure 1: Removing the Magnetic Bumper Assemblies
Collision Cart
Velcro®Pads
End Cap
Magnet Bumper
Assemblies
Thread-forming
screws
Velcro®Pads
End cap with