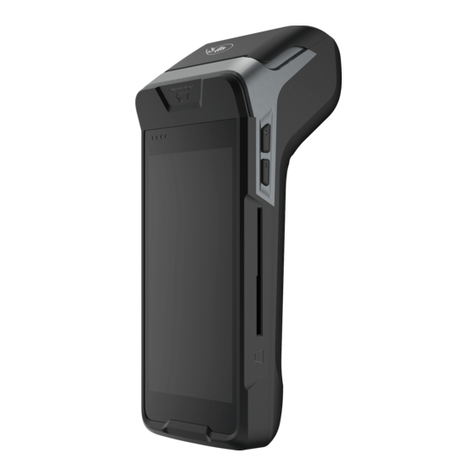
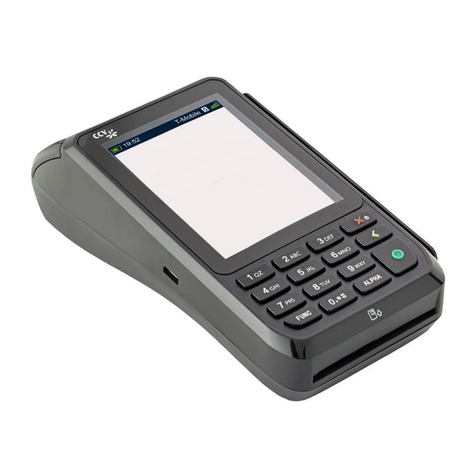
Paytec P6 Series User manual

Installation Guide P6 Series
Prior to the installation make sure you perform the following:
1. Check the machine model and protocol:
a. MDB protocol: the [AC.01] MDB cable is connected between the VMC and when
installed the coin collector.
b. Executive protocol requires the VendBox (for installation see VendBox manual).
c. To connect the terminal through serial (RS232), Pulse Potential free contact or CCI,
dedicated cables are required, please contact Payter before installing.
2. Enable/activate the Vending machine software to supports card readers “Cashless Device”
3. Check/modify the communication settings in the terminal using the Vending Tools
application:
a. LAN: DHCP or fixed IP address (the local IT administrator should provide the settings)
b. GPRS: If the SIM is not provided by Payter the APN, password and or pincode.
(Information should be provided by the network provider)
4. If telemetry is used, please check for DEX plug connector.
5. Make sure Vending Machine is powered off.
Installation
1. Use only original Payter accessories for installation
2. Always place rubber seals provided with the terminals
3. Remove protective layers (there are 2 layers) from the front!
Connect the terminal
Always use the cables provided with the Payter Terminals.
1. Connect the MDB cable
2. When using LAN, connect LAN cable to RJ 45 connector marked TCP/IP.
Placing SIM and/or SAM Modules
Place a SAM (Secure Application Module) if the selected payment scheme requires this.
Place a SIM card, if the terminal is equipped with the optional GSM/GPRS modem.
The SAM slots are located under the hatch marked “SAM MODULES” and the SIM under the
hatch marked “MODEM”. Use a Philips head screw driver to remove the screws of the
hatches.
NOTE: After placing the SAM and/or SIM modules make sure the hatches are secured
again with the screws.
Placing GPRS Antenna
1. Place antenna externally for better signal strength. (Recommended)
2. If signal strength is strong inside the machine (2+ bars) internal installation is better.
3. Make sure the antenna is not completely surrounded by metal or mounted on metal.
(reception loss)
4. Use caution when fastening the external antenna cable to Coax connector on the terminal,
too much force can damage the connection.
Test
1. Make sure products are present, if the Vending machine requires this.
2. Power the Vending machine.
3. Make sure prices are setup in the Vending Machine before the vend test
4. Make sure door switch does no inhibit the machine’s work state
After boot up the terminal will automatically connect to the servers and, if applicable,
download the latest settings configuration and/or firmware. If a new configuration is
downloaded, the terminal automatically reboots to activate the new settings. When the
terminal is connecting the display will show the following Icons in the upper left corner:
The bars show the signal strength of the GPRS connection. When the terminal is
connecting the ‘i’ will be blinking. As soon as the ‘i‘ is stable the connection has been
established with the GPRS network and the modem is working properly.
If the communication with the server and/or network has been lost, the respective icons will be visible or
blinking in the display to indicate the problem.
Test transaction
Connect a laptop to the terminal through USB and use the Vending Tool application to:
-Perform a test transaction
-Check signal strength: If signal strength is below 11 normal operation cannot be guaranteed,
please check the trouble shooting section to optimize signal strength.
SAM modules
GSM/GPRS Modem
LAN Connection
MDB Connection
External GSM
Antenna connection
Serial & USB
Power
(only when NOT
connected through MDB)
Installation Manual P6X Terminals - PTR-40-10-ML-C-0002–2015-04-20 - Copyright © Payter BV

TROUBLE SHOOTING
Problem
Solution
GPRS/GSM Connection
…. Icon blinking
No GPRS signal
Verify whether SIM Card is placed
Check whether SIM is activated with the provider
Verify whether the external antenna is correctly connected
Check whether the antenna is not cased in a metal environment with No reception, check antenna
placement outside the Vending machine
‘i’ does not appear
Reception is fine but the terminal is unable to make a connection
Check the following settings using the Vending settings tool:
1. GPRS APN
2. GPRS User
3. GPRS Password
4. GPRS SIM pin code
If a dedicated APN is used, please verify with the provider whether the required urls are accessible
GSM / 3G / 4G reception does not automatically indicate GPRS reception. Verify with local network
provider whether there is GPRS (2G) at that location.
Using a different provider can improve reception sometimes.
Low reception GPRS
You get the Most Consistent & Reliable Results by placing the antenna on top of the vending machine.
An optional External Mount Dome Antenna can be provided to help with Performance & Security
Things to consider…
Radio waves move in a straight line between our antenna and the antenna on the cell tower
They do not go around obstacles, they go through them if they can
Glass and wood are no problem but steel and concrete pose a real challenge
Consider heating ducts, plumbing and other such obstacles
LAN CONNECTION
No connection
Check LAN cable and link, LEDs should be blinking on terminal LAN connector. If not check Cable and
patch outlet.
Validate network settings with the Local IT administrator. (DHCP or static IP)
Validate firewall rules with the Local IT administrator
Verify whether below ports and URL’s are accessible
- tms.payter.nl (port 3185)
Transaction processing Equens Transaction processing Elavon
- https://89.221.178.190:1445 - https://live.cardeasexml.com (port 443)
If DNS resolve is not successful based upon DNS IP as provided by the IT administrator please try 8.8.8.8
or 8.8.4.4 (dns servers google)
Whether DNS resolve is successful or not, the IT administrator should be able to ping the terminal
through the network.
Other possible problems
If the MAC address is required for the Firewall, it can be obtained through Vend Settings tool.
To verify whether the network is correctly setup (as IT administrators often claim)
Connect a laptop using the same cable, outlet and network settings and using a browser try to
connect to the URL’s listed.
On occasion it happens that outlets are incorrectly labelled / patched.
There are cases where IT administrators require the IP address of the hosts instead of using the url’s. This
is not recommendable as Payment hosts could change IP addresses which would result in no connection.
Helpdesk
+31 85 40 123 80
Monday –Friday between 9.00 and 17.00
Payter B.V. Rozenlaan 115, 3051 LP, Rotterdam, The Netherlands
Disclaimer
This Manual has been created with the utmost care. Unfortunately, it is always possible that information, as stated is
outdated or incorrect for example, by typing errors. All information contained in this document is provided "AS IS";
and is subject to changes without notice.
Installation Manual P6X Terminals - PTR-40-10-ML-C-0002–2015-04-20 - Copyright © Payter BV

TROUBLE SHOOTING
Probleem
Oplossing
Geen verbinding
LAN / ETHERNET
Heeft de terminal een link (groen/oranje led bij connector branden). Zo niet, check patch kabel /
patch punt.
Valideer netwerk settings met gegevens van Lokale systeembeheerder (DHCP of Statisch IP)
Check met systeem beheerder of de vereiste firewall rules zijn toegepast/vrijgegeven
- tms.payter.nl (port 3185)
Transaction processing Equens Transaction processing Elavon
- https://89.221.178.190:1445 - https://live.cardeasexml.com (port 443)
Indien DNS resolven niet lukt met opgegeven DNS ip van systeembeheerder probeer 8.8.8.8 of 8.8.4.4
(dns servers google)
Ongeacht of DNS resolven lukt of niet, systeembeheerder moet terminal kunnen pingen vanaf het
netwerk.
Andere mogelijke oorzaken
Soms is mac address nodig voor firewall instellingen. Deze is via Vend settings in te zien (of opvragen
bij Payter)
Systeembeheerders kunnen wel eens hoog en laag springen dat alles goed staat.
In dat geval: sluit een laptop aan op hetzelfde patch punt /kabel aan en met dezelfde
netwerk instellingen en controleer met een browser of je bij de urls kunt.
Het is wel eens voorgekomen dat een netwerk outlet verkeerd gelabeld / gepatcht is.
Soms willen systeembeheerders ip adressen hebben van de betaalhosts. Dit is niet verstandig om te
gebruiken want wij hebben geen controle over het feit dat de betaalhosts in de toekomst wellicht van
ip adres veranderen.
GPRS/GSM Connection
…. Icon knippert
geen GPRS signal
Controleer of er een SIM kaart geplaatst is
Controleer of de sim kaart geactiveerd is bij de provider
Controleer of de GPRS antenne aangesloten is
Ligt de antenne in een metalen kast waar deze geen ontvangst heeft.
Slechte ontvangst GPRS
De beste resultaten en ontvangst worden verkregen door het plaatsen van de antenne bovenop de
automaat.
Payter kan eventueel een speciale External Mount Dome antenne leveren.
Dingen om te overwegen ...
Radio golven bewegen in een rechte lijn tussen onze antenne en de antenne op de zendmast
Ze gaan niet rond obstakels, ze gaan door hen als ze kunnen
Glas en hout zijn geen probleem, maar staal en beton vormen een echte uitdaging
Houd rekening met verwarmingsbuizen, sanitair en andere dergelijke belemmeringen
'i' blijft ‘knipperen
De ontvangst is goed maar je kunt toch geen verbinding krijgen
Vraag na bij de provider of er een specifieke / speciale APN is toegewezen.
Zo ja, vraag om de vereiste urls + tms toegangelijk zijn
Controleer de onderstaande settings in de terminal
GPRS APN
GPRS User
GPRS Password
GPRS SIM pin code
-GSM / 3G / 4G ontvangst houd niet altijd in dat er ook GPRS ontvangst is.
-Ga na of er ook GPRS (2G) dekking is op die locatie bij de network provider.
-Het kan zijn dat een andere network provider betere ontvangst heeft op die locatie.
Helpdesk
+31 85 40 123 80
Op werkdagen tussen 9.00 and 17.00
Payter B.V. Rozenlaan 115, 3051 LP, Rotterdam
Disclaimer
Deze handleiding is met de grootst mogelijke zorgvuldigheid tot stand gekomen. Helaas is het altijd mogelijk, dat
informatie, zoals deze hierin staat vermeld, verouderd is, dan wel onjuist is door bijvoorbeeld typefouten. Aan de
informatie op deze kassakaart kunnen dan ook geen rechten worden ontleend.
Installation Manual P6X Terminals - PTR-40-10-ML-C-0002–2015-04-20 - Copyright © Payter BV
Table of contents
Languages:
Other Paytec Touch Terminal manuals
Popular Touch Terminal manuals by other brands
SCM Microsystems
SCM Microsystems PAT1241 Oem manual
Aastra
Aastra Ascotel IntelliGate 150 Quick user guide
OJ Electronics
OJ Electronics FC-HTERM instructions
Siemens
Siemens MT8001 MP4.20 Installation Function & Configuration Commissioning Safety Regulations
Kollmorgen
Kollmorgen AKI-CDC-MOD-15T Installation guides

Cherry
Cherry SmartTerminal ST-1144 operating manual
