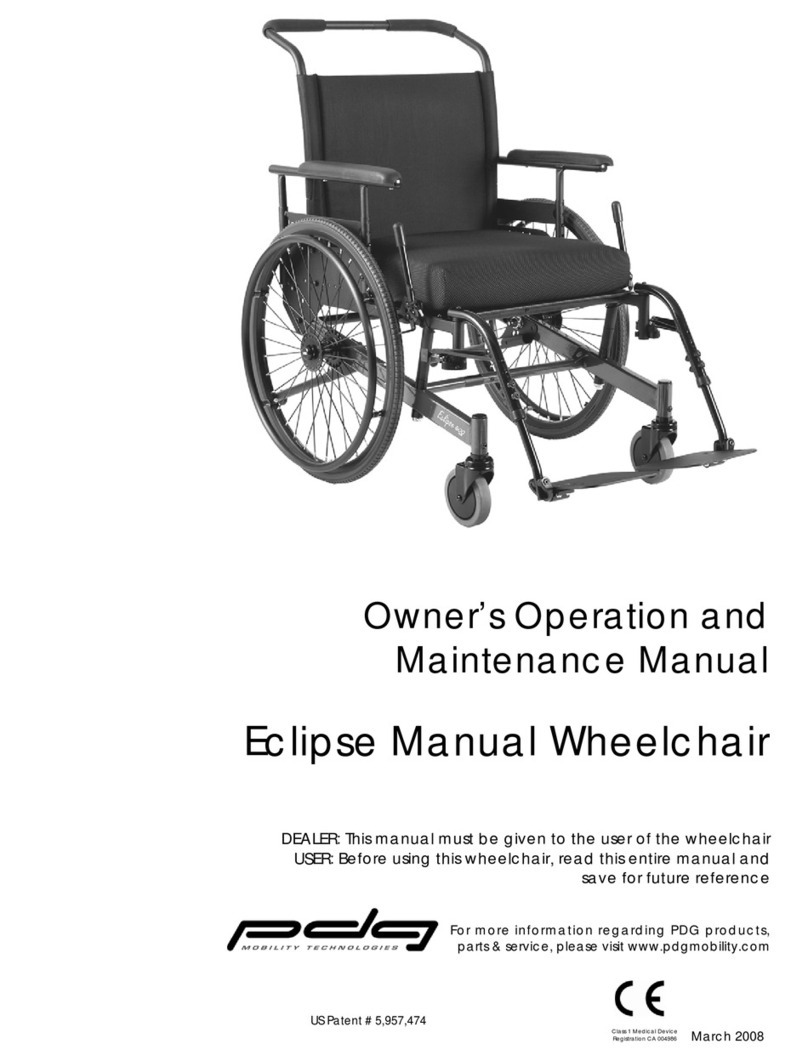
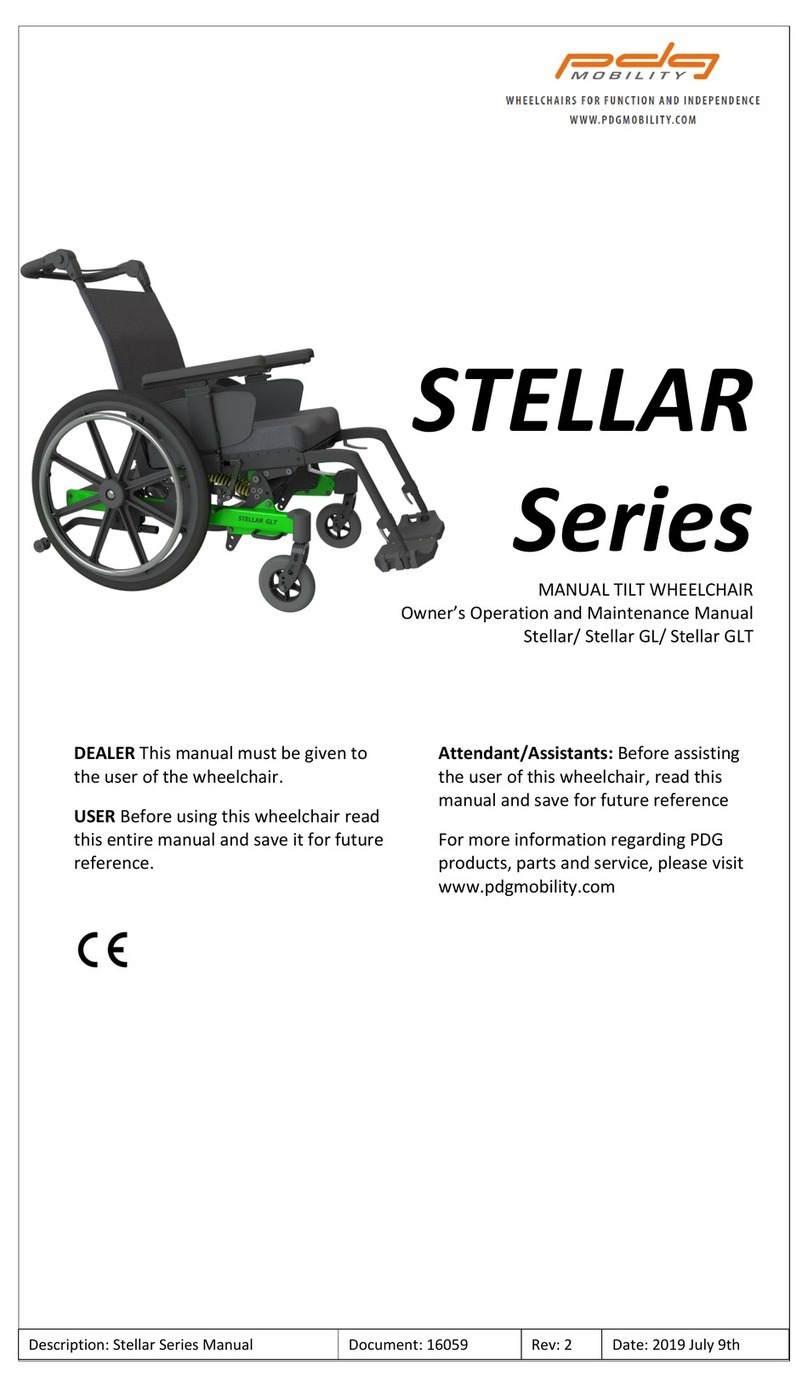
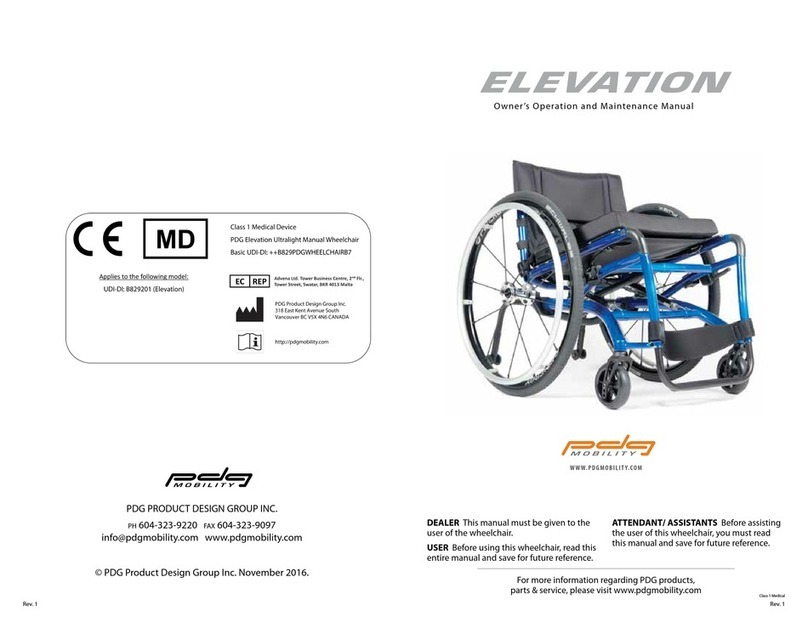
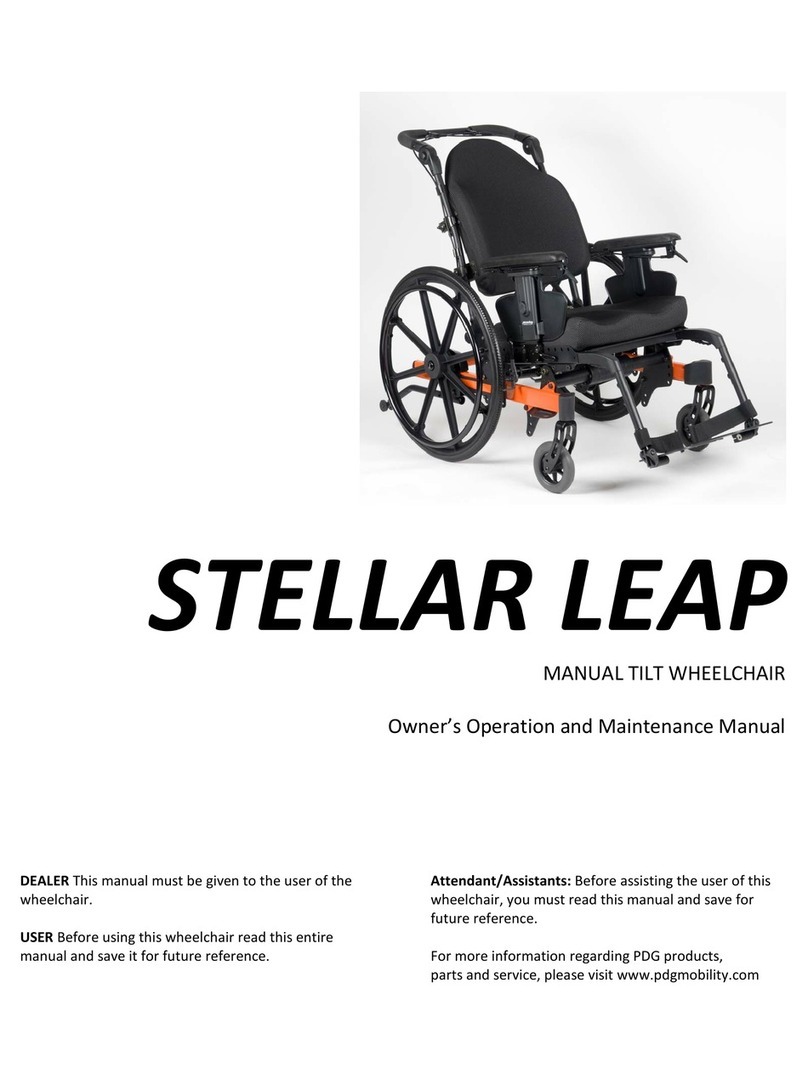
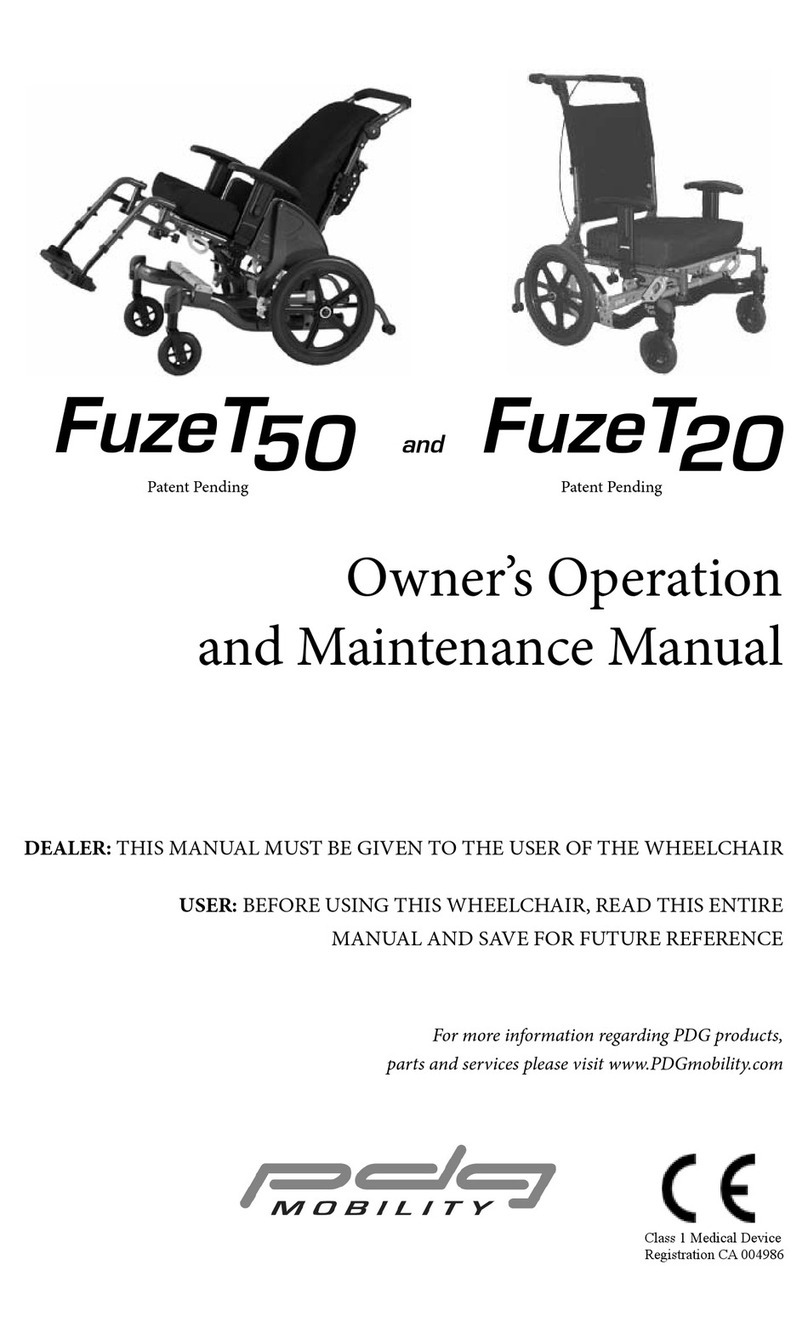
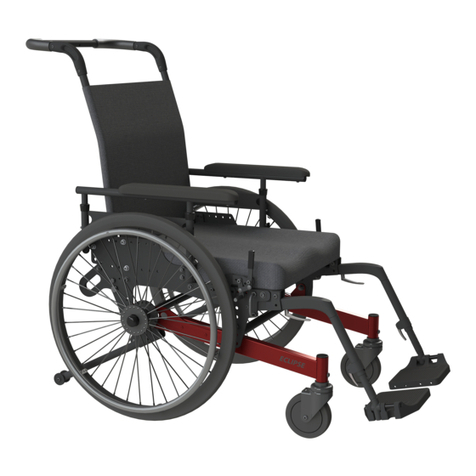
PDG Mobility Evelation Instructions for use

DRAFT
DRAFT
PDG PRODUCT DESIGN GROUP INC.
Ph: (604) 323-9220 Fax: (604) 323-9097 info@pdgmobility.com www.pdgmobility.com
© PDG Product Design Group Inc. October 2013.
DRAFT
DEALER
This manual must be given to the user of the
wheelchair.
USER
Before using this wheelchair, read this entire manual
and save for future reference.
Class 1 Medical
MANUAL WHEELCHAIR
Owner’s Operation and
Maintenance Manual
For more information regarding PDG products,
parts & service, please visit www.pdgmobility.com

DRAFT
DRAFT
page 27
page 2
WARNING
Do not operate this equipment without rst reading and understanding this manual. If you are unable to
understand the warnings and instructions, contact a health care professional such as a doctor or therapist
who is familiar with this type of product before attempting to use this equipment. Otherwise, injury or
damage may result.
Refer to this manual regularly for maximum safety and performance.
TABLE OF CONTENTS
Special Notes................................3
Safety Summary.............................3
Limited Warranty . . . . . . . . . . . . . . . . . . . . . . . . . . . . 4
Stairways....................................6
Escalators ...................................6
Contacting Your Supplier To Obtain Service. . . 6
Damage Requiring Service By Qualied Service
Agent.......................................6
Transferring To And From Other Seats . . . . . . . . 7
Percentage Of Weight Distribution . . . . . . . . . . . 7
Functional Reach From A Wheelchair. . . . . . . . . 7
Dressing Or Changing Clothes . . . . . . . . . . . . . . . 8
Environmental Conditions . . . . . . . . . . . . . . . . . . . 8
Reaching, Leaning And Bending Forward. . . . . 8
Components & Options Warnings . . . . . . . . . . . . 9
Standard Features ..........................12
Unpacking .................................12
Out Of The Box Assembly Instructions: . . . . . . 12
Inspection..................................13
Storage ....................................13
Safety Inspection Checklist . . . . . . . . . . . . . . . . . 13
Suggested Maintenance Procedures . . . . . . . . 13
Set Up & Adjustments . . . . . . . . . . . . . . . . . . . . . . 13
Troubleshooting............................14
Maintenance: Fine Tuning The Fit . . . . . . . . . . . 14

DRAFT
DRAFT
page 26 page 3
SPECIAL NOTES
WARNING/CAUTION — notices as used in this manual apply to hazards or unsafe practices which could
result in personal injury or property damage.
NOTE — THE INFORMATION CONTAINED IN THIS DOCUMENT IS SUBJECT TO CHANGE WITHOUT NOTICE.
INDICATIONs FOR UsE — To provide mobility to persons limited to a seated position.
WHEELCHAIR UsER — As a manufacturer of wheelchairs, PDG endeavors to supply wheelchairs to meet
many needs of the end user. However, nal selection of the type of wheelchair to be used by an
individual rests solely with the user and his/her health care professional capable of making such a
selection.
WHEELCHAIR TIE-DOWN REsTRAINTs AND sEAT REsTRAINTs — PDG recommends that wheelchair
users NOT be transported in vehicles of any kind while in wheelchairs. As of this date, Transport
Canada, and the Department of Transportation has not approved any tie-down systems for
transportation of a user in a moving vehicle of any type while in a wheelchair.
It is PDG’s position that users of wheelchairs should be transferred into appropriate seating in vehicles
for transportation and that use be made of the restraints made available by the auto industry. PDG
can not and does not recommend any specic wheelchair transportation systems.
REGARDING REsTRAINTs - sEAT BELTs - IT Is THE OBLIGATION OF THE HME DEALER, THERAPIsTs
AND OTHER HEALTH CARE PROFEssIONALs TO DETERMINE IF A sEATING REsTRAINT Is REQUIRED TO
ENsURE THE sAFE OPERATION OF THIs EQUIPMENT BY THE UsER. sERIOUs INJURY CAN OCCUR IN THE
EVENT OF A FALL FROM A WHEELCHAIR.
SAFETY SUMMARY
Operating Information Warning
To determine and establish particular safety limits, practice bending, reaching and transferring activities
in several combinations in the presence of a qualied health professional BEFORE attempting active use
of the wheelchair.
6 DO NOT attempt to reach objects if you have to move forward in the seat.
6 DO NOT attempt to reach objects if you have to pick them up from the oor by reaching down
between your knees.
6 DO NOT lean over the top of the back upholstery to reach objects from behind as this may cause the
wheel chair to tip over.
6 DO NOT shift your weight or sitting position toward the direction you are reaching as the wheelchair
may tip over.
6 DO NOT use an escalator to move a wheelchair between oors. Serious bodily injury may occur.
6 DO NOT attempt to stop a moving wheelchair with the wheel locks. WHEEL LOCKS ARE NOT BRAKES.
4 Before attempting to transfer in or out of the wheelchair, every precaution should be taken to reduce
the gap distance. Turn both casters toward the object you are transferring onto. When transferring to
and from the wheelchair, ALWAYS ENGAGE BOTH WHEEL LOCKS.
6 DO NOT operate on roads, streets or highways.
6 DO NOT climb, go up or down ramps or traverse slopes greater than 9º.
6 DO NOT attempt to move up or down an incline that is wet, icy or contains an oily lm.

DRAFT
DRAFT
page 25
page 4
6 DO NOT attempt to ride over curbs or obstacles. Doing so may cause your wheelchair to turn over
and cause bodily harm or damage to the wheelchair.
6 DO NOT use unauthorized parts, accessories, or adapters other than those authorized by PDG.
6 DO NOT attempt to lift wheelchair by any removable (detachable) parts.
6 DO NOT stand on the frame of the wheelchair.
4 For products supplied with anti-tippers, anti-tippers must be attached at all times.
6 DO NOT use the footplate as a platform when getting in or out of the wheelchair.
4 ALWAYS wear your seat restraint.
6 The seat and backrest position of Elevation should only be adjusted with the seat belt securely
fastened around the occupant.
6 Extreme caution should be exercised when operating the backrest recline mechanism as excessive
or sudden recline may promote the occupant to tip over backwards. The use of an anti-tip devices is
recommended.
6 Adjustment of Elevation to a higher seat position may result in changes to your body that you may
be unaccustomed to and may nd discomforting. Such changes may be dangerous and may lead to
injury or death. Consult your doctor or physical therapist prior to using Elevation.
6 The seat or backrest position of Elevation should only be elevated or reclined on rm, level ground to
avoid the risk of falling or tipping over, possibly resulting in injury or death.
6 Avoid reaching or leaning with the seat raised above the horizontal position to avoid the risk of falling
or tipping over, possibly resulting in injury or death.
6 Avoid sudden or extreme movements with the seat raised above the horizontal position or the
backrest reclined to avoid the risk of tipping over and possible injury.
6 Seat height adjustment of Elevation must only be performed with the wheel brakes locked to avoid
any undesired movement and possible accident or injury.
6 During an episode of spasms, cramps or any situation that distracts the user’s attention, it is
recommended that the user not raise the seat height until the episode subsides. If possible, it is
recommended that the user immediately lower the seat height below the horizontal until the episode
subsides.
6 Never operate Elevation without the complete condence and ability to prevent tipping over
backwards – inexperienced users are recommended to use anti-tip devices.
6 Never operate the seat raising mechanism while leaning forward or sideways.
6 Never use Elevation without the seat sling axed very rm and taut.
6 Never use Elevation without a properly tted and secured seat cushion.
6 Never use Elevation while inebriated or with some other altered state of mind.
6 Never attempt to adjust seat height of Elevation while the wheelchair is un-occupied.
6 Elevation must only be used by the original purchaser for whom it was ordered for and tted. To.
Unauthorized individuals using Elevation may void the warranty and risk accident, injury or death.
Tire Pressure
6 If pneumatic tires are supplied, DO NOT use your wheelchair unless it has the proper tire
pressure(p.s.i.). DO NOT over inate the tires. Failure to follow these suggestions may cause the tire to
explode and cause bodily harm.
LIMITED WARRANTY
PLEASE NOTE — THE WARRANTY BELOW HAS BEEN DRAFTED TO COMPLY WITH FEDERAL LAW
APPLICABLE TO PRODUCTS MANUFACTURED AFTER JULY 4, 1975.
This warranty is extended only to the original purchaser/user of our products.
This warranty gives you specic legal rights and you may also have other legal rights, which vary from
state to state.
PDG warrants its product, except for the seat cushion (which is not warranted), to be free from defects in
materials and workmanship for a period of one (1) year from date of purchase. The side frames and cross-
members are warranted for the lifetime of the original purchaser/user. If within such warranty period any
such product shall be proven to be defective, such product shall be repaired or replaced, at PDG’s option.
This warranty does not include any labor or shipping charges incurred in replacement part installation or
repair of any such product. PDG’s sole obligation and your exclusive remedy under this warranty shall be
limited to such repair and/or replacement.
For warranty service, please contact the dealer from whom you purchased your PDG product. In the event
you do not receive satisfactory warranty service, please write directly to PDG at the address on the back
cover page, provide dealer’s name, address, and date of purchase, indicate nature of the defect and, if the
product is serialized, indicate the serial number. Do not return products to our factory without our prior
consent.
Limitations and exclusions: the foregoing warranty shall not apply to serial numbered products if the
serial number has been removed or defaced, products subjected to negligence, accident, improper
operation, maintenance or storage, products modied without PDG’s express written consent including,
but not limited to, modication through the use of unauthorized parts or attachments; products
damaged by reason of repairs made to any component without the specic consent of PDG, or to a
product damaged by circumstances beyond PDG’s control, and such evaluation will be solely determined
by PDG. The warranty shall not apply to problems arising from normal wear or failure to adhere to these
instructions. The foregoing express warranty is exclusive and in lieu of any other warranties whatsoever,
whether express or implied, including the implied warranties of merchantability and tness for a
particular purpose, and the sole remedy for violations of any warranty whatsoever, shall be limited to
repair or replacement of the defective product pursuant to the terms contained herein. The application of
any implied warranty whatsoever shall not extend beyond the duration of the express warranty provided
herein. The manufacturer shall not be liable for any consequential or incidental damages whatsoever.
This warranty shall be extended to comply with state/provincial laws and requirements.

DRAFT
DRAFT
page 24 page 5
4 Replacement of a pneumatic tire or tube MUST be performed by an authorized PDG Dealer or
Qualied Technician.
Weight Training
6 PDG DOES NOT recommend the use of its wheelchairs as a weight training apparatus. PDG
wheelchairs have NOT been designed or tested as a seat for any kind of weight training. If occupant
uses said wheelchair as a weight training apparatus, PDG shall NOT be liable for bodily injury and the
warranty will be voided immediately.
Weight Limitation
The PDG Elevation wheelchair has a weight limitation of 250 lb. unless otherwise specied by PDG.
Safety/Handling of Wheelchairs
“Safety and Handling” of the wheelchair requires close attention of the wheelchair user as well as
the assistant. This manual points out the most common procedures and techniques involved in the
safe operation and maintenance of the wheelchair. It is important to practice and master these safe
techniques until you are comfortable in maneuvering around frequently encountered architectural
barriers.
Use this information only as a “basic” guide. The techniques that are discussed on the following pages
have been used successfully by many.
Individual wheelchair users often develop skills to deal with daily living activities that may dier from
those described in this manual. PDG recognizes and encourages each individual to try what works best
in overcoming architectural obstacles that they may encounter. Techniques in this manual are a starting
point for the new wheelchair user and assistant with “safety” as the most important consideration for all.
Stability and Balance
To assure stability and proper operation of your wheelchair, you must at all times maintain proper
balance. Your wheelchair has been designed to remain upright and stable during normal daily activities as
long as you do not move beyond the center of gravity.
Virtually all activities which involve movement in the wheelchair have an eect on the center of gravity.
PDG recommends using seat restraints for additional safety while involved in activities that shift your
weight.
6 DO NOT lean forward out of the wheelchair any further than the length of the armrests. Make sure
the casters are pointing in the forward position whenever you lean forward. This can be achieved by
advancing the wheelchair and then reversing it in a straight line.
Coping with Everyday Obstacles
Coping with the irritation of everyday obstacles can be alleviated somewhat by learning how to manage
your wheelchair. Keep in mind your center of gravity to maintain stability/balance.
A Note to Wheelchair Assistants
When assistance to the wheelchair user is required, remember to use good body mechanics. Keep
your back straight and bend your knees whenever tilting the wheelchair or traversing curbs, or other
impediments.
ELEVATION WHEELCHAIR TEST CONFIGURATION
Seat Width 650mm
Seat Depth 407mm
Seat Back Height 240mm
Wheelchair Weight 12 kg
Seat sling Standard Sling Seat w/tension straps
Back Upholstery Standard back upholstery
Wheels 24” Wire Wheels
Casters 5” Aluminum Soft Roll
Footrest Aluminum Footrest
Other Options None
Mass of ATD 115 kg
Max. User Weight 115 kg/250 lbs
DIMENSIONAL AND PERFORMANCE ATTRIBUTES OF THE TEST
WHEELCHAIR
Feature Min Max
Overall length with legrest 815 mm 876 mm
Overall width 587 mm 688 mm
Total mass 12.0 kg 12.0 kg
Static stability downhill >10° >10°
Static stability uphill 5.4° 7.6°
Static stability sideways >10° >10°
Seat plane angle 12.0° n/a
Eective seat depth 356 mm 457 mm
Eective seat width 356 mm 457 mm
Seat surface height at front edge 485 mm 515 mm
Backrest angle -14.5° +48.0°
Backrest height 240 mm 370 mm
Footrest to seat distance 385 mm 425 mm
Leg to seat angle 80 mm 105 mm
Hand-rim diameter 520 mm 572 mm
Minimum turning radius 515 mm 515 mm
The Elevation wheelchair conforms to the test methods for static, impact and fatigue strengths as
required by ISO 7176-8.

DRAFT
DRAFT
page 23
page 6
CONTACTING YOUR SUPPLIER TO OBTAIN SERVICE
PDG has trained customer service representatives in many locations. To nd your nearest Customer
Service Center, visit our web site at www.pdgmobility.com and click on CONTACTS. If you are uncertain
about which CONTACT is most appropriate for your needs, contact PDG directly using telephone, fax, or
e-mail contact information. Supply the serial number from the product you are attempting to service and
we will be happy to inform you of the supplier who initially provided your product.
DAMAGE REQUIRING SERVICE BY QUALIFIED SERVICE AGENT
In some circumstances it may be required that your wheelchair be returned to a Qualied Service Agent
for repairs. If any of the following conditions are observed, the wheelchair must be serviced by a Qualied
Service Agent:
6 Any part of the frame is cracked or broken
6 Any weld is cracked or broken
Always contact your Service Agent prior to sending a wheelchair for repairs. For safe and secure shipping,
the wheelchair must be boxed or fastened to a pallet to ensure it does not become damaged during
shipping. Service agent will provide specic instructions for packaging and shipping your wheelchair.
Alternatively, Qualied Service Agent may arrange for pick-up.
Be aware of any removable (detachable) parts. These must NEVER be used for hand-held or lifting
supports, as they may be inadvertently released, resulting in possible injury to the user and/or assistant(s).
When learning a new assistance technique, have an experienced assistant help before attempting it
alone.
Tilting
6 WARNING: DO NOT tilt the wheelchair without assistance.
When tilting the wheelchair, an assistant should grasp the back of the wheelchair on a non-removable(
non-detachable) part. Inform the wheelchair occupant before tilting the wheelchair and remind him/her
to lean back. Be sure the occupant’s feet and hands are clear of all wheels.
Tilting – Curbs
After mastering the techniques of tilting the wheelchair, use this procedure to tackle shallow curbs, short
stairs, etc.
METHOD 1 - Wheelchair With Step Tubes
Apply a continuous downward motion until the balance point
is achieved and the front casters clear the curb. At this point,
the assistant will feel a dierence in the weight distribution.
Roll the wheelchair forward and slowly lower the wheelchair in
one continuous movement. Do not let the wheelchair drop the
last few inches to the ground. This could result in injury to the
occupant. Push the wheelchair forward until the rear wheels
roll up and over the curb.
METHOD 2 - Wheelchairs without Step Tubes
Unless the rst assistant has exceptional upper body
strength, it is recommended that METHOD 2 use two (2)
assistants. The second assistant should be positioned at the
front of the wheelchair lifting upward on a non-removable
(non-detachable) part of the wheelchair frame when lifting
the wheelchair and stabilizing the wheelchair when the
wheelchair is being lowered to the ground.
The rst assistant should stand on the sidewalk and turn the
wheelchair so that the rear wheels are against the curb. The
wheelchair should be tilted back to the balance point and, in one continuous downward movement, the
rear wheels should be pulled up and over the curb. DO NOT return the front casters to the ground until
the wheelchair has been pulled backward far enough for the front casters to clear the edge of the curb.

DRAFT
DRAFT
page 22 page 7
STAIRWAYS
WARNING — Do not attempt to lift a wheelchair by lifting on any removable (detachable) parts. Lifting by
means of any removable(detachable) parts of a wheelchair may result in injury to the user or damage
to the wheelchair.
Extreme caution is advised when it is necessary to move an occupied wheelchair up or down the
stairs. PDG recommends using two(2) assistants and making thorough preparations. Make sure to use
ONLY secure, non-detachable parts for hand-held supports.
Follow this procedure for moving the wheelchair between
oors when an elevator is NOT available:
1 After the wheelchair has been tilted back to the balance
point, one assistant (in the rear) backs the wheelchair up
against the rst step, while securely grasping a non-
removable (non-detachable) part of the wheelchair for
leverage.
2 The second assistant, with a rm hold on a non-detachable
part of the framework, lifts the wheelchair up and over the
stair and steadies the wheelchair as the rst assistant places
one (1) foot on the next stair and repeats STEP 1.
3 The wheelchair should not be lowered until the last stair has been negotiated and the wheelchair has
been rolled away from the stairway.
ESCALATORS
SORRY! DO NOT use an escalator to move a wheelchair between oors. Serious bodily injury may occur.
TRANSFERRING TO AND FROM OTHER SEATS
WARNING — BEFORE attempting to transfer in or out of the
wheelchair, every precaution should be taken to reduce gap
distance. Turn both casters toward the object you are
transferring onto. Also be certain the wheel locks are engaged
to help prevent wheels from moving.
CAUTION — When transferring, position yourself as far back as
possible in the seat. This will prevent damaged upholstery and
the possibility of the wheelchair tipping forward.
NOTE — This activity may be performed independently
provided you have adequate mobility and upper body
strength.
1 Position the wheelchair as close as possible along side the seat to which you are transferring, with the
front casters pointing toward it. Engage wheel locks. Shift body weight into seat with transfer.
2 During independent transfer, little or no seat platform will be beneath you. Use a transfer board if at
all possible.
2 Squeeze the lever on the right side and with your left hand push up on the main frame or rear wheel
to raise the seat.
3 Release the lever at the desired height.
To lower seat
1 Squeeze the lever again and the seat will slowly lower.
2 Grab the rear wheel to assist bringing the seat down.
3 Release the lever to lock the seat at the desired height.
Warning — Adjustment of elevation to a higher seat position may
result in changes in your body that you may be unaccustomed to.
Consult your doctor or physical therapist prior to using elevation.
Warning — Use caution when adjusting the seat height; ensure that
clothing and body parts are clear of any moving parts of the
wheelchair to protect yourself and accompanying persons from
possible injury.
Warning — Raise and lower seat slowly to avoid any potential risk of
tipping and resultant injury. Please consult your elevation dealer
or other authorized representative for detailed instructions on
raising seat height.
Real-Time Backrest Recline: Operating Instructions
Your elevation has a unique backrest design that allows real time
adjustment. The backrest can be adjusted to suit the occupants
comfort by simply activating the adjustment lever located at the front
of the wheelchair, below the seat. Activation of the adjustment lever
will allow for movement of the backrest forward or back.
To recline back
1 Be sure the chair is on a solid level surface and secure it using the
brakes.
2 Squeeze the lever on the left side and lightly push back on the
backrest.
3 Release the lever at the desired postions.
To return back
1 Squeeze the lever on the left side.
2 Lean forward slowly and the back will return.
3 Release the lever to lock the back at the desired position.
Warning — The backrest must be in its upright position prior to
changing seat height.
Warning — Sudden or extreme reclining of the backrest will result in tipping backwards of the
wheelchair. The use of anti-tip devices is strongly recommended to avoid accidents or injury.
Warning — Do not bend or stretch the cables that run from the release lever to the backrest adjustment
mechanism, as this may release the mechanism and move the backrest resulting in accident or injury.
4 Test the wheelchair for maneuverability.

DRAFT
DRAFT
page 21
page 8
PERCENTAGE OF WEIGHT DISTRIBUTION
WARNING — DO NOT attempt to reach objects if you have to
move forward in the seat or pick them up from the oor by
reaching down between your knees.
Many activities require the wheelchair owner to reach, bend
and transfer in and out of the wheelchair. These movements
will cause a change to the normal balance, the center of
gravity, and the weight distribution of the wheelchair. To
determine and establish your particular safety limits, practice
bending, reaching and transferring activities in several
combinations in the presence of a quali ed health professional
BEFORE attempting active use of the wheelchair.
FUNCTIONAL REACH FROM A WHEELCHAIR
Proper positioning is essential for your safety. When reaching,
leaning, bending forward, it is important to use the front
casters as a tool to maintain stability and balance.
The approximate reach-limit values shown in the
accompanying graph were derived on the basis of a sample
of 91 male and 36 female subject wheelchair users. Note the
di erence between the maximum and the comfortable reach
limits, a subjective but important consideration in design.
REACHING, LEANING and BENDING FORWARD
Bending Forward
Position the front casters so that they are extended as far as possible
and engage wheel locks. DO NOT LEAN FORWARD OF THE ARMRESTS.
Bending Backward
WARNING —DO NOT lean over the top of the back upholstery. This will
change your center of gravity and may cause you to tip over.
Position wheelchair as close as possible to the desired object. Point
front casters forward to create the longest possible wheelbase. Reach
back only as far as your arm will extend without changing your sitting
position.
To replace gas springs
1 Position the chair on a solid level surface and secure the chair
using the brakes.
2 Be sure to have the gas spring in the fully extended position.
3 Remove both socket head shoulder bolts from the frame
strut mounts on the upper and lower frames using a 3mm
allen wrench.
4 Remove the cable from the gas spring and re-use on the new
part.
5 Re-install the new gas spring and the socket head shoulder
bolts.
6 Tighten fasteners.
Warning —Do not bend or stretch the cables that run from
the release lever to the gas springs, as this may release the
springs and move the seat resulting in injury.
Transport
The Elevation is not designed for transport in a vehicle while occupied. When transporting the chair
ensure that the wheelchair is secured to prevent any movement which may result in injury. To reduce the
risk of accidental seat height movement during transport or storage, ensure that the seat is fully lowered
and ensure that the release levers have their safety latches rmly placed in the “locked” position .
Real-time seat height: Operating Instructions
The gas springs on your Elevation wheelchair has a real-time seat height
adjustment that is unique in the wheelchair manufacturing industry. In
addition to performing all the functions of a conventional wheelchair, the
Elevation enables the user to make quick adjustments of the wheelchair
seat height to suit the needs of the occupant’s busy day.
During an episode of spasticity, cramps or any other situation that distracts
the user’s attention or causes instability or discomfort, it is recommended
that the user not raise seat height until the episode subsides. Consult
your physician to make sure you do not su er from any conditions (e.g.
strong contractions, autonomic dysre exia, osteoporosis, spasticity, or
compromised hand function) which make operation of and/or sitting at
higher seat elevations potentially harmful.
The seat height should only be adjusted on a rm, level surface to avoid
any potential risk of injury (tipping over).
To raise seat
1 Be sure the chair is on a solid level surface and secure it using the brakes.

DRAFT
DRAFT
page 20 page 9
DRESSING OR CHANGING CLOTHES
WARNING — Your weight may shift if you dress or change clothes while seated in this chair. To reduce the
risk of a fall or tip-over:
1 Rotate the front casters until they are as far forward as possible. This makes the chair more stable.
2 Lock anti-tip tubes in place. (If your chair does not have antitip tubes, back it up against a wall and
lock both rear wheels).
ENVIRONMENTAL CONDITIONS
WARNING
1 Use extra care if you must ride your chair on a wet or slick surface. If you are in doubt, ask for help.
2 Contact with water or excess moisture may cause your chair to rust or corrode. This could cause your
chair to fail.
a Do not use your chair in a shower, pool or other body of water. The chair tubing and parts are
NOT water-tight and may rust or corrode from the inside.
b Avoid excess moisture (for example, do not leave your chair in a damp bathroom while taking a
shower).
c Dry your chair as soon as you can if it gets wet, or if you use water to clean it.
COMPONENTS & OPTIONS WARNINGS
Positioning or Seat Belts
WARNING
PDG hook & loop, non-padded seat belts and Bodypoint® non-padded hip belts, both of which are
optional equipment, are intended ONLY for use as a positioning aid for simple positioning needs, such as
posterior pelvic tilt.
These belts will not be su cient for persons with more involved positioning needs. Only your health care
advisor can determine the proper positioning products for your situation. If used improperly, positioning
or seat belts can cause severe injury or even death. If your health care advisor has instructed you to
use positioning or seat belts, make sure they instruct you on the proper usage of such belts, and such
professional should supervise your use of such belts to ensure you can use them safely.
1 Belts must t snugly in order to work properly. However, they must not be so snug they interfere with
your breathing. Your health care advisor should be able to slide his or her open hand at between the
belt and your body.
2 Make sure you do not slide down in your chair while wearing a belt. If this should happen, you may
su er chest compression or be su ocated due to pressure from the belt.
3 Do not use a positioning or seat belt unless you are capable of removing the belts easily in an
emergency. If you cannot do this, consult with your health care advisor for other options to help with
your posture.
4 There are devices that help to keep you from sliding down in the seat of your wheelchair, such as a
pelvic wedge. Consult with your health care advisor to nd out if you need to use such a device in
conjunction with positioning or seat belts to mitigate the risks described above.
To adjust footrest height
1 Using a 4mm allen wrench loosen the Socket head cap screws on
the clamp.
2 Position the footrest to the desired height and ensure it is level to
the ground.
3 Re-tighten the bolts.
Warning — never attempt to adjust the footrest with the wheelchair
occupied.
Scissor Brakes
Brakes lock the rear wheels and prevent any undesirable movement of your wheelchair. To apply the
brakes, bring both brake operation levers forward as far as they will go until they lock into place. Once
the brakes are applied the wheels should not be able to rotate. If they do, PDG recommends the chair be
serviced by a PDG dealer.
To adjust brakes
1 Position the chair on a solid level surface and secure the chair so it will not move when the brakes are
unlocked.
2 Release the brakes as far as they will go.
3 Loosen both screws on the cylindrical brake mounting bracket.
4 Adjust the position of the brakes and re-tighten the screws such that rm braking action prevents the
wheels from rotating.
Warning — If adjustments to the position of the rear wheel axle have been performed, the brakes must
also be adjusted. Never attempt to adjust the brakes with the wheelchair occupied.
Side Guards
Your elevation may be purchased with the patented Flexguard™ side guards. These unique side guards
ex inward to protect the occupants clothing from contact with the tires and allow easier access to the
wheels for better performance and handling. The patented exibility of the side guards also allow for
ease of transferring. Flexguard™ side guards o er exibility and protection at a fraction of the thickness
and weight of conventional side guards. Because of their unique exibility, Flexguard™ side guards also
reduce the risk of injury due to pinching or trapping of body parts between the side guards and moving
parts. In addition, when the seat height of elevation is raised, the side guards pull inwards to improve the
user’s stability, an added safety feature. The side guards must be rmly a xed with the Velcro straps.
Gas Spring
The gas springs on elevation are pre-set at the factory for the weight of the user and allow for ease of
seat height adjustment. The gas springs are specially adjusted to balance the occupant’s weight to allow
minimal arm strength to move the seat up or down. By pushing lightly on the wheels and/or wheelchair
frame, the occupant can sit higher, and by pulling lightly down one can sit lower with minimal e ort. The
gas spring release lever, actuators, cables must be properly adjusted and maintained for comfortable and
safe usage. The gas spring units do not have any serviceable parts, do not attempt to servicing.

DRAFT
DRAFT
page 19
page 10
Calf Strap
The calf strap is positioned behind the occupant’s lower calves to prevent the legs and/or feet slipping
backwards. Adjust the Velcro strap to obtain the desired length of strap to correctly position the feet on
the footrest.
Warning — improper positioning of feet may result in accident or injury. Please consult your elevation
dealer or other authorized representative for proper strap adjustment.
Seat Sling
Your elevation comes standard with a nylon fabric seat sling that is adjusted taut by rmly tightening the
Velcro straps on the underside of the seat.
Warning – Never attempt to adjust the seat lacing with the wheelchair occupied. Never use you elevation
without the seat sling a xed very rm and taut.
Seat Cushion
A seat cushion can be attached to the seat with Velcro fasteners. If the seat cushion does not provide
complete comfort and/or any skin or other physical condition develops with usage, see your Physician
immediately.
Warning — Never use your Elevation without a tted and attached seat cushion.
Back Upholstery
The backrest upholstery is attached to the backrest with Velcro straps. Minor adjustments are possible by
loosening or tightening the Velcro fasteners. If the backrest does not provide complete comfort and/or
any skin or other physical condition develops, see your Physician immediately.
Backrest Height
The backrest height is adjusted by removing the upholstery.
To adjust back height
1 Remove the upholstery.
2 Using a 4mm allen wrench, loosen the socket head cap screws on the clamp.
3 Position the backrest tubes to the desired height and ensure they are at equal
distance on each side for maximum comfort and safety.
4 Re-tighten the bolts.
Footrest Height
The height of the footrest is adjustable and should be adjusted to suit the occupant’s needs. PDG
recommends that the footrest be a minimum 2” o the ground. Prior to adjusting the footrest, seat
cushion selection and positioning, as well as backrest selection and adjustments must be made.
5 NEVER use positioning or seat belts as a motor vehicle restraint. These types of belts are NOT
intended to protect the wheelchair rider from the forces involved in a vehicle accident, and they may,
in fact, cause you to be injured. PDG recommends wheelchair users ALWAYS transfer to appropriate
motor vehicle seating when traveling in a motor vehicle.
Note to Attendants/Assistants — NEVER use positioning or seat belts as a patient restraint (a restraint
requires a doctor’s order) or on a wheelchair user who is comatose or agitated.
Anti-Tip Tubes (Optional)
WARNING
Anti-tip tubes can help keep your chair from tipping over backward in most normal conditions.
1 PDG recommends use of anti-tip tubes:
a UNLESS you are a skilled rider of this chair and are sure you are not at risk to tip over.
b Each time you modify or adjust your chair. The change may make it easier to tip backward. Use
anti-tip tubes until you adapt to the change, and are sure you are not at risk to tip over.
2 When locked in place (in the “down” position) anti-tip tubes should be BETWEEN 1 1/2 to 2 inches o
the ground.
a If set too HIGH, they may not prevent a tip-over.
b If set too LOW, they may “hang up” on obstacles you can expect in normal use. If this occurs,
you may fall or your chair may tip over.
3 Keep Anti-Tip Tubes Locked In Place UNLESS:
a You have an attendant; or
b You have to climb or descend a curb, or overcome an obstacle, and can safely do so without
them. At these times, make sure anti-tip tubes are up, out of the way.
Fasteners
WARNING — Many of the screws, bolts and nuts on this chair are special highstrength fasteners. Use of
improper fasteners may cause your chair to fail.
1 ONLY use fasteners provided by an authorized supplier (or ones of the same type and strength, as
indicated by the markings on the heads).
2 Over- or under-tightened fasteners may fail or cause damage to chair parts.
3 If bolts or screws become loose, tighten them as soon as you can. If you fail to heed these warnings
damage to your chair, a fall, tip-over or loss of control may occur and cause severe injury to the rider
or others.
Footrests
WARNING
1 At the lowest point, footrests should be AT LEAST 2” o the ground. If set too LOW, they may “hang
up” on obstacles you can expect to nd in normal use. This may cause the chair to stop suddenly and
tip forward.
2 To avoid a trip or fall when you transfer:
a Make sure your feet do not “hang up” or get caught in the space between the footrests.

DRAFT
DRAFT
page 18 page 11
b Avoid putting weight on the footrests, as the chair may tip forward.
Pneumatic Tires
WARNING — Proper in ation extends the life of your tires and makes your chair easier to use.
1 Do not use this chair if any of the tires is under- or overin ated. Check weekly for proper in ation
level, as listed on the tire sidewall.
2 Low pressure in a rear tire may cause the wheel lock on that side to slip and allow the wheel to turn
when you do not expect it.
3 Low pressure in any of the tires may cause the chair to veer to one side and result in a loss of control.
4 Over-in ated tires may burst.
Quick-Release Axles
WARNING
1 Do not use this chair UNLESS you are sure that both quickrelease rear axles are locked. An unlocked
axle may come o during use and cause a fall.
2 An axle is not locked until the quick-release button pops out fully. An unlocked axle may come o
during use, resulting in a fall, tip-over or loss of control and cause severe injury to the rider or others.
Rear Wheels
WARNING — A change in set-up of the rear wheels will a ect the center of balance of your chair.
1 The farther you move the rear axles FORWARD, the more likely it is that your chair will tip over
backward.
2 Consult your doctor, nurse or therapist to nd the best rear axle set-up for your chair. Do not change
the set-up UNLESS you are sure you are not at risk to tip over.
3 Adjust the rear wheel locks after you make any change to the rear axles.
a If you fail to do so, the locks may not work.
b Make sure lock arms embed in tires at least 1/8 inch when locked.
Upholstery Fabric
WARNING
1. Replace worn or torn fabric of seat and seat back as soon as you can. If you fail to do so, the seat may
fail.
2 Sling fabric will weaken with age and use. Look for fraying or thin spots, or stretching of fabrics at
rivet holes.
3 “Dropping down” into your chair will weaken fabric and result in the need to inspect and replace the
seat more often.
4 Be aware that laundering or excess moisture will reduce ame retardation of the fabric.
Center of Gravity/Wheel Position
The rear wheel axle location is preset at the factory. Adjustments are possible by moving the axles and
camber tube assembly forward or backwards. To adjust the position,. Place the camber tube at the desired
position, ensure that the camber tube assembly is equally place distance on both sides by measuring
from the camber tube to the rear of the wheelchair, and then rmly tighten the bolts.
To adjust wheel position
1 Using the 6mm allen key, loosen the M8 socket head bolts
on the bottom of the axle housing/camber tube until it is
possible to slide the assembly forwards and back.
2 Place the camber tube at the desired position, ensure that
the camber tube assembly is equally set on both sides by
measuring from the camber tube to the rear of the wheelchair.
3 Re-tighten the socket head bolts.
Warning — Camber tube adjustment may increase the tendency
of elevation to tip over either forwards or backwards. The use
of anti-tip devices are strongly recommended to avoid accidents or injury.
Camber Angle
Your Elevation comes standard with a patented camber angle
adjustment.
To adjust camber angle
1 Remove the rear wheels.
2 Remove the camber blocks from the camber tube
assembly by removing the two M8 socket head bolts.
3 To set the camber angle remove M6 button head bolt.
4 Using the chart as reference install the recommended
number of washers on M6 button head for desired camber
angle and re-install onto block. (Spare camber washer are
supplied with chair.)
5 Re-install the camber block to the frame and camber tube
assembly.
6 Place the camber tube at the desired position, ensure that
the camber tube assembly is equally set on both sides
by measuring from the camber tube to the rear of the
wheelchair.
7 Re-tighten the M8 socket head bolts.
Front Casters
The size of the front castors depends on the occupant’s preference. Casters and forks are matched to
the size of the rear wheels and should not be changed or adjusted without consulting an authorized
technician.
Camber
Angle
Number of
Spacers
8 0
6 1
4 2
2 3
0 4
Camber Angle
Spacers

DRAFT
DRAFT
page 12 page 17
STANDARD FEATURES
1 Wheel Lock
2 Foot Plate
3 Front Caster
4 Tilt Activator (trigger)
5 Rear Wheel
6 Back Upholstery
7 Quick-Release Axle
8 Lower Frame
9 Back Rest
10 Seat Sling
DRAFT
DRAFT
1 Wheel Lock
DRAFT
6 Back Upholstery
UNPACKING
1 Check for any obvious damage to the carton or its contents. If damage is evident, notify your Dealer/
Carrier immediately.
2 Remove all loose packing from the carton.
3 Carefully remove all components from the carton.
NOTE — Unless the PDG Elevation is to be assembled immediately, retain cartons and packing materials
for use in storing the wheelchair until assembly is required.
Rear Wheel Axle Nut Adjustment
The quick-release axle attaches the rear wheel to the axle receiver. When the axle is fully inserted into
both the wheel and axle receiver the detent balls will lock the wheel assembly in place. By pushing the
button on the quick-release axle the detent balls will be disengaged and wheel can be removed. If wheel
and axle will not lock or alternatively if it is locking into place but there is excessive play when the wheel
hub is pushing back and forth, the nut on the axle needs to be adjusted.
If the axle does not lock
1 Using a 7/16” open end wrench, securely hold the detent ball end
of the axle.
2 Use the ¾” open-end wrench to turn the axle nut counter-
clockwise.
3 Turn the nut approximately in ½ turn increments
4 Try to lock the axle into the axle receiver.
5 If it doesn’t lock, continue step c. and d. until it locks securely.
If the axle locks, but there is excessive play
1 Using a 7/16” open end wrench, securely hold the detent ball end
of the axle.
2 Use the ¾” open-end wrench to turn the axle nut clockwise.
3 Turn the nut approximately in ½ turn increments.
4 Insert the axle and test for play.
5 Continue steps 3 and 4 until the play has be eliminated.
Seat Height
The minimum seat height adjustment setting of the elevation is preset at the factory for the user to
achieve the most commonly used range of seat heights. However, minor adjustments maybe required
to optimize an occupant’s unique requirements and comfort. Increasing the minimum seat height will
decrease the distance the seat will go down and increase the maximum distance the seat will go up.
To adjust minimum height
1 Using the 5mm allen key, loosen the socket head cap screws on the
seat brackets, as shown.
2 Slide brackets towards the front of the wheelchair to increase the
minimum height.
3 Alternatively slide the bracket rearward to decrease the minimum
height.
4 Ensure the brackets are equal distance to ensure proper functioning of
the seat height mechanism.
5 Re-tighten the cap screw once set.
Warning — Never attempt to adjust the seat height mechanism with the wheelchair occupied.
3
2
5
6
71
8
9
10
4

DRAFT
DRAFT
page13
page 16
OUT OF THE BOX ASSEMBLY INSTRUCTIONS
INSPECTION
Examine exterior of the PDG Elevation for nicks, dents, scratches or other damages. Inspect all
components. If damage is evident, notify your Dealer/Carrier immediately.
STORAGE
1 Store the repackaged PDG Elevation in a dry area.
2 DO NOT place other objects on top of the repackaged wheelchair.
SAFETY INSPECTION CHECKLIST
NOTE — Twice a year take your wheelchair to a qualied dealer for a thorough inspection and servicing.
Regular cleaning will reveal loose or worn parts and enhance the smooth operation of your
wheelchair. To operate properly and safely, your wheelchair must be cared for just like any other
vehicle. Routine maintenance will extend the life and eciency of your wheelchair.
Initial adjustments should be made to suit your personal body structure and preference. Thereafter follow
these maintenance procedures:
Cleaning
Periodic cleaning of all surfaces will help keep your wheelchair looking good and operating properly. All
surfaces can be cleaned using warm water and a mild soap solution. Do not use abrasive cleaners on any
surfaces.
SUGGESTED MAINTENANCE PROCEDURES
1 Before using your PDG Elevation, make sure all nuts and bolts are tight. Check all parts for damage or
wear and replace. Check all parts for proper adjustment.
2. Keep quick-release axles, if applicable, free of dirt and lint to ensure positive locking and proper
operation. Refer to Rear-Wheel Axle Nut Adjustment in this manual.
3 If applicable, oil quick-release axles at least once (1) a month (3-in-1 oil or equivalent).
WARNING — If pneumatic tires are used, do not use the wheelchair unless it has the proper tire pressure
(p.s.i.). DO NOT over inate the tires. Failure to follow these suggestions may cause the tire to explode
and cause bodily harm.
4 If tires are pneumatic, recommended tire pressure is listed on the side wall of the tire.
5. The wheels and tires should be checked periodically for cracks and wear, and should be replaced
when necessary at your authorized dealer or by a qualied technician.
6 For wheelchairs with handrims, periodically check handrims to ensure they are secured to the rear
wheels.
SET UP & ADJUSTMENTS
Rear Wheel Removal and Installation
Quick-release axles come standard on the Elevation. They
will allow the rear wheels to be easily removed and installed.
To install wheel
1 Depress quick-release button fully.
2 Insert axle through hub of rear wheel.
3 Keep the button depressed as the axle is slid through the
axle receiver on the frame.
4 Release button to lock axle into the receiver. Adjust
the nut on the axle if it does not lock or if there is play
between the wheel and axle receiver.
To remove wheel
1 Depress quick-release button fully.
2 With button depressed simultaneously pull back on the
center of the wheel.
Warning — Do not use this chair UNLESS you are sure both
quick-release axles are locked. An unlocked axle may
come o during use and cause a fall.

DRAFT
DRAFT
page 14 page 15
TROUBLESHOOTING
Problems Solution
6Chair veers right
Contact dealer for servicing.
If pneumatic, check tires for correct/equal
pressure.
6Chair veers left
6Sluggish turn or performance
6Casters utter
63 of 4 wheels contating ground
surface
6Sluggish turn or performance
Contact dealer for servicing.
Check for loose stem nuts and bolts.
6Casters utter
6Squeaks and rattles
6Looseness in chair
6Chair veers right
Contact dealer for servicing.
Check caster angle.
6Chair veers left
6Sluggish turn or performance
6Casters utter
6Chair veers right Contact dealer for servicing.
Check that both casters contact ground at the
same time.
6Chair veers left
6Casters utter
MAINTENANCE: FINE TUNING THE FIT
Adjustment Guide
The following instructions are intended to provide assistance in making wheelchair adjustments. It is
important to note the initial wheelchair conguration prior to making changes. When making changes,
dealers and users should do so under the guidance of a health care professional who is knowledgeable
of the particular limitation of the wheelchair user. Be sure that when nished, all components are
properly tightened and have been completed in accordance with these instructions. DO NOT over tighten
hardware attaching to the frame. This could cause damage to the frame tubing.
Tools Required
Philips Screw Driver
Allen Keys: ....................................r3mm r4mm r5mm r6mm
Adjustable or Open End Wrench . . . . . . . . . . . . . . .r7/16” r3/4”
Socket Head Driver with socket Heads . . . . . . . . .r3/4”
ITEM INITIALLY INSPECT/
ADJUST
WEEKLY
INSPECT/
ADJUST
MONTHLY
INSPECT/
ADJUST/
every 6
months
GENERAL
Wheelchair rolls straight (no excessive drag or pull
to one side). 6 6
Ensure all hardware is tight. 6 6
WHEEL LOCKS (Procedure 6)
Do not interfere with tires when rolling. 6 6
Pivot points free of ware and looseness. 6 6
Wheel locks easy to engage. 6 6
CLOTHING GUARDS
Inspect for bent or protruding metal. 6 6
Ensure all fasteners are secure. 6 6
SEAT/BACK UPHOLSTERY (Procedure 3)
Inspect for rips or sagging. 6
Inspect fastening to ensure they are secure. 6 6 6
REAR WHEELS (Procedure 4)
No excessive side movement or binding when
lifted and spun. 6 6
Quick-release axles lock properly. 6 6 6
FRONT CASTER (Procedure 5) 6 6 6
Inspect wheel/fork assembly for proper tension by
spinning caster; caster should come to a gradual
stop.
6 6
Wheel bearings are clean and free of moisture. 6 6
CAUTION: Wheels and tires should be checked
periodically for cracks and wear, and should be
replaced when necessary.
6 6
TIRES (Procedures 5 and 6)
Inspect for at spots and wear. 6 6
If pneumatic tires, check for proper installation. 6 6
Inspect rear tires for cracks and wear. 6 6
CAUTION: Wheels and tires should be checked
periodically for cracks and wear, and should be
replaced when necessary.
CLEANING
Clean and wax all parts. 6
Clean upholstery and armrests. 6
Inspect axles are free from dirt, lint, etc. 6
Inspect tilt slides and roller bearings are free from
dirt, lint, etc. 6

DRAFT
DRAFT
page13
page 16
OUT OF THE BOX ASSEMBLY INSTRUCTIONS
INSPECTION
Examine exterior of the PDG Elevation for nicks, dents, scratches or other damages. Inspect all
components. If damage is evident, notify your Dealer/Carrier immediately.
STORAGE
1 Store the repackaged PDG Elevation in a dry area.
2 DO NOT place other objects on top of the repackaged wheelchair.
SAFETY INSPECTION CHECKLIST
NOTE — Twice a year take your wheelchair to a qualied dealer for a thorough inspection and servicing.
Regular cleaning will reveal loose or worn parts and enhance the smooth operation of your
wheelchair. To operate properly and safely, your wheelchair must be cared for just like any other
vehicle. Routine maintenance will extend the life and eciency of your wheelchair.
Initial adjustments should be made to suit your personal body structure and preference. Thereafter follow
these maintenance procedures:
Cleaning
Periodic cleaning of all surfaces will help keep your wheelchair looking good and operating properly. All
surfaces can be cleaned using warm water and a mild soap solution. Do not use abrasive cleaners on any
surfaces.
SUGGESTED MAINTENANCE PROCEDURES
1 Before using your PDG Elevation, make sure all nuts and bolts are tight. Check all parts for damage or
wear and replace. Check all parts for proper adjustment.
2. Keep quick-release axles, if applicable, free of dirt and lint to ensure positive locking and proper
operation. Refer to Rear-Wheel Axle Nut Adjustment in this manual.
3 If applicable, oil quick-release axles at least once (1) a month (3-in-1 oil or equivalent).
WARNING — If pneumatic tires are used, do not use the wheelchair unless it has the proper tire pressure
(p.s.i.). DO NOT over inate the tires. Failure to follow these suggestions may cause the tire to explode
and cause bodily harm.
4 If tires are pneumatic, recommended tire pressure is listed on the side wall of the tire.
5. The wheels and tires should be checked periodically for cracks and wear, and should be replaced
when necessary at your authorized dealer or by a qualied technician.
6 For wheelchairs with handrims, periodically check handrims to ensure they are secured to the rear
wheels.
SET UP & ADJUSTMENTS
Rear Wheel Removal and Installation
Quick-release axles come standard on the Elevation. They
will allow the rear wheels to be easily removed and installed.
To install wheel
1 Depress quick-release button fully.
2 Insert axle through hub of rear wheel.
3 Keep the button depressed as the axle is slid through the
axle receiver on the frame.
4 Release button to lock axle into the receiver. Adjust
the nut on the axle if it does not lock or if there is play
between the wheel and axle receiver.
To remove wheel
1 Depress quick-release button fully.
2 With button depressed simultaneously pull back on the
center of the wheel.
Warning — Do not use this chair UNLESS you are sure both
quick-release axles are locked. An unlocked axle may
come o during use and cause a fall.

DRAFT
DRAFT
page 12 page 17
STANDARD FEATURES
1 Wheel Lock
2 Foot Plate
3 Front Caster
4 Tilt Activator (trigger)
5 Rear Wheel
6 Back Upholstery
7 Quick-Release Axle
8 Lower Frame
9 Back Rest
10 Seat Sling
DRAFT
DRAFT
1 Wheel Lock
DRAFT
6 Back Upholstery
UNPACKING
1 Check for any obvious damage to the carton or its contents. If damage is evident, notify your Dealer/
Carrier immediately.
2 Remove all loose packing from the carton.
3 Carefully remove all components from the carton.
NOTE — Unless the PDG Elevation is to be assembled immediately, retain cartons and packing materials
for use in storing the wheelchair until assembly is required.
Rear Wheel Axle Nut Adjustment
The quick-release axle attaches the rear wheel to the axle receiver. When the axle is fully inserted into
both the wheel and axle receiver the detent balls will lock the wheel assembly in place. By pushing the
button on the quick-release axle the detent balls will be disengaged and wheel can be removed. If wheel
and axle will not lock or alternatively if it is locking into place but there is excessive play when the wheel
hub is pushing back and forth, the nut on the axle needs to be adjusted.
If the axle does not lock
1 Using a 7/16” open end wrench, securely hold the detent ball end
of the axle.
2 Use the ¾” open-end wrench to turn the axle nut counter-
clockwise.
3 Turn the nut approximately in ½ turn increments
4 Try to lock the axle into the axle receiver.
5 If it doesn’t lock, continue step c. and d. until it locks securely.
If the axle locks, but there is excessive play
1 Using a 7/16” open end wrench, securely hold the detent ball end
of the axle.
2 Use the ¾” open-end wrench to turn the axle nut clockwise.
3 Turn the nut approximately in ½ turn increments.
4 Insert the axle and test for play.
5 Continue steps 3 and 4 until the play has be eliminated.
Seat Height
The minimum seat height adjustment setting of the elevation is preset at the factory for the user to
achieve the most commonly used range of seat heights. However, minor adjustments maybe required
to optimize an occupant’s unique requirements and comfort. Increasing the minimum seat height will
decrease the distance the seat will go down and increase the maximum distance the seat will go up.
To adjust minimum height
1 Using the 5mm allen key, loosen the socket head cap screws on the
seat brackets, as shown.
2 Slide brackets towards the front of the wheelchair to increase the
minimum height.
3 Alternatively slide the bracket rearward to decrease the minimum
height.
4 Ensure the brackets are equal distance to ensure proper functioning of
the seat height mechanism.
5 Re-tighten the cap screw once set.
Warning — Never attempt to adjust the seat height mechanism with the wheelchair occupied.
3
2
5
6
71
8
9
10
4

DRAFT
DRAFT
page 18 page 11
b Avoid putting weight on the footrests, as the chair may tip forward.
Pneumatic Tires
WARNING — Proper in ation extends the life of your tires and makes your chair easier to use.
1 Do not use this chair if any of the tires is under- or overin ated. Check weekly for proper in ation
level, as listed on the tire sidewall.
2 Low pressure in a rear tire may cause the wheel lock on that side to slip and allow the wheel to turn
when you do not expect it.
3 Low pressure in any of the tires may cause the chair to veer to one side and result in a loss of control.
4 Over-in ated tires may burst.
Quick-Release Axles
WARNING
1 Do not use this chair UNLESS you are sure that both quickrelease rear axles are locked. An unlocked
axle may come o during use and cause a fall.
2 An axle is not locked until the quick-release button pops out fully. An unlocked axle may come o
during use, resulting in a fall, tip-over or loss of control and cause severe injury to the rider or others.
Rear Wheels
WARNING — A change in set-up of the rear wheels will a ect the center of balance of your chair.
1 The farther you move the rear axles FORWARD, the more likely it is that your chair will tip over
backward.
2 Consult your doctor, nurse or therapist to nd the best rear axle set-up for your chair. Do not change
the set-up UNLESS you are sure you are not at risk to tip over.
3 Adjust the rear wheel locks after you make any change to the rear axles.
a If you fail to do so, the locks may not work.
b Make sure lock arms embed in tires at least 1/8 inch when locked.
Upholstery Fabric
WARNING
1. Replace worn or torn fabric of seat and seat back as soon as you can. If you fail to do so, the seat may
fail.
2 Sling fabric will weaken with age and use. Look for fraying or thin spots, or stretching of fabrics at
rivet holes.
3 “Dropping down” into your chair will weaken fabric and result in the need to inspect and replace the
seat more often.
4 Be aware that laundering or excess moisture will reduce ame retardation of the fabric.
Center of Gravity/Wheel Position
The rear wheel axle location is preset at the factory. Adjustments are possible by moving the axles and
camber tube assembly forward or backwards. To adjust the position,. Place the camber tube at the desired
position, ensure that the camber tube assembly is equally place distance on both sides by measuring
from the camber tube to the rear of the wheelchair, and then rmly tighten the bolts.
To adjust wheel position
1 Using the 6mm allen key, loosen the M8 socket head bolts
on the bottom of the axle housing/camber tube until it is
possible to slide the assembly forwards and back.
2 Place the camber tube at the desired position, ensure that
the camber tube assembly is equally set on both sides by
measuring from the camber tube to the rear of the wheelchair.
3 Re-tighten the socket head bolts.
Warning — Camber tube adjustment may increase the tendency
of elevation to tip over either forwards or backwards. The use
of anti-tip devices are strongly recommended to avoid accidents or injury.
Camber Angle
Your Elevation comes standard with a patented camber angle
adjustment.
To adjust camber angle
1 Remove the rear wheels.
2 Remove the camber blocks from the camber tube
assembly by removing the two M8 socket head bolts.
3 To set the camber angle remove M6 button head bolt.
4 Using the chart as reference install the recommended
number of washers on M6 button head for desired camber
angle and re-install onto block. (Spare camber washer are
supplied with chair.)
5 Re-install the camber block to the frame and camber tube
assembly.
6 Place the camber tube at the desired position, ensure that
the camber tube assembly is equally set on both sides
by measuring from the camber tube to the rear of the
wheelchair.
7 Re-tighten the M8 socket head bolts.
Front Casters
The size of the front castors depends on the occupant’s preference. Casters and forks are matched to
the size of the rear wheels and should not be changed or adjusted without consulting an authorized
technician.
Camber
Angle
Number of
Spacers
8 0
6 1
4 2
2 3
0 4
Camber Angle
Spacers

DRAFT
DRAFT
page 19
page 10
Calf Strap
The calf strap is positioned behind the occupant’s lower calves to prevent the legs and/or feet slipping
backwards. Adjust the Velcro strap to obtain the desired length of strap to correctly position the feet on
the footrest.
Warning — improper positioning of feet may result in accident or injury. Please consult your elevation
dealer or other authorized representative for proper strap adjustment.
Seat Sling
Your elevation comes standard with a nylon fabric seat sling that is adjusted taut by rmly tightening the
Velcro straps on the underside of the seat.
Warning – Never attempt to adjust the seat lacing with the wheelchair occupied. Never use you elevation
without the seat sling a xed very rm and taut.
Seat Cushion
A seat cushion can be attached to the seat with Velcro fasteners. If the seat cushion does not provide
complete comfort and/or any skin or other physical condition develops with usage, see your Physician
immediately.
Warning — Never use your Elevation without a tted and attached seat cushion.
Back Upholstery
The backrest upholstery is attached to the backrest with Velcro straps. Minor adjustments are possible by
loosening or tightening the Velcro fasteners. If the backrest does not provide complete comfort and/or
any skin or other physical condition develops, see your Physician immediately.
Backrest Height
The backrest height is adjusted by removing the upholstery.
To adjust back height
1 Remove the upholstery.
2 Using a 4mm allen wrench, loosen the socket head cap screws on the clamp.
3 Position the backrest tubes to the desired height and ensure they are at equal
distance on each side for maximum comfort and safety.
4 Re-tighten the bolts.
Footrest Height
The height of the footrest is adjustable and should be adjusted to suit the occupant’s needs. PDG
recommends that the footrest be a minimum 2” o the ground. Prior to adjusting the footrest, seat
cushion selection and positioning, as well as backrest selection and adjustments must be made.
5 NEVER use positioning or seat belts as a motor vehicle restraint. These types of belts are NOT
intended to protect the wheelchair rider from the forces involved in a vehicle accident, and they may,
in fact, cause you to be injured. PDG recommends wheelchair users ALWAYS transfer to appropriate
motor vehicle seating when traveling in a motor vehicle.
Note to Attendants/Assistants — NEVER use positioning or seat belts as a patient restraint (a restraint
requires a doctor’s order) or on a wheelchair user who is comatose or agitated.
Anti-Tip Tubes (Optional)
WARNING
Anti-tip tubes can help keep your chair from tipping over backward in most normal conditions.
1 PDG recommends use of anti-tip tubes:
a UNLESS you are a skilled rider of this chair and are sure you are not at risk to tip over.
b Each time you modify or adjust your chair. The change may make it easier to tip backward. Use
anti-tip tubes until you adapt to the change, and are sure you are not at risk to tip over.
2 When locked in place (in the “down” position) anti-tip tubes should be BETWEEN 1 1/2 to 2 inches o
the ground.
a If set too HIGH, they may not prevent a tip-over.
b If set too LOW, they may “hang up” on obstacles you can expect in normal use. If this occurs,
you may fall or your chair may tip over.
3 Keep Anti-Tip Tubes Locked In Place UNLESS:
a You have an attendant; or
b You have to climb or descend a curb, or overcome an obstacle, and can safely do so without
them. At these times, make sure anti-tip tubes are up, out of the way.
Fasteners
WARNING — Many of the screws, bolts and nuts on this chair are special highstrength fasteners. Use of
improper fasteners may cause your chair to fail.
1 ONLY use fasteners provided by an authorized supplier (or ones of the same type and strength, as
indicated by the markings on the heads).
2 Over- or under-tightened fasteners may fail or cause damage to chair parts.
3 If bolts or screws become loose, tighten them as soon as you can. If you fail to heed these warnings
damage to your chair, a fall, tip-over or loss of control may occur and cause severe injury to the rider
or others.
Footrests
WARNING
1 At the lowest point, footrests should be AT LEAST 2” o the ground. If set too LOW, they may “hang
up” on obstacles you can expect to nd in normal use. This may cause the chair to stop suddenly and
tip forward.
2 To avoid a trip or fall when you transfer:
a Make sure your feet do not “hang up” or get caught in the space between the footrests.

DRAFT
DRAFT
page 20 page 9
DRESSING OR CHANGING CLOTHES
WARNING — Your weight may shift if you dress or change clothes while seated in this chair. To reduce the
risk of a fall or tip-over:
1 Rotate the front casters until they are as far forward as possible. This makes the chair more stable.
2 Lock anti-tip tubes in place. (If your chair does not have antitip tubes, back it up against a wall and
lock both rear wheels).
ENVIRONMENTAL CONDITIONS
WARNING
1 Use extra care if you must ride your chair on a wet or slick surface. If you are in doubt, ask for help.
2 Contact with water or excess moisture may cause your chair to rust or corrode. This could cause your
chair to fail.
a Do not use your chair in a shower, pool or other body of water. The chair tubing and parts are
NOT water-tight and may rust or corrode from the inside.
b Avoid excess moisture (for example, do not leave your chair in a damp bathroom while taking a
shower).
c Dry your chair as soon as you can if it gets wet, or if you use water to clean it.
COMPONENTS & OPTIONS WARNINGS
Positioning or Seat Belts
WARNING
PDG hook & loop, non-padded seat belts and Bodypoint® non-padded hip belts, both of which are
optional equipment, are intended ONLY for use as a positioning aid for simple positioning needs, such as
posterior pelvic tilt.
These belts will not be su cient for persons with more involved positioning needs. Only your health care
advisor can determine the proper positioning products for your situation. If used improperly, positioning
or seat belts can cause severe injury or even death. If your health care advisor has instructed you to
use positioning or seat belts, make sure they instruct you on the proper usage of such belts, and such
professional should supervise your use of such belts to ensure you can use them safely.
1 Belts must t snugly in order to work properly. However, they must not be so snug they interfere with
your breathing. Your health care advisor should be able to slide his or her open hand at between the
belt and your body.
2 Make sure you do not slide down in your chair while wearing a belt. If this should happen, you may
su er chest compression or be su ocated due to pressure from the belt.
3 Do not use a positioning or seat belt unless you are capable of removing the belts easily in an
emergency. If you cannot do this, consult with your health care advisor for other options to help with
your posture.
4 There are devices that help to keep you from sliding down in the seat of your wheelchair, such as a
pelvic wedge. Consult with your health care advisor to nd out if you need to use such a device in
conjunction with positioning or seat belts to mitigate the risks described above.
To adjust footrest height
1 Using a 4mm allen wrench loosen the Socket head cap screws on
the clamp.
2 Position the footrest to the desired height and ensure it is level to
the ground.
3 Re-tighten the bolts.
Warning — never attempt to adjust the footrest with the wheelchair
occupied.
Scissor Brakes
Brakes lock the rear wheels and prevent any undesirable movement of your wheelchair. To apply the
brakes, bring both brake operation levers forward as far as they will go until they lock into place. Once
the brakes are applied the wheels should not be able to rotate. If they do, PDG recommends the chair be
serviced by a PDG dealer.
To adjust brakes
1 Position the chair on a solid level surface and secure the chair so it will not move when the brakes are
unlocked.
2 Release the brakes as far as they will go.
3 Loosen both screws on the cylindrical brake mounting bracket.
4 Adjust the position of the brakes and re-tighten the screws such that rm braking action prevents the
wheels from rotating.
Warning — If adjustments to the position of the rear wheel axle have been performed, the brakes must
also be adjusted. Never attempt to adjust the brakes with the wheelchair occupied.
Side Guards
Your elevation may be purchased with the patented Flexguard™ side guards. These unique side guards
ex inward to protect the occupants clothing from contact with the tires and allow easier access to the
wheels for better performance and handling. The patented exibility of the side guards also allow for
ease of transferring. Flexguard™ side guards o er exibility and protection at a fraction of the thickness
and weight of conventional side guards. Because of their unique exibility, Flexguard™ side guards also
reduce the risk of injury due to pinching or trapping of body parts between the side guards and moving
parts. In addition, when the seat height of elevation is raised, the side guards pull inwards to improve the
user’s stability, an added safety feature. The side guards must be rmly a xed with the Velcro straps.
Gas Spring
The gas springs on elevation are pre-set at the factory for the weight of the user and allow for ease of
seat height adjustment. The gas springs are specially adjusted to balance the occupant’s weight to allow
minimal arm strength to move the seat up or down. By pushing lightly on the wheels and/or wheelchair
frame, the occupant can sit higher, and by pulling lightly down one can sit lower with minimal e ort. The
gas spring release lever, actuators, cables must be properly adjusted and maintained for comfortable and
safe usage. The gas spring units do not have any serviceable parts, do not attempt to servicing.
Table of contents
Other PDG Mobility Wheelchair manuals

PDG Mobility
PDG Mobility LUNA Installation guide

PDG Mobility
PDG Mobility Eclipse Manual Wheelchair Installation guide

PDG Mobility
PDG Mobility Elevation Installation guide

PDG Mobility
PDG Mobility Fuze T50 Installation guide

PDG Mobility
PDG Mobility BENTLEY Series Installation guide

PDG Mobility
PDG Mobility Stellar Installation guide

PDG Mobility
PDG Mobility BENTLEY Installation guide

PDG Mobility
PDG Mobility STELLAR LEAP Installation guide

PDG Mobility
PDG Mobility Eclipse Installation guide

PDG Mobility
PDG Mobility FuzeT50 Installation guide