PDQ 6300M/MF User manual

1
6300M/MF EXIT INSTALLATION INSTRUCTION
MORTISE DEVICE Phone: 833-2-PDQTEC | www.pdqlocks.com
2. DOOR PREPARATION
Prepare the door for the mortise lock
using the 6300M/MF template in box.
Refer to trim template if installing trim.
Install the mortise case and secure using
two (2) #12-24 combo screws supplied in
the hardware kit.
639415 Rev0 – 4/22/21
1. MORTISE HANDING
To re-hand mortise case, remove latch
bolt screw as shown.
Orient the latch bolt head to match
handing.
Reinsert and tighten the latch bolt screw.
3. PREPARE DEVICE
Install locating stud on lower threaded
insert as determined by handing.
Rotate lower mortise driver as shown
until it stops. Make sure when installing
that mortise driver remains in this
position.
LOCATING
STUD
MORTISE
DRIVER
THREADED
INSERT
LEFT HAND REVERSE
(LHR)
RIGHT HAND REVERSE
(RHR)
OUTSIDE
INSIDE
OUTSIDE
INSIDE
LATCH BOLT
HEAD SCREW
LATCH BOLT
HEAD
LATCH BOLT
HEAD
LATCH BOLT
HEAD SCREW
2639415 Rev0 – 4/22/21
6300M/MF EXIT INSTALLATION INSTRUCTION
MORTISE DEVICE
5. INSTALL DEVICE SPINDLE
Install spindle and spring in orientation
shown on push side of door.
6. INSTALL DEVICE
Install device and trim with 1/4-20 screws
from the hardware kit.
Device can be surface mounted to the
door, optional sex nuts are available,
device is through bolted when using trim.
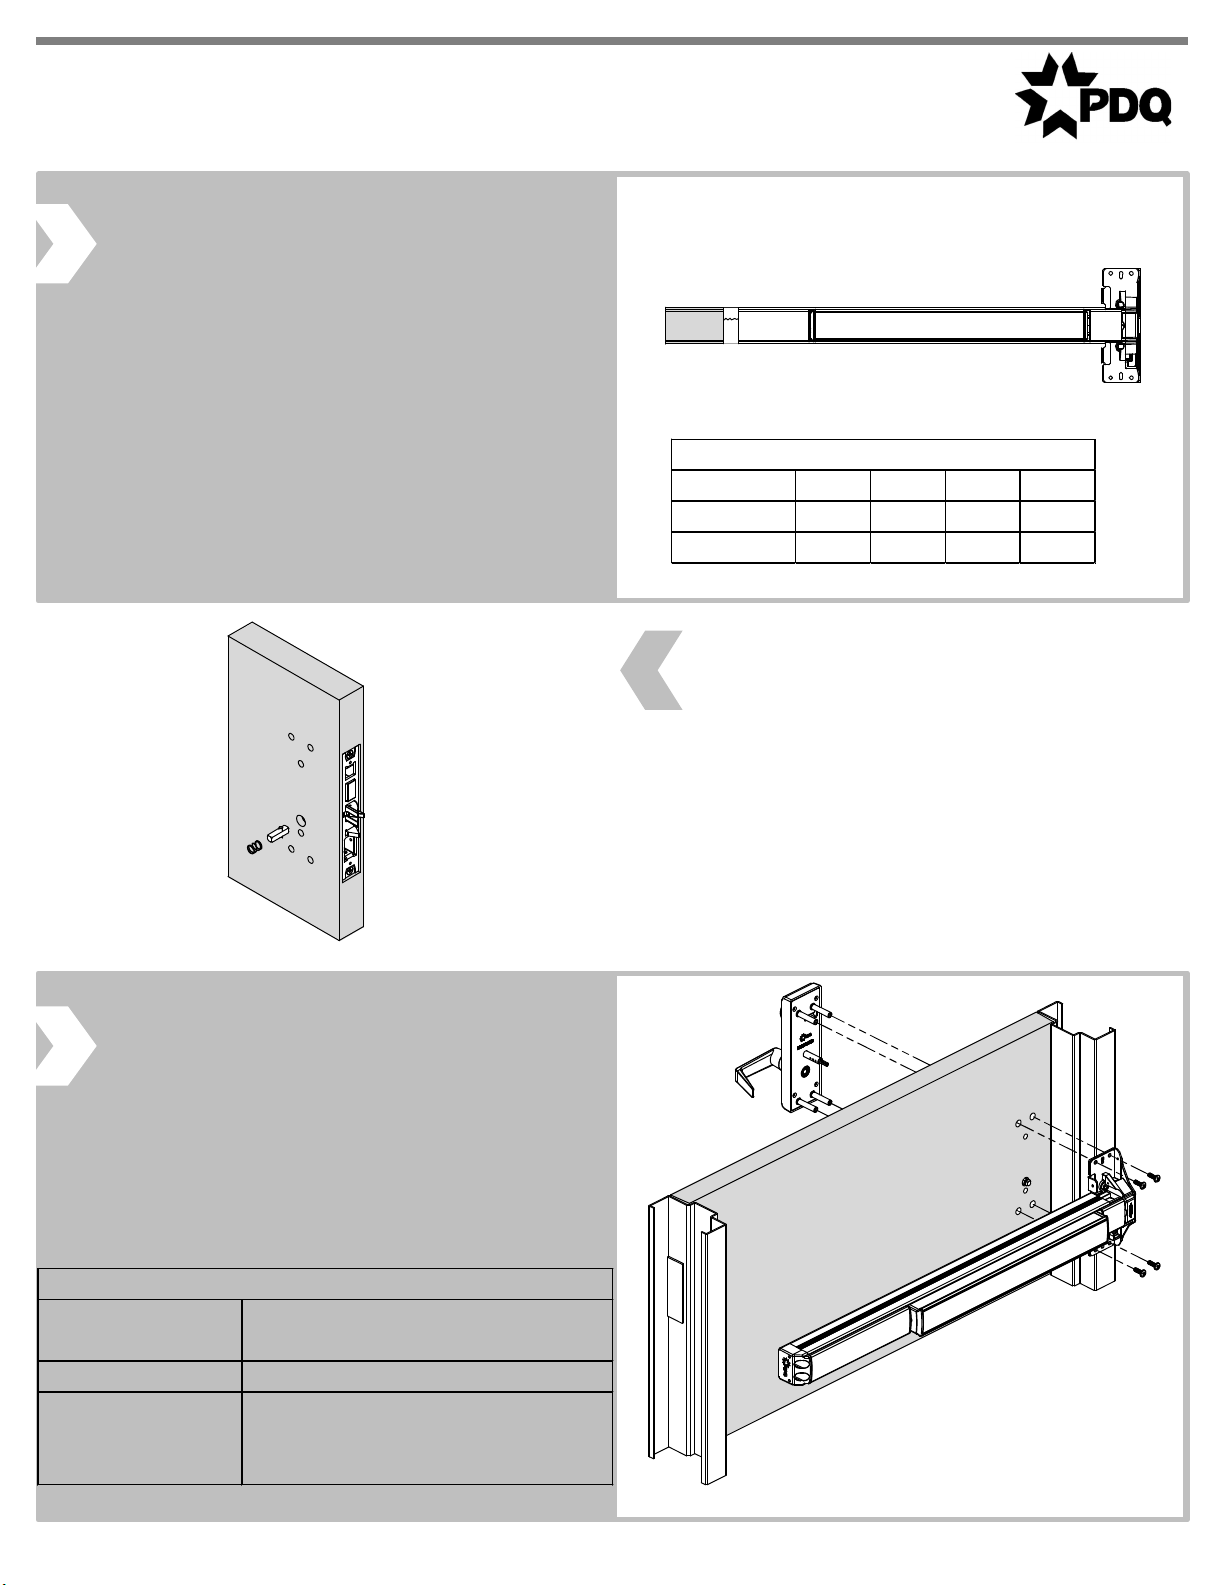
4. SIZE DEVICE
Standard lengths are for 36" or 48" door.
Device must be cut for other lengths.
Mark length with tape – length equals
device size minus desired door size (for
30" door = cut 6" off 36" device) ensuring
a square cut.
Panic Fire Alarm MLR
36" Device 6" 8" 2" 3"
48" Device 12" 14" 8" 9"
Maximum cut off length:
Reinforced Steel
or Aluminum Door
Surface Mount: Drill/Tap push
side for 1/4-20
Solid Wood Door Drill 1/8" Pilot Hole for #10 Wood
All Others
Use optional Sex Bolts. Drill push
side with 9/32" drill bit. Drill pull
side with 3/8" drill bit.
Mounting Options:

3
6300M/MF EXIT INSTALLATION INSTRUCTION
MORTISE DEVICE Phone: 833-2-PDQTEC | www.pdqlocks.com
8. INSTALL HEAD COVER
Slide head cover onto exit device
Install 4 mounting screws
639415 Rev0 – 4/22/21
7. INSTALL END CAP
Slide end cap into rail. Ensure rail is
level. Mark the centers of the slots.
Remove end cap then drill holes using
the chart from Step 3.
Reinstall end cap and fasten with screws.
9. INSTALL STRIKE
Install the strike and secure with two (2)
#12-24 combo screws supplied in the
strike screw pack.
Other PDQ Door Opening System manuals


Popular Door Opening System manuals by other brands


Besam
Besam Swingmaster MP Installation, adjustment and maintenance instructions

Assa Abloy
Assa Abloy SARGENT 1431 Series instructions

GAL
GAL MOVFR Quick setup

Häfele
Häfele Finetta T 70 VF manual

AGS
AGS D-PL Instructions for fitting, operating and maintenance

Stanley
Stanley MA900ñ Installation and owner's manual

WITTUR
WITTUR Hydra Plus UD300 Instruction handbook

Alutech
Alutech TR-3019-230E-ICU Assembly and operation manual

Pamex
Pamex KT-INP35 Installation instruction

MPC
MPC ATD ACTUATOR 50 ATD-313186 Operating and OPERATING AND INSTALLATION Manual

Chamberlain
Chamberlain T user guide

Dorma
Dorma MUTO COMFORT M DORMOTION 50 Mounting instruction