Contact
PELA Tools
Solängsvägen 13
SE-513 70 Borås
Phone: 033-202650
Environmental protection /
Scrapping
Recycle any unwanted material,
do not throw it in the household
rubbish. All machines, accessories
and packaging must be sorted and
left at a recycling center and
disposed of in an environmentally friendly manner.
Save this manual
You will need this manual for safety instructions,
installation instructions, operating instructions,
parts list and diagrams. Save in a good place for
future reference.
Safety rules for milling tables.
1. Always hold the workpiece towards the stop.
2. Never work ”freehand”. Do not use your hands
to support or guide the workpiece. Always use
the bracket to attach the workpiece before
milling.
3. Feed the workpiece in the direction of rotation.
4. Never pull back the workpiece while milling.
Stop the cutter before retracting the workpiece.
5. Make sure the machine is installed securely
before starting the work.
6. Make sure that the spindle rotates in the right
direction.
Specifications
Dimensions, work table (L x W)............ 680x510mm
Possible angle ...................................................... 45°
Working height............................................... 860mm
Net weight.......................................................... 56 kg
We have made an assembly video of the
milling table! It is available by the product on
the website.
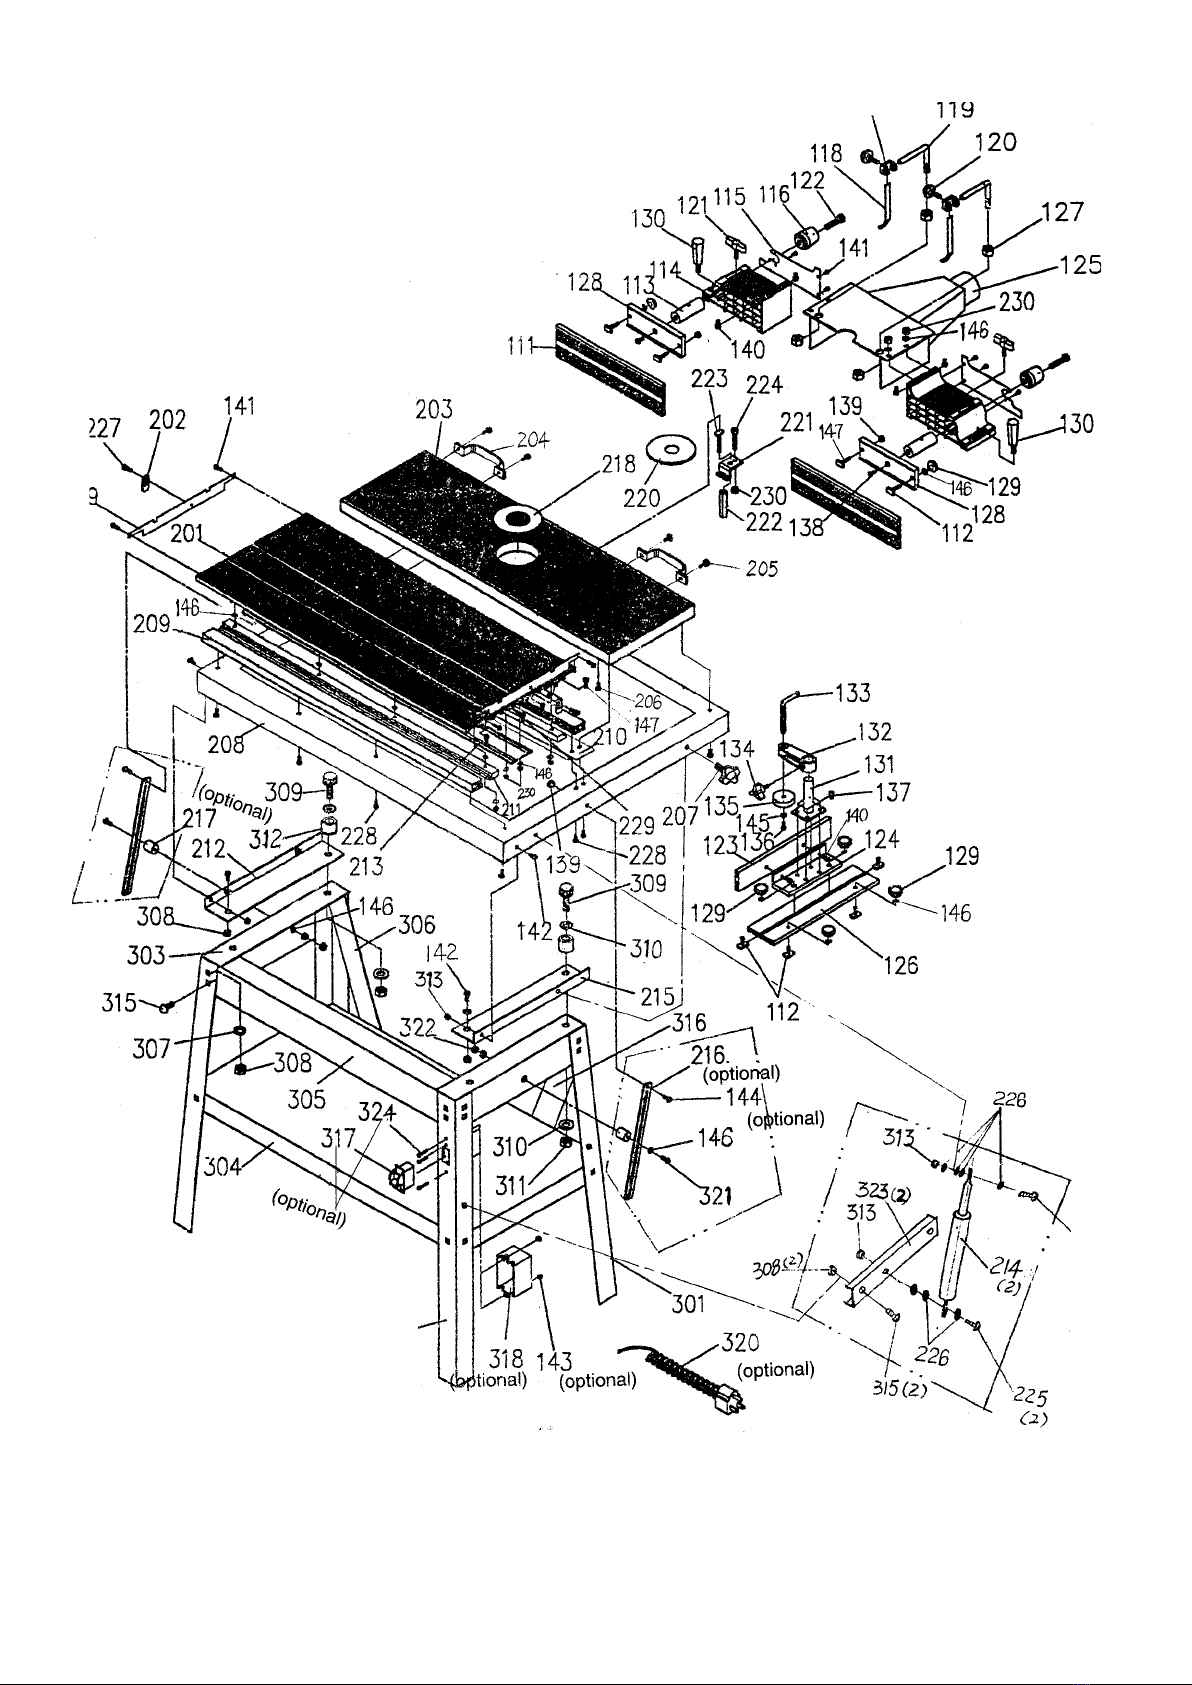
Mounting the stand
1. Fit the front upper part and the two upper sides.
2. Fit the two reinforcing legs.
3. Mount the lower intermediate supports on the
four legs and attach the reinforcing legs.
4. Tighten with the M8 screws.
5. Mount the four ”cushions” on the base of each
leg.
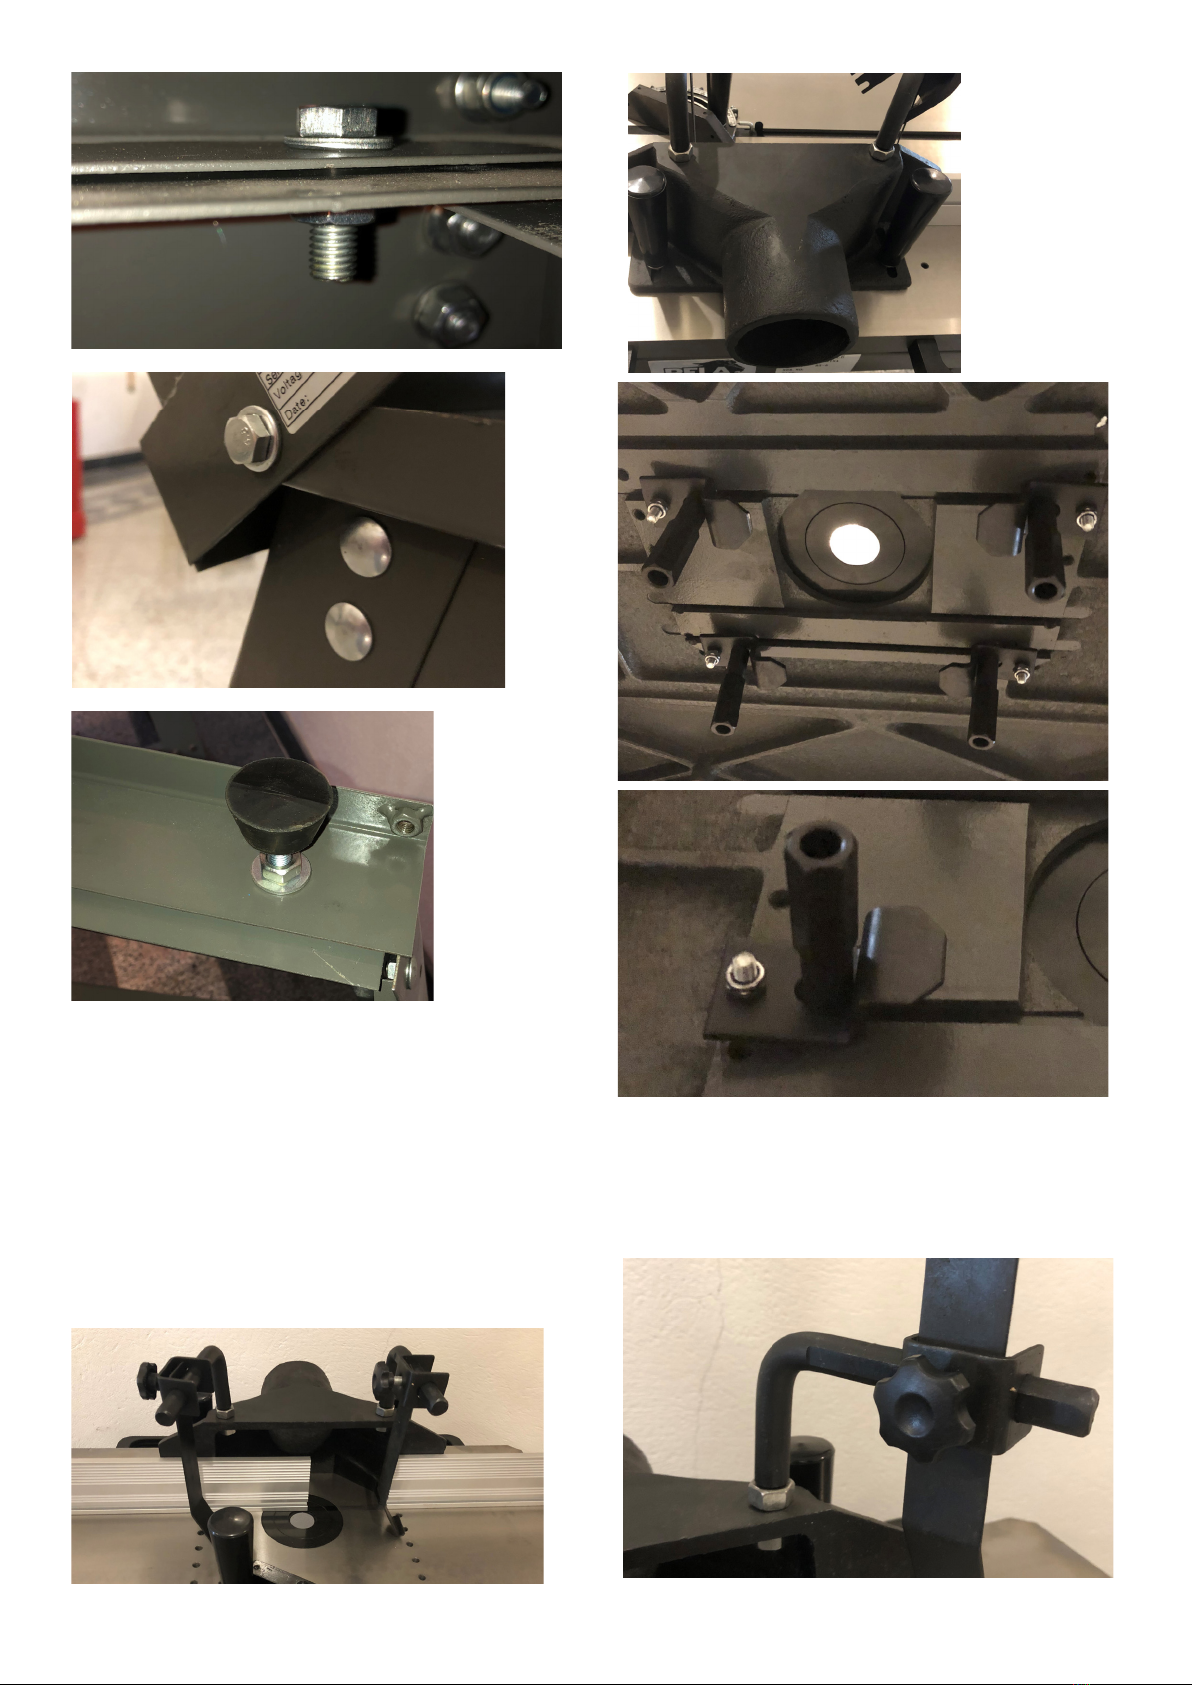
Assembly of the table
1. As the table is heavy, we recommend that two
people lift the table during installation.
2. Attach the two spacers to the side of the stand.
These two spacers and screws are used to sup-
port the table with the help of the rails and hold
it in place when tilting.
3. Align the two holes at the bottom of the table
(away from the spindle hole) with the two holes
drilled on top of the stand.
4. Tighten the table securely with two ”MB”
screws.
5. Attach the dampers in place.
2
2
3