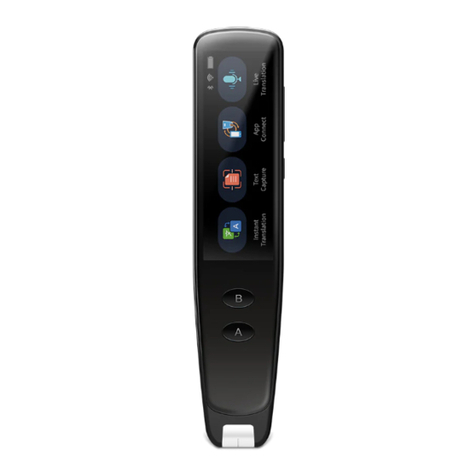
Penpower Super ScanEYE User manual

PenPower Super ScanEYE
User Manual
Version 2.0
Created January 2005

Contents
Chapter 1 Product Features ............................................................................1-1
Chapter 2 Installation ......................................................................................2-1
2.1 Accessories ...........................................................................................................2-1
2.2 Product Contents ..................................................................................................2-1
2.3 System Requirements ...........................................................................................2-1
2.4 Hardware Installation ...........................................................................................2-2
2.5 Super ScanEYE Installation .................................................................................2-3
Step 1: Set up USB Cable on your PC ..................................................................2-3
Step 2: Install the Desktop Application.................................................................2-4
Step 1: Establish Pen-PC Communications..........................................................2-6
Chapter 3 Main Function ................................................................................3-1
3.1 Hardware Button ..................................................................................................3-1
3.2 Main Function Flow Chart ...................................................................................3-2
3.3 Addition Function Flow Chart ..............................................................................3-3
3.4 Main Function Layout ..........................................................................................3-4
Chapter 4 Dictionary Program .......................................................................4-1
4.1 Scanning Techniques ............................................................................................4-1
4.2 Single Word Translation .......................................................................................4-3
4.3 Phrase Translation ...............................................................................................4-5
4.4 Sentence Translation ............................................................................................4-7
4.5 Dictionary Program Function ...............................................................................4-9
Chapter 5 Scan and Store ................................................................................5-1
5.1 Edit Current File ...................................................................................................5-1
5.2 Creating New File ................................................................................................5-1
5.3 Open File ..............................................................................................................5-2
5.4 Delete File ............................................................................................................5-2
5.5 Set Scanning Direction .........................................................................................5-2
5.6 Set New File Language .........................................................................................5-2
5.7 Beam Current File ................................................................................................5-3

Chapter 6 Data Transfer ..................................................................................6-1
6.1 Super ScanEye Program ......................................................................................6-1
6.2 Connecting Super ScanEYE to the PC ..................................................................6-2
Connection Wizard .........................................................................................6-2
Manual Connection ...........................................................................................6-4
6.3 Data Transfer ........................................................................................................6-6
Data Transfer Setting............................................................................................6-6
Transfer Data........................................................................................................6-7
6.4 Editing data Within Super ScanEYE Manager .....................................................6-8
Chapter 7 Scan to PC .......................................................................................7-1
Chapter 8 Additional Functions .....................................................................8-1
8.1 Install Add-on Programes..................................................................................8-1
8.2 Address Book Component ...................................................................................8-3
New Address .......................................................................................................8-3
View Addresses ...................................................................................................8-4
Settings ................................................................................................................8-5
Beaming .............................................................................................................8-5
Edit Address Book in Super ScanEYE Manager ..................................................8-6
8.3 Internet Link Component .....................................................................................8-7
New Link ............................................................................................................8-7
View Link ...........................................................................................................8-7
Settings ...............................................................................................................8-7
Edit Internet Link in Super ScanEYE Manager ..................................................8-8
8.4 Table Component..................................................................................................8-9
Edit Current File...................................................................................................8-9
Settings ..............................................................................................................8-10
New File ............................................................................................................8-10
Open File...........................................................................................................8-10
Delete File ........................................................................................................8-10
Edit Table in Super ScanEYE Manager ............................................................8-11
8.5 Add/Delete Software..........................................................................................8-12
8.6 Install External Dictionary.................................................................................8-13
8.7 Transtar..........................................................................................8-14

Chapter 1 Product Features 1-1
Chapter 1 Product Features
Scanning/Recognition/Translation 3-In-1
Combining the functions of scanning, recognition, translation, it provides immediate
translation once scanning has completed. The Super ScanEYE can also be used to scan
words directly into application programs.
Scanning Input Method
The Super ScanEYE’s memory enables quick scanning and input of words, even articles.
Super ScanEYE is Light in Weight and User-Friendly
It provides great assistance when users are gathering or translating data.
Human Voice Reading for English Document
Human voice reading is available for all English sentences or single words that are
scanned.
Combination of Address Book, Internet Link and Tables
Super ScanEYE can scan name card, communication document, for example, email,
documents or Internet Link and save these data in the appropriate le type.
Sophisticated Recognition System
Using the most advanced words recognition techniques availability globally, it
can recognize both horizontally aligned or vertically aligned words. Right-handed or
left-handed users setting are available too.
Computer Connection and Data Organization
By connecting the Super ScanEYE to the computer, direct transfer of data into the
computer and backup of data is easy.
Extra Software
The installation CD includes an extra translation software, Transtar, which can help to
shorten the translation time.

1-2 Supper ScaneEYE

Chapter 2 System Installation 2-1
Chapter 2 System Installation
2.1 Accessories
2.2 Product Properties
CPU: ARM7TDMI
RAM: 128MB
ROM: 2MB
Flash: 6MB
Computer Cable Connection: USB conversion cable.
Scanner Head: 128 line and image sensor.
Scanning Analysis: 400 DPI.
Display Screen: 61mm × 20mm.
Power: 2 × 1.5 V AAA batteries.
Weight: 90g (without batteries).
Size: 163mm × 38mm × 23mm.
2.3 System Requirement
Traditional Chinese Windows 95 /98 /NT /ME /2000 /XP
16MB RAM.
8MB free hard drive space.
CD ROM (program installation).
Computer must have USB port.
Super ScanEYE
Registration Card
2 AAA batteries
Earpiece
Registration Card
User Manual
Installation CD
USB Conversion Cable

2-2 Supper ScaneEYE
Chapter 2 System Installation 2-3
2.4 Hardware Installation
in built speaker
display screen
power on/off button
scanner head
protection casing
Take off Super ScanEYE battery cover and put in 2 AAA batteries.
battery cover
battery compartment
RAM
earphone connection
Infrared communication port
PC connection

2-2 Supper ScaneEYE
Chapter 2 System Installation 2-3
2.5 Super ScanEYE Installation
Step 1: Set up USB Cable on your PC
1. Insert the installation CD-ROM, the system will automatically load the installation
screen. Select “Super ScanEYE” (Diagram 1). Next select “Install and Set Up Super
ScanEYE” (Diagram 2).
2. Entering the next screen that shows installation steps selection, select “1. Set up the
USB Cable on your PC”. Please make sure that the USB cable is not connected to the
computer, then click on “Install Driver” to install the USB connection driver.
3. Click “Next” to begin installation.
Diagram 1 Diagram 2
Diagram 3 Diagram 4

2-4 Supper ScaneEYE
Chapter 2 System Installation 2-5
4. Click “Finish” to end the installation
and restart the computer. You can also
choose to restart your computer after
the subsequent installation is
completed.
5. After the software installation is
completed, Please click the [>>]
button in Diagram 4 and Diagram 5
will appear. Please refer to Diagram
5 and connect the USB cable to the
computer as shown. Next click the
[ >>] button and return to Diagram 3
that shows installation steps selection,
where you can continue the step 2
installation of Super ScanEYE
controller.
Diagram 5
1. In Diagram 3, select “2. Install the
Desktop Application” to open Diagram
6. Please click on “Install Desktop
Application” to begin installation.
Diagram 6
Step 2: Install the Desktop Application

2-4 Supper ScaneEYE
Chapter 2 System Installation 2-5
2. Click “Next” to begin installation.
3. Select the folder destination and click
“Next” to continue.
4. Please enter the user name and the
company name, then click “Next”.
5. Please check the duplicate le setting,
then click “Next” to continue.

2-6 Supper ScaneEYE
Chapter 2 System Installation 2-7
6. The system will enquire whether you
want to load the Super ScanEYE
controller automatically when starting
the computer. Click “Yes” will enable
the Super ScanEYE controller to be
activated automatically when you
switch on the computer.
7. Click “Finish” to end the Super
ScanEYE Controller installation. The
“Super ScanEYE Desktop Application
” program will be shown when you
click on “Start” / “Program”. The Super
ScanEYE Desktop Application icon
will also appear at the bottom right
corner of the computer screen.
1. In Diagram 3, select “3. Establish Pen-
PC Communications” to open the
diagram shown on the right. Please
refer to the diagram and connect the
USB cable to the Super ScanEYE.
Click on [>>] button.
2. Please follow the diagram and press the
power button on the Super ScanEYE
screen will show “Main Menu”. Else
please press the button until “Main
Meu” is shown, then click on [>>]
button.
8. Click on [>>] button in Diagram 6 and return to Diagram 3, where you can continue to
establish the connection between Super ScanEYE and the computer.
Step 3: Establsih Pen-PC Communications

2-6 Supper ScaneEYE
Chapter 2 System Installation 2-7
1. Use the Super ScanEYE direction
button and move down to Option, then
click on [>>] button shown in the right
diagram.
3. Please use the Super ScanEYE
direction button to move down to
“Advanced Options”, then click on
[>>] button.
2. Press button on the Super Scan-
EYE to enter “Option” screen, then
click on [>>] button.
4. Please click on Super ScanEYE
button to enter “Advanced Options”
screen, then click on [>>] button in the
diagram.

2-8 Supper ScaneEYE
7. Please press button to enter “In
Upgrade Mode” screen, then click on
[>>] button.
Note 1: The display screen on the Super ScanEYE will show English words. If the
interface language is in Traditional Chinese, please refer to this manual guide to
operate the Super ScanEYE.
Note 2: The above mentioned the three basic steps for Super ScanEYE installation
and setting. If you have not done step 3: “Establish Pen-PC Communications”
, you can refer to Section 6.2 and use the “Communications Wizard” to establish
connection. Please refer to Chapter 8 for the additional software installation,
such as Transtar.
8. Please click on “Establish Pen-PC
Communications” button and the
system will establish connection with
Super ScanEYE.
9. After the connection is completed, it will appear a picture. Click on “Conrm”. Next
click on “Quit” to end the installation.

Chapter 3 Main Function 3-1
Chapter 3 Main Function
3.1 Hardware Button
: power on/off
: conrm, select or proceed to next screen
: cancel, back to previous screen
: up
: down
: right
: left
Use the buttons to explore and select the functions
Select the function
Use the direction button and move to the required function. Press to conrm your
choice. Press if you want to go back to the previous menu.
Error Message
When error message appears due to improper usage, such as scanning too fast, press
to select the error message.

3-2 Supper ScaneEYE
Chapter 3 Main Function 3-3
Main Menu
3.2 Main Function Flow Chart
Scan and Translate
Hear English Speech
Set Volume
Set Speaking Speed
View Translated Words
Select Dictionary
Scan Now
Scan to PC
Chinese T.
Chinese S.
English
Horizontal
Vertical
Edit Current File
Create New File
Open File
Set Scanning Direction
Set New File Language
Beam Current File
Scan and Store
Chinese Traditional
Chinese Simplied
English
Horizontal
Vertical
Send Stored Files to PC
Options
Set Interface Language
Set Right/Left-Handed
Set Black/White Text
Set Auto Shut-Off Time (1~4 Minutes)
Set Contrast (0~15)
Advanced Options
Chinese Traditional
English
Left-Handed
Right-Handed
Black Text
White Text
Enter Upgrade Mode
Set Serial /IR Comm.
(Serial Port /Infra-Red
Set Baud Rate
(9600/19200/28400/57600/11520)
Compact Memory
Information
View Battery Status
View Memory Status
View Serial Number
Versions & Copyrights
Chinese to English
English to Chinese

3-2 Supper ScaneEYE
Chapter 3 Main Function 3-3
Additional Software Function Menu
3.3 Addition Function Flow Chart
Address Book
New
Address
View Addresses
Settings
open word/symbol list
First Name
Last Name
Title
Commpany
Address
Business Phone
Business Fax
Mobile Phone
E-mail
Web Page
Home Phone
Home Fax
Notes
Title
Commpany
Address
Business Phone
Business Fax
Mobile Phone
E-mail
Web Page
Home Phone
Home Fax
Notes
Beaming Send Address
Receive Address
Scroll Screen
Auto Advance
Auto Name
Select Fields
Fields Settings
Resume Editing
Activate Overwrite Mode
Insert Line
Delete Line
Clear Line
Scanning Opitons
Numeric
Multiple Lines
Internet Link
New
Link
View Link
Settings
open word/symbol list
Scroll Screen
Auto Advance
Link Abbreviation
Next Link Language
Resume Editing
Activate Overwrite Mode
Insert Line
Delete Line
Clear Line
Scanning Opitons Numeric
Multiple Lines
Table
Edit Current File
open word/symbol list
Settings
Scroll Screen
Auto Advance
Right-to-Left Table
Resume Editing
Activate Overwrite Mode
Clear Text
Scanning Opitons Numeric
Multiple Lines
New File
Open File
Delete File
Set New File Language
Chinese Traditional
Chinese Simplied
English
Chinese Traditional
Chinese Simplied
English

3-4 Supper ScaneEYE
Chapter 3 Main Function 3-5
3.3 Main Function Layout
Dictionary Program
Translation from English to Chinese after Super ScanEYE scan in the English document.
(Please refer to Chapter 4: Dictionary Program.)
Scanning Input To Computer
Connect the Super ScanEYE to the computer using the connection cable allows direct
input transfer into the computer application program. (Please refer to Chapter 7: Scanning
to computer.)
Scan and Store
Input and edit data (Please refer to Chapter 5: Scan and Store.)
Data Transfer
To synchronize or transfer the data between Super ScanEYE notebook and the computer.
(Please refer to Chapter 6: Data Transfer.)
Selection
User can select the interface language left-handed or right-handed usage.
1. Interface Language
Set the interface language. The default language is traditional Chinese.
2. Left-hand/Right-hand Usage
Set the left-hand/right-hand usage. The default setting is right-hand usage, scanning
from left to right. If the setting is left-hand usage, please scan from right to left.
3. Reverse White Setting
Select the scanning of usual words or scanning of reverse white words. If the setting
is scanning of reverse white words, Super ScanEYE can scan in light coloured words
with dark coloured background.

3-4 Supper ScaneEYE
Chapter 3 Main Function 3-5
4. Automatic Power Off Time
By default, if the device is not in use for 60 seconds, it will power off automatically.
The default power off time can be altered and reset.
5. Contrast Setting
Set the contrast and brightness of the device. The bigger the number, the darker the
display screen.
6. Other Setting
Update setting, connection setting, data transfer speed setting and data compress set-
ting are available. (Please refer to Chapter 6: data transfer.)
Information
Displays SuperScaEYE hardware information.
1. Battery Status
Examine how much power is left for the battery.
2. Memory Status
Examine the memory usage by diagrams indicating the space in use and space unused.
3. Super ScanEYE Serial Number
Examine the Super ScanEYE serial number.
4. Read Me
Examine the Super ScanEYE model number, copyright information and the operating
environment model number.

3-6 Supper ScaneEYE

Chapter 4 Dictionary Program 4-1
Chapter 4 Dictionary Program
Dictionary program translate English to Chinese. Using Super ScanEYE to scan English
document directly and translate it instantly to Chinese.
4.1 Scanning Techniques
Penpower Super ScanEYE can be used to scan many kinds of character. The size must be
between 6 and 22 biggest font 8mm). It can scan in any words with different background
colours except ‘red words with white background’ or vice versa and also’ blue words with
black background’ and vice versa.
1. Take off the protection cap, then press to power on.
2. Select “Scan and Translate” from the menu. Press when the screen shows “Scan
Now” message, and the scanner is ready for scanning. As the red light at the scanner
head is blinking, this indicates that scanning can begin. Press for options.
Press the left-right direction button to select Traditional Chinese to English dictionary
or English to Traditional Chinese dictionary. Under the English to Traditional Chinese
dictionary mode, the English words can be scanned and translated into Chinese
readily. Under the Traditional Chinese to English dictionary mode, the Traditional
Chinese words can be scanned and translated into English readily.
Attention: The red light should be blinking during scanning. Otherwise, please power
off the scanner and power on again.
3. Left-hand/Right-hand Setting: If you are using your left hand to operate the scanner,
please set to left-hand usage in the setting. Please refer to Chapter 3, Section 3.3.
4. Scanning Direction Setting: Default setting is auto-detection. Users can follow the
words direction and do a vertical or horizontal scanning, so as to increase the scanning
recognition speed. Please to Chapter 5 Section 5.5.
Table of contents
Other Penpower Scanner manuals

Penpower
Penpower WorldPenScan Go User manual

Penpower
Penpower WorldocScan X User manual

Penpower
Penpower WorldCard Color User manual

Penpower
Penpower mini ScanEYE User manual

Penpower
Penpower Chinease Expert PCE Standard User manual

Penpower
Penpower WorldocScan 410 User manual

Penpower
Penpower WorldPenScan Pro User manual

Penpower
Penpower WorldCard duet User manual

Penpower
Penpower WorldocScan Pro User manual

Penpower
Penpower WorldCard Series User manual