manuals.online logo
Brands
  1. Home
  2. •
  3. Brands
  4. •
  5. Permobil
  6. •
  7. Wheelchair
  8. •
  9. Permobil ROHO QUADTRO SELECT Series Guide

Permobil ROHO QUADTRO SELECT Series Guide

www.permobil.ca
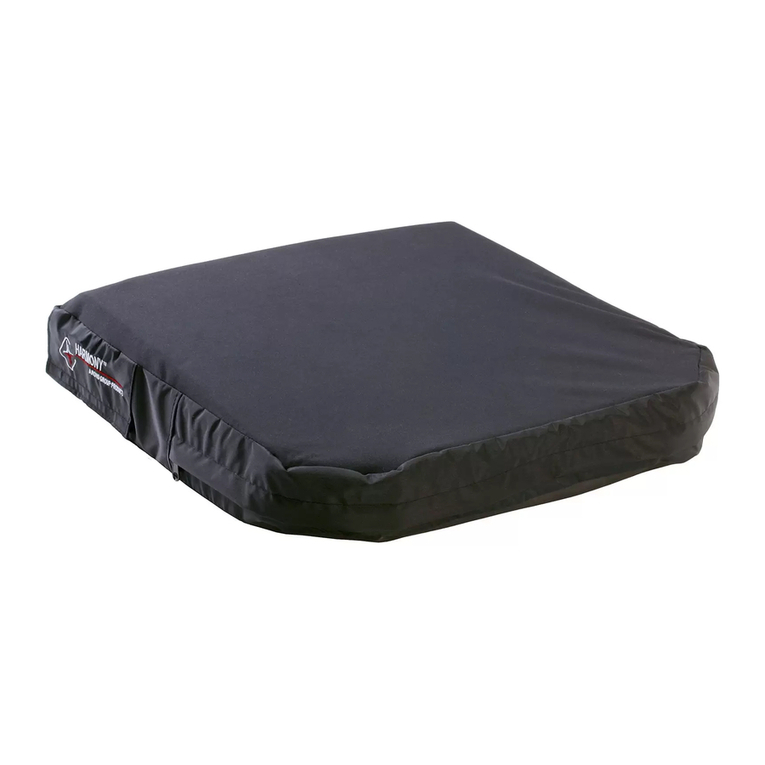
ROHO®QUADTRO SELECT®cushion
ination and adjustment guide
The QUADTRO SELECT has four compartments of air cells. When the ISOFLO® Memory Control is open, the air ows freely between the compartments. When the ISOFLO is closed, the air
is “locked” within each compartment. The ination level of each compartment can be separately adjusted. This allows you to correct or accommodate side-to-side and/or anterior-posterior
asymmetries of the pelvis and upper legs. NOTE: Before adjusting the cushion for an asymmetry, you MUST adjust the air ination level to the proper cushion ination setting as outlined below.
After overinating the cushion, perform a hand check to
adjust to the proper cushion ination setting:
QUADTRO SELECT setup Hand check results
Inate and adjust the ROHO QUADTRO
SELECT cushion for a new individual.
1. Place the QUADTRO SELECT cushion in the
wheelchair with the air cells facing up and the
non-skid surface of the cover facing down.
2. Before inating, you must
open the ISOFLO Memory
Control so that all of the air
cells will inate. Push the
ISOFLO green knob toward
the unlocked position.
3. Slide the rubber nozzle of the hand pump over the
ination valve. Pinch the nozzle, turn to open the
ination valve, and overinate the air cells.
QUADTRO SELECT adjustment
Check the ination level daily
by performing a hand check.
Re-adjust the ination level only as
needed (typically every 3-4 months).
Proper cushion ination setting
½” – 1” (1.5 cm – 2.5 cm)
— If you can slightly move your ngertips: the cushion
is at the Proper Cushion Ination Setting (½” - 1” air
between the lowest bony prominence and the seat
surface) and no further adjustment is needed.
— If you can easily move your ngertips: there is too
much air between the lowest bony part prominence
and the seat surface. Open the ination valve and
slowly release air until you can barely move your
ngertips, then close the valve.
— If you cannot move your ngertips at all: there is
too little/no air between the lowest bony prominence
and the seat surface. Open the ination valve and
slowly add air until you can slightly move your
ngertips, then close the valve.
See reverse side for instructions on how to adjust
QUADTRO SELECT for postural asymmetries.
Open
Hand Pump
Ination Valve
Close
½"-1"
Open ISOFLO -
Push green knob in
4. Remove the hand pump.
1. The individual should sit
in the chair in their usual
position. The cushion
should be centered
beneath the individual.
2. Perform a hand check:
a. Slide your hand between
the cushion and the
individual. Lift the leg
slightly and feel for the
lowest bony prominence,
and then lower the leg to
a sitting position.
b. Open the valve to remove
air, keeping your hand
beneath the individual’s
lowest bony prominence.
c. Release air until you
can slightly move your
ngertips. Close the valve.
QUADTRO SELECTAdjustment Guide Rev. 4/19 Print 4/19
Please refer to the Operation Manual for other safety
information regarding the QUADTRO SELECT cushion.
NOTE: Before adjusting QUADTRO SELECT for an asymmetry, you MUST perform a hand check to adjust the air ination level to proper cushion ination setting as detailed on the
reverse side of this document.
Adjusting a ROHO®QUADTRO SELECT®
cushion for positioning
1. Make sure the ISOFLO Memory Control is open
(press green knob in). FIGURE 1
2. Have the individual sit on the cushion in the most
upright and midline posture that they can achieve.
FIGURE 9
3. Close the ISOFLO (press red knob in). This will
help hold the pelvis in the best posture that is
achievable by that individual and prevent further
progression into asymmetry. FIGURE 3
4. Perform a hand check and make sure there is a
minimum of ½ - 1” of air between the lowest ischial
tuberosity and the seat surface. FIGURE 8 & 10
½"-1"½"-1"
To correct a reducible (exible)
pelvic obliquity (lateral asymmetry):
1. Make sure the ISOFLO Memory Control is open
(press green knob in). FIGURE 1
2. Make sure the pelvis is positioned at the back of
the cushion. FIGURE 2
3. Position the pelvis in a neutral and upright position
by pressing down on the higher side of the pelvis
until the pelvis is level. FIGURE 6
This will force more air into the quadrant under
the lower side of the pelvis to help prevent it from
tilting to that side. FIGURE 7
Close the ISOFLO (press red knob in), then release
your pressure on the pelvis. FIGURE 3
4. Perform a hand check and make sure there is
a minimum of ½ - 1” of air between the ischial
tuberosity and the seat surface. FIGURE 8
To correct a reducible (exible) posterior
pelvic tilt (anterior-posterior asymmetry):
1. Make sure the ISOFLO Memory Control is open
(press green knob in). FIGURE 1
2. Make sure the pelvis is located at the back of the
cushion, in a neutral and upright position. FIGURE 2
3. Use your hands to create downward pressure on
both sides of the pelvis to force air to the front
quadrants and create a contour for the pelvis that
will help discourage forward migration; close the
ISOFLO (press red knob in), and then release the
pressure on the pelvis. FIGURE 3
4. Perform a hand check and make sure there is
a minimum of ½ - 1” of air between the ischial
tuberosities and the seat surface. FIGURE 4
Open ISOFLO - Push green
knob in
Close ISOFLO - Push red
knob in
www.permobil.ca
To accommodate a non-reducible (xed)
postural asymmetry:
Figure 1 Figure 2
Figure 3 Figure 4 Figure 8Figure 7
Figure 5 Figure 6 Figure 9 Figure 10

Other Permobil Wheelchair manuals

Permobil ROHO DRY FLOATATION User manual

Permobil

Permobil ROHO DRY FLOATATION User manual

Permobil F5 Corpus VS User manual

Permobil

Permobil F5 Corpus VS User manual

Permobil M5 Corpus User manual

Permobil

Permobil M5 Corpus User manual

Permobil K300 User manual

Permobil

Permobil K300 User manual

Permobil M300 Corpus HD User manual

Permobil

Permobil M300 Corpus HD User manual

Permobil Comfort M2 BodiLink LPTS User manual

Permobil

Permobil Comfort M2 BodiLink LPTS User manual

Permobil ROHO DRY FLOATATION Guide

Permobil

Permobil ROHO DRY FLOATATION Guide

Permobil ROHO AGILITY Minimum Contour Back User manual

Permobil

Permobil ROHO AGILITY Minimum Contour Back User manual

Permobil BodiLink User manual

Permobil

Permobil BodiLink User manual

Permobil ROHO Hybrid Select User manual

Permobil

Permobil ROHO Hybrid Select User manual

Permobil ROHO Hybrid Elite User manual

Permobil

Permobil ROHO Hybrid Elite User manual

Permobil Corpus 3G User manual

Permobil

Permobil Corpus 3G User manual

Permobil F3 Corpus User manual

Permobil

Permobil F3 Corpus User manual

Permobil M1 User manual

Permobil

Permobil M1 User manual

Permobil K450 User manual

Permobil

Permobil K450 User manual

Permobil MPS B2 User manual

Permobil

Permobil MPS B2 User manual

Permobil ROHO nexus SPIRIT Cushion User manual

Permobil

Permobil ROHO nexus SPIRIT Cushion User manual

Permobil Helium User manual

Permobil

Permobil Helium User manual

Permobil ROHO AirLITE User manual

Permobil

Permobil ROHO AirLITE User manual

Permobil M3 Corpus User manual

Permobil

Permobil M3 Corpus User manual

Permobil STREET User manual

Permobil

Permobil STREET User manual

Permobil Comfort Company Inception User manual

Permobil

Permobil Comfort Company Inception User manual

Permobil Comfort M2 BodiLink LPTS User manual

Permobil

Permobil Comfort M2 BodiLink LPTS User manual

Permobil C300 User manual

Permobil

Permobil C300 User manual

Popular Wheelchair manuals by other brands

Drive Medical Titan owner's manual

Drive Medical

Drive Medical Titan owner's manual

Excel Mobil user manual

Excel

Excel Mobil user manual

Invacare Ranger X Brochure & specs

Invacare

Invacare Ranger X Brochure & specs

R82 Wombat Living 1 user guide

R82

R82 Wombat Living 1 user guide

You-Q ALEX Assembly instructions

You-Q

You-Q ALEX Assembly instructions

SORG Tilty vario Instructions for use

SORG

SORG Tilty vario Instructions for use

Alber e-fix E35 Instructions for use

Alber

Alber e-fix E35 Instructions for use

Decon wheel MED3136 Assembly instructions

Decon wheel

Decon wheel MED3136 Assembly instructions

Sunrise Medical Breezy Ultra 4 Brochure & specs

Sunrise Medical

Sunrise Medical Breezy Ultra 4 Brochure & specs

Sunrise Medical SEDEO PRO Assembly instructions

Sunrise Medical

Sunrise Medical SEDEO PRO Assembly instructions

Otto Bock B500 advanced Service instructions

Otto Bock

Otto Bock B500 advanced Service instructions

Vermeiren Inovys II E user manual

Vermeiren

Vermeiren Inovys II E user manual

Travel Buggy DASH manual

Travel Buggy

Travel Buggy DASH manual

TIGA Sub4 user manual

TIGA

TIGA Sub4 user manual

Rebotec ROM User instructions

Rebotec

Rebotec ROM User instructions

CareCo SIRIUS SP Owner's handbook

CareCo

CareCo SIRIUS SP Owner's handbook

EZ Lite Cruiser STANDARD MODEL manual

EZ Lite Cruiser

EZ Lite Cruiser STANDARD MODEL manual

Drive CIRRUS Owner's handbook

Drive

Drive CIRRUS Owner's handbook

manuals.online logo
manuals.online logoBrands
  • About & Mission
  • Contact us
  • Privacy Policy
  • Terms and Conditions

Copyright 2025 Manuals.Online. All Rights Reserved.