manuals.online logo
Brands
  1. Home
  2. •
  3. Brands
  4. •
  5. Petmate
  6. •
  7. Pet Care Product
  8. •
  9. Petmate Cat Mate 210 User manual

Petmate Cat Mate 210 User manual

1029/1118
CAT MATE
®
Hereby, Pet Mate Ltd., declares that this
product is in compliance with the essential
requirements and other relevant
provisions of EU Directives. All
Declarations of Conformity (DoC) may be
viewed at www.pet-mate.com/eudoc.
Pet Mate Ltd. guarantees your product for a period of 3 years from the date of purchase, subject
to the registration of your purchase details on our website www.pet-mate.com within 14 days of
purchase. (If you do not have access to a computer, please send details of your purchase with
copy of receipt along with your name and address.) In the event of a fault developing contact Pet
Mate customer services for a returns authorisation number. The guarantee is limited to any defect
arising due to faulty materials or manufacture. Any defective item will be repaired or replaced free
of charge at the manufacturer’s discretion, provided that the defect has not been caused by
neglect, misuse or normal wear and tear. Your statutory rights are not affected.
GARANTIE
Pet Mate Ltd. gewährt auf Ihr Produkt eine Garantie von 3 Jahren ab dem Kaufdatum, dass die
Registrierung Ihres Produkts auf unserer Website www.pet-mate.com innerhalb von 14 Tagen des
Kaufdatums erfolgt ist. (Wenn Sie keinen entsprechenden Computerzugang haben, senden Sie uns
bitte Ihre Kaufangaben zusammen mit einer Kopie Ihres Einkaufsbelegs und Angabe Ihres Namens
und Ihrer Adresse.) Sollte an Ihrem Produkt eine Störung auftreten, so kontaktieren Sie bitte den
Kundendienst von Pet Mate, damit wir Ihnen eine Rücksendungs-Genehmigungsnummer übermitteln
können. Die Garantie ist auf Mängel beschränkt, die auf fehlerhaftes Material oder Produktionsfehler
zurückzuführen sind. Fehlerhafte Artikel werden nach Ermessen des Herstellers kostenlos repariert
oder ersetzt, vorausgesetzt, dass der Defekt nicht durch ein Missgeschick, Vernachlässigung, falsche
Bedienung oder normale Abnutzung verursacht wurde. Ihre gesetzlichen Rechte sind nicht betroffen.
GARANTIE
Pet Mate Ltd garantit votre produit pour une période de 3 ans à compter de la date d'achat, sous
réserve d'enregistrement des détails de votre achat sur notre site www.pet-mate.com dans les 14
jours suivant l'achat. (Si vous n'avez pas accès à un ordinateur, veuillez envoyer les détails de votre
achat avec une copie du reçu, accompagnée de votre nom et de votre adresse.) En cas de
panne/mauvais fonctionnement, contactez Pet Mate pour obtenir un numéro d'autorisation de retour.
Les articles défectueux seront remplacés ou réparés gratuitement à la discrétion du fabricant, sous
réserve que le mauvais fonctionnement ne soit pas le résultat d’un usage inadapté ou abusif ou d’une
usure normale. Ces conditions n’affectent pas vos droits statutaires.
GARANTÍA
Pet Mate Ltd. garantiza su producto durante un período de 3 años a partir de la fecha de compra,
siempre y cuando haya registrado los detalles de su compra en nuestro sitio web, www.pet-
mate.com, durante los 14 días posteriores a la fecha de compra. (Si no tuviera acceso a un
ordenador, por favor, envíe los detalles de su compra junto con una copia del recibo, su nombre y
dirección.) En caso de producirse un fallo, póngase en contacto con Servicio al Cliente de Pet Mate
para obtener un número de autorización de devolución. La garantía se limita a aquellos fallos que se
produzcan como consecuencia de materiales o fabricación defectuosos. Todo artículo defectuoso se
reparará o reemplazará a la discreción del fabricante, siempre y cuando el defecto no haya sido
causado por negligencia, uso indebido o el uso y desgaste normales. Sus derechos estatutarios no
resultarán afectados.
GARANTIE
Pet Mate Ltd. garandeert uw product gedurende 3 jaar na koopdatum, vanaf de koopdatum en
afhankelijk van de registratie binnen 14 dagen na aankoop van uw koopgegevens op onze website
www.pet-mate.com. (Als u geen toegang tot een computer hebt, wilt u dan de gegevens over uw
aanschaf samen met een kopie van uw koopbewijs inclusief uw naam en adres opsturen.) Mocht
zich een defect voordoen, neemt u dan contact op met de klantendienst van Pet Mate en u ontvangt
een autoriserings-nummer voor retour. Deze garantie betreft slechts defecten ten gevolge van
materiaal- of fabrieksfout. Elk defect onderdeel wordt gratis gerepareerd of vervangen, dit ter
beoordeling van de fabrikant, en op voorwaarde dat het defect niet ontstaan is door onzorgvuldigheid,
onjuist gebruik of door normale slijtage. Dit heeft geen effect op uw vastgelegde rechten.
NL
E
F
D
©
PET MATE Ltd
· Lyon Road · Hersham · Surrey · KT12 3PU · England
N.America only:
Ani Mate
· 104A Longview Street · Conroe · Texas 77301
FITTING INSTRUCTIONS
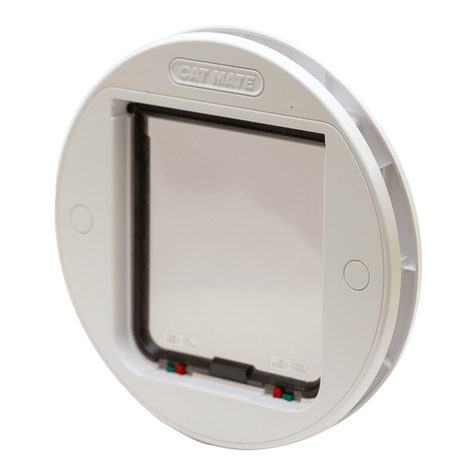
Glass Fitting
Cat Flap (Ref. 210)
+44 (0)1932 700 001
N America (936) 760 4333
www.pet-mate.com
EINBAUANLEITUNG
Katzenklappe für Glasscheiben (Ref. 210)
D
INSTRUCTIONS DE MONTAGE
Chatière pour vitre (réf. 210)
F
INSTRUCCIONES DE AJUSTE
Gatera para Cristales (Ref. 210)
E
MONTAGE INSTRUCTIES
Kattendeur voor Glazen Deuren (Ref. 210)
NL
Hierbij verklaart Pet Mate Ltd. dat dit
product voldoet aan de essentiële eisen
en overige relevante voorschriften van EU
Richtlijnen. Alle verklaringen van
overeenstemming (DoC) zijn te lezen op
www.pet-mate.com/eudoc.
Pet Mate Ltd. erklärt, dass dieses Produkt
den grundlegenden Anforderungen und
anderen zutreffenden Bestimmungen
von EU-Richtlinien entspricht. Alle
Konformitätserklärungen können unter
www.pet-mate.com/eudoc aufgerufen
werden.
D
Pet Mate Ltd. déclare par la présente que
ce produit est conforme aux exigences
essentielles et aux autres dispositions
pertinentes des directives de l’UE.
Toutes les déclarations de conformité
peuvent être consultées à l'adress
www.pet-mate.com/eudoc.
F
Por el presente, Pet Mate Ltd. declara que
este producto cumple los requisitos
esenciales y demás provisiones oportunas
de las Directivas UE. Todas las
Declaraciones de Conformidad (DoC)
pueden verse en www.pet-mate.com/
eudoc.
E
NL
approx.
125mm (5”)
Ø
223mm
(8
3
/
4
”)
1
2
3
• Read all instructions before installing or using this product.
• Register your purchase on-line at www.pet-mate.com (see guarantee).
• Do not allow children to play with this product.
• Inspect product regularly for correct operation and damage. Do not use if in
doubt.
• This product is designed for use with pets only, as described in these
instructions.
• The locking system of this pet door is not intended as a security device.
• This pet door is not a fire resistant door and must not be used where there is a
risk from fire spread.
• The installer of this pet door is responsible for complying with all relevant building
regulations.
• During installation of this pet door take appropriate care. Follow safety
instructions for all tools and wear appropriate personal protective equipment.
• Dispose of all packaging material properly.
NOTE: Plastic bags could cause
suffocation - keep away from children and animals.
IMPORTANT SAFETY INSTRUCTIONS
SAVE THESE INSTRUCTIONS
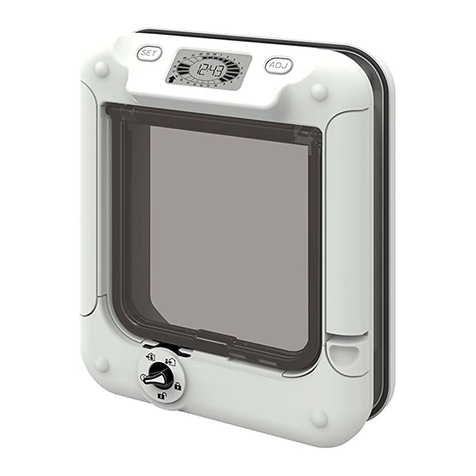
Fig. 1. We recommend that you ask a glazier to cut a hole of 223mm (8 3/4") diameter
in the position required. We recommend the bottom of the hole is approximately level
with your pet’s stomach.
NOTE: For existing toughened/double/ triple glazing, a new
glass panel will be required.
Fig. 2. For glass panels 2 - 5mm (1/16” - 3/16”): Carefully cut interior frame (frame
without swinging flap) to moulded step with a hacksaw or plastic cutting disc.
Fig. 3. Position cat flap frame on outside of panel and screw interior frame to it using
the appropriate screw/spacer combination for your thickness of panel, (see table
below). Do not overtighten screws. Cover screwheads with the caps supplied.
Door thickness Short screw Long screw Spacer under
screwhead
02 - 10mm
10 - 17mm
17 - 23mm
23 - 30mm
30mm +
(1/16” - 3/8”)
(3/8” - 11/16”)
(11/16” - 7/8”)
(7/8” - 1 1/4”)
(1 1/4” +) Use 2 off 8g (Ø 4.2) self tapping screws
cut to length = door thickness + 12mm (1/2”)
✓✓
✓
✓✓
✓
A helpful tip... To train your cat to use the cat flap, prop it open, (e.g. with a clothes
peg), at first and use food as an encouragement.
02 - 10mm
10 - 17mm
17 - 23mm
23 - 30mm
30mm +
02 - 10mm
10 - 17mm
17 - 23mm
23 - 30mm
30mm +
WICHTIGE SICHERHEITSANWEISUNGEN
• Bitte lesen Sie vor dem Einbau oder der Verwendung dieses Produkts sämtliche
Anweisungen.
• Registrieren Sie Ihr Produkt online unter www.pet-mate.com (siehe Garantie).
• Lassen Sie keine Kinder mit diesem Produkt spielen.
• Prüfen Sie das Produkt regelmäßig auf ordnungsgemäßen Betrieb und mögliche
Anzeichen von Beschädigung. Im Zweifelsfall soll es nicht verwendet werden.
• Dieses Produkt ist nur geeignet zur Verwendung mit Haustieren und nur wie in der
vorliegenden Bedienungsanleitung beschrieben.
• Das Verriegelungssystem dieser Haustiertür ist nicht zur Verwendung als
Sicherheitsvorrichtung konzipiert.
• Diese Haustiertür ist keine Brandschutztür und darf nicht verwendet werden, wo Gefahr
zur Brandausbreitung besteht.
• Der Installierer dieser Haustiertür trägt die Verantwortung für die Einhaltung aller
zutreffenden Bauvorschriften.
• Der Einbau dieser Haustiertür soll mit entsprechender Sorgfalt vorgenommen werden.
Dabei sollen die Sicherheitsanweisungen für die Verwendung aller Werkzeuge befolgt
und entsprechende persönliche Schutzausrüstung getragen werden.
• Entsorgen Sie alle Verpackungsmaterialien ordnungsgemäß.
HINWEIS: Plastikbeutel
können Erstickungsgefahren verursachen und müssen außer Reichweite von Kindern
und Tieren gehalten werden.
BITTE DIESE ANWEISUNGEN AUFBEWAHREN
D
Abb. 1. Wir empfehlen, daß Ihnen in diesem Fall ein Glaser den Türeinschnitt ausschneidet,
und zwar an der gewünschten Stelle mit einem Durchmesser von 223mm.
HINWEIS: Bei
bestehender Sicherheits- bzw. Doppel- / Dreifachverglasung ist eine neue Scheibe
erforderlich.
Abb. 2. Für Glasscheiben mit Dicke 2 - 5mm: Den Innenrahmen (Rahmen ohne
Schwingklappe) mit einer Metallsäge oder Kunststofftrennscheibe genau auf die
Randabstufung zurückschneiden.
Abb. 3. Den Klappenrahmen an die Außenseite legen und den Innenrahmen mit den für die
Türdickte gegeigneten. Schrauben/Abstandstücken, (siehe Tabelle unten), an den
Klappenrahmen schrauben. Die Schrauben nicht zu fest anziehen. Die Schraubenköpfe mit
den mitgelieferten Schraubenkappen abdecken.
Nützlicher Tipp... Damit sich Ihre Katze an die Katzenklappe gewöhnen kann, die Klappe
vorerst offenhalten (z.B. mit einder Wäscheklammer) und Ihr Tier mit Futter locken.
Türdickte Kurze Schraube Lange Schraube Abstandsstück
02 - 10mm
10 - 17mm
17 - 23mm
23 - 30mm
30mm + Zwei Ø 4.2 Schneidschrauben passend zuschneiden
= Türdickte + 12mm
✓✓
✓
✓✓
✓
Fig. 1. Nous vous recommandons de demander à votre vitrier de pratiquer une ouverture
de 223mm de diamètre dans la position voulue.
REMARQUE: Pour le vitrage trempé
/double/triple existant, un nouveau panneau de verre sera nécessaire.
Fig. 2. Panneaux de verre de 2 - 5mm d’épaisseur: Découpez soigneusement le cadre
intérieur (cadre sans le battant) jusqu’au bord moulé avec une scie à métaux ou un disque
à découper le plastique.
Fig. 3. Posez le cadre de la chatière du côté extérieur au panneau, et vissez-y le cadre
intérieur au moyen des vis et des pièces d'écartement correspondant à l'épaisseur de votre
panneau (voir table ci-dessous). Ne serrez pas trop les vis. Couvrez les têtes de vis avec
les garnitures fournies.
IMPORTANT CONSIGNES DE SECURITE
• Veuillez lire attentivement toutes les instructions avant d’installer ou d’utiliser ce produit.
• Enregistrez votre achat en ligne à l'adresse www.pet-mate.com (voir la garantie).
• Ne laissez pas les enfants jouer avec ce produit.
• Inspectez régulièrement le produit pour vous qu'il fonctionne correctement et qu'il n’est pas
endommagé. Ne l’utilisez pas en cas de doute.
• Ce produit est conçu pour être uniquement utilisé avec les animaux de compagnie, comme
décrit dans ces instructions.
• Le système de verrouillage de cette porte/chatière n'est pas censé être un dispositif de
sécurité.
• Cette porte/chatière ne résiste pas au feu et ne doit pas être utilisée en cas de risque de
propagation d’incendie.
• L'installateur de cette porte/chatière est responsable de se conformer à toutes les
réglementations du bâtiment pertinentes.
• Prenez les précautions qui s'imposent pendant l'installation de cette porte/chatière.
Respectez les consignes de sécurité pour tous les outils et portez un équipement de
protection individuelle approprié.
• Éliminez tous les matériaux d'emballage dans le respect des lois environnementales.
REMARQUE : les sacs en plastique peuvent provoquer la suffocation - tenez-les à l'écart
des enfants et des animaux.
CONSERVEZ CES INSTRUCTIONS
F
Astuce... Au début, habituez votre chat à passer par la chatière enla maintenant ouverte
(avec une pince à linge, par exemple) et en offrant un peu de nourriture à votre chat
del'autre côté.
Epaisseur de la porte Vis courtes Vis longues Pièce d’écartement
02 - 10mm
10 - 17mm
17 - 23mm
23 - 30mm
30mm + Prenez due vis autotaraudeuses de Ø 4.2mm coupés à la
longueur voulue, soit l'épaisseurde la porte + 12mm
✓✓
✓
✓✓
✓
INSTRUCCIONES IMPORTANTES DE SEGURIDAD
• Lea todas las instrucciones antes de instalar o utilizar este producto.
• Registre su compra en línea en www.pet-mate.com (consulte la garantía).
• No permita jugar a los niños con este producto.
• Inspeccione el producto regularmente para observar que funciona correctamente y
no hay daños. No lo utilice si tiene dudas.
• Este producto se ha diseñado para el uso con mascotas exclusivamente, como se
describe en estas instrucciones.
• El sistema de cierre de esta gatera no se ha diseñado como dispositivo de seguridad.
• Esta gatera no es resistente al fuego y no se deberá utilizar en lugares donde exista
el riesgo de propagación de fuego.
• El instalador de esta gatera es responsable de cumplir todos los reglamentos de
construcción oportunos.
• Durante la instalación de esta gatera, tome las precauciones apropiadas. Siga las
instrucciones de seguridad de todas las herramientas y utilice equipo apropiado de
protección personal.
• Elimine apropiadamente todo el material de embalaje.
NOTA: Las bolsas de plástico
pueden causar asfixia - manténgalas alejadas de los niños y los animales.
CONSERVE ESTAS INSTRUCCIONES
E
Fig. 1. Le recomendamos que llame a un cristalero para que corte un orificio de 223mm
de diámetro en la posición requerida.
NOTA: Para acristalamiento templado/doble/triple,
se requerirá un nuevo panel de cristal.
Fig. 2. Para paneles de cristal de 2 - 5mm de grosor: Con cuidado, corte el marco
interior (el marco sin la hoja oscilante) hasta el escalón moldeado con una sierra de arco
o un disco de corte de plástico.
Fig. 3. Coloque el marco de la gatera sobre la parte exterior del panel y atornille la cubierta
interior a éste utilizando la combinación apropiada de tornillo/separador para el grosor de
su panel (ver la tabla siguiente). No apriete los tornillos en exceso. Cubra los ajustes con
las cubiertas provistas.
BELANGRIJK! VEILIGHEIDSINSTRUCTIES
• Lees alle instructies voor of bij het gebruik van dit product.
• Registreer uw aankoop online bij www.pet-mate.com (zie garantie).
• Kinderen niet met dit product laten spelen.
• Inspecteer het product regelmatig op correcte werking en eventuele beschadiging.
Bij twijfel niet gebruiken.
• Dit product is uitsluitend ontworpen voor gebruik met huisdieren, zoals beschreven
in deze instructies.
• Het sluitsysteem van dit huisdierendeur is niet bedoeld als beveiliging.
• Dit huisdierendeur is niet brandwerend en mag niet worden gebruikt als er risico
bestaat van branduitbreiding.
• Bij de installatie van dit huisdierendeur is men verantwoordelijk voor de naleving van
alle relevante bouwvoorschriften.
• Neem passende maatregelen bij de installatie van dit huisdierendeur. Volg
veiligheidsinstructies voor alle gereedschappen en draag geschikte persoonlijke
beschermingsmiddelen.
• Verwijder al het verpakkingsmateriaal op de juiste wijze.
NB: Houd plastic zakken
uit de buurt van kinderen en dieren om verstikkingsgevaar te vermijden.
BEWAAR DEZE INSTRUCTIES
NL
Afb. 1. U kunt het best uw glazenhandelaar vragen een opening met een doorsnede
223mm op de gewenste plaats te snijden.
NB: Voor reeds aanwezig
gehard/dubbel/driedubbel glas is een nieuw glaspaneel nodig.
Fig. 2. Voor glaspanelen 2 - 5mm dik: Snijd het binnenframe (frame zonder scharnierend
luik) met een ijzerzaag of plastic doorslijpschijf overeenkomstig het voorgevormde
opstapje uit.
Fig. 3. Houd het frame van het kattenluik tegen de buitenkant van het paneel en schroef
het binnenpaneel erop met behulp van de juiste schroef/afstandsstuk combinatie voor
de dikte van uw paneel, (zie onderstaande tabel). Dek de bevestigingen af met de
bijgeleverde kapjes.
Consejo útil... Para entrenar a su gato en el uso de la gatera, ábrala en primer lugar y
utilice comida para atraer a su mascota.
Een goede tip… Om uw kat te trainen het kattendeur te gebruiken, eerst open stutten en
voedsel als lokmiddel gebruiken.
Grosor de la puerta Tornillo corto Tornillo largo Separador debajo
cabeza del tornillo
Utilice 2 tornillos autorroscantes de 8g (Ø 4.2mm) cortados a
la longitud adecuada = grosor de la puerta + 12mm.
✓✓
✓
✓✓
✓
Deurdikte Korte schroef Lange schroef Afstandsstuk onder
de schroefkop
Gebruik 2 x 8 (Ø 4.2mm) zelftappende schroeven op maat
gesneden = deurdikte + 12mm
✓✓
✓
✓✓
✓
This manual suits for next models

1

Other Petmate Pet Care Product manuals

Petmate infinity User manual

Petmate

Petmate infinity User manual

Petmate FISH MATE F14 User manual

Petmate

Petmate FISH MATE F14 User manual

Petmate Deluxe Vari Kennel User manual

Petmate

Petmate Deluxe Vari Kennel User manual

Petmate Le Bistro User manual

Petmate

Petmate Le Bistro User manual

Petmate CAT MATE C500 User manual

Petmate

Petmate CAT MATE C500 User manual

Petmate cat mate C3000 User manual

Petmate

Petmate cat mate C3000 User manual

Petmate CAT MATE Elite Series User manual

Petmate

Petmate CAT MATE Elite Series User manual

Petmate Le Bistro User manual

Petmate

Petmate Le Bistro User manual

Petmate CAT MATE 359 User manual

Petmate

Petmate CAT MATE 359 User manual

Petmate 21232 User manual

Petmate

Petmate 21232 User manual

Petmate CAT MATE 357 User manual

Petmate

Petmate CAT MATE 357 User manual

Petmate CAT MATE 304 User manual

Petmate

Petmate CAT MATE 304 User manual

Petmate ANIMATE Cat Mate User manual

Petmate

Petmate ANIMATE Cat Mate User manual

Petmate CAT MATE C500 User manual

Petmate

Petmate CAT MATE C500 User manual

Petmate Cat Mate C50 User manual

Petmate

Petmate Cat Mate C50 User manual

Petmate 360W User manual

Petmate

Petmate 360W User manual

Petmate CAT MATE Elite 355 User manual

Petmate

Petmate CAT MATE Elite 355 User manual

Petmate Cat Mate Elite Selective User manual

Petmate

Petmate Cat Mate Elite Selective User manual

Petmate CAT MATE 221 User manual

Petmate

Petmate CAT MATE 221 User manual

Petmate Pet Shuttle User manual

Petmate

Petmate Pet Shuttle User manual

Petmate Le Bistro User manual

Petmate

Petmate Le Bistro User manual

Petmate WIRE CRATE User manual

Petmate

Petmate WIRE CRATE User manual

Petmate CAT MATE C300 User manual

Petmate

Petmate CAT MATE C300 User manual

Petmate Fresh Flow User manual

Petmate

Petmate Fresh Flow User manual

Popular Pet Care Product manuals by other brands

Garmin PRO Control 2 HH owner's manual

Garmin

Garmin PRO Control 2 HH owner's manual

Zolia Zen Falls manual

Zolia

Zolia Zen Falls manual

My Pet Command DF113R Operation guide

My Pet Command

My Pet Command DF113R Operation guide

Kerbl 81634 Aassembly Instructions

Kerbl

Kerbl 81634 Aassembly Instructions

outstanding pet LR-800M user manual

outstanding pet

outstanding pet LR-800M user manual

IRIS CI-604 quick start guide

IRIS

IRIS CI-604 quick start guide

Trixie TX7 Instructions for use

Trixie

Trixie TX7 Instructions for use

Petsafe VT-100 operating guide

Petsafe

Petsafe VT-100 operating guide

Smart Kitty SMARTKITTY user manual

Smart Kitty

Smart Kitty SMARTKITTY user manual

Cat Camp Cat Tent instruction manual

Cat Camp

Cat Camp Cat Tent instruction manual

Zetlight AQUARIUM SURVEILLANCE Operation instructions

Zetlight

Zetlight AQUARIUM SURVEILLANCE Operation instructions

HoneyGuaridan S36 user manual

HoneyGuaridan

HoneyGuaridan S36 user manual

Petsafe PBC00-15999 operating guide

Petsafe

Petsafe PBC00-15999 operating guide

Petsafe PAC11-11037 installation guide

Petsafe

Petsafe PAC11-11037 installation guide

Premier Bark & Actvity Counter user manual

Premier

Premier Bark & Actvity Counter user manual

iM3 Shona User's manual and care instructions

iM3

iM3 Shona User's manual and care instructions

Martin System PRO TRAINER 3000 user guide

Martin System

Martin System PRO TRAINER 3000 user guide

Petsafe VBC-10 operating guide

Petsafe

Petsafe VBC-10 operating guide

manuals.online logo
manuals.online logoBrands
  • About & Mission
  • Contact us
  • Privacy Policy
  • Terms and Conditions

Copyright 2025 Manuals.Online. All Rights Reserved.