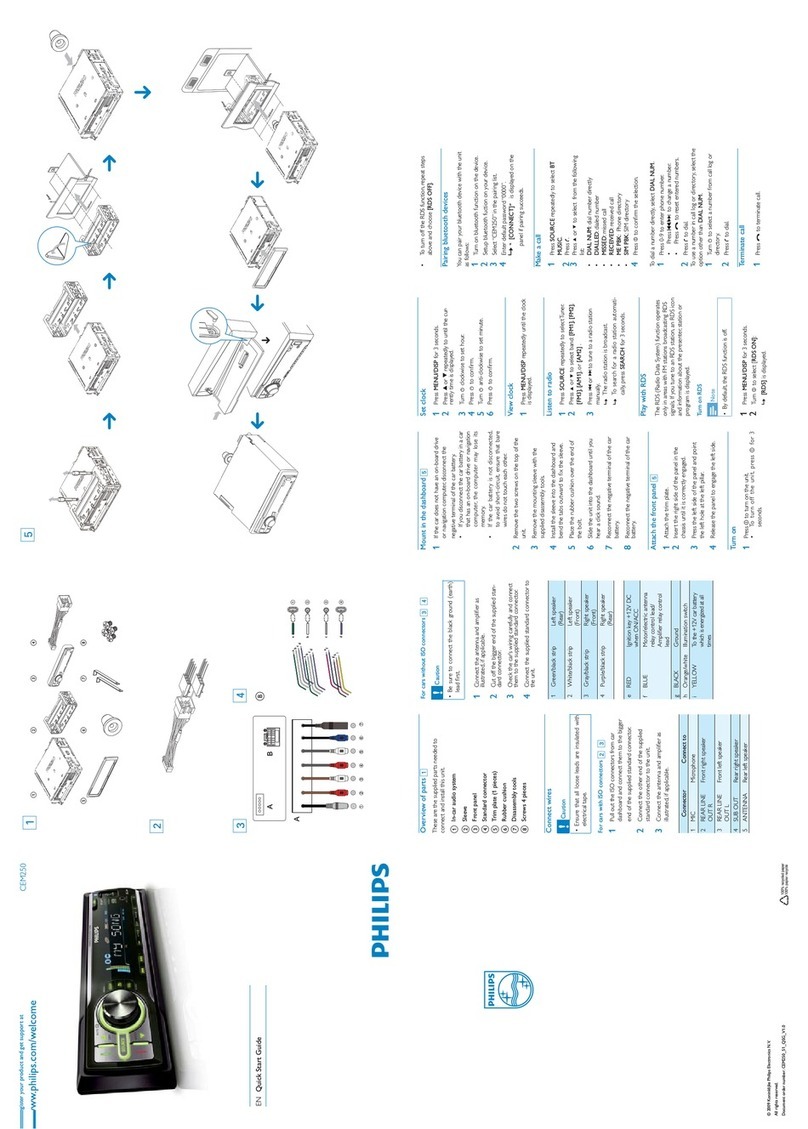
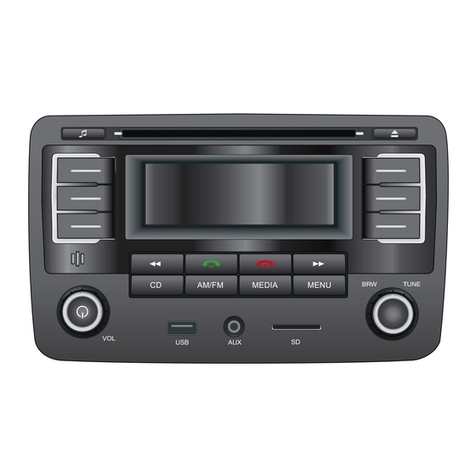
Register your product and get support at CED750
ENG Quick Start Guide
English
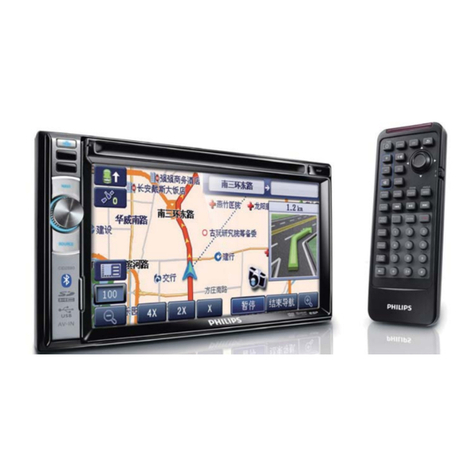
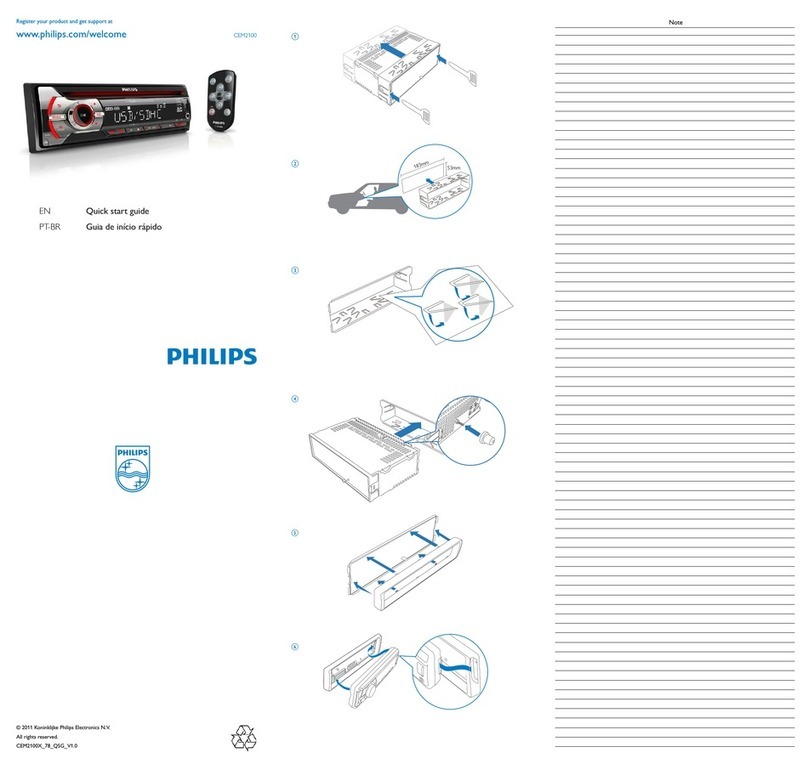
Connect wires: ISO connectors
1Pull out the ISO connectors from the car
dashboard and connect them to the bigger
end of the supplied standard connector.
2Connect the other end of supplied standard
connector to the unit.
If necessary, connect the following:
Connector Connect to/with
1Black cable Antenna
2Yellow cable Video out 1
3Yellow cable Video out 2
4Yellow cable Camera in
5Green/white
wire
Parking
6Black cable Bluetooth microphone
7Blue cable Subwoofer
8Red cable Front line out L
9White cable Front line out R
0Red cable Rear line out L
!white cable Rear line out R
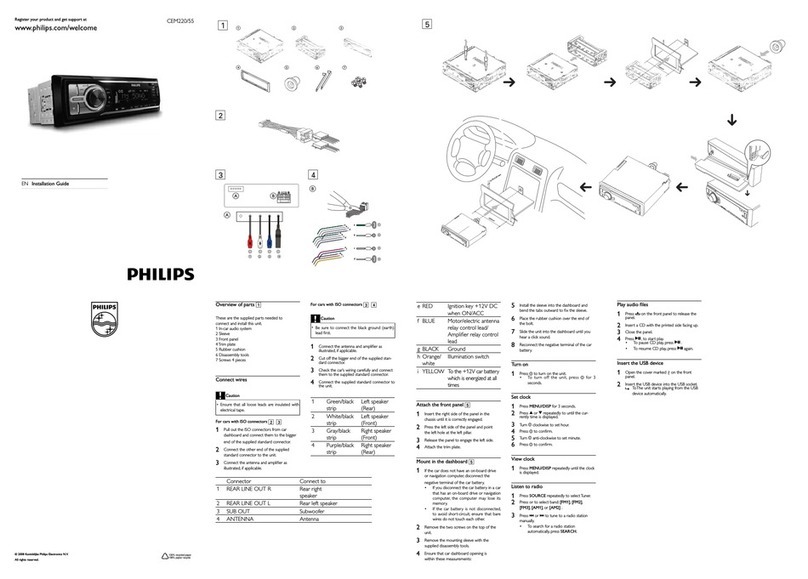
Mount in the dashboard
Note
Check wire connection before you mount
the unit into a car.
If preset radio stations are lost when the
ignition key is turned OFF and then back
ON, reconnect the red leads crosswise to
the yellow ones.
•
•
1If the car does not have an on-board drive or
navigation computer, disconnect the negative
terminal of the car battery.
If you disconnect the car battery in
a car that has an on-board drive or
•
•
navigation computer, the computer may
lost its memory.
If the car battery is not disconnected,
to avoid short-circuit, ensure that bare
wires do not touch each other.
2Ensure that car dashboard opening is within
these measurements:
Since the unit cannot be used if the
dashboard opening’s slant angle is above
20 degrees: Ensure that the horizontal
slant of the car dashboard opening is
between 0 and 20 degrees
3Remove the screws on the both side of the
unit.
4Remove the mounting sleeve.
5Install the sleeve into the dashboard and
bend the tabs outward to fix the sleeve.
6Place the rubber cushion over the end of the
bolt.
7Slide the unit into the dashboard until a click
sound is heard.
If the unit cannot fit into the dashboard,
remove the mounting bracket on the
both side of the unit and replace them
with the supplied short mounting
brackets.
8Attach the trim plate.
9Reconnect the negative terminal of the car
battery.
Turn on
1 Press the to turn on the unit.
The screen opens automatically.
The available OSD (On-Screen Display)
languages are displayed.
2Touch a language to select.
The OSD language is changed to the
selected language immediately.
To adjust the screen tilt, press TILT .
To close the screen, press OPEN/CLOSE.
To adjust the brightness/contrast, press / ,
then adjust 4 WAY NAVIGATION.
To turn off the system, press for 3 sec-
onds.
The screen closes automatically.
•
•
•
»
»
»
•
•
•
•
»
Set clock
1 Touch to display main menu.
2Touch [Setting].
The setup menu is displayed.
3 Touch [General].
4 Touch the [Clock mode] repeatedly to
select:
[12hr] : 12 hour mode
[24hr] : 24 hour mode
5 Touch the hour digits, then touch or .
6Touch the minute digits, then touch or .
7If 12 hour mode is selected, touch or
to select AM or PM.
8 Touch to exit.
Tune to a radio station
1Touch to display the main menu.
2 Touch [Radio].
Band and frequency information is
displayed.
3Touch [Band] repeatedly to select:
FM band options: FM1, FM2, FM3
AM band options: AM1, AM2
4Briefly touch [Previous] or [Next] to tune
to a radio station by step.
Play discs
1Insert the disc into the disc slot with label
side facing up.
Play starts automatically.
To remove the disc, press the button.
When the disc is ejected, the unit switches
to the previous source, if connected. Other-
wise, the unit switches to [Radio] mode auto-
matically.
Insert USB or SD/MMC card
1Open the USB/SD/MMC card cover.
»
•
•
»
•
•
»
»
»
2Insert the USB device or SD/MMC card into
the USB socket or SD/MMC card slot.
Play starts automatically.
Pair the Bluetooth-enabled
devices
1Turn on the Bluetooth function on the
device.
2 Setup the Bluetooth function on your device.
3Select “CED750” in the pairing list.
4Enter default password “0000”.
iI pairing succeeds. [Connect] is displayed
on the panel.
Make a call
1Pair the phone with the system.
2 Touch to return to main menu.
3Touch [Bluetooth].
The Bluetooth menu is displayed.
4Touch to dial.
Receive call
1If there is incoming call, [Incoming call…]
flashes on the screen. Speak into the Blue-
tooth microphone.
2 When conversation ends, touch to
terminate the call.
»
»
»
2
183 mm
53.5mm
5mm
1
1
2
3
4
5
6
7
8
9
0
