Phoenix Contact TP 3070W/P User manual

Touch Panels with
Capacitive Glass Touch
User manual

PHOENIX CONTACT 107460_en_00
User manual
Touch Panels with Capacitive Glass Touch
2016-06-22
Designation:
Revision:
Order No.:
UM EN TP 3XXXX/P
00
—
This user manual is valid for:
Designation Order No.
TP 3070W/P
TP 3090W/P
TP 3120W/P
TP 3156W/P
TP 3185W/P
2403459
2403460
2403461
2403462
2403862

PHOENIX CONTACT
How to contact us
Internet Up-to-date information on Phoenix Contact products and our Terms and Conditions can be
found on the Internet at:
phoenixcontact.com
Make sure you always use the latest documentation.
It can be downloaded at:
phoenixcontact.net/products
Subsidiaries If there are any problems that cannot be solved using the documentation, please contact
your Phoenix Contact subsidiary.
Subsidiary contact information is available at phoenixcontact.com.
Published by PHOENIX CONTACT GmbH & Co. KG
Flachsmarktstraße 8
32825 Blomberg
GERMANY
Should you have any suggestions or recommendations for improvement of the contents and
layout of our manuals, please send your comments to
tecdoc@phoenixcontact.com
General terms and conditions of use for technical documentation
Phoenix Contact reserves the right to alter, correct, and/or improve the technical documen-
tation and the products described in the technical documentation at its own discretion and
without giving prior notice, insofar as this is reasonable for the user. The same applies to any
technical changes that serve the purpose of technical progress.
The receipt of technical documentation (in particular user documentation) does not consti-
tute any further duty on the part of Phoenix Contact to furnish information on modifications
to products and/or technical documentation. You are responsible to verify the suitability and
intended use of the products in your specific application, in particular with regard to observ-
ing the applicable standards and regulations. All information made available in the technical
data is supplied without any accompanying guarantee, whether expressly mentioned, im-
plied or tacitly assumed.
In general, the provisions of the current standard Terms and Conditions of Phoenix Contact
apply exclusively, in particular as concerns any warranty liability.
This manual, including all illustrations contained herein, is copyright protected. Any
changes to the contents or the publication of extracts of this document is prohibited.
Phoenix Contact reserves the right to register its own intellectual property rights for the prod-
uct identifications of Phoenix Contact products that are used here. Registration of such in-
tellectual property rights by third parties is prohibited.
Other product identifications may be afforded legal protection, even where they may not be
indicated as such.

TP 3XXXX/P
PHOENIX CONTACT

Table of Contents
107460_en_00 PHOENIX CONTACT 5
Table of Contents
1 Important Notes .........................................................................................................................7
1.1 Symbols ................................................................................................................ 7
1.2 Safety Notes.......................................................................................................... 7
1.3 Intended Use ......................................................................................................... 8
1.4 Target Group ......................................................................................................... 8
2 Installation and Commissioning .................................................................................................9
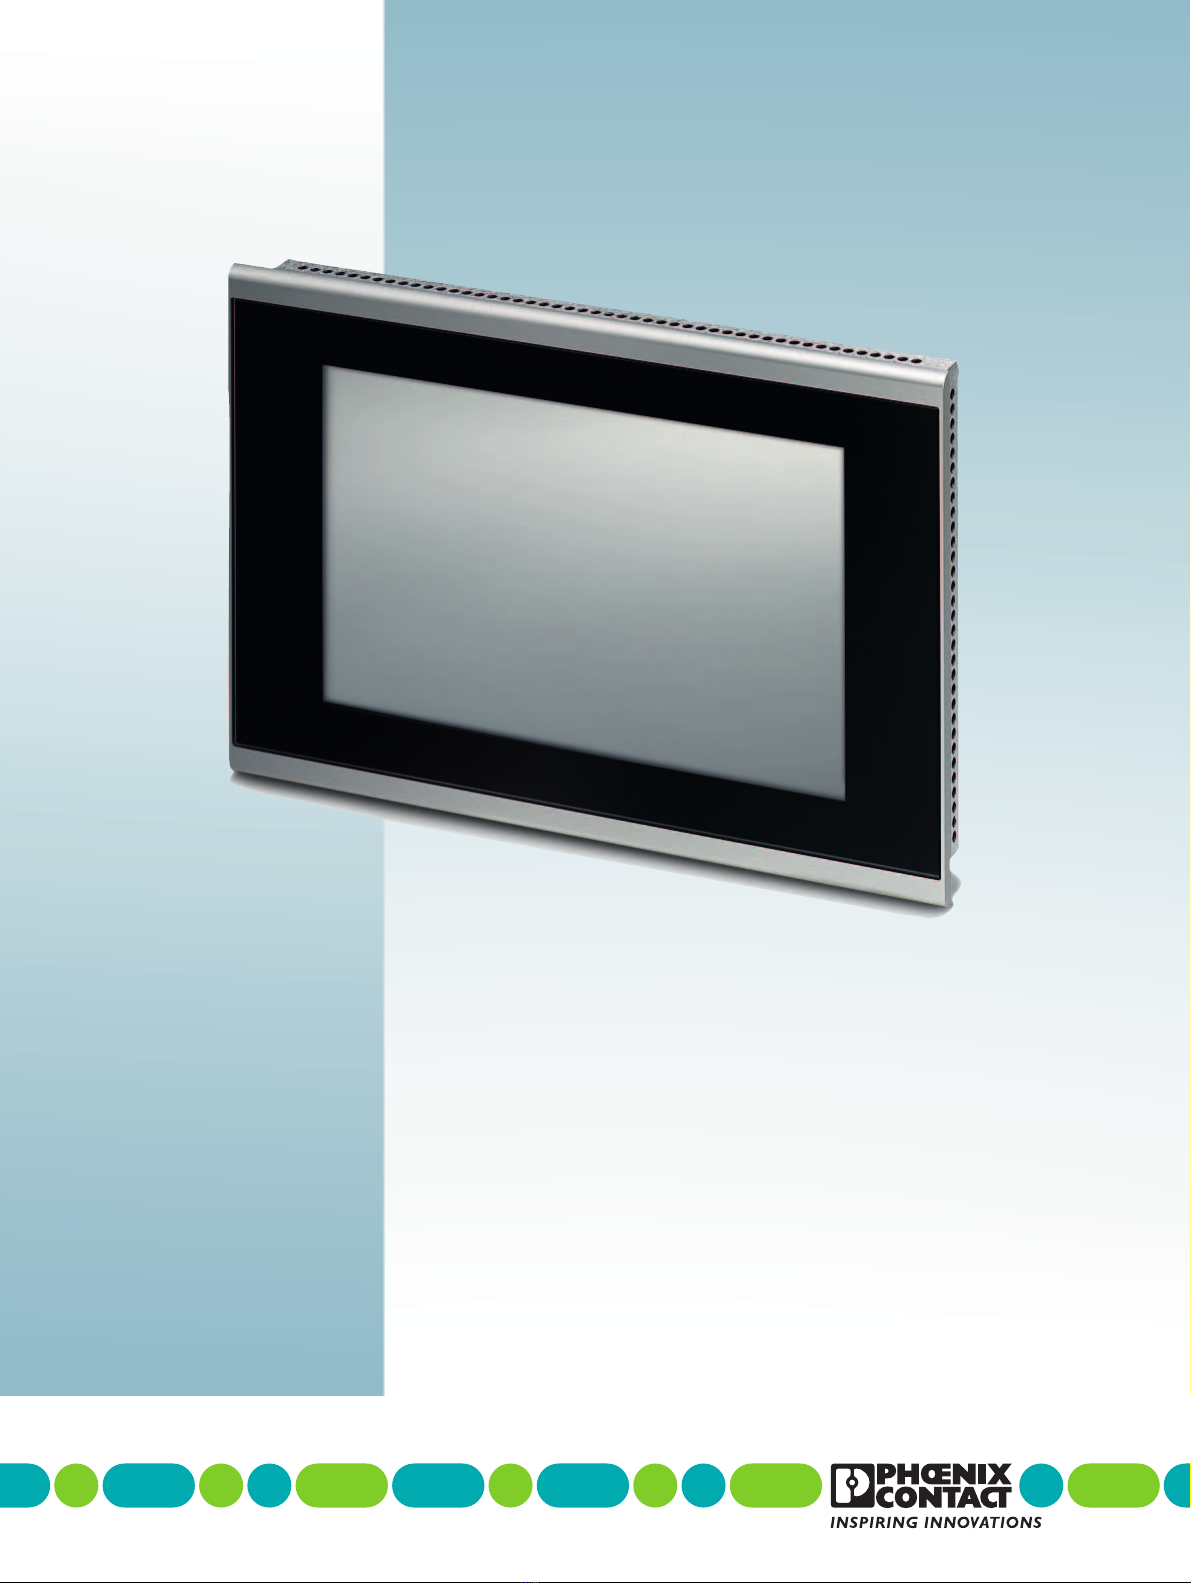
2.1 Unpacking the Device............................................................................................ 9
2.2 Mounting the Device.............................................................................................. 9
2.2.1 Front Panel Dimensions ....................................................................... 11
2.2.2 Mounting Cutout .................................................................................. 16
2.2.3 Side View, Mounting Depth .................................................................. 21
2.3 Connecting the Device ........................................................................................ 26
2.3.1 Supply Voltage ..................................................................................... 26
2.3.2 Grounding ............................................................................................ 27
2.4 Switching On ....................................................................................................... 28
2.4.1 Menu Structure .................................................................................... 30
2.4.2 Settings and Functions ........................................................................ 31
2.5 Visualization ........................................................................................................ 41
2.5.1 System Variables ................................................................................. 41
2.6 Identification ........................................................................................................ 43
3 Control and Display Elements ..................................................................................................45
3.1 Touchscreen ....................................................................................................... 45
3.2 Display................................................................................................................. 45
4 Interfaces of the Device ...........................................................................................................47
4.1 Standard Interfaces ............................................................................................. 47
4.1.1 Ethernet (X5) ........................................................................................ 48
4.1.2 USB (X9, X10) ..................................................................................... 49
4.1.3 Memory Card ....................................................................................... 50
5 Maintenance and Servicing ......................................................................................................51
5.1 Maintenance Interval ........................................................................................... 51
5.2 Front Panel .......................................................................................................... 51
5.3 Fuse .................................................................................................................... 51
5.4 Battery................................................................................................................. 51
5.4.1 Changing the Battery ........................................................................... 52
5.4.2 Battery Disposal ................................................................................... 53

TP 3XXXX/P
6PHOENIX CONTACT 107460_en_00
6 Technical Data .........................................................................................................................55
6.1 General................................................................................................................ 55
6.2 TP 3070W/P ........................................................................................................ 57
6.3 TP 3090W/P ........................................................................................................ 58
6.4 TP 3120W/P ........................................................................................................ 59
6.5 TP 3156W/P ........................................................................................................ 60
6.6 TP 3185W/P ........................................................................................................ 61

Important Notes
107460_en_00 PHOENIX CONTACT 7
1 Important Notes
1.1 Symbols
The symbols in this manual are used to draw your attention on notes and dangers.
There are three different categories of personal injury that are indicated with a signal word.
1.2 Safety Notes
– Read this manual carefully before using the operating device. Keep this manual in a
place where it is always accessible to all users.
– Proper transportation, handling and storage, placement and installation of this product
are prerequisites for its subsequent flawless and safe operation.
– This user manual contains the most important information for the safe operation of the
device.
– The user manual, in particular the safety notes, must be observed by all personnel
working with the device.
– Observe the accident prevention rules and regulations that apply to the operating site.
– Installation and operation must only be carried out by qualified and trained personnel.
This is the safety alert symbol. It is used to alert you to potential personal injury hazards.
Obey all safety messages that follow this symbol to avoid possible injury or death.
DANGER
This indicates a hazardous situation which, if not avoided, will result in death or serious
injury.
WARNING
This indicates a hazardous situation which, if not avoided, could result in death or serious
injury.
CAUTION
This indicates a hazardous situation which, if not avoided, could result in minor or moder-
ate injury.
NOTICE
This symbol together with the signal word NOTE and the accompanying text alert the
reader to a situation which may cause damage or malfunction to the device, hardware/
software, or surrounding property.
This symbol and the accompanying text provide the reader with additional information or
refer to detailed sources of information.

TP 3XXXX/P
8PHOENIX CONTACT 107460_en_00
1.3 Intended Use
– The device is designed for use in the industry.
– The device is state-of-the art and has been built to the latest standard safety require-
ments. However, dangerous situations or damage to the machine itself or other prop-
erty can arise from the use of this device.
– The device fulfills the requirements of the EMC directives and harmonized European
standards. Any modifications to the system can influence the EMC behavior.
1.4 Target Group
The use of products described in this manual is oriented exclusively to:
– Qualified electricians or persons instructed by them, who are familiar with applicable
standards and other regulations regarding electrical engineering and, in particular, the
relevant safety concepts.
– Qualified application programmers and software engineers, who are familiar with the
safety concepts of automation technology and applicable standards.
NOTICE: Radio Interference
This is a class A device. This device may cause radio interference in residential areas. In
this case, the user may be required to introduce appropriate countermeasures, and to
bear the cost of same.

Installation and Commissioning
107460_en_00 PHOENIX CONTACT 9
2 Installation and Commissioning
2.1 Unpacking the Device
Unpack all parts carefully and check the contents for any visible damage in transit. Also
check whether the shipment matches the specifications on your delivery note.
If you notice damages in transit or discrepancies, please contact us immediately.
2.2 Mounting the Device
The device can be easily and quickly mounted from the rear of the device. A panel thickness
of 1 mm to 6 mm (0.039" to 0.236") is permitted for proper mounting.
1. Cut the mounting cutout in the housing for the device size to be installed.
2. Push the device through the mounting cutout from the front.
Figure 2-1 Mounting the device using a mounting bracket
NOTICE: Damage
When installing the device, leave a gap of at least 30 mm (1.181") around the device to
ensure sufficient air circulation.
NOTICE: Damage
When the operating device is installed horizontally, please note that additional sources of
heat beneath the operating device may result in heat accumulation.
Make sure to allow sufficient heat dissipation!
Please observe the permissible temperature range specified in the technical data when
operating the device.
NOTICE: Damage
In order to ensure the degree of protection specified in the technical data, observe the fol-
lowing points:
– A tolerance of ±0.5 mm is maintained for the mounting cutout.
– The seal lies flat against the mounting surface.
– The number of mounting brackets, given in the technical data, is used.
– The threaded pins of the mounting brackets are tightened uniformly to a maximum
torque of 1 Nm.
C
B
A

TP 3XXXX/P
10 PHOENIX CONTACT 107460_en_00
3. Fix the mounting brackets in the recesses provided (A).
4. Pull the mounting brackets down until the snap into place (B).
5. Secure the device using the threaded pins (C).

Installation and Commissioning
107460_en_00 PHOENIX CONTACT 11
2.2.1 Front Panel Dimensions
2.2.1.1 TP 3070W/P
Figure 2-2 Front panel (dimensions in mm)
148,5
208

TP 3XXXX/P
12 PHOENIX CONTACT 107460_en_00
2.2.1.2 TP 3090W/P
Figure 2-3 Front panel (dimensions in mm)
179
271

Installation and Commissioning
107460_en_00 PHOENIX CONTACT 13
2.2.1.3 TP 3120W/P
Figure 2-4 Front panel (dimensions in mm)
234
336

TP 3XXXX/P
14 PHOENIX CONTACT 107460_en_00
2.2.1.4 TP 3156W/P
Figure 2-5 Front panel (dimensions in mm)
278
436

Installation and Commissioning
107460_en_00 PHOENIX CONTACT 15
2.2.1.5 TP 3185W/P
Figure 2-6 Front panel (dimensions in mm)
329
485

TP 3XXXX/P
16 PHOENIX CONTACT 107460_en_00
2.2.2 Mounting Cutout
2.2.2.1 TP 3070W/P
Figure 2-7 Mounting cutout (dimensions in mm)
AMounting Cutout
BFront Panel
198 ±0,5
208
138
±0,5
148,5
A
B

Installation and Commissioning
107460_en_00 PHOENIX CONTACT 17
2.2.2.2 TP 3090W/P
Figure 2-8 Mounting cutout (dimensions in mm)
AMounting Cutout
BFront Panel
169
±0,5
179
261
±0,5
271
A
B

TP 3XXXX/P
18 PHOENIX CONTACT 107460_en_00
2.2.2.3 TP 3120W/P
Figure 2-9 Mounting cutout (dimensions in mm)
AMounting Cutout
BFront Panel
224
±0,5
234
326 ±0,5
336
A
B

Installation and Commissioning
107460_en_00 PHOENIX CONTACT 19
2.2.2.4 TP 3156W/P
Figure 2-10 Mounting cutout (dimensions in mm)
AMounting Cutout
BFront Panel
260
±0,5
278
425
±0,5
436
A
B

TP 3XXXX/P
20 PHOENIX CONTACT 107460_en_00
2.2.2.5 TP 3185W/P
Figure 2-11 Mounting cutout (dimensions in mm)
AMounting Cutout
BFront Panel
311
±0,5
329
475 ±0,5
485
A
B
This manual suits for next models
9
Table of contents
Other Phoenix Contact Touch Panel manuals

Phoenix Contact
Phoenix Contact UM EN TP 3 Series User manual

Phoenix Contact
Phoenix Contact TP 3043W User manual

Phoenix Contact
Phoenix Contact HTP10 1000 User manual

Phoenix Contact
Phoenix Contact VL PPC 300 User manual

Phoenix Contact
Phoenix Contact UM EN TP 3 Series User manual

Phoenix Contact
Phoenix Contact WP 4000 User manual

Phoenix Contact
Phoenix Contact UM EN OPC 7015 User manual