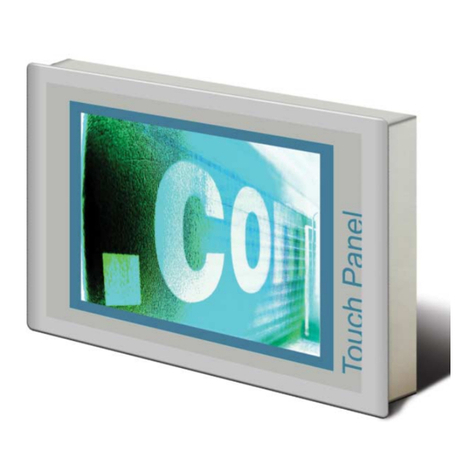
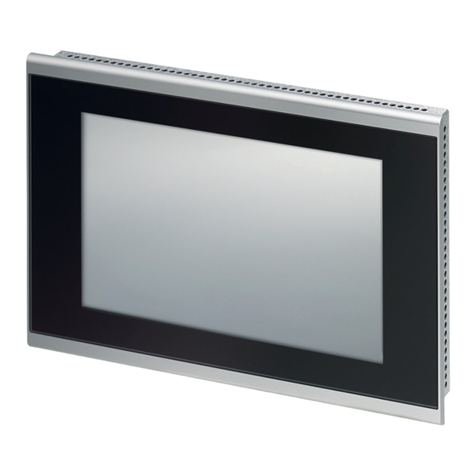
Phoenix Contact UM EN TP 3 Series User manual

AUTOMATION
User Manual
UM EN TP 3xxx
Touch Panel with TFT-Display


8095_en_00 PHOENIX CONTACT
AUTOMATION
User Manual
06/2010
Designation:
Revision:
Order No.:
UM EN TP 3xxx
00
This user manual is valid for:
Designation Art.-No.
TP 3057M
TP 3057T
TP 3070T
TP 3105T
TP 3121T
2700901 - 2700905
2700906 - 2700910
2700911 - 2700915
2700916 - 2700920
2700921 - 2700925

TP 3057M, TP 3057T, TP 3070T, TP 3105T, TP 3121T
PHOENIX CONTACT 8095_en_00
General terms and conditions of use for technical documentation
Phoenix Contact reserves the right to alter, correct, and/or improve the technical documen-
tation and the products described in the technical documentation at its own discretion and
without giving prior notice, insofar as this is reasonable for the user. The same applies to any
technical changes that serve the purpose of technical progress.
The receipt of technical documentation (in particular data sheets, installation instructions,
manuals, etc.) does not constitute any further duty on the part of Phoenix Contact to furnish
information on alterations to products and/or technical documentation. Any other agree-
ment shall only apply if expressly confirmed in writing by Phoenix Contact. Please note that
the supplied documentation is product-specific documentation only and that you are re-
sponsible for checking the suitability and intended use of the products in your specific ap-
plication, in particular with regard to observing the applicable standards and regulations.
Although Phoenix Contact makes every effort to ensure that the information content is ac-
curate, up-to-date, and state-of-the-art, technical inaccuracies and/or printing errors in the
information cannot be ruled out. Phoenix Contact does not offer any guarantees as to the
reliability, accuracy or completeness of the information. All information made available in
the technical data is supplied without any accompanying guarantee, whether expressly
mentioned, implied or tacitly assumed. This information does not include any guarantees re-
garding quality, does not describe any fair marketable quality, and does not make any
claims as to quality guarantees or guarantees regarding the suitability for a special purpose.
Phoenix Contact accepts no liability or responsibility for errors or omissions in the content
of the technical documentation (in particular data sheets, installation instructions, manuals,
etc.).
The aforementioned limitations of liability and exemptions from liability do not apply, in so
far as liability must be assumed, e.g., according to product liability law, in cases of premed-
itation, gross negligence, on account of loss of life, physical injury or damage to health or on
account of the violation of important contractual obligations. Claims for damages for the vi-
olation of important contractual obligations are, however, limited to contract-typical, predict-
able damages, provided there is no premeditation or gross negligence, or that liability is as-
sumed on account of loss of life, physical injury or damage to health. This ruling does not
imply a change in the burden of proof to the detriment of the user.

8095_en_00 PHOENIX CONTACT
Statement of legal authority
This manual, including all illustrations contained herein, is copyright protected. Use of this
manual by any third party is forbidden. Reproduction, translation, and public disclosure, as
well as electronic and photographic archiving or alteration requires the express written con-
sent of Phoenix Contact. Violators are liable for damages.
Phoenix Contact reserves all rights in the case of patent award or listing of a registered de-
sign. Third-party products are always named without reference to patent rights. The
existence of such rights shall not be excluded.
How to contact us
Internet Up-to-date information on Phoenix Contact products and our Terms and Conditions can be
found on the Internet at:
www.phoenixcontact.com
Make sure you always use the latest documentation.
It can be downloaded at:
www.phoenixcontact.de/download
Subsidiaries If there are any problems that cannot be solved using the documentation, please contact
your Phoenix Contact subsidiary.
Subsidiary contact information is available at www.phoenixcontact.com.
Published by
Should you have any suggestions or recommendations for improvement of the contents and
layout of our manuals, please send your comments to
tecdoc@phoenixcontact.com
PHOENIX CONTACT GmbH & Co. KG
Flachsmarktstraße 8
32825 Blomberg
Germany
Phone +49 - (0) 52 35 - 3-00
Fax +49 - (0) 52 35 - 3-4 12 00
PHOENIX CONTACT
P.O. Box 4100
Harrisburg, PA 17111-0100
USA
Phone +1-717-944-1300

TP 3057M, TP 3057T, TP 3070T, TP 3105T, TP 3121T
PHOENIX CONTACT 8095_en_00

Kapitel 1
8095_en_00 PHOENIX CONTACT i
Table of Contents
Important Notes...............................................................................................................................1-1
1.1 Symbols .............................................................................................................1-1
1.2 Safety Notes.......................................................................................................1-1
1.3 Intended Use ......................................................................................................1-2
1.4 Target Group ......................................................................................................1-2
Installation and Commissioning.......................................................................................................2-1
2.1 Unpacking the Device.........................................................................................2-1
2.2 Mounting the Device...........................................................................................2-1
2.2.1 Front Panel Dimensions.......................................................................2-3
2.2.2 Mounting Cutout ..................................................................................2-7
2.2.3 Side View, Mounting Depth................................................................2-10
2.3 Connecting the Device .....................................................................................2-14
2.3.1 Supply Voltage 24 V ..........................................................................2-14
2.4 Switching On ....................................................................................................2-17
2.4.1 Loading Procedure on Windows CE Operating System.....................2-17
Control and Display Elements .........................................................................................................3-1
3.1 Touchscreen ......................................................................................................3-1
3.2 Key "Reset" ........................................................................................................3-1
3.3 Display................................................................................................................3-1
Interfaces of the Device...................................................................................................................4-1
4.1 Standard Interfaces ............................................................................................4-1
4.1.1 Ethernet (X5) .......................................................................................4-2
4.1.2 USB (X9, X10) .....................................................................................4-3
4.2 Serial Interfaces..................................................................................................4-4
4.2.1 RS422 / RS485 (X6) ............................................................................4-5
4.2.2 RS232 (X6)..........................................................................................4-7
4.3 Field Bus Slave Interfaces ..................................................................................4-8
4.3.1 CAN Slave (X6, X7) .............................................................................4-8
4.3.2 MPI Slave (X6)...................................................................................4-12
4.3.3 PROFIBUS-DP Slave (X6).................................................................4-15
4.4 Memory Card....................................................................................................4-18
4.4.1 Inserting the Memory Card ................................................................4-18
4.4.2 Ejecting the Memory Card .................................................................4-19
4.5 Shielding D-SUB Connectors ...........................................................................4-19

TP 3057M, TP 3057T, TP 3070T, TP 3105T, TP 3121T
ii PHOENIX CONTACT 8095_en_00
Maintenance and Servicing.............................................................................................................5-1
5.1 Maintenance Interval ..........................................................................................5-1
5.2 Front Panel .........................................................................................................5-1
5.3 Fuse ...................................................................................................................5-1
5.4 Battery................................................................................................................5-1
5.4.1 Changing the Battery ...........................................................................5-2
5.4.2 Battery Disposal...................................................................................5-3
Technical Data ................................................................................................................................6-1
6.1 Generally ............................................................................................................6-1
6.2 TP 3057M...........................................................................................................6-3
6.3 TP 3057T............................................................................................................6-4
6.4 TP 3070T............................................................................................................6-5
6.5 TP 3105T............................................................................................................6-6
6.6 TP 3121T............................................................................................................6-7

Important Notes
8095_en_00 PHOENIX CONTACT 1-1
1 Important Notes
1.1 Symbols
The symbols in this manual are used to draw your attention on notes and dangers.
1.2 Safety Notes
– Read this manual carefully before using the operating device. Keep this manual in a
place where it is always accessible to all users.
– Proper transportation, handling and storage, placement and installation of this product
are prerequisites for its subsequent flawless and safe operation.
– This user manual contains the most important information for the safe operation of the
device.
– The user manual, in particular the safety notes, must be observed by all personnel
working with the device.
– Observe the accident prevention rules and regulations that apply to the operating site.
– Installation and operation must only be carried out by qualified and trained personnel.
This is the safety alert symbol. It is used to alert you to potential personal injury hazards.
Obey all safety messages that follow this symbol to avoid possible injury or death.
DANGER
This symbol is used to refer to instructions which, if ignored or not carefully followed, will
result in death or serious injury.
WARNING
This symbol is used to refer to instructions which, if ignored or not carefully followed, could
result in death or serious injury.
CAUTION
This symbol is used to refer to instructions which, if ignored or not carefully followed, could
result in minor or moderate injury.
NOTICE
This symbol and the accompanying text alerts the reader to a situation which may cause
damage or malfunction to the device, either hardware or software, or surrounding prop-
erty.
Reference to source of information
This symbol refers to detailed sources of information on the current topic.

TP 3057M, TP 3057T, TP 3070T, TP 3105T, TP 3121T
1-2 PHOENIX CONTACT 8095_en_00
1.3 Intended Use
– The device is designed for use in the industry.
– The device is state-of-the art and has been built to the latest standard safety require-
ments. However, dangerous situations or damage to the machine itself or other prop-
erty can arise from the use of this device.
– The device fulfills the requirements of the EMC directives and harmonized European
standards. Any modifications to the system can influence the EMC behavior.
1.4 Target Group
All configuration, programming, installation, commissioning, operating and maintenance
work in connection with the automation system must be performed by trained personnel
only (e.g. qualified electricians, electrical engineers, etc.).
The configuration and programming personnel must be familiar with the safety concepts of
automation technology.
The operating personnel must have been trained in handling the controller and be familiar
with the operating instructions.
The installation, commissioning and maintenance personnel must have an education which
entitles them to work on automation systems.
NOTICE: Radio Interference
This is a class A device. This device may cause radio interference in residential areas. In
this case, the user may be required to introduce appropriate countermeasures, and to
bear the cost of same.

Installation and Commissioning
8095_en_00 PHOENIX CONTACT 2-1
2 Installation and Commissioning
2.1 Unpacking the Device
Unpack all parts carefully and check the contents for any visible damage in transit. Also
check whether the shipment matches the specifications on your delivery note.
If you notice damages in transit or discrepancies, please contact our sales department im-
mediately.
2.2 Mounting the Device
The device can be easily and quickly mounted from the rear of the device. Ideally, the device
should be installed in switch panels with a plate thickness of approx. 1 mm to 6 mm (0.039"
to 0.236").
1. Insert the device in the mounting cutout from the front.
Figure 2-1 Mounting the device using a mounting bracket
2. Insert the mounting brackets into the appropriate openings (figure 1) and pull the brack-
ets downwards until they lock in place (figure 2).
NOTICE: Damage
When installing the device, leave a gap of at least 30 mm (1.181") around the device to
ensure sufficient air circulation.
NOTICE: Damage
When the operating device is installed horizontally, please note that additional sources of
heat beneath the operating device may result in heat accumulation.
Make sure to allow sufficient heat dissipation!
Comply with the allowable temperature range listed in the technical data for the use of the
operating device!
NOTICE: Damage
To ensure the specified degree of protection, make sure that the seal rests flat on the
mounting surface and the threaded pins of the mounting brackets are uniformly tightened.

TP 3057M, TP 3057T, TP 3070T, TP 3105T, TP 3121T
2-2 PHOENIX CONTACT 8095_en_00
3. Fasten the device into position using the threaded pins (figure 3).

Installation and Commissioning
8095_en_00 PHOENIX CONTACT 2-3
2.2.1 Front Panel Dimensions
Figure 2-2 TP 3057M, TP 3057T

TP 3057M, TP 3057T, TP 3070T, TP 3105T, TP 3121T
2-4 PHOENIX CONTACT 8095_en_00
Figure 2-3 TP 3070T

Installation and Commissioning
8095_en_00 PHOENIX CONTACT 2-5
Figure 2-4 TP 3105T

TP 3057M, TP 3057T, TP 3070T, TP 3105T, TP 3121T
2-6 PHOENIX CONTACT 8095_en_00
Figure 2-5 TP 3121T

Installation and Commissioning
8095_en_00 PHOENIX CONTACT 2-7
2.2.2 Mounting Cutout
Figure 2-6 TP 3057M, TP 3057T, TP 3070T
AMounting Cutout
BFront Panel

TP 3057M, TP 3057T, TP 3070T, TP 3105T, TP 3121T
2-8 PHOENIX CONTACT 8095_en_00
Figure 2-7 TP 3105T
AMounting Cutout
BFront Panel

Installation and Commissioning
8095_en_00 PHOENIX CONTACT 2-9
Figure 2-8 TP 3121T
AMounting Cutout
BFront Panel

TP 3057M, TP 3057T, TP 3070T, TP 3105T, TP 3121T
2-10 PHOENIX CONTACT 8095_en_00
2.2.3 Side View, Mounting Depth
Figure 2-9 TP 3057M, TP 3057T
1Mounting Bracket
2Threaded Pin
3Mounting Surface Thickness 1 mm to 6 mm
4Circumferential Seal
5Front Panel
Other manuals for UM EN TP 3 Series
1
Table of contents
Other Phoenix Contact Touch Panel manuals

Phoenix Contact
Phoenix Contact VL PPC 300 User manual

Phoenix Contact
Phoenix Contact UM EN TP 3 Series User manual

Phoenix Contact
Phoenix Contact WP 4000 User manual

Phoenix Contact
Phoenix Contact TP 3070W/P User manual

Phoenix Contact
Phoenix Contact UM EN OPC 7015 User manual

Phoenix Contact
Phoenix Contact HTP10 1000 User manual

Phoenix Contact
Phoenix Contact TP 3043W User manual