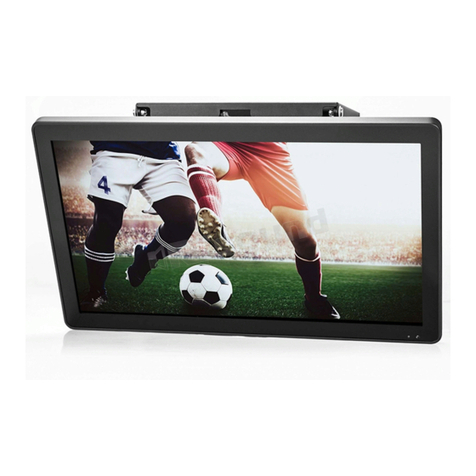
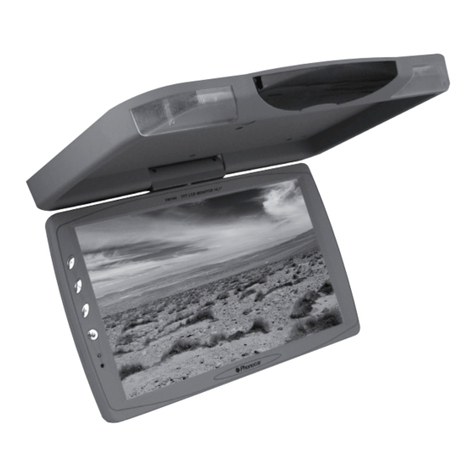
Phonocar VM171 Installation guide

MONITOR
VM171
ISTRUZIONI DI MONTAGGIO
ASSEMBLING INSTRUCTIONS
INSTRUCTIONS DE MONTAGE
MONTAGEANLEITUNG
INSTRUCCIONES PARA EL MONTAJE

2
INDICE
CONTENTS • INDEX • INHALTSVERZEICHNIS • INDICE
3 - Garanzia
Warranty / Garantie / Garantía
5-
Precauzioni di sicurezza
Security precautions • Précautions de sécurité • Sicherheitsbedingte Maßnahmen •
Seguridad
7 - Installazione
Installation • Einbau • Instalación
8 - Collegamenti
Connections • Connexions • Anschlüsse • Conexiones
9 - Dotazione
Equipment • Equipement • Lieferumfang • Equipamiento
10 - Descrizione comandi monitor •
Monitor controls • Description des commandes du moniteur
• Beschreibung der Bedienelemente am Monitor • Descripción de los mandos del monitor
12 - Funzioni telecomando •
Remote controls • Functions de la télécommande • Tasten der Fer-
nbedienung • Mondos del telemando
13 - Caratteristiche tecniche
Technical specifications • Caracteristiques techniques • Technische Merkmale •
Características téenicas.
- Sostituzione pila telecomando
Changing the remote control battery • Remplacement de la pile de la télécommande • Au-
swechseln der Batterie der Fernbedienung • Sustitución pila telemando
14 - Cuase e rimedi a problemi di installazione
Causes and remedies to installation problems • Causes et solutions aux problèmes d’in-
stallation • Ursachen und Abhilfe bei Installationsproblemen • Problemas de instalación:
causas y soluciones.

VM171
Questo prodotto é garantito per 2 anni dalla data di acquisto
Questa garanzia dà diritto alla sostituzione gratuita dei pezzi difettosi la cui causa è da imputarsi a difetti di materiale
o fabbricazione. Sarà solo ed esclusivamente competenza del nostro servizio tecnico valutare se il guasto è dovuto a
cattivo uso o difetto di costruzione.
Le riparazioni effettuate in garanzia non danno luogo a proroghe o rinnovi della stessa ed è escluso ogni indennizzo a
qualsiasi titolo.
Non sono coperti da garanzia: Avarie da trasporto (graffi, ammaccature e simili). Danni dovuti ad errata installazione
dell'apparecchio elettrico o alterazioni derivanti da condizioni ambientali, climatiche o altra natura. Avarie causate da
trascuratezza, negligenza, manomissione, incapacità d'uso, o riparazioni effettuate da personale non autorizzato. Per
le riparazioni rivolgersi al rivenditore o telefonare al Centro Assistenza Tecnica Phonocar al N° 0522 - 941621. L’ap-
parecchio dovrà essere consegnato con il certificato di garanzia, correttamente compilato, ed il relativo documento
d’acquisto.
This product is guaranteed for 2 years from the date of purchase.
This warranty gives you the right to receive free-of-charge replacement of the defective parts due to sub-standard ma-
terials or workmanship. It shall be the prerogative of our company's technical staff to assess whether the defect clai-
med reflects improper use of the appliance or defect of manufacture.
The repairs effected under warranty will not give the right of postponement or renewal of the warranty period and no
damages can, in any case, be claimed.
Warranty does not cover: Damage due to transport(scratches, dents, etc.); damage resulting from an incorrect in-
stallation of the equipment; from a falulty or inadequate electrical system, or anomalies caused by environmental / cli-
matic or other conditions. Damage caused by wrong handling, lack of care and attention, tampering, or modifications
or repairs attempted by non-authorized persons. Should the appliance be out of order, please turn to your nearest
Sales Point or ring PHONOCAR Italy directly at n°. 0039/0522/941621. The appliance will have to be sent in along
with the correctly filled-in warranty-certificate and the relevant purchase document.
Durée: Ce produit est garanti 2 ans à compter de la date dʼachat. Les éventuelles interventions effectuées sous
garantie durant cette période ne donnent droit à aucune prolongation ou renouvellement de la durée de garantie.
La présente garantie porte exclusivement sur le remplacement gratuit des pièces détachées nécessaires à la réparation,
sauf en cas de non respect des prescriptions d’installation et d’utilisation, de modifications des caractéristiques techniques
de l’appareil ou lorsqu’une cause étrangère à l’appareil est responsable de la défaillance.Elle exclut également toute au-
tres indemnités de quelques nature qu’elles soient.
Conditions dʼapplication: durant la période de garantie, seul le Service Technique de Phonocar est habilité à décider
du bien-fondé de la demande de prise en charge sous garantie, et à intervenir sur les appareils. Les matériels doivent être
retournés munis du certificat de garantie dûment complété et de la facture d’achat du revendeur. N’entrent pas, dans le
cadre de la garantie, les dégâts éventuels infligués aux appareils durant leur transport.
F
GB
I
✄✄
Condizioni di garanzia • Warranty • Clauses de garantie
CERTIFICATO DI GARANZIA • CERTIFICAT DE GARANTIE
GUARANTEE CERTIFICATE • GARANTIE-SCHEIN
CERTIFICADO DE GARANTIA
VM171

Garantie legale: les dispositions stipulées ci-dessus ne sont pas exclusives du bénéfice de la garantie légale pour défaut
et vice caché qui s’applique en tout état de cause dans les conditions des articles 1641 et suivants du Code Civil.Phonocar
porte une attention toute particulière à la qualité de ses matériels et à la satisfaction des utilisateurs.Néanmoins, si vous êtes
confrontés à un problème technique imputable au matériel, contactez, en priorité, votre revendeur habituel ou, en cas d’im-
possibilité, téléphonez directement à Phonocar Italie à l’aide du NuméroVert 0800 90 43 99.
Auf dieses Produkt gewähren wir eine 2-jährige Garantie ab Einkaufsdatum.
Diese Garantie gilt für den kostenlosen Austausch defekter Teile, die auf Material- oder Fabrikationsfehler zurückzufü-
hren sind. Die Entscheidung, ob die Ursache des Schadens auf falsche Handhabung oder auf einen Fabrikationsfehler
beruht, steht nur unserer Technischen Abteilung zu. Die unter Garantie durchgeführten Reparaturen geben keinerlei
Recht auf Verlängerung bzw. Erneuerung der Garantiezeit. Ansprüche auf Schadenersatz sind auf jeden Fall ausge-
schlossen.
Folgende Ursachen werden nicht von der Garantie abgedeckt: Unvorsichtiger Transport (Kratzer, Beulen oder äh-
nliches). Schäden, die auf unsachgemässen Einbau des Gerätes, auf ungenügende Leistung der elektrischen Anlage
oder auf Veränderungen aufgrund von Außeneinflüssen zurückzuführen sind. Schäden, die auf nachlässiger Behan-
dlung, schlechter Pflege, oder falscher Benutzung beruhen. Generell bei Fremdeingriff. Sollte das Gerät nicht funktio-
nieren, bitte Ihren Händler zu Rate ziehen oder PHONOCAR-Deutschland befragen unter der Rufnr. 07144/823020.
Nach vorheriger Absprache ist das Gerät einzusenden mit dem korrekt ausgefüllten Garantie-Schein und dem betref-
fenden Kauf-Nachweis.
Estos productos esta garantizados por un periodo de dos años a partir de la fecha de adquisición.
El producto amparado por esta garantía se halla protegido por ella para piezas y mano de obra, por defecto de fabrica-
ción. Será exclusivamente competencia de nuestro departamento técnico, que despues de una atenta evaluación con-
firmara si se trata de un defecto de fabricación o si es debido a mal uso. Las reparaciones cubiertas por la garantía no
prorrogan ni renuevan la garantia ni dan derecho a indemnización alguna.La garantia non cubre: daños debidos a una
mala instalación del aparato eléctrico, averias de transporte (rayado, abolladuras, etc.), daños ocasionados por la in-
stalación o alteración que deriven de condiciones ambientales, climáticas, etc., averías causadas por descuido, negli-
gencia, manipulación, incapacidad de uso o reparaciones realizadas por personas non autorizadas.
Si el aparato no funciona correctamente dirigerse al vendedor o al Centro de AsistenciaTécnica más próximo.Delegado
Comercial para Península Ibérica Domenico Verderese Tel.(0034) 958 302295 E-mail: [email protected]. En caso
de Reparación en Garantía el aparato deberà ir acompañado de la factura de compora, asi como de estaTarjeta de Ga-
rantia correctamente rellenada.
E
D
Serie N°
Indirizzo/Address/Adresse/Anschrift/Dirección
Nome/First name/Prénom/Vorname/Nombre Cognome/Surname/Nom/Nachname/Apellido
CAP
Data d’acquisto/Purchase Date/Date d’Achat/Kaufdatum/Pecha compra
Città/City/Ville/Ort/Ciudad Nazione/Country/Pays/Land/Pais
Serie N°
Allegare documento d’acquisto/Enclose Purchase Document/Joindre le document d’Achat/Kauf-Nachweis bitte beilegen/Adjuntar documento de compra
Garantie-Bedingungen • Condiciones de garantias
✄✄

5
PRECAUZIONI DI SICUREZZA
SECURITY PRECAUTIONS • PRÉCAUTIONS DE SÉCURITÉ
SICHERHEITSBEDINGTE MASSNAHMEN • SEGURIDAD
Allo scopo di operare in sicurezza osservare attentamente le seguenti precauzioni:
• Installare i dispositivi all’interno dell’auto in posizioni che non ostacolino le normali operazioni di
guida e che non interferiscano con i dispositivi di sicurezza del veicolo (ABS, Air-bag, etc.).
• Provare il sistema prima della sua installazione definitiva.
• Per ottenere le migliori condizioni operative, collegare i cavi come dagli schemi di seguito ripor-
tati.
• Effettuare le regolazioni del sistema a veicolo fermo.
• Il codice della strada vieta di guardare programmi televisivi durante la guida.
• Evitare di toccare il display LCD
• La temperatura di utilizzo va da 0° a 50°C.
• A basse temperature il display potrebbe risultare leggermente scuro alla sua accensione, ma tor-
nerà alla corretta luminosità dopo pochi minuti (situazione dovuta alle caratteristiche fisiche dei
cristalli liquidi).
• In caso di rottura del display non toccare il fluido dei cristalli liquidi, se viene a contatto
con il corpo o gli abiti, lavare immediatamente con acqua e sapone neutro.
To operate under security, please carefully observe the following precautions:
• install the appliances inside the car, in a position leaving free space for the normal car-driving
operations and the security-devices situated within the car (ABS, Air-Bag etc.).
• Test the whole system, before giving way to its definite installation.
• Regulate the whole system while car is in stopped position.
• Remember that Traffic Security Rules do NOT allow watching TV while driving the car.
• Never touch the LCD-Display.
• Use system at a temperature between 0 and +50°C.
• At low temperatures, the display could be slightly dark after switch-on.The display will, in any
case, come to its normal brightness after a few minutes.This situation is normally due to the
physical characteristics of the liquid cristals.
• Never touch the liquid cristals in the case that they should run out from a broken di-
splay. Accidental stains on your skin and clothes should be washed away immediately,
using water and neutral soap.
Afin dʼopérer en pleine sécurité, veuillez observer les précautions suivantes:
• installer les dispositifs à l’intérieur de la voiture, dans une position qui n’obstacle pas les opéra-
tions normales de guide et qui n’interfère pas avec les dispositifs de sécurité du véhicule (ABS,
Air-bag, etc.).
• Essayer le système avant d’effectuer son installation définitive.
• Pour obtenir les meilleures conditions opératives, brancher les câbles selon les schémas ci-après
indiqués.
• Effectuer les réglages du système, à voiture arrêtée.
• Le Code Routière ne permet pas de regarder des programmes TV pendant la guide.
• Eviter de toucher l’écran LCD.
• La température d’exercice est de 0° à 50°.
• A basses températures, l’écran peut résulter légèrement foncé, au moment de l’allumage.La lu-
minosité correcte va, en tout cas, se rétablir après quelques minutes. (Ces circonstances sont
liées aux caractéristiques physiques des cristaux liquides).
• En cas de rupture dʼécran, ne pas toucher le liquide des cristaux. En cas de contacte, laver
immédiatement, peau ou vêtements, avec de lʼeau et du savon neutre.
F
GB
I
6
Um eine sichere Inbetriebnahme zu gewährleisten, bitten wir, folgendes unbedingt zu
beachten:
• bei der Montage der Geräte in den Wageninnenraum darauf achten, dass die gewählte Position
die Steuerung des Fahrzeugs und die darin befindlichen Sicherheitsvorrichtungen (ABS, Airbag
etc.) nicht stört;
• das System testen, bevor Sie zur endgültigen Montage übergehen;
• die Einstellung des Systems bei stehendem Fahrzeug vornehmen;
• das Verkehrsschutzgesetz verbietet das Fernsehen am Steuer;
• das LCD-Display nicht anfassen;
• die Raumtemperatur muß innerhalb 0° und +50° C liegen;
• bei geringer Raumtemperatur könnte das Display, unmittelbar nach dem Einschalten, etwas
dunkel ausfallen, jedoch sollte die normale Helligkeit nach wenigen Minuten eintreten (physisch
bedingt durch die Flüssig-Kristalle);
• bei Verletzung des Displays, die austretende Kristallflüssigkeit nicht anfassen. Bei unbe-
absichtigtem Kontakt mit Kleidung und Haut, sofort mittels Wasser und neutraler Seife
entfernen.
Para operar en condiciones de seguridad hay que seguir estas indicaciones:
• Instalar los dispositivos en una posición que no obstaculice la conducción y no interfiera con los dis-
positivos de seguridad del vehículo (ABS, airbags, etc.)
• Probar el sistema antes de instalarlo.
• Conectar los cables como se indica en los esquemas eléctricos.
• Efectuar las regulaciones del sistema con el vehículo detenido.
• Las normas de circulación vial prohíben ver programas de televisión mientras se conduce.
• No tocar el display de cristal líquido.
• La temperatura de funcionamiento es de 0 a 50°C.
• Si la temperatura es muy baja el display puede quedar oscuro durante unos minutos después del en-
cendido.
• Si el display se rompe no hay que tocar el fluido del cristal líquido. Si entra en contacto con
el cuerpo o la ropa hay que lavarlos inmediatamente con agua y jabón neutro.
D
E

7
INSTALLAZIONE
INSTALLATION • EINBAU • INSTALACIÓN
A/V IN
MENUPOWER
IRTRANSMITTER
IN PLANCIA
IN DASHBOARD •
SUR LETABLEAU DE BORD • IM ARMATURENBRETT • EN EL PANEL
NEI POGGIATESTA
IN HEADREST • SUR LES APPUIE-TÊTE • IN DER NACKENSTÜTZE • EN EL APOYACABEZA
A/VIN
MENUPOWER
IRTRANSMITTER
A/V IN
MENU POWER
IRTRANSMITTER

8
COLLEGAMENTI
CONNECTIONS • CONNEXIONS • ANSCHLÜSSE • CONEXIONES
IRTRANSMITTER
A/V IN
MENU POWER
VIDEO IN (Giallo/Yellow)
AUDIO IN (Bianco/White)
(Rosso/Red)
(Nero/Black)
FUSE
FILTER
BOX
VIDEO IN (Giallo/Yellow)
AUDIO IN (Bianco/White)
AV/IN
INPUT
+12V DC
GROUND

9
DOTAZIONE
• EQUIPMENT • EQUIPEMENT • LIEFERUMFANG • EQUIPAMIENTO
n° 1 Cavo di collegamento monitor
n° 1 Cavo ingresso A/V ausiliario
n° 1 Cornice per installazione ad incasso nei poggiatesta e chiavi di sgancio
n° 1 Staffa di fissaggio da plancia
n° 1 Telecomando I/R
n° 1 Batteria per telecomando (mod. CR2025 Lithium - 3V)
1 pc Monitor connection-cable
1 pc A/V auxiliari input-cable
1 pc Frame for flush-installation into head-rests plus release-key
1 pc Fixation-Bracket for dashboard installation
1 pc IR Remote-control
1 pc Remote-control battery (mod. CR2025 Lithium - 3V)
1 pièce Câble de branchement monitor
1 pièce Cable entrée A/V auxiliaire
1 pièce Cadre d’installation dans les appui-tête et clé de déclenchement
1 pièce Etrier pour le fixage sur le tableau de bord
1 pièce Télécommande IR
1 pièce Batterie pour télécommande IR (mod. CR2025 Lithium - 3V)
1 Stck. Monitor-Anschlusskabel
1 Stck. A/V-aux. Eingangskabel
1 Stck. Rahmen für Einbau in Kopfstützen;mit Entankerungs-Schlüssel
1 Stck. Befestigungsbügel für Schacht-Montage
1 Stck. Fernbedienungsgerät IR
1 Stck. Batterie für Fernbedienungsgerät (Mod. CR2025 Lithium - 3V)
n. 1 Cable de conexión monitor
n. 1 Cable señal A/V
n. 1 Marco adaptador para instalación en el reposacabezas y llave de extracción
n. 1 Soporte para salpicadero
n. 1 Mando a distancia IR
n. 1 Bateria mando a distancia (mod. CR2025 Lithium - 3V)
E
D
F
GB
I

10
DESCRIZIONE COMANDI MONITOR •
MONITOR CONTROLS
DESCRIPTION DES COMMANDES DU MONITEUR • BESCHREIBUNG DER BEDIENE-
LEMENTE AM MONITOR • DESCRIPCIÓN DE LOS MANDOS DEL MONITOR
1 - A/V IN - Ingresso Audio / Video.
2 - USCITA CUFFIE - Jack 3,5”.
3 - IR - Ricevitore segnale telecomando.
4 - - / + - Permettono di regolare il volume sull’uscita cuffie e tutte le funzioni selezionate con il tasto MENU.
5 - MENU - In sequenza appariranno i seguenti menù:
Bright, Contrast, Color, Volume, Rotate, Language, Reset.
- Bright, Contrast, Color: permettono di regolare luminosità, contrasto e colore dell’immagine.
- Volume: permette di regolare il volume sull’uscita cuffie.
- Rotate: ruota l’immagine sopra / sotto e in modo speculare.
- Language: lingua menù (inglese)
- Reset: riporta le impostazioni del monitor ai valori predefiniti dal costruttore.
6 - POWER - Comando di accensione / spegnimento monitor.
7 - IR TRANSMITTER - Trasmettitore audio infrarossi (IR).
Permette l’ascolto mediante cuffie IR senza fili. (cod. VM401)
1 - AUDIO/VIDEO-Input
2 - HEADPHONE-EXIT - Jack 3.5
3 - IR - Receiver of remote-control signal
4 - - /+ - To regulate the volume on the headphone-exit and all the functions selectable through the Menu-key.
5 - MENU - One after the other, the following Menus will appear:
Bright, Contrast, Colour, Volume, Rotate, Language, Reset.
- Bright, Contrast, Colour: to regulate brightness, contrast and coulours of the pictures.
- Volume: to regulate volume on the headphone-exit.
- Rotate: to rotate picture upward/downward and in specular way.
- Language: Menu-language (English)
- Reset: resumes the monitor-settings made by the Producer.
6 - POWER - To switch monitor On/Off.
7 - IR TRANSMITTER - Infrared AudioTransmitter.Possibility of using IR-Headphones without cables (VM401).
GB
I
12 3
4
56 7
A/V IN
MENU POWER
IRTRANSMITTER

11
1 - A/V IN - Entrée Audio /Vidéo
2 - SORTIE CASQUE - Jack 3,5
3 - RÉCEPTEUR IR pour signal télécommande
4 - -/+ - Réglage du volume sortie casque et de toutes les fonctions liées à la touche Menu
5 - MENU - En séquence, les menus suivants sont montrés:
Bright, Contrast, Colour, Volume, Rotate, Language, Reset.
- Bright, Contrast, Colour: possibilité de réglage luminosité, contrast et couleur d'image.
- Volume: possibilité de réglage du volume sortie casque.
- Language: langue Menu (Anglais)
- Reset: reprise des réglages présélectionnés par le Constructeur de l'écran
6 - POWER - Touche pour allumer/éteindre l'écran
7 - TRANSMETTEUR IR - Transmetteur audio aux infrarouges (IR)
Possibilité d'écouter par le casque IR sans fils (art.VM401).
1 - A/V IN - Audio/Video-Eingang
2 - KOPFHÖRER-Ausgang - Jack 3,5
3 - IR-Empfänger des Fernbedienungssignals
4 - -/+ - Einstellung der Lautstärke des Kopfhörer-Ausgangs und der verschiedenen Menü-Funktionen
5 - MENU - Der Reihe nach, erscheinen folgende Menüs:
Bright, Contrast, Colour, Volume, Rotate, Language, Reset.
- Bright, Contrast, Colour: zur Einstellung von Bild-Helligkeit, Kontrast und Farbe.
- Volume: zur Einstellung der Lautstärke am Kopfhörer-Ausgang.
- Rotate: dreht das Bild noch oben / unten oder spiegelbildlich.
- Language: Menü-Sprache (Englisch)
- Reset: greift auf die vom Hersteller vorgegebenen Monitor-Einstellungen zurück
6 - POWER - Ein-/Ausschalten des Bildschirms.
7 - IR TRANSMITTER - Infrarot-Audio-Sender (IR)
Ermöglicht den Anschluss kabelloser IR-Hopfhörer (Art.VM401).
1 - A/V IN - Entrada Audio / Video
2 - Salida - Auricular - Jack 3,5
3 - IR-Receptor de señales desde el mando a distancia.
4 - -/+ - Permiten ajustar el volumen de la salida del auricular y todas las funciones seleccionadas con la
tecla MENU.
5 - MENU - En secuencia aparecerán los siguientes menús:
Brillo, Contraste, Color, Volumen, Rotación, idioma, Reset.
- Bright, Contrast, Color: permiten ajustar el Brillo el Contraste y el Color de la imagen.
- Volumen: permite regular el volumen de la salida del auricular.
- Rotate: invierte la imagen arriba / abajo y en modo especular.
- Language: Idioma menú (ingles)
- Reset: Apretando esta tecla el monitor vuelve a los ajustes predefinidos por el fabricante
6 - POWER - Comando de encendido/ apagado monitor.
7 - IR TRANSMITTER - Transmisor audio por infrarrojos (IR).
Permite la escucha mediante los auriculares inalámbricos.(cod.Phonocar VM401)
E
D
F

12
1) POWER Touche de mise sous/hors tension ON/OFF.
2) P.P Réglage image (Bright, PASTEL,Vivid, Standard, User Defined).
3) MENU Sélection Menu
4) Contrôle du volume des oreillettes et réglages de la touche MENU (3).
1) POWER Ein-/Aus-Schalter
2) P.P Bild-Einstellung (Bright, Pastel,Vivid, Standard, User Defined)
3) MENU Menu-Wahl
4) Einstellung der Kopfhörer-Lautstärke u.der Menü-Taste
1) POWER
Tecla de encendido/ apagado ON/OFF
2) P.P
Ajustes de la imagen (Bright, (brillo) Pastel (tonalidad), Vivid (Color intenso), Standard
(Standard), User Defined (definido por el usuario)
3) MENU
Selecciona menú
4)
Control volumen auricular y ajustes tecla menú
E
D
F
LCD REMOTE
MENU
P.P.
1
2
3
4
FUNZIONI TELECOMANDO
REMOTE-CONTROL FUNCTIONS • FONCTIONS TELECOMMANDE
FUNKTIONEN DER FERNBEDIENUNG • FUNCIONES MANDO A DISTANCIA
1) POWER Tasto accensione ON/OFF
2) P.P Impostazioni immagine (Bright, Pastel,Vivid,
Standard, User Defined)
3) MENU Seleziona menù
4) Controllo volume cuffia e regolazioni tasto
MENU (3)
1) POWER ON/OFF button
2) P.P Setting of picture (Bright, Pastel,Vivid,
Standard, User Defined)
3) MENU Menu selection
4) Headphones volume control and adjust-
ment of MENU functions (3)
GB
I

13
Battery mod. CR2025 Litium - 3V
SOSTITUZIONE PILA TELECOMANDO
CHANGINGTHE REMOTE CONTROL BATTERY • SUSTITUCIÓN PILATELEMANDO
REMPLACEMENT BATTERIETÉLÉCOMMANDE
AUSWECHSELN DER BATTERIE DER FERNBEDIENUNG
Formato /
Format
. . . . . . . . . . . . . . . . . . . . . . . . . . . . . . 16:9
Schermo /
Screen
. . . . . . . . . . . . . . . . . . . . . . . . . . . . . 7.0” (diagonal)
Sistema /
System
. . . . . . . . . . . . . . . . . . . . . . . . . . . . . . TFT, LCD active matrix
Risoluzione /
Resolution
. . . . . . . . . . . . . . . . . . . . . . . . 1440x234 pixel
Angolo di visione /
Viewing angle
. . . . . . . . . . . . . . . . . Horiz. 60°/60° - Vert. 60°/60°
Ingresso-Uscita /
Inputs-Output
. . . . . . . . . . . . . . . . . . signal composite video
Alimentazione /
Power
. . . . . . . . . . . . . . . . . . . . . . . . . . 12V DC ± 5%
Assorbimento /
Current draw
. . . . . . . . . . . . . . . . . . . . . 600 mA
Dimensioni /
Dimensions
(L-H-D) . . . . . . . . . . . . . . . . . 180 x 120 x 22 mm.
Luminosità /
Brightness
. . . . . . . . . . . . . . . . . . . . . . . . . high brighness back light
Regolazioni /
Setting
. . . . . . . . . . . . . . . . . . . . . . . . . . . brightness/contrast/color
Telecomando /
Remote control
. . . . . . . . . . . . . . . . . . . Infrared
Trasmettitore audio /
Audio transmitter
. . . . . . . . . . . . . IR integrated
Funzioni /
Functions
. . . . . . . . . . . . . . . . . . . . . . . . . . . On Screen Display (OSD)
Temperatura d’esercizio /
Working temperature
. . . . . . 0 ÷ 50°C
Trasmettitore audio infrarossi /
IR audio transmitter:
Frequenze /
Frequencies
. . . . . . . . . . . . . . . . . . . . . . . . Left 2.5 MHz / Right 2.8 MHz
CARATTERISTICHE TECNICHE
TECHNICAL SPECIFICATIONS • CARACTERISTIQUESTECHNIQUES
TECHNISCHE MERKMALE • CARACTERÍSTICASTÉCNICAS
ATTENZIONE: Tutti i componenti sono studiati per funzionare con una tensione di 12V.
IMPORTANT: All components are designed to operate with a 12V power supply.
ATTENTION: Tous les composants sont conçus pour fonctionner avec une tension de 12V.
ACHTUNG: Alle Bauteile sind für einen Betrieb mit einer Spannung von 12V ausgelegt.
ATENCIÓN: Todos los componentes han sido diseñados para funcionar con una tensión de 12V.

Lʼapparecchio
non si accende
PROBLEMI CAUSE RIMEDI
Non c’é tensione sul cavo di
alimentazione. Controllare i collegamenti ed i
fusibili.
Sul display non appare nes-
suna immagine Non c’é collegamento tra il mo-
nitor e gli altri dispositivi. Controllare la connessione del
monitor.
Lʼimmagine appare scura Troppo freddo nell’abitacolo. Attendere qualche istante che
si riscaldino i cristalli liquidi.
Il telecomando non interagi-
sce con il Monitor Batteria telecomando scarica.
Ostacoli tra telecomando e mo-
nitor.
Sostituire la batteria.
Effettuare la pulizia dei sensori
e verificare gli ostacoli.
CAUSE E RIMEDI A PROBLEMI DI INSTALLAZIONE
CAUSES AND REMEDIES TO INSTALLATION PROBLEMS
Lʼappareil
sʼallume pas
PROBLÈME CAUSE SOLUTION
Manque de tension sur le câble
d’alimentation. Contrôler les connexions et les
fusibles.
Lʼécran ne montre pas dʼima-
ges Il n’y a pas de connexion entre
l’écran et les autres dispositifs. Contrôler la connexion de
l’écran et/ou la correcte intro-
duction du câble audio/vidéo.
Lʼimage est trop foncée Température trop froide dans
l’habitacle. Attendre quelques instants
pour que les cristaux liquides
se chauffent.
Le télécommande nʼinteragit
pas avec lʼécran Battérie du télécommande
déchargée.
Présence d’obstacles entre
télécommande et écran.
Remplaçer la battérie.
Effectuer le nettoyage des
senseurs.Contrôler qu’il n’y a
pas des objets interagissant
avec la transmission.
CAUSES ET SOLUTIONS AUX PROBLEMES DʼINSTALLATION
I
GB
F
The appliance does not
switch on
PROBLEM CAUSE REMEDY
There is no tension on the feed
cable Check connections and fuses.
Display does not show
anything There is no connection bet-
ween the TV-monitor and the
other devices.
Check monitor-connection
and/or the correct plugging of
the audio and video pin-jacks.
The picture on the display is
rather dark. The in-car temperature is too
low. Wait a few seconds until the li-
quid cristals get warm.
There is no inter-action bet-
ween remote-control and
monitor
Remote-control battery is flat.
There are obstacles between
remote-control and monitor.
Replace battery
(as per instructions)
Clean the sensors and make
sure there are no objects capa-
ble of interfering in transmis-
sion.
14

15
PROBLEM URSACHE ABHILFE
PROBLEMAS DE INSTALACIÓN: CAUSAS Y SOLUCIONES
Gerät läßt sich
nicht einschalten. Das Netzkabel führt keine
Spannung. Verbindungen und Sicherungen
nachsehen.
Der Bildschirm bleibt leer TV-Bildschirm u. andere Ge-
räte sind nicht miteinanderver-
bunden.
Monitor-Anschluß sowie Stecker
für Audio/Video kontrollieren.
Das TV-Bild ist zu dunkel Wageninnenraum ist unter-
kühlt. Abwarten, bis Flüssigkristalle
sich anwärmen.
Fernbedienungs-Einheit ist
nicht im Einklang mit dem
Monitor.
Fernbedienungs-Batterie leer.
Bestehendes Hindernis zwi-
schen Fernbedienung u.Moni-
tor.
Neue Batterie einsetzen
(siehe Anweisungen).
Sensoren reinigen. Etwaige
Gegenstände aus dem Em-
pfangsraum entfernen.
URSACHEN UND ABHILFE BEI INSTALLATIONSPROBLEMEN
D
E
El aparato no se enciende
PROBLEMAS CAUSAS SOLUCIONES
No hay tensión en el cable de
alimentación. Controlar las conexiones y los
fusibles.
En el display no aparece
ninguna imagen No hay conexión entre el moni-
tor de televisión y otros disposi-
tivos.
Controlar la conexión del
monitor y del pin-jack de
audio y vídeo.
La imagen aparece oscura El habitáculo está demasiado
frío. Esperar unos instantes hasta
que se caliente el cristal líquido.
El control remoto no inter-
actúa con el monitor La batería del control remoto
está descargada.
Hay obstáculos entre el control
remoto y el monitor.
Cambiar la batería (ver instruc-
ciones).
Limpiar los sensores.Verificar
si hay objetos que interfieren
en la transmisión.

S.pA. - Via F.lli Cervi, 167/C - 42100 Reggio Emilia (Italy) - Tel. ++39 0522 941621 - Fax ++39 0522 942452
www.phonocar.com - e-mail:info@phonocar.it
FRANCE
Vente et Assistance assurées par le Fabricant italien
Tél/Fax N° Vert 0800.90.43.99
www.phonocar.fr • e-mail:info@phonocar.it
DEUTSCHLAND
71711 - MURR - Rudolf Diesel Strasse, 13 -
Tel. 07144 82302-0 / Fax 07144 282114
www.phonocar.de - e-mail:info@phonocar.de
ESPAÑA
Delegado Comercial Sr.VERDERESE DOMENICO
Tel. 958 302295 - Fax 958 302470 - Movil 607592406
e-mail: d.verderese@phonocar.it
Table of contents
Other Phonocar Monitor manuals

Phonocar
Phonocar VM188 User manual

Phonocar
Phonocar VM189 Installation guide

Phonocar
Phonocar VM 191 User manual

Phonocar
Phonocar VM184 Installation guide

Phonocar
Phonocar VM 198 User manual

Phonocar
Phonocar VM 173 User manual

Phonocar
Phonocar VM 173 Installation guide

Phonocar
Phonocar VM001D User manual

Phonocar
Phonocar VM 155 User manual