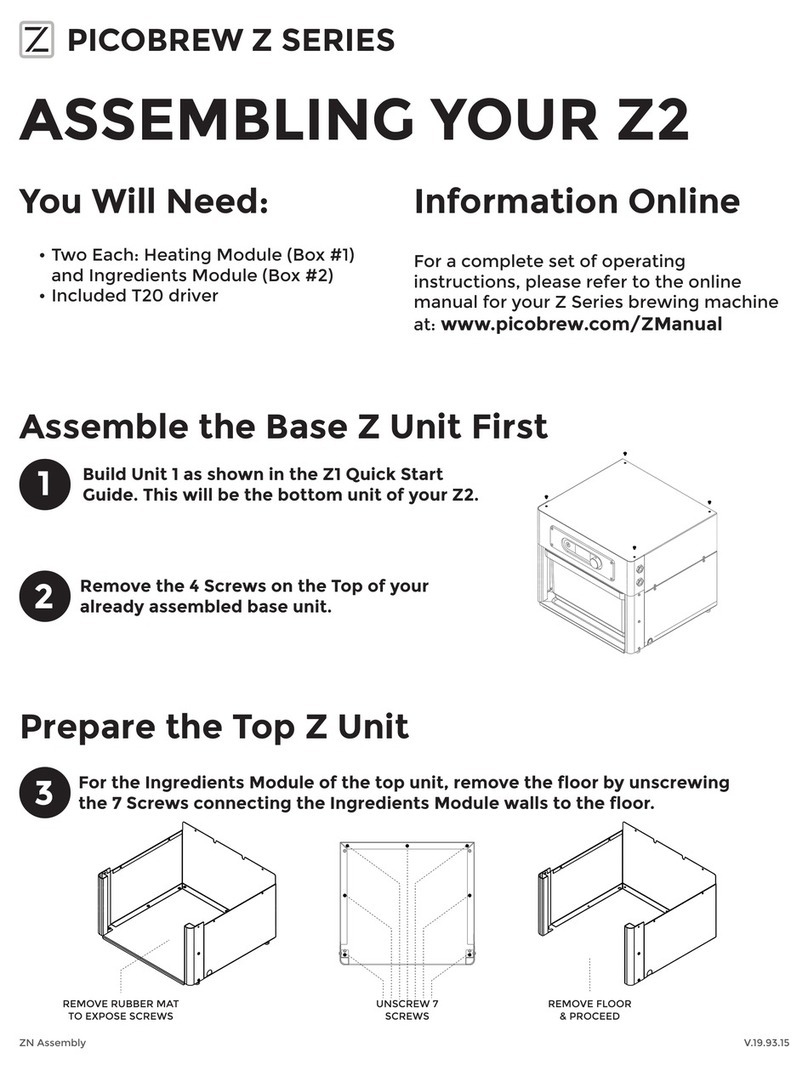
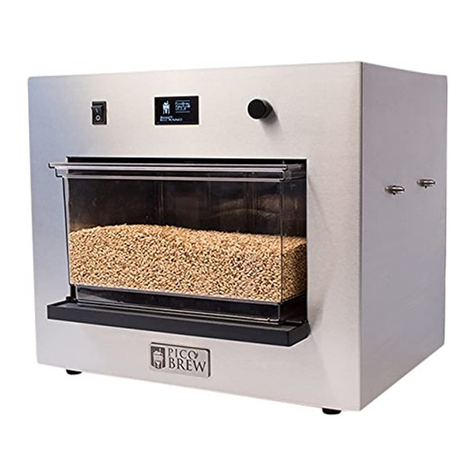
PicoBrew Z Series User manual

PICOBREW
Z SERIES
User’s Manual
v. 19-0114

PICOBREW Z SERIES
User Manual
version 19-0114

3
Important Safety Information
• Exercise common sense while operating the Z.
• Always use the keg cozy to shield the hot metal of the keg.
• Close supervision is needed when used around children.
• Allow machine to fully cool before removing or replacing parts.
• Do not operate with a frayed cord or broken plug.
• Do not remove Step Filter from the Z unless in pause mode or brew
cycle is completed.
• The Step Filter and contents may be hot when removing from the
machine.
• Do not immerse or soak the machine.
• Make sure all hoses are connected before starting a brewing,
rinsing or cleaning cycle.
• To avoid risk of electrical shock hazard do not disassemble the Z.
There are no user serviceable parts inside.
• Various surfaces can get extremely hot during the brewing cycle,
use caution when handling the keg, hoses and components.
• Do not remove the hose clamps, hot liquid spray may result.
• Do not remove the keg attachments while brewing.

4
WHAT’S IN THE BOX
BOX #1
• Z Heating Module
BOX #2
Module components
• Z Brewing Ingredients Module
• Assembly Screws (4 Black, 2 Stainless)
• T20 Screw Driver
• Drip Mat
• Heating Module Power Cord
Step Filter components
• Step Filter
• Step Filter Plug (3)
• Step Filter Lid
• Drain Tube
• Drain Tube Grommet (2)
• Adjunct Compartment
• Top Mash Screen
• Bottom Mash Screen
• Adjunct Screen
• Hop Cages and Lids (4 each)
Accessories
• Keg Cozy
• Keg Seal
• Keg Seal Plug
• Foam Trap
• Syringe
• Transfer Tube
• Bottle of Anti-Foam
• Fast Fermentation Adapter
• Cleaning Tubes (2)
• Dishwasher Tablet
• Dip Tube Cleaning Brush
BOX #3 (KEG)
• Brew Keg (5 gallon)
• Metal Keg Lid

5
ASSEMBLY
Attaching Heating Module to Brewing Ingredients Module
Assembling the Step Filter
USE STAINLESS
SCREWS IN FRONT
BOTTOM MASH SCREEN
STEP FILTER PLUG
TOP MASH SCREEN
ADJUNCT SCREEN
ADJUNCT COMPARTMENT
HOPS CAGES AND LIDS
STEP FILTER LID
DRAIN TUBE
DRAIN TUBE GROMMET
1
2
3
4

6
CONNECTING Z TO YOUR NETWORK
To connect to WiFi:
1. Power on your Z. You will see the Z logo and then a network
connection prompt.
2. Select ‘WiFi’ from the network connection options.
3. Select your WiFi network from the list of available networks. If you
do not see your network listed, check to see if your wireless router
is connected correctly.
4. Enter the password for your WiFi network and click ‘OK’. Z will then
connect to your network.
To connect to ethernet:
1. Connect an ethernet cable to your router and connect the other
end to the ethernet port on the back of your Z.
2. Power on your Z. You will see the Z logo and then a network
connection prompt
3. Select ‘Ethernet’ from the network connection options.
To add your Z to your PicoBrew account:
Once you have successfully connected Z to your home network, you will need
to add the Z to your account on picobrew.com. Follow prompts on the Z
screen in order to add your Z to your account.

7
FIRST RINSE
Before you start your rst brew, run a quick rinse cycle using an empty
bucket, your keg, and the cleaning wand. You may notice the keg running
empty, which can cause the ow from the nozzle to look erratic. This is
normal—pulling air through the machine aids in removing buildup.
Step Filter set-up:
1. Ensure that the Step Filter Plug is securely in place.
2. Place the Bottom Mash Screen into the mash compartment so
that it rests on the bottom ledge of the Step Filter. This is the false
bottom that the grain will sit on.
3. Place the Adjunct Screen on the other side of the Step Filter (the
Adjunct Compartment), also resting on the bottom ledge.
4. Place the Top Mash Screen on the top ledge of the Step Filter.
5. Insert the Drain Tube and Drain Tube Grommet into the Step Filter
Lid as shown in the ‘Assembling the Step Filter’ illustration above.
6. Place the Step Filter Lid on top of the Step Filter, ensuring that the
holes are aligned correctly.
7. Slide Step Filter into Z. There should be a little resistance as the
drain slides into place and the Step Filter presses against the back
of the Z. Ensure that both the left and right sides of the Step Filter
are pushed in completely.
Rinse set-up:
1. Fill your keg with approximately 2 gallons of clean, hot tap water.
Place the keg either on the oor or on the counter next to your Z.
2. Connect the BLACK Ball Lock to the keg post labeled OUT. Lift the
outer ring of the Ball Lock, place it on the appropriate keg post, let
go of the outer ring and press down rmly. The Ball Lock will click
when it ts into place.
3. In the same manner, attach a Cleaning Tube to the GRAY Ball Lock.
Allow the gray hose to sit in an empty bucket.
4. Power on your Z. From the main menu, select Ultilities, then
select Rinse by clicking the Control Knob. Follow the on-screen
instructions.
8
5. Once the rinse cycle completes, remove your Step Filter, dump out
any remaining water, and clean Step Filter.
6. Remove, clean, and re-install in-line lter.
7. Disconnect the keg from the machine. To disconnect the Ball
Locks, pull up on the outer ring of the Ball Lock, and pull the Ball
Lock off of the keg post. Dump any remaining water out of the keg.

9
LET’S BREW
Once your equipment is clean, it’s time to get brewing! Follow the steps
below to get started:
1. From the main menu of your Z, select Recipes, select the recipe
you want to brew, and then follow the on-screen prompts to
complete steps detailed below.
2. Ensure Step Filter Plug is installed.
3. Measure (and grind, if necessary) your grain. Place the Bottom
Mash Screen into the mash compartment so that it rests on
the bottom ledge of the Step Filter. Pour grain into the mash
compartment on top of the Bottom Mash Screen.
4. Level the grain with your hand. Do not compact. Place the Top
Mash Screen on the top ledge of the Step Filter so it rests above the
grain. The notches on the screen should align with the center wall
of the Step Filter.
5. Place the Adjunct Screen in the Adjunct Compartment of the Step
Filter, resting on the bottom ledge. Ensure that the semi-circular
cutout for the Drain Tube is placed on the same side of the Step
Filter as the Drain Tube indentation.
6. Measure hops and place in appropriate Hop Cages. Secure the Hop
Cage Lids. Secure with silicone bands if lids feel loose.
7. Place each cage into the Adjunct Compartment, on top of the
Adjunct Screen, with the longest boiling hop going into the rst
compartment (the one with the notch).
43
21
Hop cages are ordered 1-4 from Right to Left

10
8. Place the Adjunct Compartment, with Hop Cages inserted, into
the Hop section of the Step Filter (this is the smaller section at the
back of the Step Filter). Make sure that the tabs on the outside of
the Adjunct Compartment are facing toward the back of the Step
Filter.
9. Insert the Drain Tube into the Drain Tube Grommet and then t
the assembled Drain Tube into the Drain Tube hole in the Step
Filter Lid. Make sure that the Drain Tube is aligned with the Step
Filter Drain.
10. Place the lid on the Step Filter, ensuring the holes are aligned
correctly. Slide the Step Filter into the Z.
11. Fill your keg with the amount of water listed in your recipe. Use a
gallon jug and measuring cup or a scale (8.33 lbs water = 1 gallon
of water) to measure your water. Accurate water measurement
is important to ensure the best results for your brew. Water
measurement errors are one of the most common problems
brewers encounter. If you use a scale to measure your water, don’t
forget to tare it to your container before adding water!
12. Insert the black Keg Seal, by inserting one end and rmly pressing
around the edge of the seal until it has been pushed into place. Do
not put too much pressure on the center of the seal as it may fall
into your keg.
13. Place the Keg Cozy around your keg.
14. Assemble the Foam Trap. Place a few drops of Anti-foam onto the
felt washer. Place the spindle on top of the felt washer (long side of
spindle pointing down). Insert the assembled Foam Trap into the
hole in the Keg Seal.
15. Connect the BLACK Ball Lock to the OUT keg post and the GRAY
Ball Lock to the IN keg post of your lled keg.
While your Z brews, you can watch its progress online. Login to your PicoBrew
account on picobrew.com, select the BrewHouse tab, then select the current
recipe under the Z session list to view session data with current wort and heat
loop temperatures.

11
CARE AND MAINTENANCE
Cleaning the Z
We recommend rinsing your Z after every brew (see Rinse instruction above).
Water and rubbing alcohol are recommended for cleaning the outside of the
Z. Do not use abrasive materials or cleaners. Do not use cleaners on the OLED
screen.
Cleaning the Step Filter, Cages, and Screens
The Step Filter, Adjunct Compartment, Mesh Screens, Hop Cages, Cage Lids,
and Foam Trap (including spindle and fabric washer) are all dishwasher
safe. Hot water soaks can be used in place of dishwashing. DO NOT use Pro
Brewers Wash (PBW) on the Step Filter.
Cleaning the Keg
Cleaning your keg is extremely important—a dirty keg can lead to
contaminated batches.
1. Using a wrench, remove both keg posts and clean out any debris
that is inside.
2. Remove the dip tube and use the dip tube brush to scrub the
inside.
3. Use a scrub brush to loosen any hardened yeast or trub on the
walls of the keg.
We highly recommend using Pro Brewers Wash to clean and Star San to
sanitize your keg before the next brew. Consult the “How to clean your keg
video” on the PicoBrew website for help here.
Deep Clean
Every 3-4 brews, you will need to run a deep clean cycle on your Z. For the
deep clean cycle, you will need a dishwasher tablet (one has been included in
your kit).
CAUTION: The deep clean heats water to boiling temperature, do not use any
unsafe cleaning agents.
1. Select Clean on the OLED display and click to begin.
2. Fill a keg with 1 gallon of water and attach hoses to keg.
3. Place the dishwasher tablet in the keg.

12
4. Place keg cozy on keg and insert a Keg Seal.
5. Load your Step Filter with the Bottom Mash Screen, Adjunct Screen
and Top Mash Screen installed.
6. Place the lid on the Step Filter, ensuring that the Drain Tube and
Drain Grommet are installed.
7. Slide the Step Filter into the Z.
After the Clean Cycle is complete, it is important to rinse with clean water.
Run 5 gallons of water through your machine using the rinse cycle. Discard
the rinse water.
Customer Care
If you experience any problems with your Z Series brewing system, please
contact support@picobrew.com for assistance.
Other manuals for Z Series
2
Table of contents
Other PicoBrew Brewing System manuals

PicoBrew
PicoBrew C User manual

PicoBrew
PicoBrew 2AJZKS1PICO User manual

PicoBrew
PicoBrew Zymatic User manual

PicoBrew
PicoBrew Z User manual

PicoBrew
PicoBrew Pico C User manual

PicoBrew
PicoBrew Z Series User manual

PicoBrew
PicoBrew Z Series User manual

PicoBrew
PicoBrew Z2 User manual

PicoBrew
PicoBrew PicoStill Operating instructions