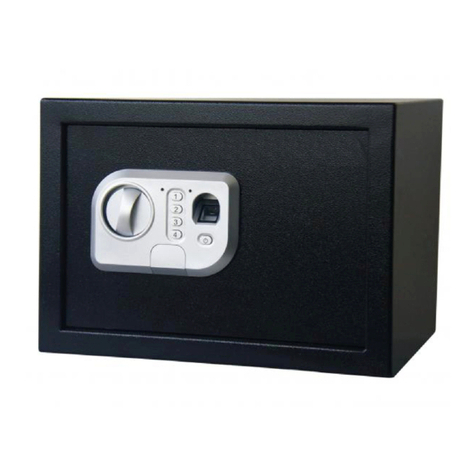
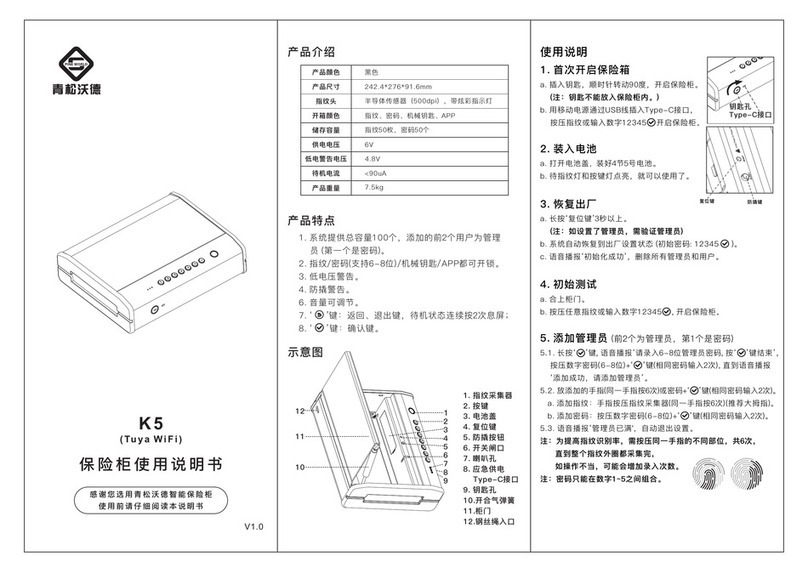
Pineworld Tuya WiFi User manual

保 险 柜 使 ⽤ 说 明 书
感谢您选⽤⻘松沃德智能保险柜
使⽤前请仔细阅读本说明书
1. 系统提供总容量100个,添加的前2个⽤户为管理员 (第⼀个是密码)。
2. 指纹/密码(⽀持6-8位)/机械钥匙/APP都可开锁。
3. 低电压警告。
4. 防撬警告。
6. ⾳量可调节。
7. ‘ ’键:返回、退出键,待机状态连续按2次息屏;
8. ‘ ’键:确认键。
产品介绍
⿊⾊
242.4*276.4*91.6mm
半导体传感器 ( 500dpi ),带炫彩指示灯
指纹、密码、机械钥匙、APP
指纹50枚,密码50个
6V
4.8V
<90uA
7.5kg
产品颜⾊
产品尺⼨
指纹头
开箱⽅式
存储容量
供电电压
低电警告电压
待机电流
产品重量
K 5
( Tu y a W i F i )
V1.0
示意图
1. 指纹采集器
2. 按键
3. 电池盖
4. 复位键
5. 防撬按钮
6. 开关闸⼝
7. 喇叭孔
8. 应急供电
Type-C接⼝
9. 钥匙孔
10.开合⽓弹簧
11.柜⻔
12.钢丝绳⼊⼝
1
2
3
4
5
6
7
10
12
8
9
使⽤说明
1. ⾸次开启保险箱
a. 插⼊钥匙,顺时针转动90度,开启保险柜。
(注:钥匙不能放⼊保险柜内。)
b. ⽤移动电源通过USB线插⼊Type-C接⼝,
按压指纹或输⼊数字12345 开启保险柜。
2. 装⼊电池
a. 打开电池盖,装好4节5号电池。
b. 待指纹灯和按键灯点亮,就可以使⽤了。
3. 恢复出⼚
a. ⻓按‘复位键’3秒以上。
(注:如设置了管理员,需验证管理员)
b. 系统⾃动恢复到出⼚设置状态 (初始密码: 12345)。
c. 语⾳播报‘初始化成功’,删除所有管理员和⽤户。
4. 初始测试
a. 合上柜⻔。
b. 按压任意指纹或输⼊数字12345 , 开启保险柜。
5. 添加管理员 (前2个为管理员,第1个是密码)
5.1. ⻓按‘ ’键, 语⾳播报‘请录⼊6-8位管理员密码, 按‘ ’键结束’,
按压数字密码(6-8位)+‘ ’键(相同密码输⼊2次), 直到语⾳播报
‘添加成功,请添加管理员’。
5.2. 放添加的⼿指(同⼀⼿指按6次)或密码+‘ ’键(相同密码输⼊2次)。
a. 添加指纹:⼿指按压指纹采集器(同⼀⼿指按6次)(推荐⼤拇指)。
b. 添加密码:按压数字密码(6-8位)+‘ ’键(相同密码输⼊2次)。
5.3. 语⾳播报‘管理员已满',⾃动退出设置。
注:为提⾼指纹识别率,需按压同⼀⼿指的不同部位,共8次,
直到整个指纹外圈都采集完,
如操作不当,可能会增加录⼊次数。
注:密码只能在数字1~5之间组合。
6. 添加⽤户
6.1. ⻓按‘ ’键,语⾳播报‘请验证管理员’。
6.2. 验证已添加的管理员,语⾳播报‘请添加⽤户’。
6.3. 放添加的⼿指(同⼀⼿指按6次)或密码+‘ ’键(相同密码输⼊2次)。
a. 添加指纹:⼿指按压指纹采集器(同⼀⼿指按6次)(推荐⼤拇指)。
b. 添加密码:按压数字密码(6~8位)+‘ ’键(相同密码输⼊2次)。
6.4. 语⾳播报‘添加成功'。
Type-C接⼝
钥匙孔
11
复位键
产品特点

保 修 卡
1. 产品出⼚包装均配有此说明书及保修卡,⽤户安装好后请填
写好保修卡内容并妥善保管,以作保修凭证。
2. 本产品保修⼀年。
3. 以下不属于保修范围:
A.意外因素、⼈为⾏为或外⼒(包括暴⼒撬坏,输⼊不适合的
电压等)造成损坏。
B.⾃然灾害等不可抗拒⼒(如地震,⽕灾,⽔灾等)原因造成的损坏。
C.⾃⾏安装或不符合安装说明书要求引起的损坏。
D.⾮我司指定安装⼈员引起的损坏。
4. 对于保修范围外,我们将收取相应费⽤。
5. 产品出现故障时,请致电售后询求帮助,保修时请填写具体
地址.姓名.电话及故障现象。
江⻄指芯智能科技有限公司
江⻄省宜春市经济开发区宜商⼤道133号
www.pineworld.net
售后电话:400 900 5952
7. 删除⽤户
7.1. ⻓按‘ ’键,语⾳播报‘请验证管理员’。
7.2. 验证已添加的管理员,语⾳播报‘请添加⽤户’。
7.3. 再次⻓按‘ ’号键。
7.4. 语⾳播报:按“1”删除全部⽤户指纹,按“2”删除全部⽤户密码,
按“3”删除全部⽤户。
7.5.选择“1”、“2”或“3”键进⾏删除对应⽤户。
7.6.语⾳播报‘操作成功’。
注:此操作不能删除管理员,管理员需通过恢复出⼚设置删除。
8. 密码修改:
8.1 按‘5’‘ ’键,输⼊需要修改的原密码,语⾳提示‘请输⼊新密码’。
8.2 输⼊新密码+“ ”(相同密码输⼊2次),直到添加成功。
(注:管理员不能修改;添加成功后,旧密码不能使⽤)
9. APP配⽹
9.1. ⼿机连上WiFi,且⽹络正常。
9.2. 在APP Store或应⽤商店搜索‘涂鸦智能’或微信扫描尾⻚⼆维码,下载并安装。
9.3. 打开APP,⽤⼿机号注册并登录,进⼊APP。
9.4. 配⽹:
a. APP:点击‘我的家’/‘添加设备’/‘安防监控’/‘保险箱(WiFi)’,
选择2.4Ghz Wi-Fi⽹络并输⼊密码,点击‘下⼀步’/‘确认指示灯快闪。
b. ⻔锁:按“3”‘ ’, 验证管理员,待智能锁LED⾯板上指示灯闪烁。
c.APP:进⼊配⽹状态,直到成功。
d. 添加成功,语⾳播报‘操作成功’,添加失败,请重试。
注:1. APP和⼿机需连接同⼀WiFi⽹络(仅⽀持2.4Ghz WiFi)。
2.APP远程开锁: 需先按⻔锁上‘4’‘ ’进⾏激活,
待APP上出现‘点击远程开锁’提示,点击后才能开锁。
3.APP临时密码:点击右下⻆‘临时密码’,进⼊临时密码界⾯,点击添加。
临时密码开锁:先按‘6’‘ ’激活,再输⼊临时密码+‘ ’进⾏开锁。
10. 其他功能
10.1 防错⾃锁
密码连续输错5次,系统锁定180秒,发出警告提示声⾳,
并上报到APP进⾏提醒。
解除防错⾃锁:已注册的指纹⽤户(包括管理员)开锁⼀次。
10.2 防撬警告
当钥匙开锁或柜⻔受到外⼒破坏,如导致防撬按钮松动,
系统锁定180秒,发出警告提示声⾳,并上报到APP进⾏提醒。
解除防撬警告:已注册的指纹⽤户(包括管理员)开锁⼀次、
防撬按钮连续按三下 或⻓按3S、卸下电池重装。
10.3 低电压警告
电池低于4.8V时,每次开⻔都会提示‘电池没电了,请及时
更换电池’,此时能使⽤50次左右,请及时更换新的电池。
10.4 虚位密码
在注册的密码前后输⼊任意密码 (密码总数不超过10位),
都可开锁。
10.5 ⾳量切换
按‘3’‘3’‘3’‘ ’键进⾏切换静⾳、⾼⾳(默认)。

K 5
( Tu y a W i F i )
V1.0
Type-C Port
Key Hole
1
2
3
4
5
6
7
10
12
8
9
11
Reset Button
PINEWORLD
Biometric Personal Safe User Manual
Please read this manual carefully before use
Do not leave the key in the safe.
Overview
Features
Introduction
1. The fingerprint capacity is 50, the password capacity is 50,
the first two users are administrators.
Please input password as the first administrator.
2. Support volume adjustment(Mute/Low/High).
3. Support 6-8 digital passwords and scramble PIN passwords.
(No longer than 10 digitals)
4. Support pickproof alarm and low power alarm.
5. ` `: Return or Quit. ` `: Confirm.
Color
Size
Fingerprint
Unlock Way
System Capacity
Supply Voltage
Low Voltage Alarm
Standby Current
Weight
Black
242.4*276.4*91.6mm
Semiconductor( 500dpi ) with Colorful Light
Fingerprint, Password, Key and APP
Fingerprint: 50, Password: 50
6V
4.8V
<90uA
7.5kg
1.Fingerprint Collector
2.Keypad
3.Battery Cover
4.`Reset` Button
5.Pickproof Button
6.Switch Gate
7.Speak Hole
8.Emergency Power Supply
Type-C Port
9.Keyhole
10.Switch Gas Spring
11.Safe Door
12.Wire Rope Entrance
First Use
1. Open the Safe
a. Insert the key into the keyhole, and turn
90 degrees clockwise to open the safe.
Note: Do not leave the key in the safe.
b. Plug in the USB cable with the mobile
power through the Type-C port, and press
the fingerprint or press `12345 ` to
open the safe.
2. Install the Battery
a. Open the battery cover and install 4pcs of AA batteries.
b. When the fingerprint light and key light are on, it is ready for use.
3. Reset the Safe
a. Long Press `Reset` button for more than 3 seconds.
Note: If the administrator is added, it needs
to be verified the administrator.
b. The system automatically restores to the
factory default settings
(initial password: 12345)
c. Voice prompt `initialization successful`,
delete all administrators and users.
4. Initial Test
a. Close the safe door.
b. Press any fingerprint or enter `12345 ` to open the safe.
Function Operation
1. Add Administrator
(The first two are administrators, and the first is password)
a. Long press ` `key, voice prompt `please enter 6-8 administrator
password, press ` `key to end`.
b. Enter new password(6-8 digits) ended with ' ' (The same
password, 2 times), until the voice prompt `Successfully`,
then we can continue to add the 2nd administrator.
c. Add administrator`s fingerprint(6 times), or password (6-8 digits)
ended with ' '(The same password, 2 times).
d. The voice prompt `The administrator is full, quit setting.
Notes: Make sure to press different parts of the .
same finger until the whole fingerprint is
collected completely, the lock key `1-5` will
be light on when add successful.
2. Add User
a. Long press ' ', the voice prompt `Please verify administrator`.
b. Verify the administrator, and the voice prompt `Successful,
please add user.
c. Add user`s fingerprint(6 times), or password (6-8 digits) ended
with ' '(The same password, 2 times).
d. The voice prompt `Successful`.

3. Delete User
1. Long press ' ', the voice prompt `Please verify administrator`.
2. Verify the administrator, and the voice prompt `Successful, please
add user`.
3. Long press ' ' again.
4. Press `1` to delete all user fingerprints, press `2` to delete all user
passwords, press `3` to delete all users.
5. The voice prompts `Successful`.
Note:The administrator can not be removed by doing this or by APP.
Only resetting the lock can delete the administrator.
.
4. Modify Password
1. Press `5 `, the voice prompt `Please input old password`.
2. Enter the old password which needs to be modified, the voice prompt
‘New password’.
3. Enter new password(6-8 digits) ended with ' '
(The same password, 2 times), the voice prompt `Successful`.
Note: The previous password is invalid after modification.
The administrator password cannot be modified.
.
5. Reset Lock
1. Long press `Reset` button with 3 seconds, the button light flashes.
2. Verify the administrator, and the system restores to the factory default
settings. (The initial password is `12345`)
3. After the reset, all the information are removed
(including the administrator),
4. Please add a new administrator immediately.
.
APP Installation and Network Configuration
1.Search `TuyaSmart` in APP store, download APP.
2.Install and open APP, register and login with the mobile phone number.
3.APP: Press `Home`/`Add Device`/`Security&Sensor`/`Lock(Wi-Fi)`/
`Confirm indicator rapidly blink`, then select WiFi network, enter WiFi password.
4. Short press `3 `of the lock, Verify the administrator.
5.Network configuration: While the LED fast flash, please add network in APP.
6.Refer to the operation prompt to complete the network configuration of APP.
7.Add successfully: The voice prompts `add successfully`.
8. Add failure: The voice prompts `add failure`,please try again.
Notes:
1. This APP supports only 2.4Ghz WiFi network.
2. The WiFi connected to the APP and mobile phone should be stay in same.
3. APP Remote Unlock:
a. Lock: Press `4 ` to activate the lock.
b. APP: When prompting `Remote Unlock Request`, slide icon to `Agree`.
4. Users: You can add the fingerprint/password/card according to the prompt.
5. Temporary Code:
Click `Temporary Code`, you can set online code or offline code to unlock.
FCC Statement:
This device complies with Part 15 of the FCC Rules. Operation is subject to the
following two conditions:
(1)This device may not cause harmful interference.
(2)This device must accept any interference received, including interference
that may cause undesired operation.
Warning: Changes or modifications not expressly approved by the party
responsible for compliance could void the user's authority to operate the equipment.
Note: This equipment has been tested and found to comply with the limits for a
Class B digital device, pursuant to Part 15 of the FCC Rules. These limits are
designed to provide reasonable protection against harmful interference in a
residential installation. This equipment generates uses and can radiate radio
frequency energy and, if not installed and used in accordance with the instructions,
may cause harmful interference to radio communications. However, there is no
guarantee that interference will not occur in a particular installation. If this
equipment does cause harmful interference to radio or television reception, which
can be determined by turning the equipment off and on, the user is encouraged
to try to correct the interference by one or more of the following measures:
Reorient or relocate the receiving antenna.
Increase the separation between the equipment and receiver.
Connect the equipment into an outlet on a circuit different from that to which
the receiver is connected.
Consult the dealer or an experienced radio/TV technician for help.
FCC Radiation Exposure Statement:
This equipment complies with FCC radiation exposure limits set forth for an
uncontrolled environment. This equipment should be installed and operated
with minimum distance 20cm between the radiator & your body.
Other Function
1. Low Power Alarm:
When the battery power is lower than 4.8V, the lock will prompt
`The battery is use up, please replace it`, please replace with 4 new
AA batteries in time.
2. Self-lock of The Password
It will be locked 180 seconds when entering wrong password 5 times
continuously.
Release Self-lock: Unlock with the registered fingerprint once.
3. Pickproof Alarm
When the Safe Door is damaged by external forces, the pickproof
button is loose, the safe will alert alarm, APP issues warning alarm.
Remove The Pickproof Alarm:
a. Unlock with the registered fingerprint once.
b. Short press the Pickproof button 3 times continuously.
c. Press the Pickproof button for 3 Seconds.
d. Remove the battery and reinstall.
4. Scramble PIN Password:
Random password added before or after the correct password, it also
can unlock as long as the real password keep continuously correct.
(Virtual password can not exceed 10 digits)
.
5.Volume Adjustment
Press `333 ` to switch(Mute, or Regular).
APP Download QR Code
Room 406-407, Science&Research Building, Tinghua
Information Port, Nanshan District, Shenzhen, China
Website: Https://service.pineworld.net
Email:xiaoyi@fingercrystal.com
Hotline: (+86)18503000629
Shenzhen Zhixin IoT Technology Co., Ltd.
Warranty Card
1. Please fill out the warranty card and keep it well.
2. The warranty period of this product is 12 months.
3. The following belongs to the scope of non warranty:
a. The warranty has expired.
b. Damage occurred during or in relation to non-routine and/or
unauthorized disassembly.
c. Failure to provide a valid proof of purchase when requesting service
or repair.
d. Damage occurred as a result of natural disaster.
(including earthquake, fire, flood etc.)
e. Damage occurred due to unexpected factors or man-made reasons.
(including mis-operation, improper insert or pulling, hauling,
bumping, improper voltage input and others)
4. We will charge for the repairing if it is out of warranty.
5. When the product breaks down, ask your local dealer for repair and
write out specific information below.
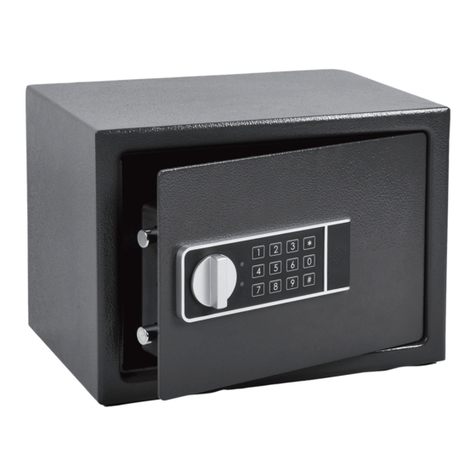
This manual suits for next models
1
Other Pineworld Safe manuals
Popular Safe manuals by other brands

Honeywell
Honeywell 2077D - 1.21 Cubic Foot Anti-Theft Safe Operations & installation guide

First Alert
First Alert 2190F Operations & installation guide

Arregui
Arregui ALKA manual

SentrySafe
SentrySafe DH-109E owner's manual

Phoenix
Phoenix Elara HS3550 Base Fixing Instructions & Guarantee Registration

Masterlock
Masterlock ML08EB Instructions for use

Indel B
Indel B SAFE 30 EASY User instructions

Chubbsafes
Chubbsafes OMEGA DEPOSIT user guide

Bunker Hill Security
Bunker Hill Security 61565 Owner's manual & safety instructions

Dometic
Dometic MD310 Installation and operating manual

Perel
Perel SSE017 user manual

Phoenix
Phoenix DS2500K Instructions & Guarantee Registration