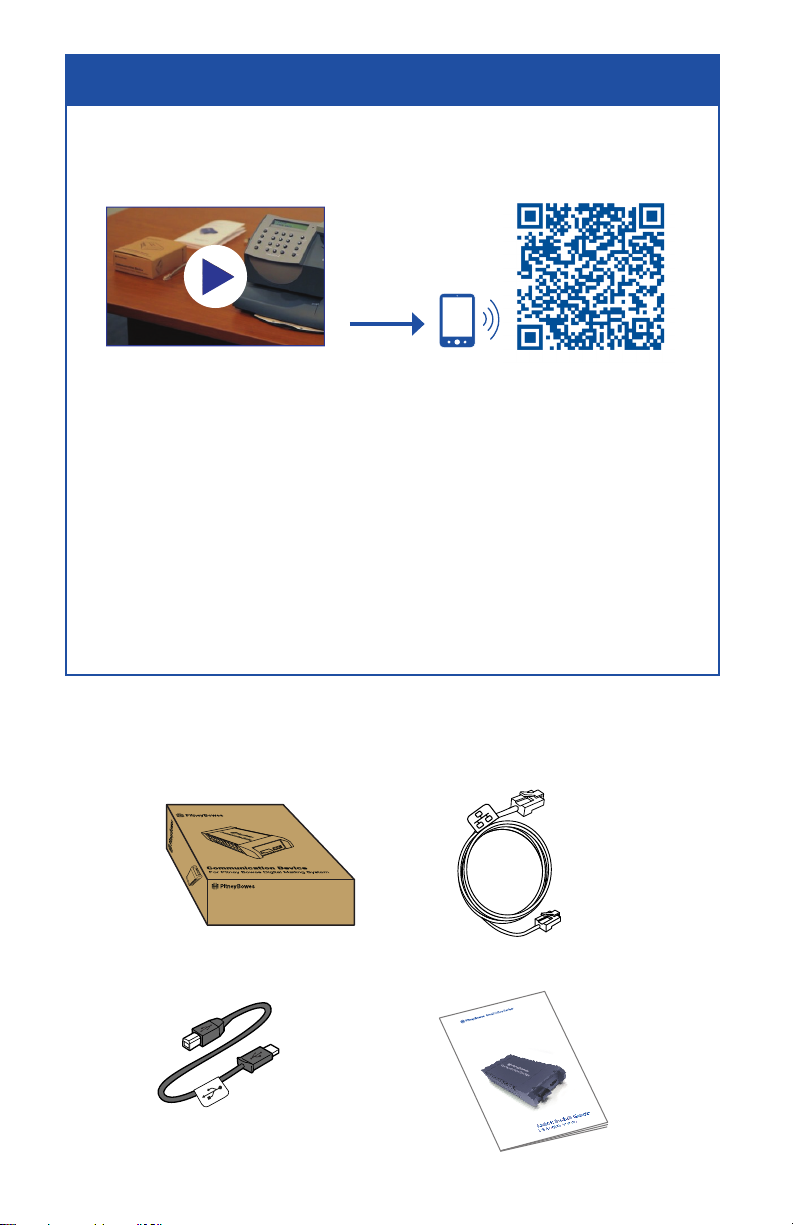
Install Communication Device
2Preparing for Installation
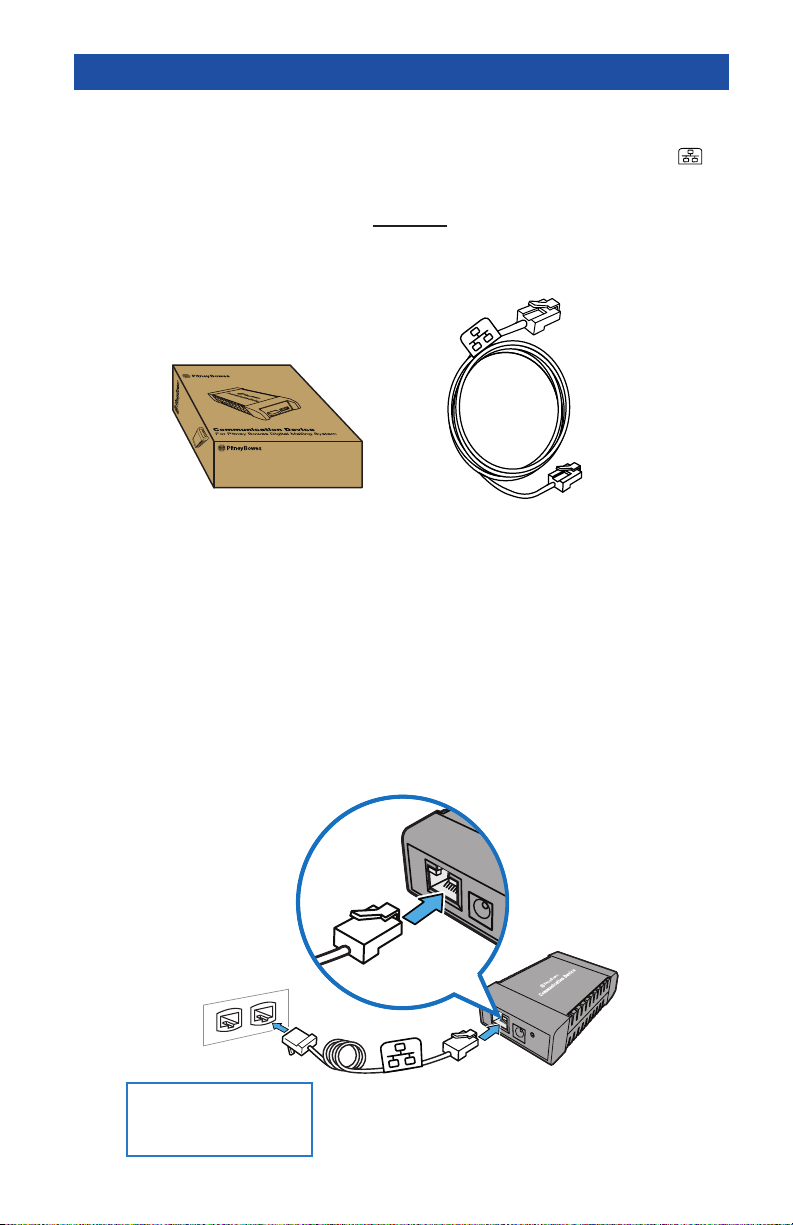
To connect your meter to the Internet, you will need the following:
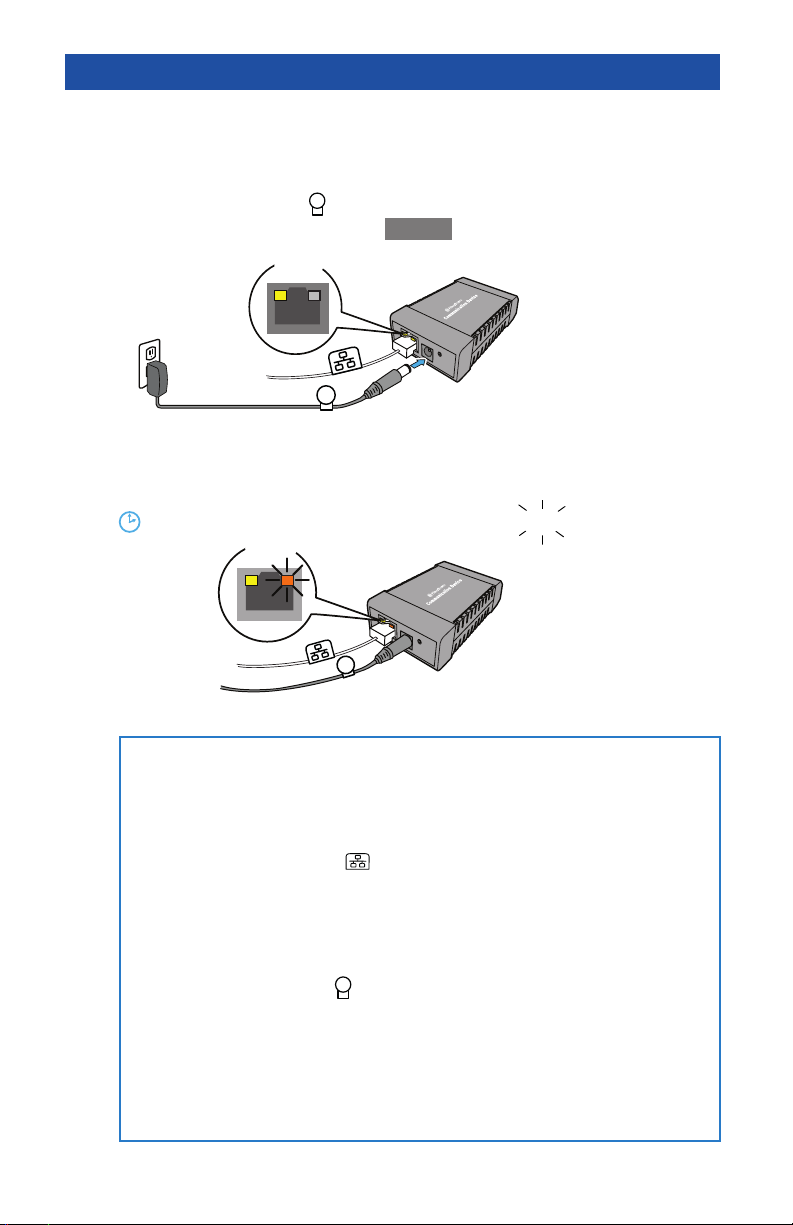
• One power outlet
• An Internet source, such as a router, hub or network wall jack.
Note: DO NOT use a port in a computer to connect to your network.
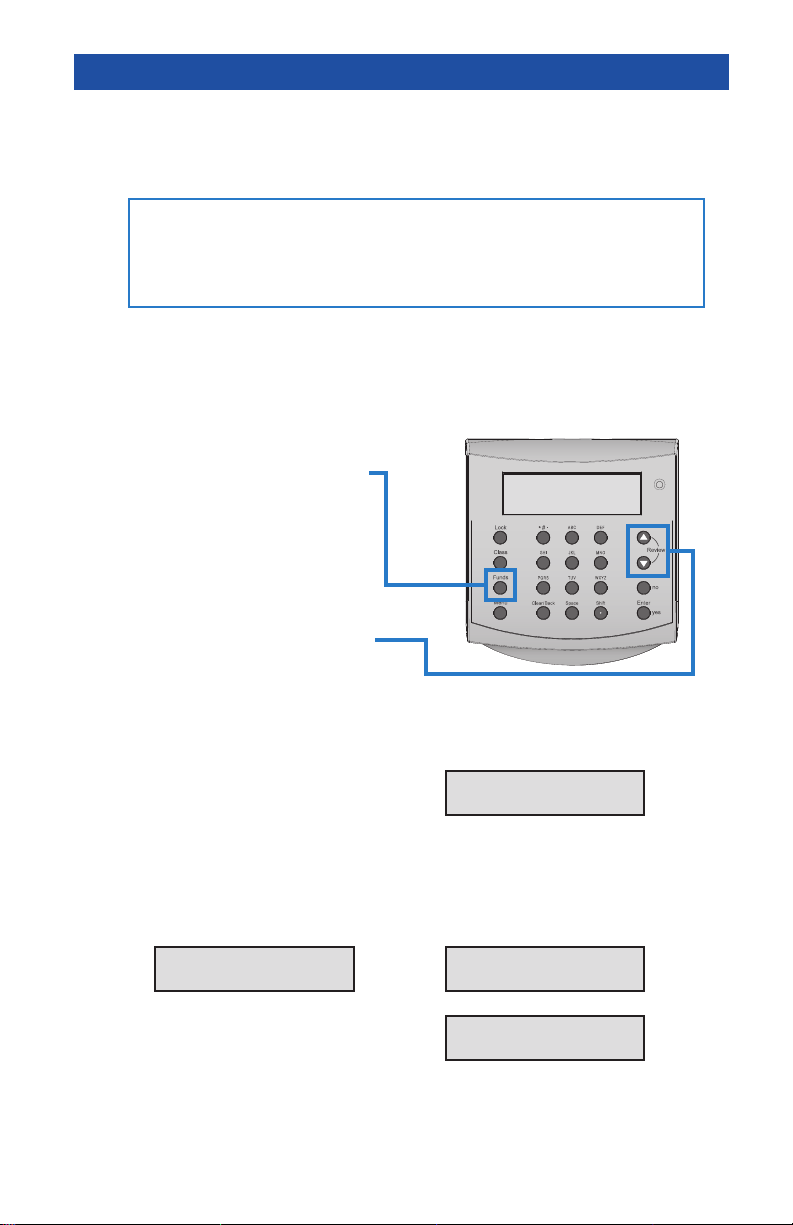
• Clear any messages on the meter so it is at the Ready screen,
by pressing the Clear/Back key.
Technical Requirements:
IP Address
-Automatic assignment with DHCP and DNS server capability, or
-Manually specied static IP (not shared with other devices on your network).
If your network requires special settings, such as static IPs or proxy
settings, your IT specialist should use the Special Network Settings
instructions in this booklet, as part of the installation.
Proxy Server (if needed)
If your network uses Static IPs or Proxies, the setup software requires:
Operating System:
• Windows 2000, Windows XP, Windows Vista, Windows 7
• Mac OS X (PowerPC: Ver10.3.x ~ Ver10.5.5)
Compatible Browsers:
Internet Explorer 7.x, 8.x, 9.x, Chrome 16.x, 17.x, 18.x, Firefox 10.x, 11.x, 12.x
Safari 5.1
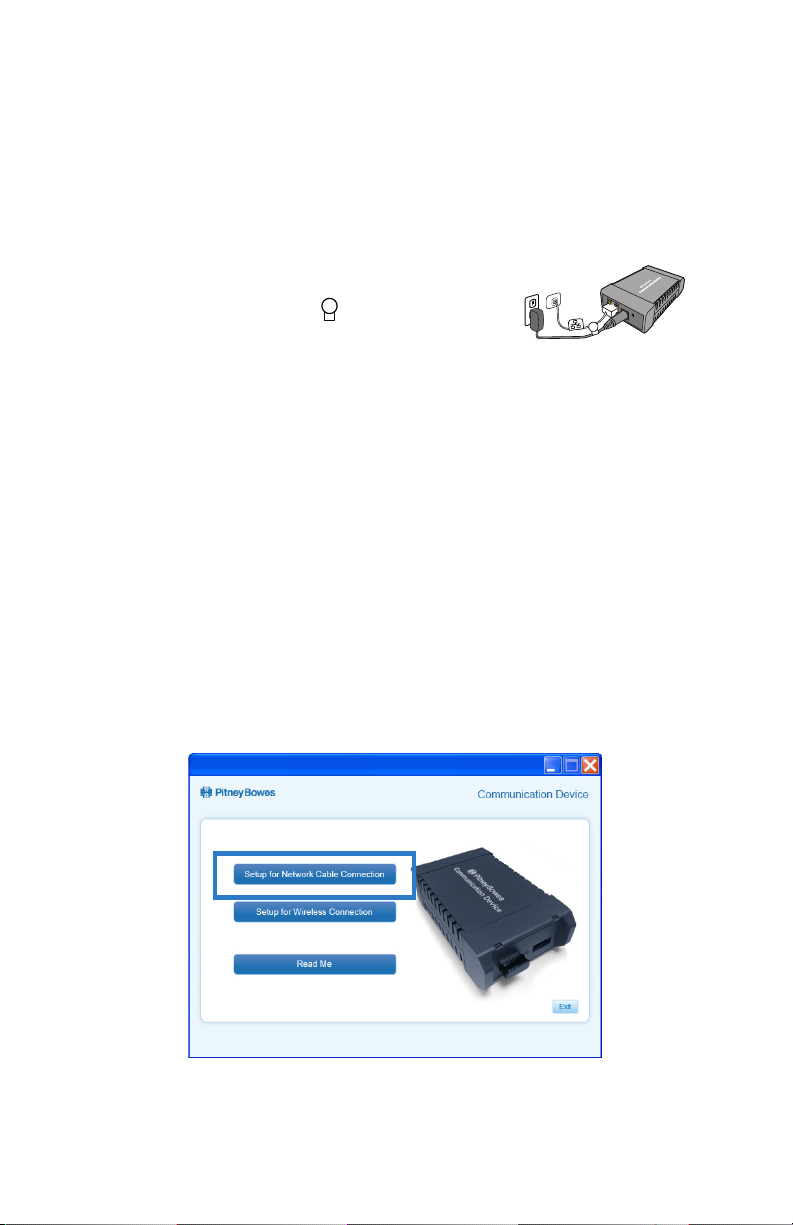
Wireless: Step 2 through Step 8 must be completed before
wireless installation.
2
$0.46 0lb 0.0 oz
1st Cl Ltr MAY 26