2Pulling Tractor User Guide 66802 V0515
Cautionary and Warning Statements
• This kit is designed and intended for educational purposes only.
• Use only under the direct supervision of an adult who has read and understood the instructions
provided in this user guide.
• Read warnings on packaging and in manual carefully.
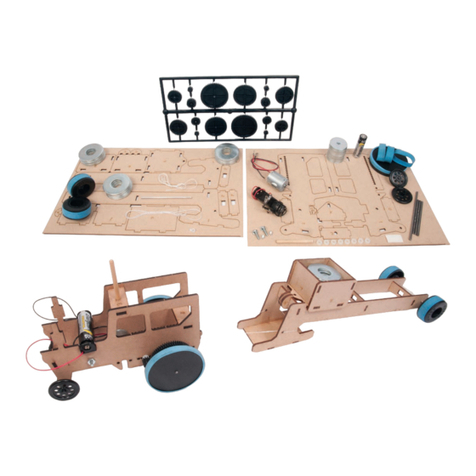
Materials Included
• Sheet of laser-cut basswood parts
• 4 Phillips head screws (two 4-40 x 1/4 Lg. and
two 6-32 x 1/2 Lg.)
• Motor with prewired connectors
• AA battery
• Battery module
• Gear font
• 4 axles
• 30 metal washers
• 4 wheels
• 2 self-adhesive foam tabs
• 2 hex nuts (6-32)
• 4 rubber bands
• 8 spacers
• Wooden rod
• 2 #4 nylon washers
Items Required (not included)
• HD Bond II (or other white glue)
• Phillips head screwdriver
Building the Tractor
1. Pop out the laser-cut parts from the
basswood sheet. Lay a Part 1 piece
at on its side. In the rst slot on
Part 1, the front of the tractor, glue
a Part 2. Moving back on the tractor
from the top to the bottom, glue in
the Part 3, the other Part 2, and the
Part 4 (Figure 1).
2. Glue the other side of all pieces in
the rst Part 1. Place the other Part
1 onto the parts so they t snugly
into the same notches (Figure 1).
3. Glue the Part 5 into the slot on Part
4 with the hook on Part 5 facing the rest of the
tractor (Figure 1).
4. Take the wooden rod and glue it into the hole on
Part 3 (Figure 1).
Installing the Motor and Battery Module
1. On the bottom middle of Part 1, slide the motor
into the opening so that the holes on the motor
line up with the holes on Part 1. Note: You can
install the motor on either Part 1 piece (Figure 2).
2. Attach the motor to the tractor body using two
4-40 x 1/4 Lg. screws and the two small nylon
washers (Figure 2).
Figure 1
Figure 2

