Plockmatic 510 User manual

Friction Collator/Feeder 510
Operating Instruction
Part no: 114-104155
Doc no: T10189
Rev. date: 5 Apr 2013

2
Note
The domestic environment is an environment where the use of broadcast radio and television
recievers may be expected within a distance of 10 m of the apparatus concerned.
WARNING:
• Electromagnetic compliance:
• This is a Class A product. In a domestic environment this product may cause radio
interference in which case the user may be required to take adequate measures.
• The product (System) which is connected to this machine will be class A.

3
Introduction
This manual contains instructions on the operation and maitenance of this machine. To get
the maximum versatility from this machine all operators should carefully read and follow
the instructions in this manual. Keep this manual in a handy place near the machine.
Please read the Safety Information before using this machine. It contains information re-
lated to USER SAFETY and PREVENTING EQUIPMENT PROBLEMS.
How to read this manual
Notation conventions
Whenever necessary, the following points for attention are indicated in this manual.
WARNING:
Indicates a potentially hazardous situation which, if instructions are not followed, could
result in death or serious injury.
CAUTION:
Indicates a potentiality hazardous situation which, if instructions are not followed, may
result in minor or moderate injury or damage to machine or property.
Note
This sign refers to:
• Remarks for making the operation much easier. You get practical hints or knowledge to
assist you in the machine operation such as:
• Preparations required before operating
• How to prevent papers from being misfed or damaged
• Precautions required or actions to take after misoperation
• Limitations like numerical limits, functions that cannot be used together or conditions,
under which a particular function cannot be used or obtained.
• Information.
[ ]
Keys that appear on the machine’s display panel.

4
WARNING:
• To avoid hazardous situations like for instance electric shock or danger while exposed
to moving, rotating or cutting devices, do not remove any covers, guards or screws
other than those specied in this manual.
• Turn off the power and disconnect the power plug (by pulling the plug, not the cable) if
any of the following conditions exists:
• You drop objects or spill something into the equipment.
• You suspect that your equipment needs service or repair.
• Your equipment’s covers has been damaged.
• You notice unusual noises or odours when operating the equipment.
• If the power cable or plug becomes worn out or otherwise damaged.
• Before cleaning and care (unless otherwise specically instructed).
• Electromagnetic compliance:
• This is a Class A product. In a domestic environment this product may cause radio
interference in which case the user may be required to take adequate measures.
• The product (System) which is connected to this machine will be class A.
Safety Information
When using this machine, following safety precautions should always be followed.
Safety during operation
General safety
WARNING:
• Always connect the equipment to a properly grounded power source (wall outlet). If in
doubt, have the power source checked by a qualied electrician.
• Improper grounding of the equipment can result in electrical shock. Never connect the
machine to a power source that lacks a ground connection terminal. This machine is
destined for specic purpose only. Any use going beyond this specic purpose is re-
garded as beyond the determination. The manufacturer will not be liable for damages
resulting from any use beyond the determination, unallowed operation, respectively.
The user alone bears the risk.
• Do not make arbitrary changes or modications to the machine. The manufacturer will
not be liable for modications made at the machine on your own and damages result-
ing thereof. EC declaration of conformity and the mark CE will be invalidated, if you
make changes at the machine or at the individual components.
• Do not override or bypass electrical or mechanical interlock devices.
• The machine is to be used only by authorized and instructed persons. The responsibil-
ities on operating the machine have to be strictly laid down and observed so that there
are no unclear competences regarding safety aspects.
• Vent holes serve for air circulation to protect the machine from overheating. Make sure
that the holes are not covered.
• Do not expose ngers or other parts of the body to moving, rotating or cutting devices
such as for instance between upper and lower trimmer knives.
• Allways locate the equipment on a solid support surface with adequate strength tor
the weight of the machine.

5
Note
• The indications like front and rear, left and right refer to the paper transport direction.
• The operator manual always has to be available at the place of use of the machine.
• In the interest of technical development the company reserves the right to make alterations to
specications without prior notice!
CAUTION:
• The machine and its peripherals must be installed and maintained by a customer service repre-
sentative who has completed the training course on those models.
• Allways follow all warnings marked on, or supplied with, the equipment.
• When you disconnect the power plug from the wall outlet, allways pull the plug (not the cable).
• Disconnect the power cord before you move the machine. While moving the machine, allways
exercise care and make sure that the power cord will not be damaged under the machine.
• Allways contact service if relocating the equipment.
• Do not move the machine while the machine is running.
• Do not open covers while the machine is running.
• Do not switch of the power while the machine is running. Make sure the machine cycle has
ended.
• Lay the power cord in a way that nobody will stumble over it. Do not place things on the cord.
• Never attempt any maintenace function that is not specically described in this documentation.
• Always keep magnets and all devices with strong magnetic elds away from the machine.
• If the place of installation is air-conditioned or heated, do not place the the machine where it
will be:
• Subject to sudden temperature changes.
• Directly exposed to cool air from an air-conditioner.
• Directly exposed to heat from a heater.
• If the machine is not used over an extended period of time it should be unplugged to prevent
damage in the case of overload.
General safety, continued

Page intentionally blank

7
TABLE OF CONTENTS
What You Can Do With This Machine ............................................................................................ 9
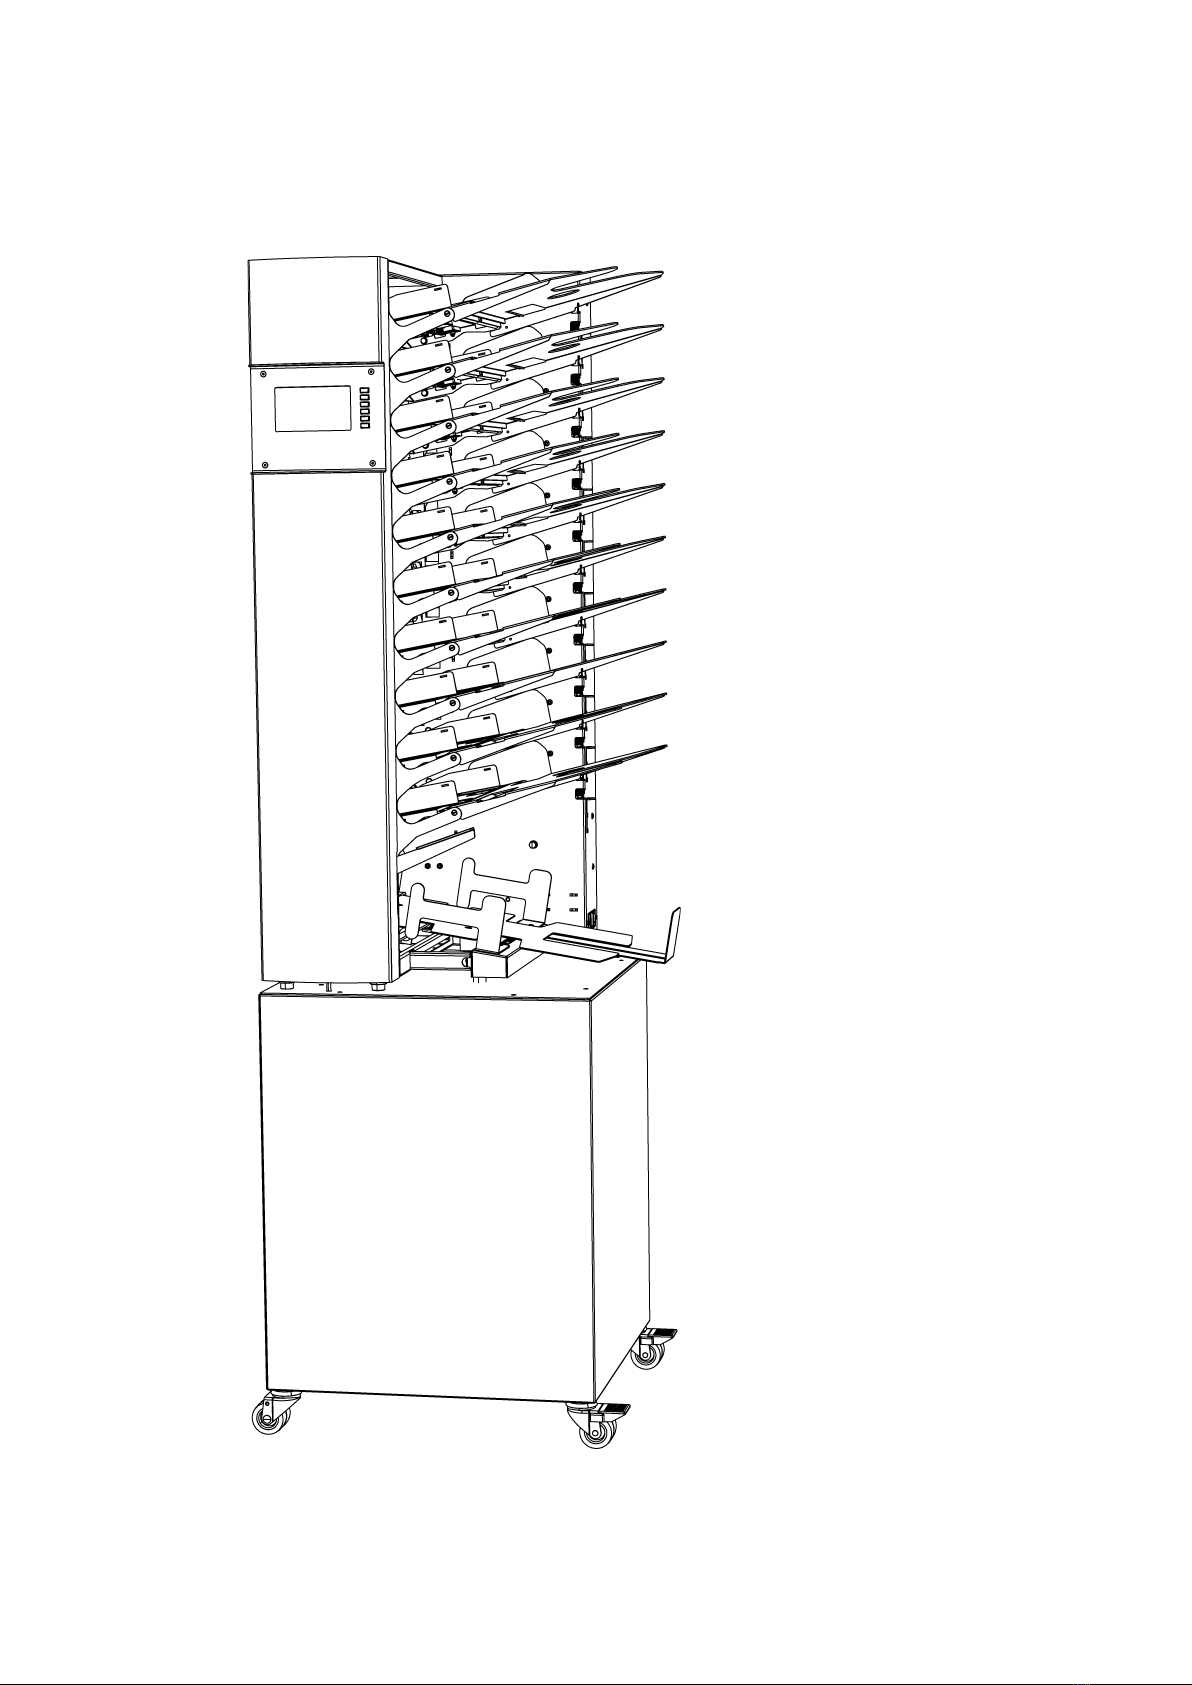
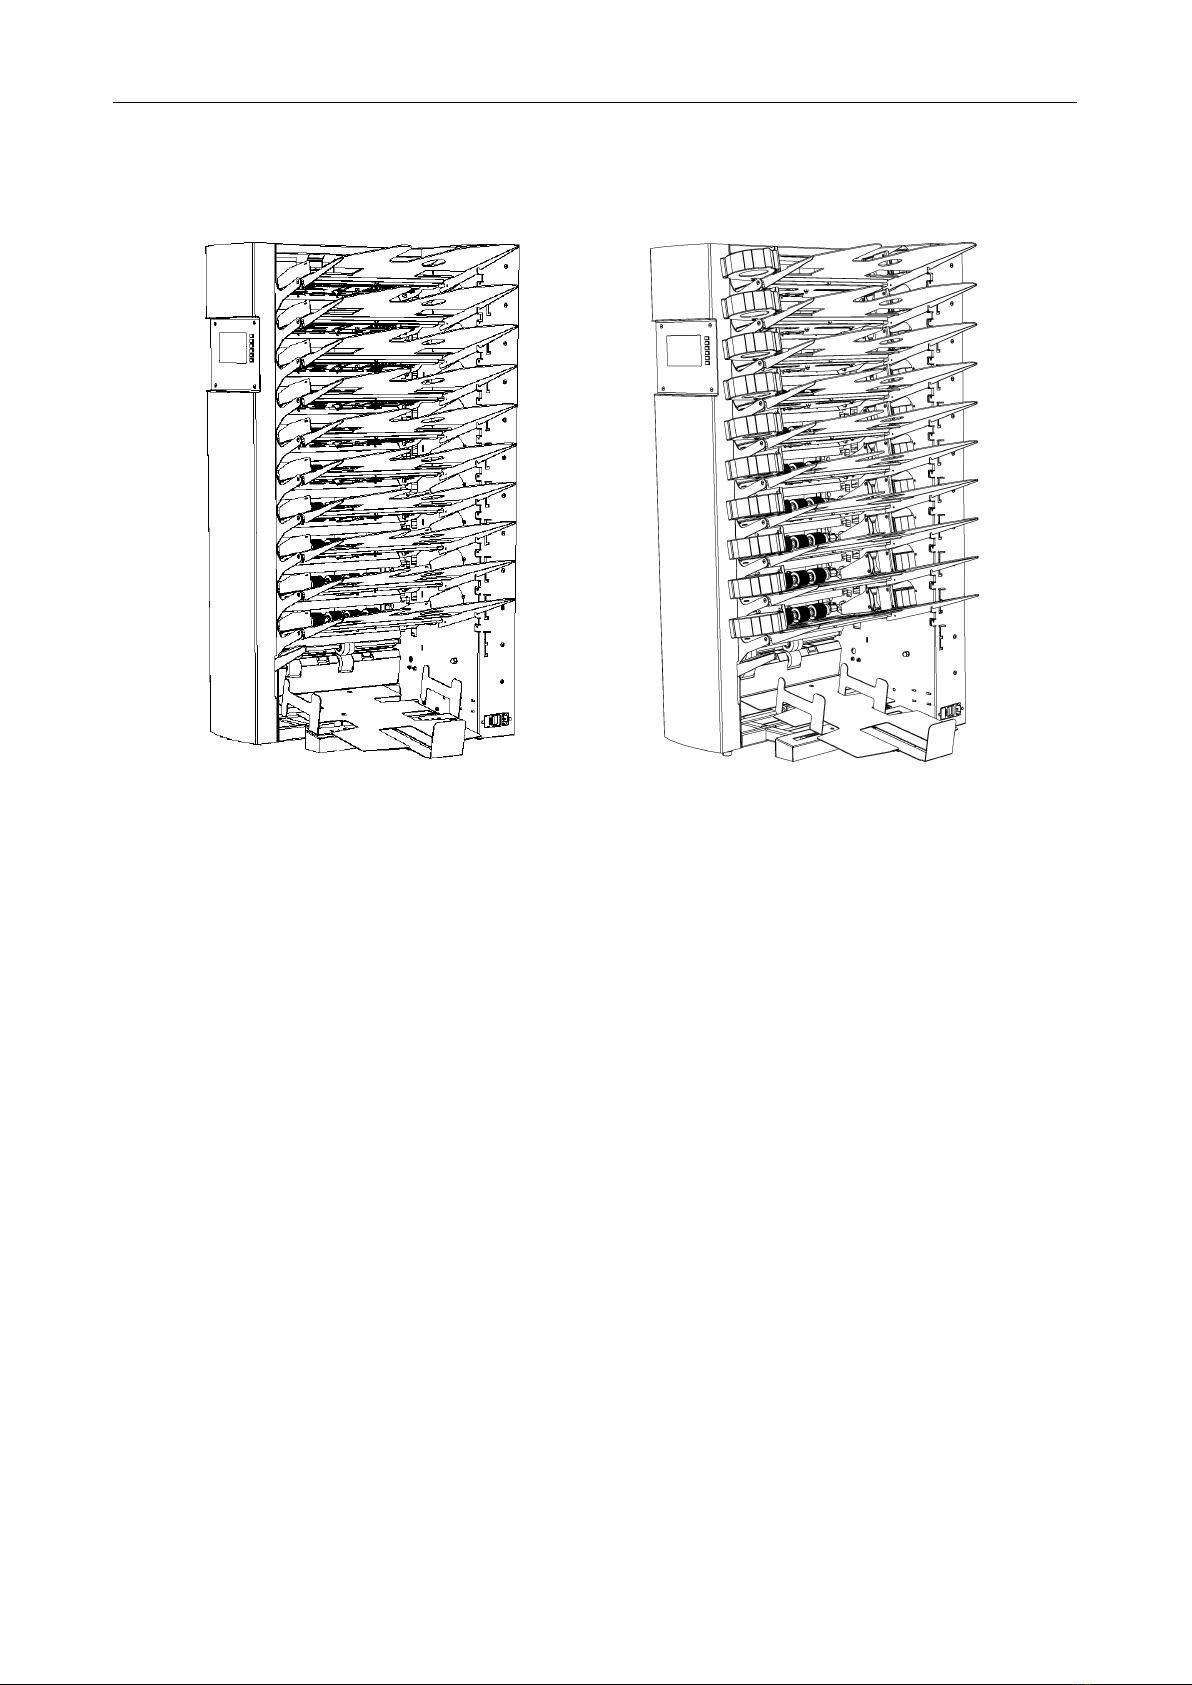
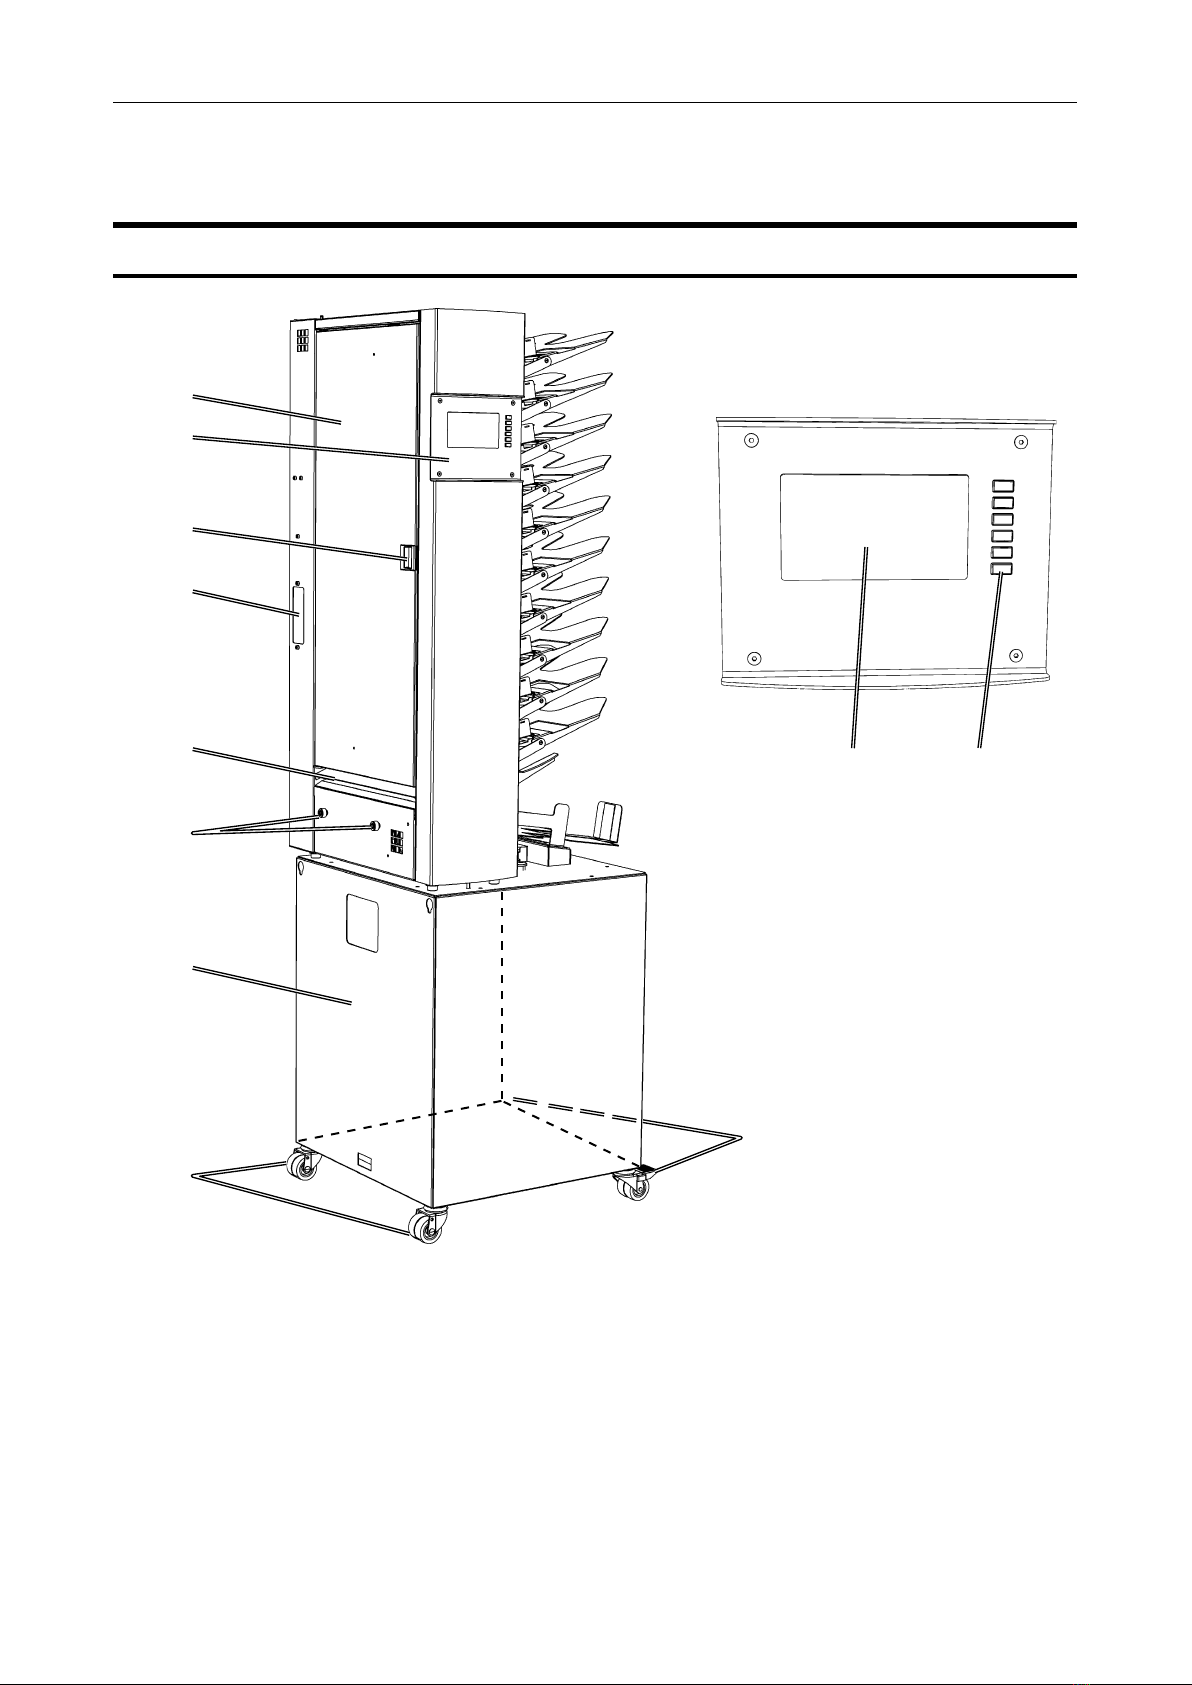
Main Components ......................................................................................................................... 10
General ....................................................................................................................................... 10
General, continued ..................................................................................................................... 11
ACF 510...................................................................................................................................... 12
1. Basics
Turning On / Off the Power ........................................................................................................... 13
Loading the bins............................................................................................................................ 15
Loading sheets, standard procedure .......................................................................................... 15
Loading sheets while running ..................................................................................................... 15
Feed pressure lever ...................................................................................................................... 16
Stacker............................................................................................................................................ 16
Internal Stacker .......................................................................................................................... 16
Extension Bin position.................................................................................................................. 17
2. Running the System
Collating ......................................................................................................................................... 19
Using the C/CF/AC/ACF 510 as a Collator................................................................................. 19
Collating Programs ..................................................................................................................... 21
Auto Bin Select Mode............................................................................................................................21
Insert Sheet Mode.................................................................................................................................21
Alternate Bin Mode................................................................................................................................21
Alternate Cover Mode ...........................................................................................................................22
Block Mode............................................................................................................................................22
Manual Bin Select Mode .......................................................................................................................22
Feeding........................................................................................................................................... 23
Using the CF/ACF 510 as a Feeder ........................................................................................... 23
Feeder Programs........................................................................................................................ 25
Basic programming ............................................................................................................................... 25
Advanced Programming........................................................................................................................26
Dual Mode ...................................................................................................................................... 27
Increasing capacity of the CF/ACF 510 (Feeding and Collating) ............................................... 27
Dual Mode Programming ......................................................................................................................28
Finishing......................................................................................................................................... 29
Internal Stacker........................................................................................................................... 29
Booklet Maker............................................................................................................................. 29
Counters......................................................................................................................................... 30
Counters ..................................................................................................................................... 30
3. Air Pre-Separation
Air Flow .......................................................................................................................................... 31
Setting the Air Flow..................................................................................................................... 31
Air Flow Settings......................................................................................................................... 32
4. Jobs
Job Handling.................................................................................................................................. 33
Retrieving a job........................................................................................................................... 33
Storing a job................................................................................................................................ 34
Deleting a Job............................................................................................................................. 35

8
5. Added Features
The Added Features Menu............................................................................................................ 37
Speed ......................................................................................................................................... 37
Air Flow....................................................................................................................................... 37
Overlap ....................................................................................................................................... 37
Language.................................................................................................................................... 38
Double Sheet Detection (DSD)................................................................................................... 38
Software Version......................................................................................................................... 38
Service........................................................................................................................................ 38
6. Troubleshooting
Troubleshooting ............................................................................................................................ 39
Error screens ................................................................................................................................ 40
Collator/Feeder ........................................................................................................................... 40
Internal Stacker........................................................................................................................... 41
Booklet Maker............................................................................................................................. 42
7. General Remarks
Do’s And Don’ts............................................................................................................................. 43
Placing Your Machine ................................................................................................................... 44
Machine Environment ................................................................................................................. 44
Power Connection ...................................................................................................................... 44
8. Specications
Technical Specication ............................................................................................................... 45

9
What You Can Do With This Machine
The Collator / Feeder 510 series consists of four friction collators/feeders. The C 510 Col-
lator, the CF 510 Collator-Feeder, the AC 510 Air Collator and the ACF 510 Air Collator-
Feeder. In addition to these machines there are two upgrade kits. The f-kit with the addi-
tional feeder that upgrades the C 510 to a CF 510 and the AC 510 to a AFC 510. The A-kit
with the additional Air function that upgrades the C, CF to an AC, ACF 510.
The C 510 Collator is a traditional collator for normal collating/sorting jobs. It has 10 bins
with a 28 mm bin capacity. For collating there are six different program modes enabling
continuous production and maximum productivity.
The CF, ACF 510 Collator-Feeder has advanced feeding applications. The CF, ACF 510 is
fully programmable making it possible to feed multiple sheets from each bin in any order.
The AC, ACF Air Collator-Feeder has an air pre-separation feature as a complement to the
friction feeding used in the C 510 and CF 510. The air pre-separation improves the feeding
of sheets from the bins and reduces the risk of mis- and double feeding.
C, CF 510 AC, ACF 510

10
Main Components
General
1
2
3
4
5
6
7
8
9
10 11
1. Conveyor door
2. Control display
3. Door handle
4. Optional communication outlet
5. Outfeed area
6. Docking knobs
7. Base (optional)
8. Castors, xed without brakes
9. Castors with brakes
10. LCD display
11. Buttons, multi function.

11
General, continued
1
2
3
654
7
8
9
10
1112
1314
15
1. Air outlet, additional power supply
(Only on AC, ACF)
2. Feed pressure lever
3. CAN communication connector
4. Power inlet
5. ON/OFF switch
6. Fuse
7. Tray
8. Tray length stop
9. Tray side stop
10. Loading lever
11. Feeder roller
12. Separation pad
13. Feed roller rubber
14. Bin side guide (adjustable)
15. Bin extentions

12
ACF 510
1
2
1. Right side fan
2. Left side fan
(Integrated, mounted on sideguides)

13
A
1. Basics
Plug the power cord into the wall outlet and into the collator/feeder.
Set power switch (A) to 1 to turn on the power
To turn off the power set power switch (A) to 0
Turning On / Off the Power

1. Basics
14
Most settings and adjustments are operated from the control panel using the multi function
buttons. The actual function of each button depends on the information displayed next to
the button. See the examples that follows.
Using the Menus
Example 1: In this screen, by pressing button 1 you
will exit the present screen.
Example 2: In this screen, button 1 has no function.
Example 3: Pressing button 1 here will answer “No”
to the question on the screen.
1
2
3
4
5
6
Buttons
1
2
3
4
5
6
1
2
3
4
5
6

15
1. Basics
Loading the bins
Press down the loading lever to lower the bins.
Load the sheets under the feed rollers. Make sure that
the sheets are well fanned and loaded into the bins so
that all sheets are even at the rear end. See illustrations
showing correctly and incorrectly loaded bin.
Set the feed pressure lever at preferred position
by moving the feed pressure lever (A). You have
to do this individually for each of the 10 bins. For
details, see next page.
Adjust the side guides (B) as shown in the picture.
Make sure that the loaded sheets are “locked” be-
tween the side guides. This is specially important
in the ACF 510 because the fans are mounted on
the side guides .
When the sheets are in place, choose prefered Bin
position. For details see next page. Then release
the loading lever. Make sure that the sheets stay
in place.
A
B
Correctly loaded bin
Loading sheets, standard procedure
Incorrectly loaded bin
Loading sheets while running
Apart from the standard procedure of loading the bins,
there are modes, such as alternate bin mode, block
mode or feeder mode, when you might want to reload
an empty bin while the collator/feeder is running.
Each bin is individually spring loaded. Press the bin
down by hand as illustrated to load a new stack of
sheets under the feed roller.
Note
Loading like this should only be carried out when the
bin is empty and currently not in use.

1. Basics
16
Stacker
When the integral stacker is to be used, slide
the adjustable side and length stop to the
correct sheet size. Notice that there are two
different scales on the side stops. One for
straight stacking and one for offset stacking.
Note
The side stops are connected and centered.
Side and length stops
Internal Stacker
The Collator / Feeder 510 can be used with a bookletmaker and it also has an internal
stacker. The setup for the stacker is shown in Section 2, Running the system.
Feed pressure lever
With the feed pressure lever you can change the pressure on the feed roller. There are
three different positions. Follow recommendations below.
Low mark position is recommended when handling printed
sheets that easily smear. This can also be recommended
if you have loaded the machine with thin sheets. The
separation function will be lower.
Use this position if the current sheets are:
A4, 8,5x11”, 8,5x14” and weigh up to 140 gsm.(37lb Bond)
A3, 11x17” and weigh up to 120 gsm.(32 lb Bond)
Use this position if your sheets weigh more than the
weight recommended in the 0 position.

17
1. Basics
Extension Bin position
The extension bin has two possible positions. The higher position is the standard posi-
tion and is to be used in normal usage of the collator/ feeder. The lower position should be
used when loaded sheets is very thin or unstiff to prevent papers from twisting when enter-
ing the machine. This is done manually and has to be done individually for each of the 10
bins.

Page intentionally blank

19
Collating
In the Main Menu, select Program using the [ ]
and [ ] buttons and press [ ].
Before running chosen program you have to set
the nishing. In the Main Menu, select Finishing
and press [ ]. Select type of nishing using the
[ ] and [ ] buttons and press [OK]. Descriptions
of the nishing types are found later in this section.
Select any of the programs using the [ ] and
[] buttons and press [ ] to enter program setup.
Detailed programming descriptions are found later
in this section.
2. Running the System
Select Collator and press [OK].
All four versions of the Collator / Feeder 510 can be used as a collator.
Using the C/CF/AC/ACF 510 as a Collator

20
2. Running the system
This screen will be shown while the job is running.
The number (in this exampel 1) will tell you how
many sheets that has been completed.
After a successfully completed calibration, the Run
Menu will be shown. If you are satised with your
programmed settings, press [Start] to start the job.
This screen will be shown during calibration.
Using the C/CF/AC/ACF 510 as a Collator
Select [Proof] in Run Menu to calibrate.
Note
This is something you have to do to be able to run the
program you have chosen.
If an error screen should appear, attend to the
problem, When the error is located and corrected
press [ESC]. Press Proof in Run Menu to calibrate
again.
After calibration, remove the calibration set and
check that it is OK.
Table of contents
Other Plockmatic Industrial Equipment manuals

Plockmatic
Plockmatic SF 4000 User manual

Plockmatic
Plockmatic Morgana PowerSquare 160 User manual

Plockmatic
Plockmatic FeederPro 1000 User manual

Plockmatic
Plockmatic BM3000 User manual

Plockmatic
Plockmatic HCI3500 User manual

Plockmatic
Plockmatic HCI3500 User manual

Plockmatic
Plockmatic Morgana VFL Feeder User manual

Plockmatic
Plockmatic MPS XL User manual

Plockmatic
Plockmatic Pro XL User manual