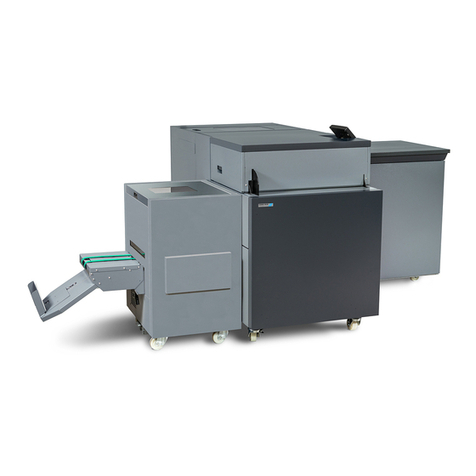
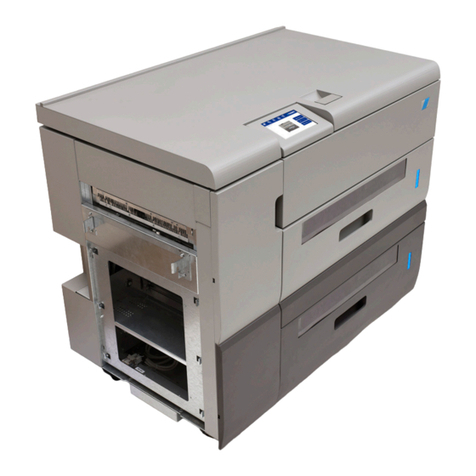
Plockmatic HCI3500 User manual

x17162C
07 June 2018
HCI3500
Installation Instruction

HCI3500 07 June 2018 1. Installation Procedure
1-1
1 Installation Procedure
1.1 Installation Requirements..........................................................................................................................................................................1-2
1.1.1 Minimum Space Requirements ..........................................................................................................................................................1-2
1.1.2 Power Requirements ..........................................................................................................................................................................1-2
1.2 HCI3500 Installation..................................................................................................................................................................................1-3
1.2.1 Accessory Check................................................................................................................................................................................1-3
1.2.2 Mount Upstream Sheet Guides or Decurler Paper Guide ..................................................................................................................1-5
1.2.3 Mount Downstream Docking Plate .....................................................................................................................................................1-7
1.2.4 Disconnect Power, Install Termination Plugs and Cable Protection ...................................................................................................1-7
1.2.5 Adjust Machine Height........................................................................................................................................................................1-8
1.2.6 Mount Upstream Grounding Plate ......................................................................................................................................................1-9
1.2.7 Mount Downstream Grounding Plate ...............................................................................................................................................1-10
1.2.8 Dock to Upstream Device.................................................................................................................................................................1-10
1.2.9 Install Paper Supports ...................................................................................................................................................................... 1-11
1.2.10 Dock Downstream Device ................................................................................................................................................................ 1-11
1.2.11 Connect Electrical Connectors ......................................................................................................................................................... 1-11
1.2.12 Plug in Main Power...........................................................................................................................................................................1-12
1.2.13 Turning Off the Service Power Switch (If Necessary).......................................................................................................................1-12
1.3 HCI3500 Installation Check.....................................................................................................................................................................1-13
1.3.1 Checking the software ......................................................................................................................................................................1-13
1.3.2 Checking the installation...................................................................................................................................................................1-13

HCI3500 07 June 2018 1. Installation Procedure
1-2
1.1.2 Power Requirements
WARNING
1. Make sure that the wall outlet is near the main machine and
easilyaccessible.Makesuretheplugisrmlyinsertedinthe
outlet.
2. Avoid multi-wiring.
3. Be sure to ground the machine.
4. Never place anything on the power cord
• Universal Power Supply
• 100-240V +6%/-10%, 50-60 Hz
1.1 Installation Requirements
1.1.1 Minimum Space Requirements
Service Access
705 mm
600 mm
1150mm
Operator Access

HCI3500 07 June 2018 1. Installation Procedure
1-3
1.2 HCI3500 Installation
1.2.1 Accessory Check
Item Qty Description Location
1 1 Power Cord EUR/IEC-C13 4,5m Accessories box
2 1 Power Cord USA/IEC-C13 AWG18 4,5m Accessories box
3 1 Power Cord UK/IEC-C13 4,5m Accessories box
4 1 Power Cord AUS/IEC-C13 4,5m Accessories box
5 1 Power Cord Switzerland/IEC-C13 4,5m Accessories box
6 1 Power Cord Denmark/IEC-C13 4,5m Accessories box
7 1 Termination Plug, Female Accessories box
8 1 Termination Plug, Male Accessories box
9 1 Spanner 24mm Front of the machine*
10 1 USB to STM32F Dongle Rear of the machine**
11 1 US DSD Calibration Strip Front of the machine*
12 1 DSD Calibration Strip Front of the machine*
13 2 Interlock Cheaters Rear of the machine**
14 1 USB Memory, 8 GB Front of the machine*
15 1 Grounding Plate, Upstream Accessories box
For part number information, see HCI3500 Parts Catalog.
*Open the trays to reach this item.
**Remove the back cover of the HCI3500 to reach this item.
2 3
65
1
4
7 8 9
12
10
13 14 15
11

HCI3500 07 June 2018 1. Installation Procedure
1-4
1.2 HCI3500 Installation, Continued
1.2.1 Accessory Check, Continued
Item Qty Description Location
16 1 Grounding Plate, Downstream Accessories box
17 1 Docking Plate, Downstream Accessories box
18 1 Sheet Guide Plates Accessories box
19 1 Software Loading Adapter 16p to 8p Rear of the
machine**
20 1 Cable Protection Accessories box
21 4 Paper Support Accessories box
22 1 Decurler Paper Guide Accessories box
23 2 Foot Accessories box
24 4 Screw M6SF+T20 M4x10*** Accessories box
25 2 Screw M6SF-TT M5x10*** Accessories box
26 2 Screw M6S M 3x5*** Accessories box
27 4 Screw M6S M 4x10 washer o12,5*** Accessories box
For part number information, see HCI3500 Parts Catalog
**Remove the back cover of the HCI3500 to reach this item.
***The screws might be found either in a separate plastic bag or already mounted on the
part.
17 18
2019
22
16
21
2423 25
26 27

HCI3500 07 June 2018 1. Installation Procedure
1-5
1.2 HCI3500 Installation, Continued
NOTE! If the upstream device does not have a decurler installed, the
Upstream Sheet Guides have to be used: follow steps 1 to 5 of this proce-
dure. If a decurler is installed, follow steps 6 to 8 instead.
A
B
Screws to use
1.2.2 Mount Upstream Sheet Guides or Decurler Paper Guide
Upstream Sheet Guides Decurler Paper Guide
2. Use screws [A] (2X) -”M6S M 3x5” to fasten Upstream Sheet Guides
3. If the HCI is being installed to a Buffer unit, follow steps number 4 and
5 as well, otherwise skip to 1.2.3.
4. If the HCI is being installed to a Buffer unit, the mylar guides [B] (2X)
(which are shipped with the Buffer unit) have to be installed on the in-
ner part of the upstream Sheet Guides.
5. Stick the mylar guides to the inner part of the Upstream Sheet Guides
as shown in the picture below: note that distance [C] has to be of
around 2 cm. This is the end of this procedure. Proceed to 1.2.3.
C
1. Place Upstream Sheet Guides as shown in the picture below

HCI3500 07 June 2018 1. Installation Procedure
1-6
A
Screws to use
NOTE! If the upstream device has a decurler installed, the Decurler Paper
Guide has to be used: follow the steps 6 to 8 of this procedure.
If the upstream device does not have a decurler installed, follow steps 1 to
5 instead.
6. Place Decurler Paper Guide as shown
7. Use screws [A] (2X) -”M6S M 3x5” to fasten Decurler Paper Guide.
1.2.2 Mount Upstream Sheet Guides or Decurler Paper Guide (continued)
1.2 HCI3500 Installation, Continued
D
E
8. Adjust Decurler unit to have paper path aligned. Slots [D] (2X) are
there to facilitate this operation, as they are exactly in the center of the
paper path [E].

HCI3500 07 June 2018 1. Installation Procedure
1-7
1.2 HCI3500 Installation, Continued
1. Ensure main power cord is unplugged and power is off
2. Install termination plugs as shown
3. Install Cable Protection [A]
4. Fasten screws - “M6SF-TT M5x10” - [B] (2X)
Male PlugFemale Plug
B
A
Screws to use
1.2.4 Disconnect Power, Install Termination Plugs and Cable
Protection
1.2.3 Mount Downstream Docking Plate
1. Place docking plate as shown
2. Use screws [A] (4X) -” M6SF+T20 M4x10”- to fasten Downstream
Docking Plate
A
Screws to use

HCI3500 07 June 2018 1. Installation Procedure
1-8
1.2 HCI3500 Installation, Continued
C D
4. Using the spanner, adjust wheel height as shown [C]. Measure the
distance between the machine and the oor. As a rule of thumb, meas-
ured distance [D] should be equal to 100 mm at all four corners of the
machine.
NOTE: the distance [D] might be different depending on system con-
guration (e.g. whether the upstream device has a decurler or not) and
on oor characteristics.
5. Place a spirit level on the paper path of the HCI3500 and raise/lower
the casters until the machine is leveled.
1.2.5 Adjust Machine Height
1. Open front door
2. Reach in and pull green tab [A] up in order to open both trays
3. Locate the spanner [B] (behind cover of lower tray)
A
B

HCI3500 07 June 2018 1. Installation Procedure
1-9
1.2 HCI3500 Installation, Continued
1. Place grounding plate as shown
2. Use screws [A] (2X) - “M6S M 4x10 washer o12,5” - to fasten
Upstream Grounding Plate
A
Screws to use
1.2.6 Mount Upstream Grounding Plate
6. Place the spirit level on the infeed middle cover and on the exit middle
cover of the HCI to check that the machine is leveled.
7. Place one foot under the left screw [E] (behind the door).
E F
8. Place the other foot under the right screw [F] (behind the lower tray).
9. Adjust the screws height until they touch the feet.
10. Return the spanner to the original location in the machine.
1.2.5 Adjust Machine Height (Continued)

HCI3500 07 June 2018 1. Installation Procedure
1-10
1.2 HCI3500 Installation, Continued
1. Open up upper tray (see earlier in procedure)
2. Remove locking screw [A]
3. Pull out locking mechanism [B]
4. Align the docking mechanisms on the Upstream Device and the
HCI3500
5. Push the machines together
6. Push the locking mechanism back in
7. Re-install locking screw
A
B
1.2.8 Dock to Upstream Device
1.2.7 Mount Downstream Grounding Plate
1. Place grounding plate as shown
2. Use screws [A] (2X) - “M6S M 4x10 washer o12,5” - to fasten
Downstream Grounding Plate
A
Screws to use

HCI3500 07 June 2018 1. Installation Procedure
1-11
1.2 HCI3500 Installation, Continued
Refer to downstream device installation manual for docking instructions
1. Connect the upstream device connector [A] to the printer
2. Connect the downstream device connector [B] to the HCI3500
1.2.11 Connect Electrical Connectors
A
B
1.2.10 Dock Downstream Device
1.2.9 Install Paper Supports
1. Open up upper tray (see earlier in procedure)
2. Push the side guide in to gain access to the Paper Support Holder [A]
3. Place the Paper Supports [B] in Paper Support Holder
4. Repeat the procedure for lower tray
B
A

HCI3500 07 June 2018 1. Installation Procedure
1-12
The HCI3500 contains two power switches (Service and Main). For
normal operation, the Service Power Switch must be turned off. If the
Service Power Switch is on, power on signals from upstream devices will
be ignored. The default position for the Service Power Switch is off. The
procedure in this section will only need to be followed if the Service Power
Switch is accidentally left on by a service technician. The procedure is as
follows:
1. If on, turn off the main power switch
2. Remove rear cover by loosening screw [A] and lifting the cover up and
then out using the handles [B]
3. Turn off Service Power Switch [C]
4. Replace Rear Cover
5. Retry Section 1.2.12 Steps 3 through 6
1.2 HCI3500 Installation, Continued
C
B
A
1.2.13 Turning Off the Service Power Switch (If Necessary)
1.2.12 Plug in Main Power
1. Close trays and reinstall back cover
2. Choose correct power cord and plug into HCI3500 and local power
source
3. Turn on the main power switch (inside front cover) [A]
4. Ensure that the machine DOES NOT power on. The machine should
only be able to power on through a signal from an upstream device. If
the machine powers on, see Section 1.2.13
5. Leave the main power switch on and close the front cover
6. Installation is complete. Turn on the HCI3500 through the Power
Switch on the upstream device
A

HCI3500 07 June 2018 1. Installation Procedure
1-13
This section describes how to verify that the system is properly installed.
Should any issue be found, make a note and pass it on to a trained service
technician.
1.3 HCI3500 Installation Check
A
1.3.1 Checking the software
1.3.2 Checking the installation
1. Turn on the upstream device
2. Turn on the main power switch on the HCI3500
3. Press [Tools]
4. Press [Software version] to check installed software version
5. If needed, download and install latest software according to procedure
described in system service manual
6. If a new software is installed, recalibrate the DSD sensors according to
the procedure described in the System Operator Manual
7. Turn off the main power switch
1. Turn on the upstream device
2. Turn on the main power switch on the HCI3500
3. From the main menu, press [Load tray A/B]
CAUTION:
There is a risk of tilting the machine with the back cover off and pa-
per in the trays, make sure that the back cover is on when loading the
paper in the trays.
4. Load paper in the trays
5. Adjust the Paper Guides [A] (3X) according to the size of paper loaded
into the machine
6. Close the trays
7. From the upstream device, run a test job so that paper runs thorugh
the bypass area and both the trays are used to feed paper (see opera-
tor manual)


Other manuals for HCI3500
1
Table of contents
Other Plockmatic Industrial Equipment manuals

Plockmatic
Plockmatic BM3000 User manual

Plockmatic
Plockmatic SF 4000 User manual

Plockmatic
Plockmatic HCI3500 User manual

Plockmatic
Plockmatic MPS XL User manual

Plockmatic
Plockmatic 510 User manual

Plockmatic
Plockmatic Morgana VFL Feeder User manual

Plockmatic
Plockmatic FeederPro 1000 User manual

Plockmatic
Plockmatic Pro XL User manual

Plockmatic
Plockmatic Morgana PowerSquare 160 User manual