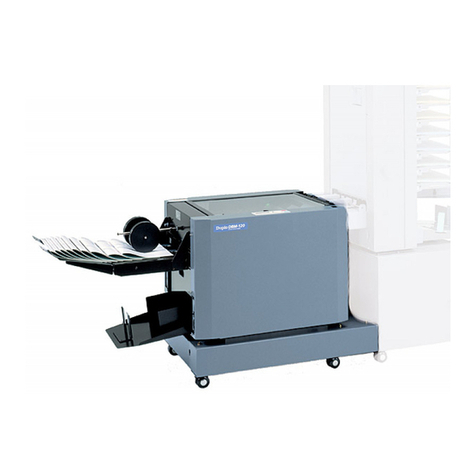
Plockmatic 300 Series User manual

-~
ARTISAN
®
~I
TECHNOLOGY
GROUP
Your definitive source
for
quality
pre-owned
equipment.
Artisan Technology
Group
Full-service,
independent
repair
center
with
experienced
engineers
and
technicians
on staff.
We
buy
your
excess,
underutilized,
and
idle
equipment
along
with
credit
for
buybacks
and
trade-ins
.
Custom
engineering
so
your
equipment
works
exactly as
you
specify.
•
Critical
and
expedited
services
•
Leasing
/
Rentals/
Demos
• In
stock/
Ready-to-ship
•
!TAR-certified
secure
asset
solutions
Expert
team
ITrust
guarantee
I
100%
satisfaction
All
tr
ademarks,
br
a
nd
names, a
nd
br
a
nd
s a
pp
earing here
in
are
th
e property of
th
e
ir
r
es
pecti
ve
ow
ner
s.
Find the Plockmatic 306 at our website: Click HERE

Collator Series 300/400
Operator Manual
January 2003
Part No. 90907


T10137 Jan 2003
Collator Series 300/400 Operator Manual i
Table of contents
1. Introduction page
1.1 Operational safety 1-1
2. Installation
2.1 Installation 2-1
3. Getting to know the collator
3.1 Main components 3-1
3.2 The control panel 3-2
4. Operator instructions
4.1 Load paper 4-1
4.2 Operating the collator 4-1
4.3 Bin indicators 4-2
4.4 Correcting counter and stacker position 4-2
4.5 Zero setting total counter 4-2
4.6 Programming preset counter 4-3
and sheet insertion program
4.7 LED indications, third party device 4-3
4.8 Disabling stacker motion 4-4
4.9 Collator speed adjustment 4-4
4.10 Disengaging bin´s with defective sensors 4-4
5. Maintenance
5.1 Cleaning feed rollers and paper separator pad 5-1
6. Problem solving
6.1 Problem solving 6-1
7. Specications
7.1 Specications 7-1

T10137 Jan 2003
Collator Series 300/400 Operator Manual 1-1
Always connect the equipment to a properly
grounded power source receptacle. In doubt,
havethereceptaclecheckedbyaqualied
electrician.
WARNING: Improper connection of the equip-
ment grounding conductor can result in electri-
cal shock.
Always follow all warnings marked on, or sup-
plied with, the equipment.
Always locate the equipment on a solid sup-
port surface with adequate strength for the
weight of the machine.
Always exercise care in moving or relocating
the equipment.
Always keep magnets and all devices with
strongmagneticeldawayfromthemachine.
Never use a ground adapter plug to connect
the equipment to a power source receptacle
that lacks a ground connection terminal.
Never attempt any maintenance function that
isnotspecicallydescribedinthisdocumenta-
tion.
Never remove the covers or guards that are
fastened with screws.
Never install the unit near a radiator or any
other heat source.
Never override or “cheat” electrical or me-
chanical interlock devices.
Never operate the equipment if you notice
unusual noises or odours. Disconnect the
power cord from the power source receptacle
and call your customer service engineer to
correct the problem.
Attention to the following notes ensures the continued safe operation of your equipment.
1. Introduction
This operator manual describes how to operate the
collators 300/400 as stand alone units.
For third party arrangements, refer to the operator
manual for the third party device.
1.1 Operational safety
T10137 Jan 2003
Collator Series 300/400 Operator Manual 2-1
Plug the collator into the power source. Make sure
that the collator is plugged in securely. If an exten-
sion cord is being used, check all cord connections.
2. Installation
2.1 Installation

T10137 Jan 2003
Collator Series 300/400 Operator Manual 3-1
3. Getting to know the collator
3.1 Main components
1 Control panel
2 Adjustable side guide (in each bin)
3 Load lever
4 Power switch
5 Adjustable stacker guide (left)
6 Adjustable stacker guide (front)
7 Bin extension plate
8 Power cord receptacle
9 Third party receptacle
10 Conveyor door
1
2
3
4
5 6
7
8
9
10

T10137 Jan 2003
3.2 The control panel
Collator Series 300/400 Operator Manual 3-2
1
2
3
4
5
6
7
8
9
10
11
12
13
14
15
16
1 Double feed or paper jam mode
(Shownbybinindicators-rmlight)
2 Door open indicator
3 Third party device mode/stacking mode
4 Straight/offset stacking
5 Counter display
6 Counter reset button
7 Test calibration button
8 Miss feed mode
(Shownbybinindicatorsashing)
9 Clear button conveyor belt
transport & third party
10 Bin indicators
11 Stacker full or load lever out of
position
12 Total counter
13 Selection programming mode
14 Preset counter
15 Sheet insertion program
16 Start & stop button

T10137 Jan 2003
Collator Series 300/400 Operator Manual 4-1
4. Operator instructions
4.1 Load paper
4.2 Operating the collator
1 Make sure that the sheets are well fanned to avoid
miss feeds or double feeds.
2 Align the sheets well to achive a reliable collating
operation and good stacking result.
3 Make sure that the ink has dryed out well.
4 Press the load lever downwards to release the bins.
5 Load the sheets into the bins.
6 Move the adjustable sidwe up against the sheets until
there is no clearance.
7 Raise the load lever to actuate the feed rollers.
1 Set the on/off switch to on position. The counter display
willshow”HEJ”toconrmthatallsystemsareOK.
2 Select output mode:
- Offset/straight stacking mode.
- Third party mode.
3 Select stacking mode if set to stacking:
- Straight stacking.
- Offset stacking.
4 Set the adjustable stacker guide (left) to the selected
paper size.
5 Set the adjustable stacker guide (front) to the paper
size.
6 Press test/calibration button. The collator will adjust
the number of bins used and the paper quality in each
bin and is now ready for operation. Check the result to
makesurethatitisOKandpressstart.

T10137 Jan 2003
Collator Series 300/400 Operator Manual 4-2
4.3 Bin indicators
noitisoPDEL noitpircseD setoN
thgilmriF tcetedmaJ/teehselbuoD :ybdesuacebnaC
steehselbuoD
majrepaP
gnideefrepapde
cudeR
ytilibapac
derapmoc(htgnelrepaptcerrocnI
)htgneldetarbilacehtot
wolsgnihsalF noitacidnideefssiM
tsafgn
ihsalF ehT.elcycnoitarbilacehtretfanosemoC
foelbapacnisi,gnihsalfsitahtrosnesnib
lanoitarepositubsteehselbuodgnisnes
ehT.lortnocdeefssimehttogsahllitsdna
detarbilacdnaKOerasnibrehto
4.4 Correcting counter and stacker position
#petS noitpircseD noitcA setoN
1 latotehtecudeR
tes1ybeulavretnuoc
"nottubteserretnuoC"sserP
yltrohs
edomgnikcatst
esffonI
ecnoelcyclliwrekcatseht
4.5 Zero setting total counter
#petS noitpircseD noitcA setoN
1 latotehttesoreZ
retnuoc
eromrof"nottubteserretnuoC"sserP
dnoces)1(enonaht

T10137 Jan 2003
Collator Series 300/400 Operator Manual 4-3
4.6 Programming preset counter and sheet insertion program
#petS noitpircseD noitcA setoN
1 margorptceleS
edom
"edomgnimmargorpnoitceleS"sserP
otmargorpehtgnitacidniDELehtl
itnu
teehsroretnuocteserp(tilsiteseb
)margorpnoitresni
2 edommargorpweiV "nottubteserretnuoC"sserP wohslliwyal
psidehT
gnihsalfeulaveht
3 eulavwenamargorP sseccaot"nottubteserretnuoC"sserP
tigidtsaleht
"edomgnimmargorpno
itceleS"sserP
gnittesehtegnahcot
mrifnocot"nottubteserretnuoC"sserP
tigiddnocesehtsseccadnagnitteseht
sti
gid)2(gniniamerehtrofsihttaepeR
noitceleS"gnisserphtiwgnitrats
"edomgnimmargorp
sserp,tigidtsalehtgnitsu
jdaretfA
ehtmrifnocot"nottubteserretnuoC"
edamsgnittes
taepeR
eseht
owt
spets
swohsyalpsiD 000
noitacidnIDEL noitpircseD setoN
thgilmriF detcelesedomecivedytrapdrihT
gnihsalF nwodtuhsytrapdrihT
4.7 LED indications, third party device

T10137 Jan 2003
Collator Series 300/400 Operator Manual 4-4
4.8 Disabling stacker motion
#petS noitpircseD noitcA setoN
1 rekcatselbasiD
noitom
rof"gnikcatstesffo/thgiartS"sserP
sdnoces)2(owtnahterom
eme
rtxefognildnahroF
srepapthgiewthgil
2 noitomrekcatsniageR "gnikcatstesffo/thgiartS"sserP
#petS noitpircseD noitcA setoN
1 deepsretnE
edomtnemtsujda
"edomgnimmargorpnoitceleS"sserP
sdnoces)2(owtnahteromr
of
lliwDELnibtsalehT
ehtdnaputhgil
wohsyalpsidretnuoc
01÷h/stesnideeps
2 gnitalloctceleS
deeps
edomgnimmargorp
noitceleS"sserP lliwretnuocehT
nideepsehtylpsid
01÷h/stes
3 tnemtsujdamrifnoC "edomgnimmargorpnoitceleS"sserP
n
ibehT(sdnoces)2(owtnahteromrof
)tuooglliwDEL
wonlliwretnuocehT
retnuocehtyalpsid
eulav
4.9 Collator speed adjustment
4.10 Disengaging bin´s with defective sensors*
#petS noitpircseD noitcA setoN
1 nibevitcefedetalosI
dnasrosnes
esehtegagnesid
s´nib
eromrof"noitarbilacdnatseT"ss
erP
sdnoces)5(evifnaht
skcehcscinortceleehT
dnasrosnesniblla
s´nibehtsegagnesid
srosnesevitcefedhtiw
2 retfas
´nibegagneeR
melborpehtfonoitcerroc
eromrof"noitarbilacdnatseT"sserP
sdnoces)5(evifnaht
This process can also be used to disengage bin´s with other problems. In this case the
feed roller shaft is removed and a sheet inserted (80 gsm or heavier) in the bin to cover
the bin sensor (simulating a defective sensor). Pressing ”Test and calibration” for more
thanve(5)secondswillnowdisengagethisbin.
*

T10137 Jan 2003
Collator Series 300/400 Operator Manual 5-1
5. Maintenance
5.1 Cleaning feed rollers and paper separator pad
1 Remove the feed roller assembly shaft by pressing it
to the left side.
The right end of the feed roller assembly will now be
released and the assembly can be removed.
2 Clean the feed rollers and the separator pad with an
alcohol based liquid.
paper separator pad
feed rollers Press to the left
Lift out this side

T10137 Jan 2003
Collator Series 300/400 Operator Manual 6-1
6. Problem solving
6.1 Problem solving
melborP sesuacelbissoP noitcA
sienihcamehT
ehtdnaevitareponi
tonera"JEH"srettel
yalpsidehtninwohs
sienihcameht
nehw
nodehctiws
tonnacdnadekcolbyartrekcatS
noitisopemohhcaer
yartkcolbnU.ffoenihcamehthctiwS
noenihcamhctiwsdna
sienihcamehT
ehtsaevitareponi
sinottubtrats
desserp
noitidnocmajnienihcaM
noitisoprewolnireveldaoL
ll
ufrekcatS
neporoodroyevnoC
nwodtuhsytrapdrihT
majraelC
noitisopreppuotreveldaolesiaR
rekcatsytpmE
roodesolC
ecivedytrapdrihtnimelborptcerroC
ssimdetepeR
sdeefelbuod/sdeef
gninaelcdeensrellordeeF
sdeendaprotarapesr
epaP
gninaelc
hguonedennaftonsteehS
lliw.ctesrrubgnittuc/redwop/kni(
)petstnatropmiyrevasihtekam
noitacifi
cepsfotuoytilauqrepaP
naelc/kcehC
naelc/kcehC
naf/kcehC
kcehC
elbuodtcerrocnI
noitacidnimaj/def
tnirproytila
uqrepaptnereffiD
ecniss´nibehtninoisserpmi
noitarbilacsuoiverp
repapdexim(steehsdexiM
)seitilauq
elcycnoitarbilacmrofreP
steehsehtkcehC
lenaptnorF
sdnammoc
evitareponi
deretneyltnediccasahenihcaM
edomecivres
no-ffo
enihcamhctiwS

T10137 Jan 2003
Collator Series 300/400 Operator Manual 7-1
7.Specications
7.1 Specications
604ledoM 014ledoM +603ledoM +013ledoM
snibforebmuN 6 01 6 01
yticapacniB )"4/3(mm02
ezisteehsmuminiM
3
39(021
3
)"4/18x"4/34(mm012x)
ezisteehsmumixaM mm653x612
)"41x"2/18(
mm054x023
)"4/371x"8/521(
.nimthgiewrepaP
1
msg04
.xamthgiewrepaP
1
msg002
deepselbatsujdA
2
,0023,0003,0082,0062,0022,0081,0051,0001
ruoh/stes0063,0043
noitceteddeefelbuoD nibhcaenirosnes,seY
noitceteddeefsiM seY
noitcetednibytpmE seY
noitcetedmajrepaP seY
noitcetedllufrekcatS seY
retnuocteS seY
retnuoctese
rP seY
margorpgnitresniteehS seY
yartgniveiceR gnikcatsthgiarts/tesffO
thgieH mm007
)"2/172(
mm099
)"93(
mm007
)"
2/172(
mm099
)"93(
htdiW )"4/191(mm094 )"4/322(mm575
htpeD )"4/371(mm054 )"4/302(mm525
thgieW gk25
)bl511(
gk06
)bl2
31(
gk56
)bl341(
gk57
)bl561(
egatloV zH06-05A4V521/511/501
zH06-05A2V042/032/022
.ediwmm5731sidnagk061sthgiew)B013dna+013ledoM(metsysrotallocniwtA
1
.ytilauqrepapnognidnepeD
2
.M09LPdna-20.1noisrevrossecorproF
3
720009srepaphtdiwworranediugediSgnisufi,htdiwmm39otnwodogotytilibissoP


Artisan
Technology
Group
is
an independent supplier
of
quality pre-owned equipment
Gold-standard
solutions
Extend the life
of
your
critical industrial,
commercial, and military systems
with
our
superior service and support.
We
buy
equipment
Planning to
upgrade
your current
equipment? Have surplus equipment taking
up shelf space? We'll give it a
new
home.
Learn
more!
Visit us at artisantg.com for more info
on price quotes, drivers, technical
specifications, manuals, and documentation.
Artisan Scientific
Corporation
dba
Artisan
Technology
Group
is
not
an affiliate,
representative,
or
authorized
distributor
for
any
manufacturer
listed herein.
We're here to make your life easier.
How
can
we
help you today?
(217)
352-9330
Isales@artisantg.com Iartisantg.com
This manual suits for next models
5
Table of contents