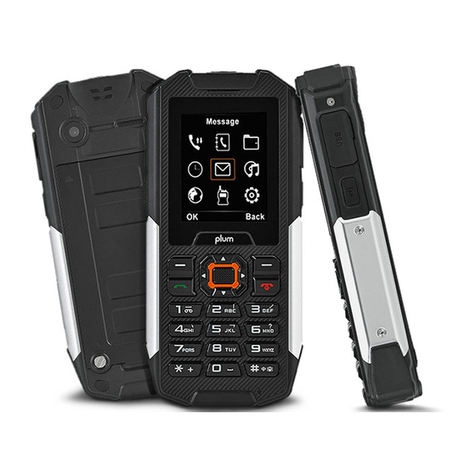
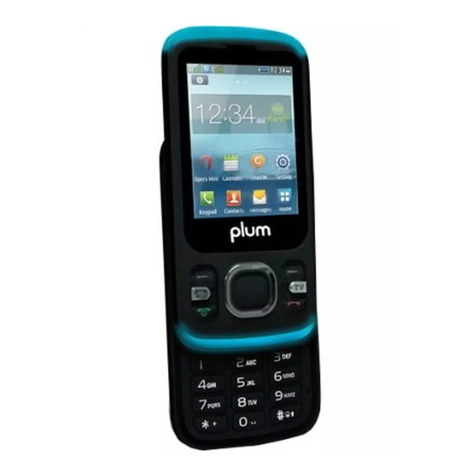
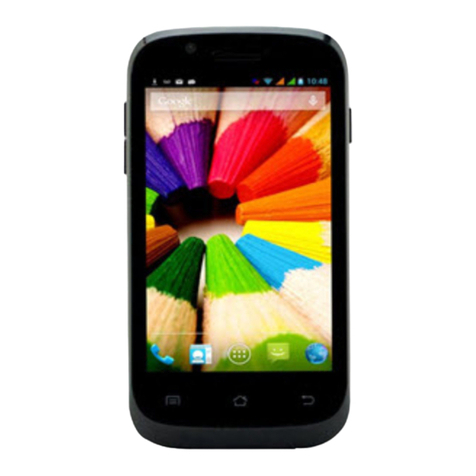
Plum genius p200 User manual

P200 User Manual


I
Contents
1.Getting to know your phone...........................1
1.1 Your Phone.................................................1
1.2 Status icons................................................1
1.3 Installing SIM card and battery....................1
1.4 Installing Storage card................................2
1.5 Battery charging .........................................2
1.6 Power on/ off..............................................3
1.6.1 Power on..............................................3
1.6.2 Power off..............................................3
1.7 Using shortcut keys....................................3
2.Using Call Function........................................4
2.1 Making a call..............................................4
2.1.1 Directly call on Home Screen ...............4
2.1.2 Make an international call.....................4
2.1.3 Dial an extension number.....................4
2.2 Answering or rejecting a call.......................4
2.2.1 Answer a call........................................4
2.2.2 Reject a call.........................................4
2.3 Adjusting call volume..................................4
2.4 Ending a call...............................................4
3.Call logs ..........................................................5
3.1 Dialed calls.................................................5
3.2 Received calls............................................5
3.3 Missed calls................................................5
3.4 Rejected calls.............................................5
3.5 Delete all....................................................5
3.6 Call timers..................................................5
3.7 Call cost.....................................................5
3.8 GPRS volume.............................................5
4.User profiles....................................................6
4.1 Standard.....................................................6
4.2 Silent..........................................................6
4.3 Vibrate........................................................6
4.4 Low ring .....................................................6
4.5 High ring and vibrate...................................6
5.Contacts ..........................................................7
5.1 View a contact............................................7
5.2 Adding a new contact..................................7
6.Message ..........................................................8
6.1 Write message ...........................................8
6.1.1 New SMS.............................................8
6.1.2 New MMS............................................8
6.2 Inbox..........................................................8
6.3 Outbox .......................................................8
6.4 Drafts .........................................................8
6.5 Sentbox......................................................8
6.6 Message setting .........................................8
6.6.1 Templates ............................................9
6.6.2 Voice mail server..................................9
6.6.3 Broadcast message..............................9
6.6.4 SMS settings........................................9
6.6.5 MMS settings.....................................10
6.6.6 Message capacity ..............................10
7.Internet.......................................................... 11
7.1 Input URL................................................. 11
7.2 Homepage................................................ 11

II
7.3 Bookmark .................................................11
7.4 History ......................................................11
7.5 Offline.......................................................11
7.6 WAP settings ............................................11
7.6.1 Browser settings.................................11
7.6.2 Preferred storage................................12
7.6.3 GPRS setting......................................12
7.6.4 Restore default...................................12
8.Multimedia .....................................................13
8.1 Camera.....................................................13
8.2 Video recorder ..........................................13
8.3 Audio player..............................................13
8.3.1 Background audio player ....................13
8.4 Video player..............................................13
8.5 Image browser..........................................14
8.6 Recorder...................................................14
8.7 FM radio ...................................................14
8.8 File manager.............................................14
9.Tools...............................................................16
9.1 Alarm........................................................16
9.2 Calendar...................................................16
9.3 Calculator .................................................16
9.4 Bluetooth ..................................................16
9.5 E-Book reader...........................................16
10.Applications.................................................17
10.1 Sokoban .................................................17
11.Settings........................................................18
11.1 Call settings.............................................18
11.1.1 Multi-SIM ..........................................18
11.1.2 Network selection..............................18
11.1.3 Call divert..........................................18
11.1.4 Call barring .......................................19
11.1.5 Call waiting .......................................19
11.1.6 Hide ID..............................................19
11.1.7 Select line.........................................20
11.1.8 Flight mode.......................................20
11.1.9 Others...............................................20
11.2 Phone settings.........................................20
11.2.1 Time and date...................................20
11.2.2 Select language................................20
11.2.3 Auto power on/off..............................20
11.2.4 Motion detection................................21
11.2.5 Power management..........................21
11.3 Display settings.......................................21
11.3.1 Wallpaper settings.............................21
11.3.2 Power on display...............................21
11.3.3 Power off display...............................21
11.3.4 Contrast............................................21
11.3.5 Backlight...........................................22
11.3.6 Keypad light......................................22
11.4 Security settings......................................22
11.4.1 PIN ...................................................22
11.4.2 PIN2 .................................................23
11.4.3 Privacy..............................................23
11.4.4 Auto keypad lock...............................23
11.4.5 Lock screen by end-key ....................23
11.4.6 Power-on password...........................23
11.4.7 Guardlock .........................................24
11.5 Restore settings ......................................25
12.Safety Precaution ........................................26

III
12.1 Usage environment ................................26
12.2 Medical devices......................................26
12.2.1 Pacemaker.......................................26
12.2.2 Hearing aids.....................................27
12.2.3 Emergency calls...............................27
12.3 Password access....................................27
12.3.1 Phone password ..............................27
12.3.2 PIN code..........................................28
12.3.3 PIN2 code........................................28
12.3.4 PUK code.........................................28
12.3.5 PUK2 code.......................................28
12.4 Cautions for battery charging..................28
12.5 Cautions for battery usage......................29
12.6 Cautions for spare parts usage...............30
12.7 Other safety information.......................... 31

IV
Foreword
Dear customer, thank you for choosing P200 phone.
The phone will give you unprecedented and pleasantly surprised experience: The phone supports three-GSM
card and three -SIM standby functions.
The camera of high-definition digital will keep the colorful memories for you. The built-in MP3 and MP4
multimedia player will bring comprehensive enjoyment to you as well.

V
Declaration
The content of this guide is protected by Copyright
Law. It is forbidden to copy, distribute, publish or
cite the content of this user guide, in whatever form
without empowerment of our company.
The company has carefully and closely reviewed
the content of this user guide. Nevertheless, it is
possible that there are mistakes and omissions.
The pictures in this manual only works as the
reference, please base on the actual picture while
using the phone.
The company reserves the right to update and
improve any products described in this guide, as
well as the content of this guide. Amendments will
be made without prior notification.
This is the user guide for the mobile phone only and
does not include an introduction to this product’s
software and hardware configuration.
Some functions mentioned in this guide also need
the support of a network operator or service
provider. If you are unable to confirm whether you
will be able to use certain functions or services with
this phone, please consult your network operator or
service provider.
The phone may include some commodities,
technology or software, which is under the control
of export law, and regulations of China or other
countries and areas; therefore, any illegal transfer
action is forbidden.
In the fullest extent permitted by applicable law, in
any case, the company or the party with its permit
should take no responsibility for any loss of data,
income and any special, occasional or indirect loss,
no matter what reason it caused by.
In order to ensure your safety, please read the
“Safety Notice” and “Safety Precaution”.
Typographic conventions used in this user guide
include:
<>: Shows function key;
“”: Shows prompts on the phone interface;
【】:Shows the keys;
[ ]: Shows the phone menus.

VI
Safety notice
Before using the phone, please read and follow below rules carefully.
If you dial or answer a call while driving,
please use the hands-free device or use
your phone after parking the vehicle.
Please make sure your phone is switched off or
in flight mode during the whole flight, for mobile
phone will interfere with the communication
network for the airplane.
All phones may be susceptible to
interference, which could affect
performance.
Please switch off your phone near medical
devices or places which phone using is
forbidden.
In order to ensure high performance and to
avoid damage the phone, please use the
original accessories and battery. Please do
no use products which are not compatible.
To avoid the risk of any explosion, please switch
off the phone at gas stations and places near
fuel, chemicals or other dangerous substances.
To avoid interfering blasting operation,
please switch off your phone in blasting
scene or areas with sign “Turn off
bidirectional radios. Pay attention to and
obey any relevant rules and regulations.
Please don’t burn the phone battery or treat it as
ordinary rubbish as this could endanger life and
damage the environment. Please obey local
environmental policy, and dispose and recycle
them timely.
If you need to connect your phone to other
devices, please read the user guide of that
device carefully for safety.
Keep small parts (e.g. Storage card) out of the
reach of children, to prevent them from being
swallowed or causing other dangers.
Please back up the important phone
information or to have a handwritten record
to avoid important data lost.
SOS
Make sure the phone is switched on and within
service coverage before dialling the emergency
number. Press the call key to inform your
position. Don’t end the call unless told to do so.

Getting to know your phone
1
1. Getting to know your phone
1.1 Your Phone
1.2 Status icons
Icon
Function description
Represent current SIM1, SIM2 and
SIM3 network signal. The more
bars, the stronger the signal
Flight mode
Battery status, more bars indicate
more battery capacity left
Unread MMS
MMS memory full
MMS downloading
Headset mode
Unread SMS
SMS memory full
Clock has set
Bluetooth function is activated
Profile has set as Silent Mode
Profile has set as Low ring Mode
Profile has set as High ring and
vibrate Mode
Profile has set as Vibrate Mode
1.3 Installing SIM card and battery
(1) Hold on 【End Key】for about three seconds.
(2) Slide the battery cover in the direction of the
bottom of the phone and then remove it.
(3) Remove the battery.

Getting to know your phone
2
(4) Follow the sign for SIM1, SIM2 and SIM3 on
the phone to install SIM1, SIM2 and SIM3.
Please make sure that the golden contacts of
the card face downwards, then push the card
gently until it fixes itself in the card slot.
(5) Replace the battery with its golden contact part
facing the set phone battery contact piece, and
then replace the battery cover.
1.4 Installing Storage card
(1) Hold on【End Key】for about three seconds to
switch off the phone.
(2) Remove the battery cover.
(3) Follow the arrow direction of "OPEN" on the
T-Card slot cover, open card slot cover, put the
T-Card into the slot vertically, make sure that
the gold contacts of the card face upwards,
until the card fixes itself in the card slot.
(4) Follow the arrow direction of "LOCK" on the
T-Card slot cover, pull card slot cover to lock
the card slot.
1.5 Battery charging
Charged by the travel charger
(1) Install the battery correctly into the phone.
(2) Insert the lead of the travel charger to
connecting slot of the phone, and then connect
the charger to a standard power socket.
When charging is complete, unplug the charger
from the standard power socket first, and then
disconnect the phone and charger.
Caution:
1. Please use the approved battery and
charger designated for this product, otherwise
it may cause an explosion.
2. If the battery is completely empty, the battery
icon will appear after charging for two to three
minutes. Generally, the charging time is 2-5
hours, depending on the current status of the
phone (whether switched on, during a phone
call etc).
3. Please use charger to charge, try best to
avoid charging via USB cable.
4. For optimal battery performance, charge and
discharge the new battery two or three times.
The first several times you charge the battery,
charge it for at least 10 hours.

Getting to know your phone
3
1.6 Power on/ off
1.6.1 Power on
Hold on【End Key】for three seconds to switch on
the phone.
1.6.2 Power off
Hold on 【End Key】for three seconds to switch off
the phone.
Warning:
Don’t switch the phone on in areas where
wireless phone usage is prohibited or where it
may cause interference or danger, and also
make sure that you haven’t activated the
function “Auto power on/off”.
1.7 Using shortcut keys
Pressing some keys directly from the Home Screen
provides direct access to common phone functions.
Key
Operation
Function
Call
key 1/3
press
briefly
Enter Call History
1~3
Keys
hold on
Enter voicemail box
for SIM1 , SIM2 or
SIM3
4~9
Key
hold on
Enter the
corresponding speed
dial

Using Call Function
4
2. Using Call Function
2.1 Making a call
2.1.1 Directly call on Home Screen
(1) On the Home Screen, input the area code and
phone number.
(2) Click <Options→SIM1 call/ SIM2 call/ SIM3
call > to select SIM 1 , SIM 2 or SIM 3 to call.
2.1.2 Make an international call
(1) Enter the country code (To enter ”+”, just press
【* Key】twice).
(2) Enter the area code (Usually exclude the first
“0”) and the phone number.
(3) Click <Options→SIM1 call/ SIM2 call/ SIM3
call > to select SIM 1 , SIM 2 or SIM 3 to call.
2.1.3 Dial an extension number
(1) Enter the switchboard number.
(2) On the Dialling screen, select <Options→
Insert→Pause P>, then enter the extension
number.
(3) Click <Options→SIM1 call/ SIM2 call/ SIM3
call > to select SIM 1 , SIM 2 or SIM 3 to call.
The extension number will be transmitted in
few seconds after getting through the
switchboard.
2.2 Answering or rejecting a call
2.2.1 Answer a call
When there is an incoming call, you can press
【Left Soft Key】to answer.
2.2.2 Reject a call
When there is an incoming call, you can press
【End Key】to reject it.
2.3 Adjusting call volume
During a call, you can press 【Navigation Key】to
adjust the earphone volume.
2.4 Ending a call
Press 【End Key】to end the call.

Call logs
5
3. Call logs
Enter the main menu, and then select [Call
logs] to enter the call list.
On the Home Screen, press【Call Key 1/3】to
view call list.
3.1 Dialed calls
Display recent call records.
3.2 Received calls
Display recent calls received.
3.3 Missed calls
Display recent calls unpicked up.
3.4 Rejected calls
Display the phone numbers set as rejected calls.
3.5 Delete all
Delete all the call entries.
3.6 Call timers
Select the desired SIM Card, and then you can view
all relevant information about the SIM Card.
3.7 Call cost (need the network
support)
Total cost: Record total call charges for SIM1,
SIM2 and SIM3.
Max cost: You can set the desired upper limit
for call costs.
Price per unit: Record the cost rate for SIM1,
SIM2 and SIM3.
Reset cost: Reset the total call charges as
zero.
3.8 GPRS volume
You can view the detail about GPRS flowrate.

User profiles
6
4. User profiles
4.1 Standard
Activate: Activate the chosen profile.
Settings: Set the options as required.
Rename: Modify the name of the selected
profile.
4.2 Silent
For the settings, please refer to”Standard”.
4.3 Vibrate
For the settings, please refer to”Standard”.
4.4 Low ring
For the settings, please refer to”Standard”.
4.5 High ring and vibrate
For the settings, please refer to”Standard”.

Contacts
7
5. Contacts
5.1 View a contact
Enter the contacts, the phone is defaulted to show
contact list with all entries. Press【Left Key/Right
Key】to switch between different groups.
5.2 Adding a new contact
On the Contacts list, select<Options→New>to
create a new contact.
Phone: You can input the contact name, mobile
number, home number, etc. You can also set
special image and ring for the contact entry
SIM1: The input record will be saved to SIM1,
with each name one phone number.
SIM2: The input record will be saved to SIM2,
with each name one phone number.
SIM3: The input record will be saved to SIM3,
with each name one phone number.

Message
8
6. Message
6.1 Write message
6.1.1 New SMS
On the Home Screen, press【Left Soft Key】and
select [Message→Write message→New SMS] to
edit a new SMS directly.
After writing an SMS, click < Send > to send the
message.
6.1.2 New MMS
MMS is a multimedia message, supporting pictures
in GIF, JPEG, WBMP, and BMP format.
Caution:
The MMS can only be used when it is
supported by the network operator; and only
phones with multimedia function can receive
and normally display it.
On the Home Screen, press【Left Soft Key】and
select [Message→Write message→New MMS] to
create a new MMS.
6.2 Inbox
Store all received SMS and MMS.
6.3 Outbox
Store all SMS and MMS failed to be sent.
6.4 Drafts
Save edited SMS and MMS haven’t sent.
6.5 Sentbox
Store all the SMS and MMS successfully sent out. If
you want the sent messages be saved
automatically, please select
[Message→Options], then select [SMS settings→
Save sent messages→Save].
6.6 Message setting
On the Home Screen, press【Left Soft Key】to enter
the main menu, then select [Message→Options]
to enter the message setting menu.

Message
9
6.6.1 Templates
While editing messages, you can directly cite the
preset common phrases. Select <Edit> to set the
common phrases by yourselves.
6.6.2 Voice mail server
This function works like an answering machine,
which can transfer a missed call to your personal
voice mail, allowing the caller to leave a voice
message and notify you by an SMS. Voice Mail is a
part of the bundled software provided by network
operator, therefore, you need to register to active
this function, and manually set the phone. Please
contact with your network operator for more details.
Caution:
It’s workable to transfer the voice call into the
voice mail (The number the call will leave a
message) by setting “Divert calls”.
6.6.3 Broadcast message
You can receive broadcast text messages with
various contents via network service, such as news,
weather or traffic information. For more details,
please consult your network operator.
6.6.4 SMS settings
SIM1 msg center: While sending messages,
you must set the service center number
provided by network operator. Most SIM cards
defaulted contain the service center number.
You can also gain this number directly from the
network operator.
Caution:
If you modify or delete the service center
number, an SMS might not be sent
successfully.
SIM2 msg center: Please refer to [SIM1 msg
center].
SIM3 msg center: Please refer to [SIM1 msg
center].
Message validity period: Allows you to set the
length of time during which your SMS will be
stored in the message center. The validity
period depends on the network operator.
Status report: Select [On], then the text
message center will inform you when you
successfully sent a message.

Message
10
Save sent messages: You can select whether
to save the sent message or not.
Preferred storage: You can select to save the
SMS to the SIM card or the phone first.
6.6.5 MMS settings
SIM1 MMS account/SIM2 MMS account/ SIM3
MMS account: You can select SIM1/SIM2/SIM3
MMS account.
Delivery report: Select [Activate], then the
MMS center will inform you that the recipient
has received and downloaded the MMS.
Send read report: Click [Activate], then you
will receive a report message when the sent
MMS has been read by the recipients.
Anonymous send: Select [Activate], the MMS
will be sent to the desired recipient without
displaying the sender’s phone number.
Priority: Set the priority level for MMS.
Receive MMS: You can select [Manual
receive] between [Auto receive]. If manual
retrieve function is activated, then you have to
manually download the received MMS from the
inbox; if auto function is chosen, then the phone
will automatically download the received MMS
once the phone is back to the Home Screen.
Play audio:After activated, the phone will play
sound while reading a MMS.
Allow adversting:After activated, the phone
will receive advertisement while receiving a
MMS.
Validity period: You can set the validity for the
MMS. The period depends on the service
provided by network operator.
Storage: You can select the desired storage
location for pictures, music or video files of
MMS.
Restore default: Reset to the default setting.
6.6.6 Message capacity
You can view memory capacity status for SMS and
MMS via this function.

Internet
11
7. Internet
On the Home screen, press【Left Soft Key】and
select [Internet].
Caution:
1.Your network service provider may not
support some functions. In order to ensure the
browser work normally, please confirm first that
your SIM card supports and have the Internet
function activated.
2. If you browse the web page, flowrate fee will
be charged.
7.1 Input URL
Enter the wanted website, and click <OK> to
connect it.
7.2 Homepage
By selecting this option, your mobile phone will
directly visit the preset or defaulted homepage.
While browsing the website, press【Left Soft Key】
to switch between address bar, websites and tool
bar.
7.3 Bookmark
Bookmarks are defaulted as blank, and you are
able to edit it as you want. Save the common visited
website into the Favorites, and marked by simple
names. Select one saved name, then the
corresponding web will be connected. Please refer
to below setting:
Add bookmark: Enter the new bookmark
address and name, then select <OK> to save it.
7.4 History
Record the websites you visited before.
7.5 Offline
After saving a website as snapshot, you can browse
the website while offline.
7.6 WAP settings
7.6.1 Browser settings
Clear cache:In order to avoid congestion and
improve the web browsing speed, please clear
the cache regularly.

Internet
12
SIM1 network account:Set the SIM1 network
port.
SIM2 network account:Set the SIM2 network
port.
SIM3 network account:Set the SIM3 network
port.
Download image: After enabling this function,
the image will only be displayed after being
downloaded.
Play background sound: After enabling this
function, you can play background music.
Accept push: If enabling this function, you can
receive Push messages.
Caution:
Do not arbitrarily change the settings, or you
may not normally visit the website.
7.6.2 Preferred storage
You can choose the place where to save the picture,
music or video files from the Internet.
7.6.3 GPRS setting
You can select to always open GPRS or open it
when required.
7.6.4 Restore default
Reset the WAP settings back to the factory set.
Other manuals for genius p200
1
Table of contents
Other Plum Cell Phone manuals

Plum
Plum Z515 User manual

Plum
Plum Z407 User manual

Plum
Plum Polka D110 User manual

Plum
Plum Z306 User manual

Plum
Plum S107 Installation and operation manual

Plum
Plum Mouse W202 User manual

Plum
Plum TAG-3G User manual

Plum
Plum Trigger Plus Z305 User manual

Plum
Plum Slick B102 User manual

Plum
Plum genius p200 User manual