manuals.online logo
Brands
  1. Home
  2. •
  3. Brands
  4. •
  5. Pollard
  6. •
  7. Indoor Furnishing
  8. •
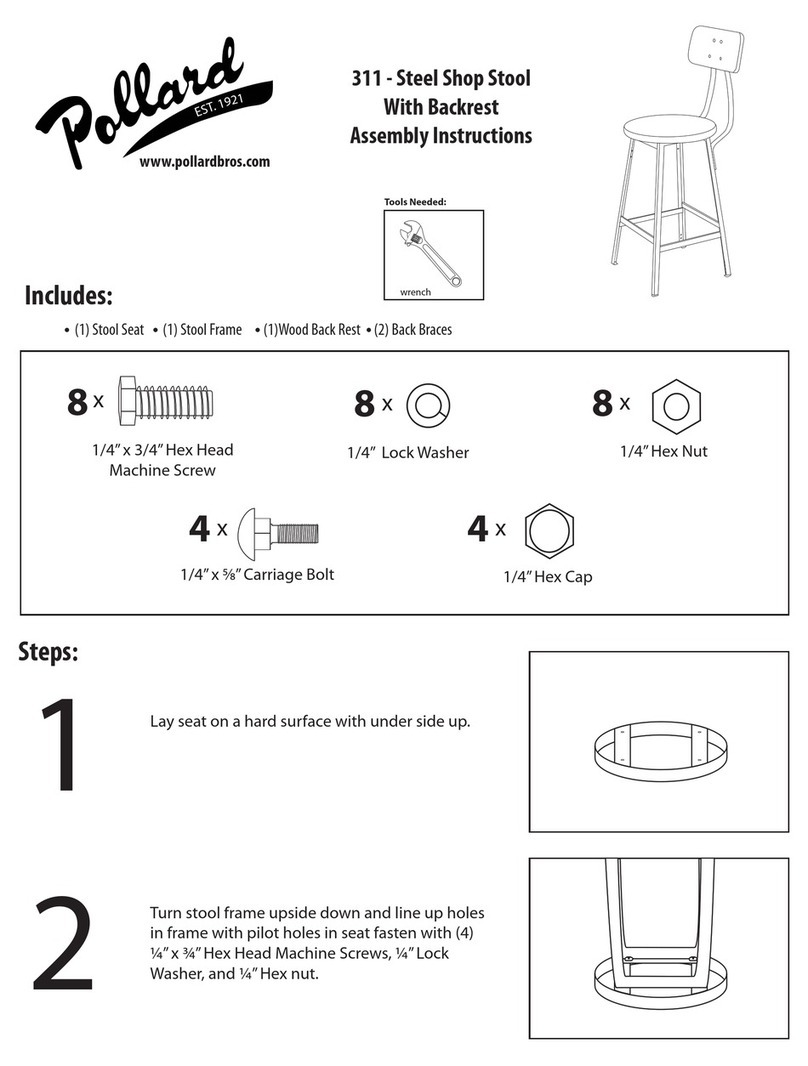
  9. Pollard 334 User manual

Pollard 334 User manual

E
S
T
.
1
9
2
1
334 - Wall Mount Bench
Assembly Instructions
www.pollardbros.com
Large Bracket Small Bracket
3’-6’ Benches (2)
7‘-9’ Benches (3)
6’ Benches (1)
7-10’ Benches (2)
1” Lag Screws attach
through top holes
into bench seat
1” Lag Screws attach
through top holes
into bench seat
⁄” x 2”Hex Head Screws
attach through rear holes
into wall studs.
⁄” x 2”Hex Head Screws
attach through rear holes
into wall studs.
3/8” x 2” Hex Head
Machine Screw
Brackets Maple Seat
Includes:
x3
Tools Needed:
wrench at head screwdriver power drill
#14 - 1” Hex
Head Lag Screw
Per Large Bracket
x2Per Small Bracket
x3Per Large Bracket
x2Per Small Bracket
Pollard Brothers Manufacturing 5504 N. Northwest Highway Chicago IL 60630
. . . .
phone(773)763-6868 fax(773)763-4466 toll free(800) 551-5566
After seat is in place, make sure bench is square and then, tighten all bolts.
Wall Mount Brackets are designed to mount to standard wall studs using 3/8” x 2” Hex Head Lag
Screws. Standard spacing of wall studs is 16”. Recommended Spacing of brackets and subsequent
overhang of seat depends on the length of the Bench Seat. As a general rule, heavy duty angle brack-
ets should be mounted approximately every 3-4 studs. Where additional strip brackets are supplied
they should be mounted to the stud closest to the center point between the (2) outer angle brackets.
Where (3) Angle brackets are provided, the center angle bracket should be mounted to the stud
closest to the center of the outer brackets. It is recommended that pilot holes be drilled, and only the
rst lag screw attached, before checking to make sure brackets are level, then proceed with remaining
lag screws. After again checking to make sure brackets are level, center locker room bench seat on
brackets and use #14 -1” Hex head lag screws to attach seat. NOTE: Below spacing is recommended but
actual spacing will vary depending on placement of wall studs. All brackets can also be mounted to
concrete or brick walls, but hardware is not provided.
3’ LRB Brackets-from center of bracket to center of bracket-should be spaced 30-1/2” apart leaving approximately 2” of overhang on the far side of each
bracket. 4’ LRB-from center of bracket to center of bracket- should be spaced 46-1/2” apart with little to no overhang of seat. 5’ LRB –from center of
bracket to center of bracket- should be spaced 46-1/2” apart as well with approximately 6” of overhang on each side. 6’ LRB-from center of bracket to
center of bracket-should be spaced 63” apart with approximately 4-1/2” of overhang. NOTE: Strip bracket should be placed approximately 31” from each
angle bracket and mounted to center stud. 7’-8’ LRB come with (3) Heavy Duty Angle Brackets which should be spaced accordingly. Outer brackets for 7’
LRB should be 78-1/2” apart with overhang of approximately 2”. The 3rd angle bracket on one of center studs. 8’ LRB should have outer brackets 94-1/2”
apart with center bracket splitting the dierence and mounted to the stud approximately 46-1/2” in from each side.
[2]

Other Pollard Indoor Furnishing manuals

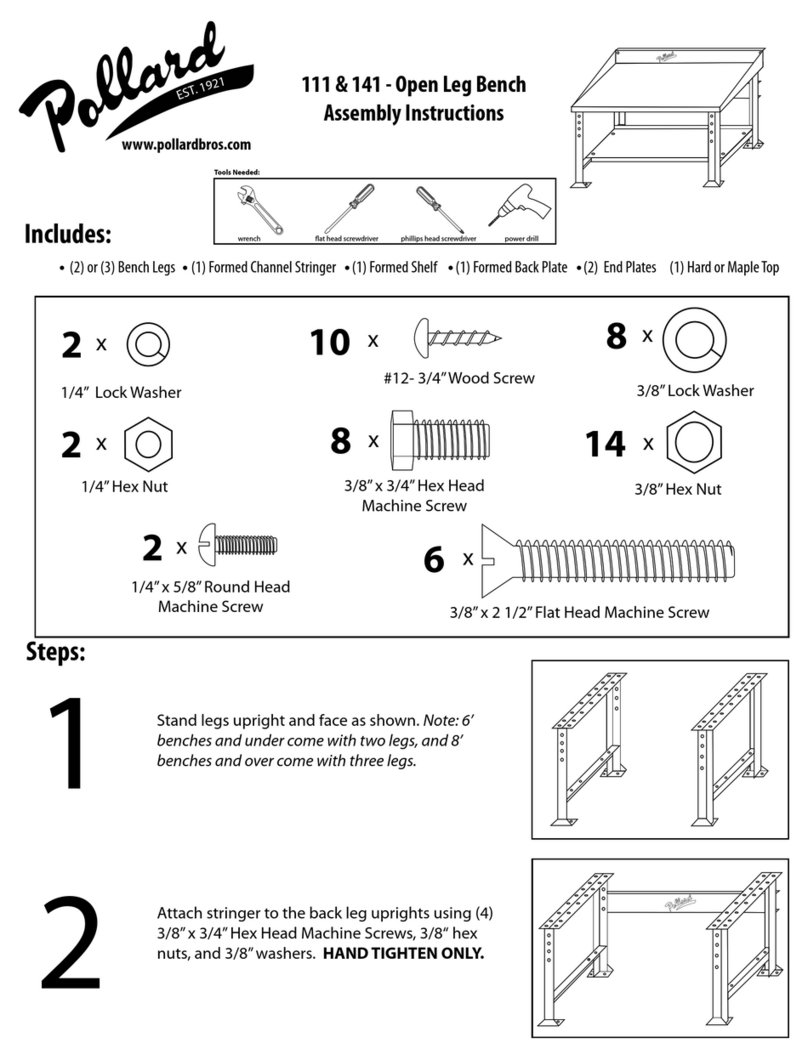
Pollard 111 User manual

Pollard

Pollard 111 User manual

Pollard 140 User manual

Pollard

Pollard 140 User manual

Pollard 332 User manual

Pollard

Pollard 332 User manual

Pollard 311 User manual

Pollard

Pollard 311 User manual

Pollard 506 High Truck User manual

Pollard

Pollard 506 High Truck User manual

Pollard 121 User manual

Pollard

Pollard 121 User manual

Pollard 144 User manual

Pollard

Pollard 144 User manual

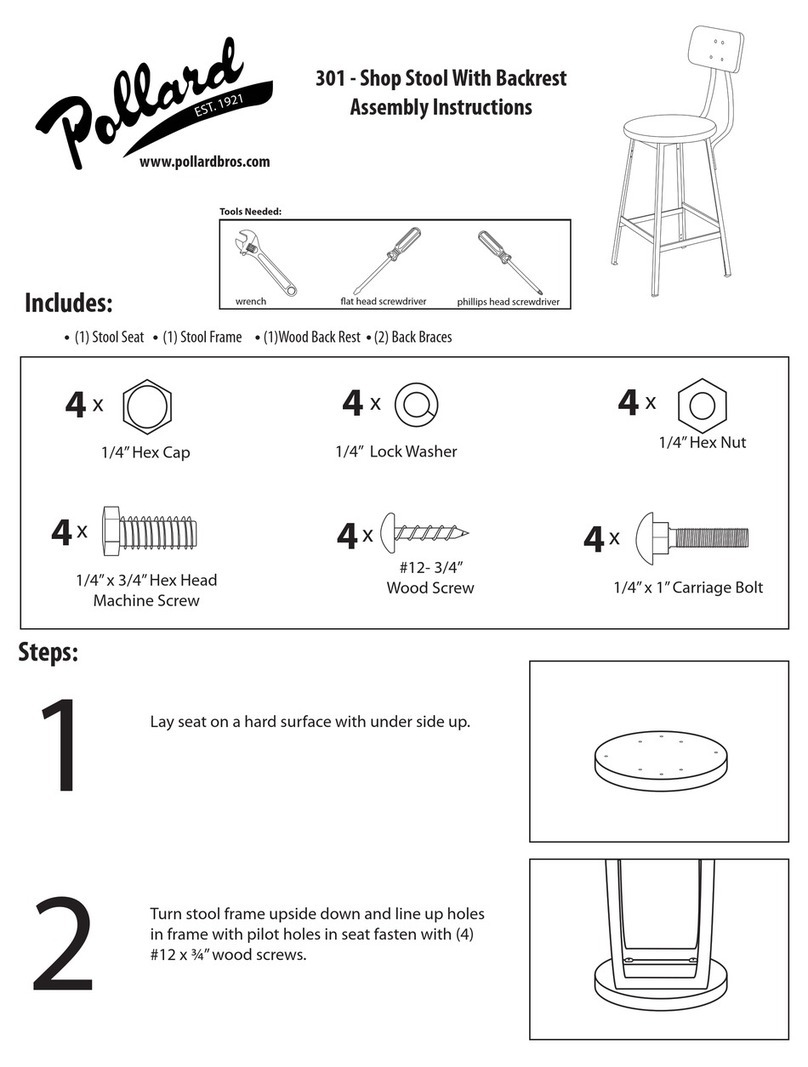
Pollard 301 User manual

Pollard

Pollard 301 User manual

Pollard 313 User manual

Pollard

Pollard 313 User manual

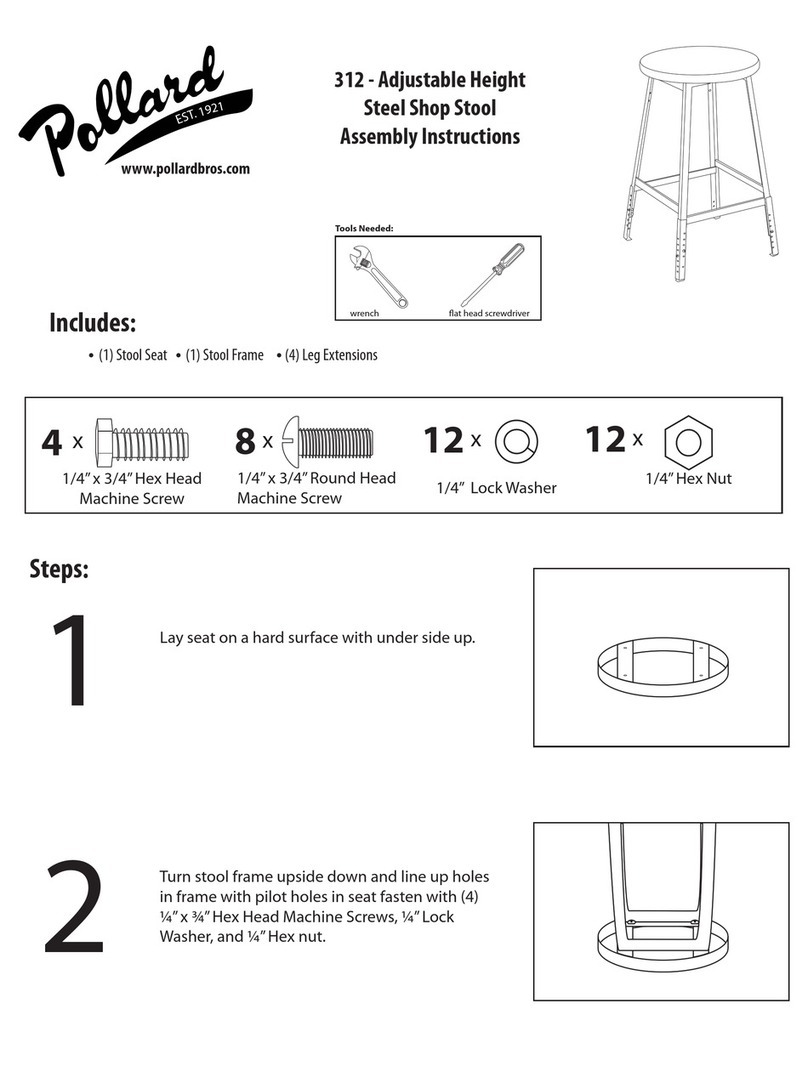
Pollard 312 User manual

Pollard

Pollard 312 User manual

Pollard 126 User manual

Pollard

Pollard 126 User manual

Popular Indoor Furnishing manuals by other brands

SAFAVIEH COUTURE Viviette SFV8727A quick start guide

SAFAVIEH COUTURE

SAFAVIEH COUTURE Viviette SFV8727A quick start guide

Natural Signature ZIG ZAG DIVIDER 25-4658 Quick start manual

Natural Signature

Natural Signature ZIG ZAG DIVIDER 25-4658 Quick start manual

Songmics VASAGLE LET271 Assembly instructions

Songmics

Songmics VASAGLE LET271 Assembly instructions

Enwork ADVENTURE NE0001 installation instructions

Enwork

Enwork ADVENTURE NE0001 installation instructions

Office Star Products STC3020 operating instructions

Office Star Products

Office Star Products STC3020 operating instructions

Zenith 9058HBRS Assembly instructions

Zenith

Zenith 9058HBRS Assembly instructions

Forte KFLR821 Assembling Instruction

Forte

Forte KFLR821 Assembling Instruction

Courtyard Creations KTS6917 Assembly instructions

Courtyard Creations

Courtyard Creations KTS6917 Assembly instructions

Manhattan Comfort Cooper BE 53 Assembly instructions

Manhattan Comfort

Manhattan Comfort Cooper BE 53 Assembly instructions

Kettler Cora120 cm Round Dining Table HUC28208 Assembly instructions

Kettler

Kettler Cora120 cm Round Dining Table HUC28208 Assembly instructions

Backyard Creations ALLENWOOD 272-5421 quick start guide

Backyard Creations

Backyard Creations ALLENWOOD 272-5421 quick start guide

avaks nabytok BASIC 4DV nadstavec Assembly instructions

avaks nabytok

avaks nabytok BASIC 4DV nadstavec Assembly instructions

SUMMER CLASSICS 29434 Assembly instruction

SUMMER CLASSICS

SUMMER CLASSICS 29434 Assembly instruction

Williams-Sonoma PRESIDIO Assembly instructions

Williams-Sonoma

Williams-Sonoma PRESIDIO Assembly instructions

Dorel DL7519E user manual

Dorel

Dorel DL7519E user manual

Rauch M2659 Assembly instructions

Rauch

Rauch M2659 Assembly instructions

Oeseder Möbelindustrie 992 413 Assembly instructions

Oeseder Möbelindustrie

Oeseder Möbelindustrie 992 413 Assembly instructions

American Standard Retrospect Washstand 9422.020 Assembly/installation instructions

American Standard

American Standard Retrospect Washstand 9422.020 Assembly/installation instructions

manuals.online logo
manuals.online logoBrands
  • About & Mission
  • Contact us
  • Privacy Policy
  • Terms and Conditions

Copyright 2025 Manuals.Online. All Rights Reserved.