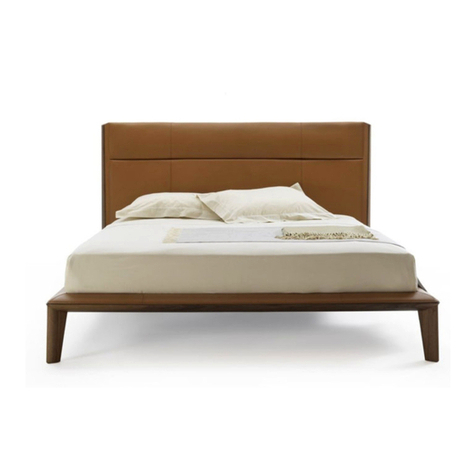
porada KILLIAN 130 User manual

1
KILLIAN 130
Design: M. Marconato - T. Zappa
Istruzioni di montaggio
Assembly-instruction
Nell’imballaggio troverete la struttura del letto scomposta in 4 parti (A-B-C-D), la testata, la rete, i piedini, i comodini e gli
elementi di fissaggio (viti, bulloni e supporti).
In the package you will find the bed base disassembled into 4 pieces (A-B-C-D), the bedhead, the slatted bed base, the
night tables, the supporting feet and the fixing elements (screws, bolts and supports).
C
A
B
D

2
3
Rimuovere le viti provvisore e staccare l’elemento da fissare a parete.
Remove the temporary screws and separate the wall support from the bedhead.
Posizionare l’elemento sulla parete e segnare le posizioni dei fori da praticare, facendo attenzione all’altezza che deve
corrispondere a quella indicata sul disegno e verificando l’allineamento orizzontale.
Lean the support against the wall and draw the holes that need to be drilled, paying attention to the height marked in the
drawing and to the horizontal alignment to the floor.
99 cm

Posizionare l’elemento sulla parete e segnare le posizioni dei fori da praticare, facendo attenzione all’altezza che deve corrispondere a
quella indicata sul disegno e verificando l’allineamento orizzontale. Praticare i fori e fissare l’elemento alla parete con viti e tasselli.
Verificare che tasselli e viti in dotazione siano adatti al tipo di parete alla quale verrà fissato il supporto, altrimenti provvedere alla
sostituzione con materiale idoneo.
Lean the support against the wall and draw the holes that need to be drilled, paying attention to the height marked in the
drawing and to the horizontal alignment to the floor. Please check that if hardware supplied is suitable for the wall the mirror will
be hung on.
Avvitare i due comodini dal retro della testata del letto con l’aiuto di una chiave a brugola.
In order to fix the two night tables, insert and fasten the screws with an allen key from the back of the bedhead.
4
5
4x4x
4x

Posizionare la testata del letto sul supporto precedentemente fissato a muro.
Place the bedhead on the support previously fixed to the wall.
6
7
Infilare le bussole (n.4 in totale) nei corrispondenti fori nella parte A (indicati in giallo nel disegno) in entrambe le
estremità facendo attenzione che il foro del perno (indicato in verde nel disegno) sia orizzontale.
Insert the pins (total n.4) in the corresponding holes in the part A (in yellow) at both ends, positioning the pin holes (in
green) horizontally.
A
4x

Avvitare i 2 perni in metallo (n.4 in totale) nei fori corrispondenti (indicati in giallo nel disegno) nell’estremità superiore
della parte C e D (verificare il disegno) in modo che il foro del perno (indicato in verde nel disegno) sia orizzontale.
Screw the 2 metal pins (total n.4) into the corresponding holes (in yellow) in the upper part of element C and D, positio-
ning the pin hole (in green) horizontally.
C
4x
Assemblare l’elemento A con gli elementi C e D come rappresentato nel disegno; avvitare i grani nelle 4 bussole inseritie
nel passaggio 7.
Assemble the part A of the bed with parts C and D and screw the 4 grub-screws in the 4 pins previously fixed (step 7).
8
9
D
A
C
D

10
Infilare le bussole (n.4 in totale) nei corrispondenti fori nelle due estremità della parte B e nell’estremità delle parti C e D
(indicati in giallo nel disegno) facendo attenzione che il foro del perno (indicato in verde nel disegno) sia orizzontale.
Insert the pins (total n.4) in the corresponding holes in both ends of part A (in yellow) and part C-D (in yellow), positioning
the pin holes (in green) horizontally.
4x
11
B
4x
C
D
B
Inserire le spine in legno (n.4 in totale) nei corrispondenti fori (indicati in giallo nel disegno) in entrambe le estremità della parte B.
Insert the wooden dowel pins into the corresponding holes (in yellow) on both sides of part B.

Infilare i perni (n.2 in totale) nei corrispondenti fori nelle due estremità della parte B e nell’estremità delle parti C e D
(indicati in giallo nel disegno) facendo attenzione che il foro del perno (indicato in verde nel disegno) sia orizzontale.
Avvitare e stringere i 2 perni per assemblare l’elemento B alla struttura del letto.
Insert the pins (total n.2) in the corresponding holes at both endsof part A (in yellow) and at the and of parts C and D (in
yellow), positioning the pin holes (in green) in parallel to board A. Screw and fasten the pins in order to fix part B to the
structure of the bed.
2x
12
C
D
B

13
1
Avvitare i supporti nelle rispettive posizioni con le viti svasate.
Screw the 6 supports in the corrisponding position with the countersunk screws.
40x
1
1
1
2
1
2
2
2
2

2x
Avvitare i due piedini di appoggio anteriori con l’aiuto di una chiave a brugola.
Screw and fasten the front feet with an allen key.
14

15
Fissare la struttura alla testata del letto con l’aiuto di una chiave a brugola.
Fix the bed structure to the bedhead with an allen key.
12x

1x
Avvitare manualmente il piedino di sostegno in rotazione nell’apposito foro centrale della rete.
Manually screw and fix the supporting central foot to the slatted bed.
16

PORADA Arredi s.r.l. - 22060 Cabiate (Como) - Italia - via B. Buozzi, 2 - Tel. +39 031 766215 - Fax +39 031 768386 - [email protected] - www.porada.it
Appoggiare la rete ai supporti precedentemente montati (passaggio 13).
Place the slatted bed base on the supports previously assembled (step 13).
17

1
KILLIAN 150
Design: M. Marconato - T. Zappa
Istruzioni di montaggio
Assembly-instruction
C
A
B
D
Nell’imballaggio troverete la struttura del letto scomposta in 4 parti (A-B-C-D), la testata, la rete, i piedini, i comodini e gli
elementi di fissaggio (viti, bulloni e supporti).
In the package you will find the bed base disassembled into 4 pieces (A-B-C-D), the bedhead, the slatted bed base, the
night tables, the supporting feet and the fixing elements (screws, bolts and supports).

2
3
Rimuovere le viti provvisore e staccare l’elemento da fissare a parete.
Remove the temporary screws and separate the wall support from the bedhead.
Posizionare l’elemento sulla parete e segnare le posizioni dei fori da praticare, facendo attenzione all’altezza che deve corri-
spondere a quella indicata sul disegno e verificando l’allineamento orizzontale. Praticare i fori e fissare l’elemento alla parete
con viti e tasselli. Verificare che tasselli e viti in dotazione siano adatti al tipo di parete alla quale verrà fissato il supporto, altrimenti
provvedere alla sostituzione con materiale idoneo.
Lean the support against the wall and draw the holes that need to be drilled, paying attention to the height marked in
the drawing and to the horizontal alignment to the floor. Please check that if hardware supplied is suitable for the wall the
mirror will be hung on.
99 cm
4x4x

Posizionare la testata del letto sul supporto precedentemente fissato a muro.
Place the bedhead on the support previously fixed to the wall.
4
5
Infilare le bussole (n.4 in totale) nei corrispondenti fori nella parte A (indicati in giallo nel disegno) in entrambe le estremità
facendo attenzione che il foro del perno (indicato in verde nel disegno) sia orizzontale.
Insert the pins (total n.4) in the corresponding holes in the part A (in yellow) at both ends, positioning the pin holes (in green) horizontally.
A
4x

Assemblare l’elemento A con gli elementi C e D come rappresentato nel disegno; avvitare i grani nelle 4 bussole
precedentemente inserite (step 5).
Assemble part A of the bed structure with parts C and D and screw the 4 grub-screws of tthe 4 pins previously fixed (step 5).
7
D
A
C
Avvitare i 2 perni in metallo (n.4 in totale) nei fori corrispondenti (indicati in giallo nel disegno) nell’estremità superiore
della parte C e D (verificare il disegno) in modo che il foro del perno (indicato in verde nel disegno) sia orizzontale.
Screw the 2 metal pins (total n.4) into the corresponding holes (in yellow) in the upper part of element C and D, positio-
ning the pin hole (in green) horizontally.
C
4x
6
D

8
Infilare le bussole (n.4 in totale) nei corrispondenti fori nelle due estremità della parte B e nell’estremità delle parti C e D (indicati
in giallo nel disegno) facendo attenzione che il foro del perno (indicato in verde nel disegno) sia orizzontale.
Insert the pins (total n.4) in the corresponding holes in both ends of part A (in yellow) and part C-D (in yellow), positioning the
pin holes (in green) horizontally.
4x
Inserire le spine in legno (n.4 in totale) nei corrispondenti fori (indicati in giallo nel disegno) in entrambe le estremità della parte B.
Insert the wooden dowel pins into the corresponding holes (in yellow) on both sides of part B.
9
B
4x
C
D
B

10
Infilare i perni (n.2 in totale) nei corrispondenti fori nelle due estremità della parte B e nell’estremità delle parti C e D (indicati in
giallo nel disegno) facendo attenzione che il foro del perno (indicato in verde nel disegno) sia orizzontale. Avvitare e stringere i
2 perni per assemblare l’elemento B alla struttura del letto.
Insert the pins (total n.2) in the corresponding holes at both endsof part A (in yellow) and at the and of parts C and D (in yellow),
positioning the pin holes (in green) in parallel to board A. Screw and fasten the pins in order to fix part B to the structure of the bed.
2x
C
D
B

11
Avvitare i supporti nelle rispettive posizioni con le viti svasate.
Screw the 6 supports in the corrisponding position with the countersunk screws.
40x
1
1
1
1
2
1
2
2
2
2

Avvitare i due piedini di appoggio anteriori con l’aiuto di una chiave a brugola.
Screw and fasten the front feet with an allen key.
12
Table of contents
Other porada Indoor Furnishing manuals
porada
porada BAYUS 5 User manual

porada
porada ALAN BOTTE 4 GAMBE User manual

porada
porada MARY User manual

porada
porada ZIGGY BED BALDACCHINO User manual

porada
porada Odino Oval User manual

porada
porada DOMINO User manual

porada
porada JOINT 120 C User manual

porada
porada NYAN User manual

porada
porada ABACUS User manual

porada
porada ZIGGY 17313 User manual
Popular Indoor Furnishing manuals by other brands

Mocka
Mocka Jack Assembly instructions

Lifely
Lifely Mia Series Assemble instructions

Rauch
Rauch 59462.50 Assembly instructions

BINO
BINO Hampton Cot bed instructions

Furniture of America
Furniture of America 5 Drawer Cabinet FGI-18603C21-L Assembly instructions

Closet Maid
Closet Maid 4561 installation instructions